How to install a Standard TCP/IP Printer on Windows 10
The print server works on AD-Hoc mode with the SSID WLAN-PS by default, but due to Windows 10 is unable to connect Ad-hoc wireless network, you may use other computer to setup TL-WPS510U in order to connect to your main router and then finish the rest installing part on Windows10. Since Windows 10 supports TCP/IP printing, it is compatible with our Print Servers, like TL-PS110U/TL-PS110P/TL-PS310U/TL-WPS510U. Here is the configuration guide.
Before the installation, please make sure the printer works fine if it is connected to computer directly.
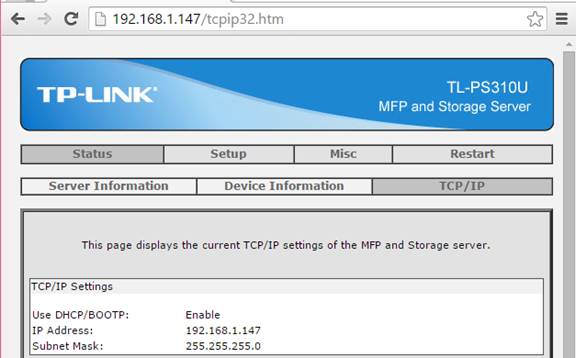
Step 1 Configure the print server as usual. Example looks below (sample is using IP 192.168.1.147).
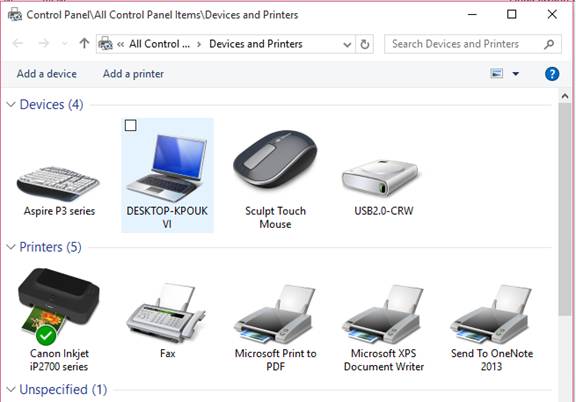
Step 2 Open Device & Printers on Control Panel, or Press Window Button, then type “Printer” then Enter.
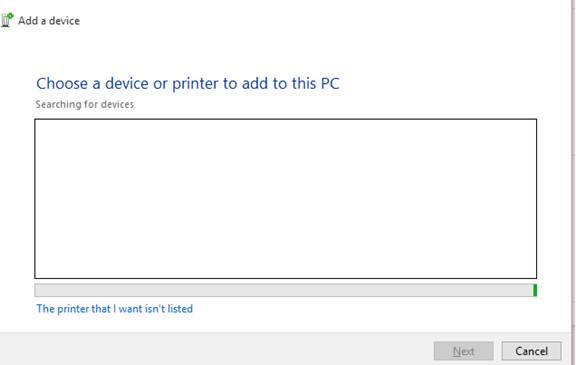
Step 3 Click “Add a printer”. Then it will automatically search for devices. Instead, click “The Printer that I want isn’t listed”.
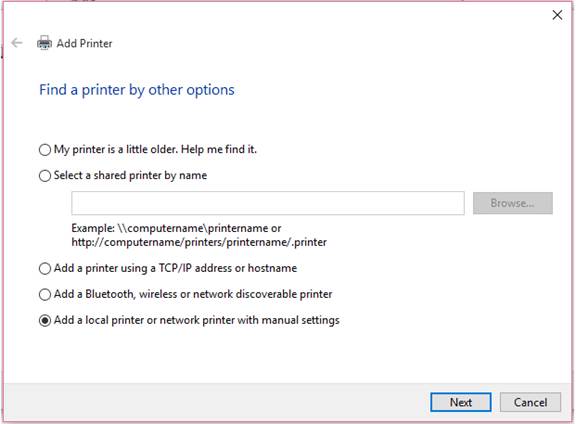
Step 4 Then it will show Add Printer page. Select “Add a local printer or network printer with manual settings”. Then next.
Step 5 On the next page, you will be asked for printer port. In this case, select “Create a new port”, and then select “Standard TCP/IP Port”. Then next.

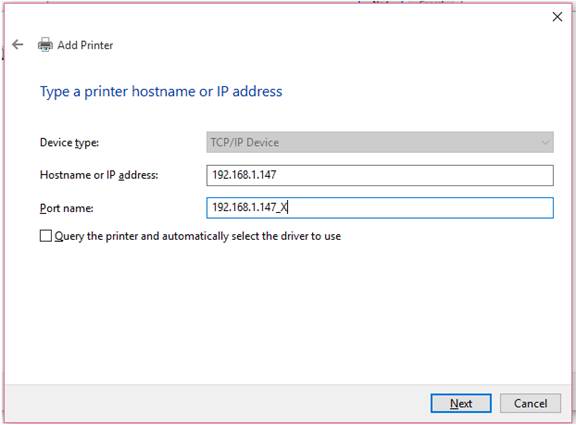
Step 6 Next page you will be asked for IP address of your device. Put in the print server’s IP Address and on the Port Name, add some text. For example, 192.168.1.147_X. Also remember NOT to tick the “Query the printer and automatically select the driver to use”.
Step 7 You then will be shown a page with Detecting TCP/IP Port. Wait a few minutes depends on your network configuration. It will show you that the system cannot find any devices. Don’t worry, this is as expected. Then you will be shown the page like next page.
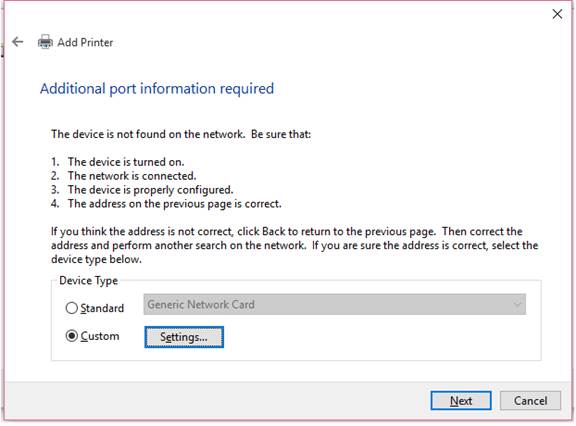
Select “Custom” then click “Settings…”
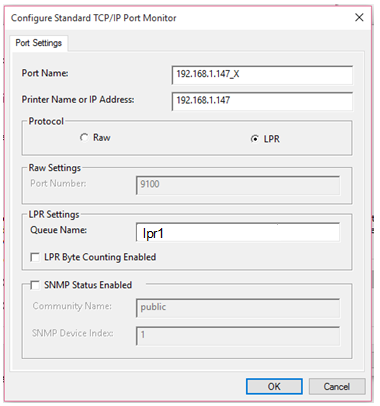
Step 8 Please type the IP address of your Print Server in Hostname or IP address. The print server’s IP should in the same subnet with your router. As default, the Protocol is Raw. You can keep it still or select LPR. The two protocols support different printing languages. You can try one first, if can’t print, delete it and try another one.
Step 9 Click Next.
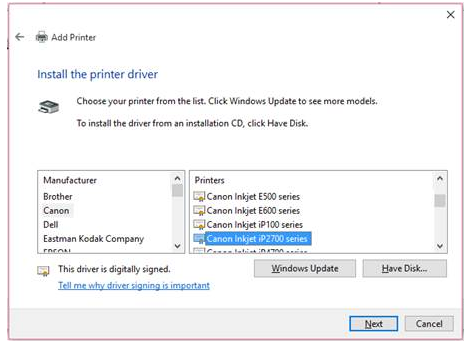
Step 10 You will be asked to select your printer driver. Select based on your printer model and type from Windows standard drivers. Or you can use from your printer CD/DVD setup kit. After that, click Next.
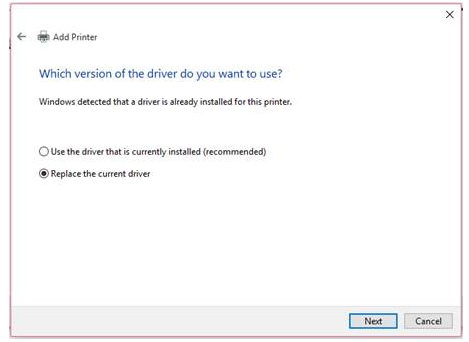
Step 11 Then you will be asked whether you would like to use current driver or replace it. This is only happen when you already have printer driver before. I assume that you have installed previously. So, select to replace.
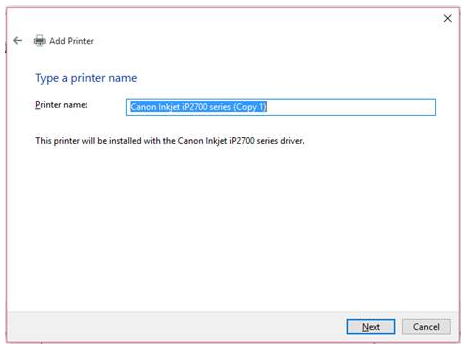
Step 12 Then put the name of your printer here.
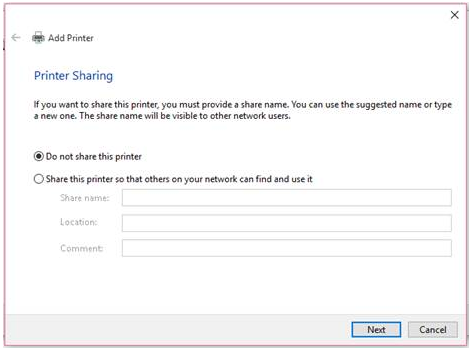
Step 13 Click “do not share this printer”.
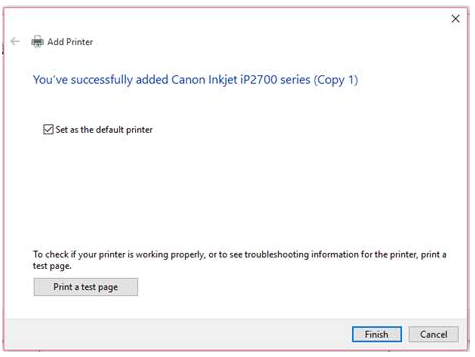
Step 14 Set this printer as default by ticking the selection “Set as the default printer” or not. Also if you want to do Print test, just press the button “Print a test page”.
Is this faq useful?
Your feedback helps improve this site.
TP-Link Community
Still need help? Search for answers, ask questions, and get help from TP-Link experts and other users around the world.