How to modify the IP address of the VIGI camera in batch via vigi app
Contents
Step 1: Use VIGI to discover cameras
Step 2: Select and verify camera in batch
Step 3: Modify selected camera
Step 4: Modifying and check the result of IP modification
Objective
This article introduces how to use the VIGI app to modify the IP addresses of multiple VIGI cameras in batch.
Requirements
This section introduces the required conditions, such as devices, software.
VIGI App
VIGI Camera
Configuration
Step 1: Use VIGI to discover cameras
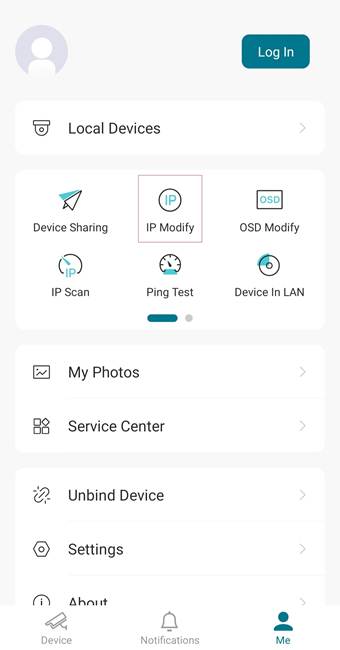
1.1 Open VIGI App and find “IP Modify”, then click it.
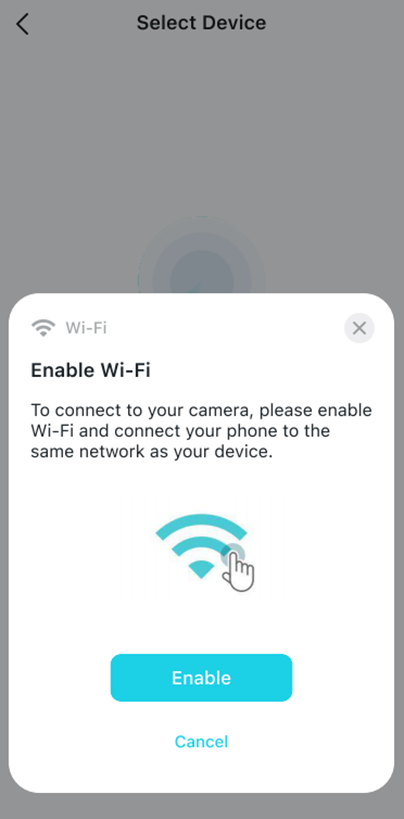
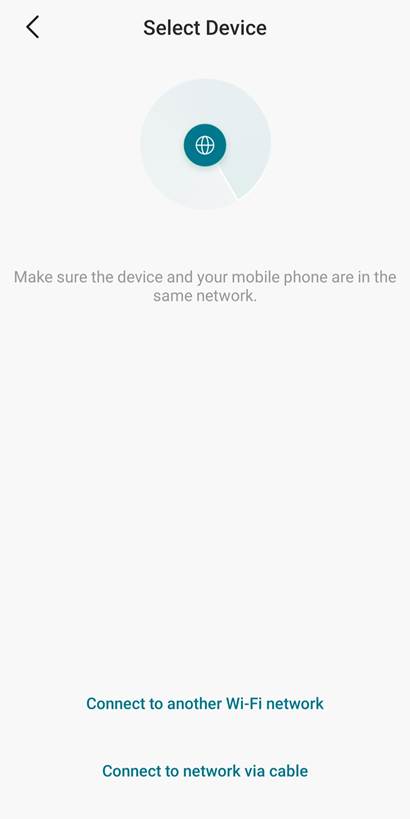
1.2 Make sure the Wi-Fi your phone connected, and camera device are all on the same local network.
If your phone doesn’t connect to any WIFI or cable network, the app will automatically prompt you to enable Wi-Fi via a pop-up window. After you enable WIFI or a cable connection is detected, the pop-up window will close automatically, and your device will automatically scan the camera.
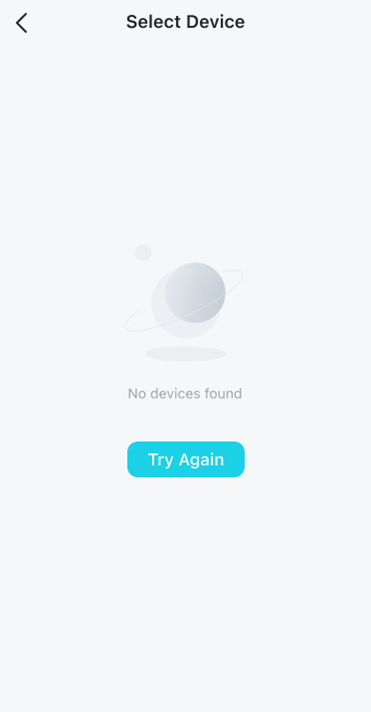
1.3 If the result shows as “No devices found”, you can click “try again” or go back to step 1.2 to reselect and search devices again.
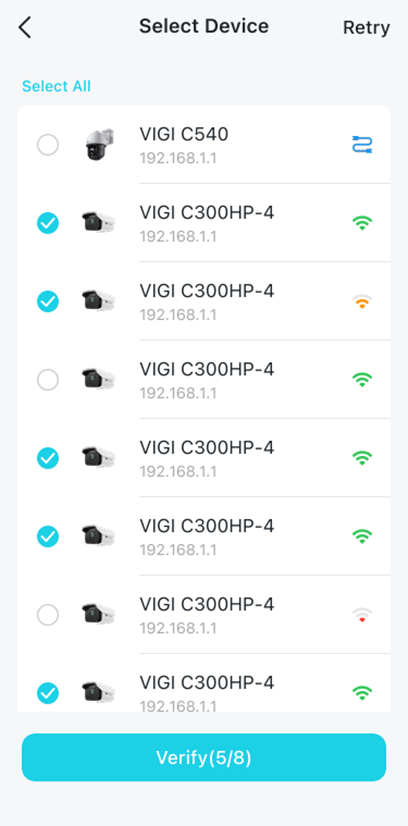
Step 2: Select and verify camera in batch
2.1 During the searching, the camera will be found one by one, once the animated search icon disappears, it indicates that the search process has been completed.
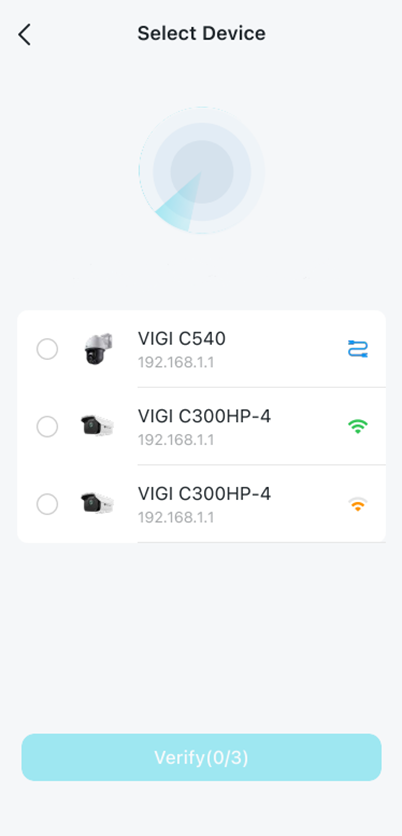
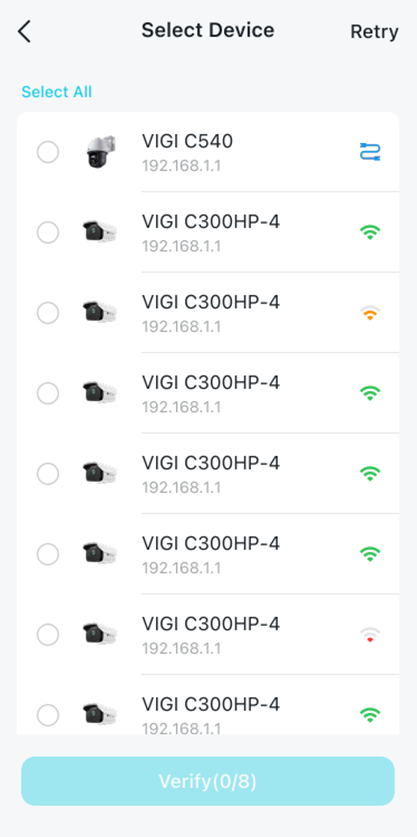
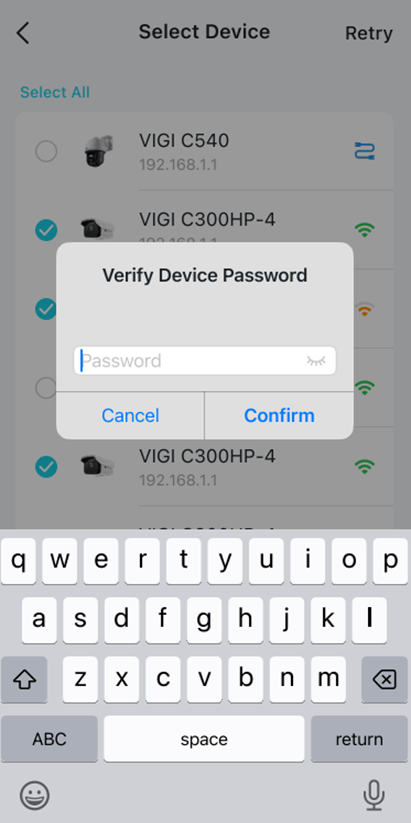
2.2 You can select multiple cameras that you wish to modify, and then click “Verify.” The app will then display a pop-up window prompting you to enter the password for the selected cameras. Click “confirm”
Step 3: Modify selected camera
3.1 After input and confirm the password, the app will redirect you to the following page.
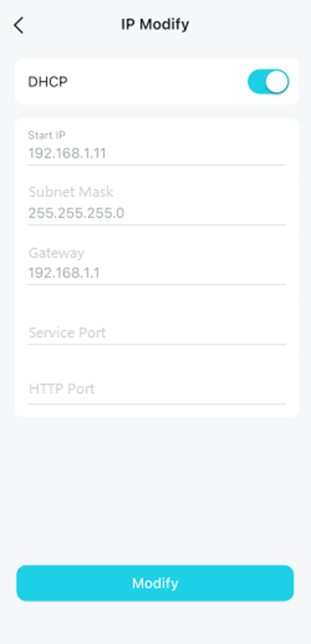
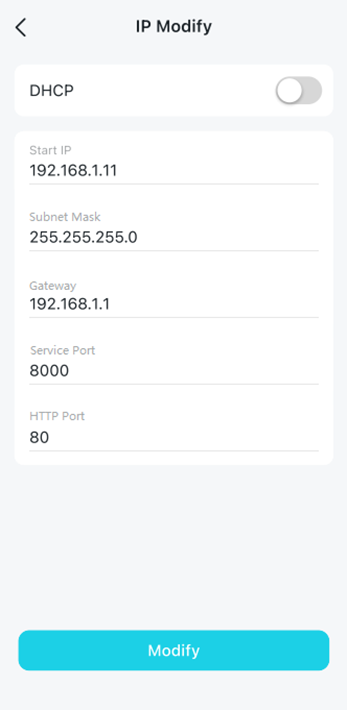
3.2 Turn off the “DHCP” button, then enter the appropriate values in all configuration fields.
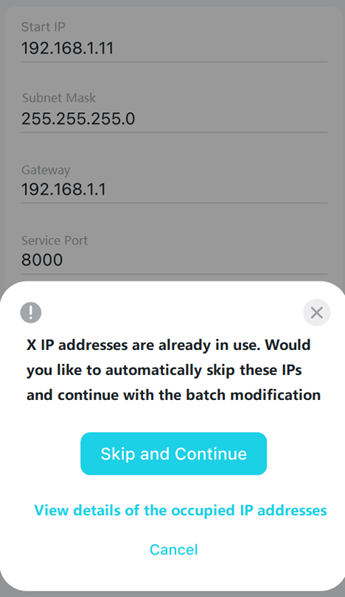
3.3 After all the configuration fields are properly filled, click “modify”, app will check if the IPs you configured are occupied or not. (Example: If you choose to modify 5 camera’s IP, and your start IP is 192.168.1.11, then the IP will be allocated to these cameras will be from 192.168.1.11 to 192.168.1.15, so if any of the IP in 192.168.1.11 to 192.168.1.15 is already occupied)
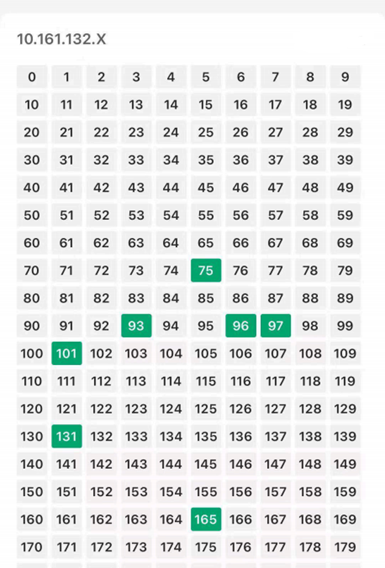
The app will display a pop-up window asking whether to skip the occupied IP addresses in sequence and continue the assignment. It will also show the status of the IPs that are already in use (Occupied IP: Marked green in the right picture).
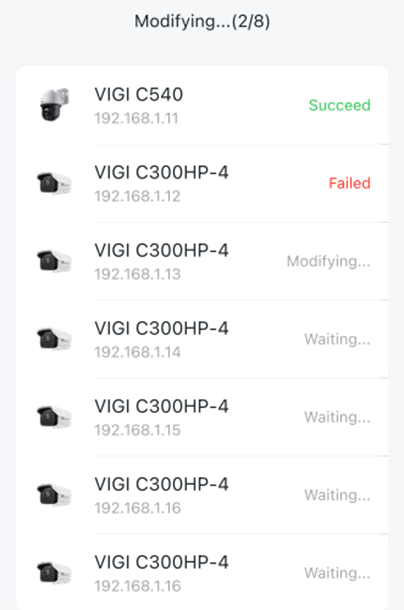
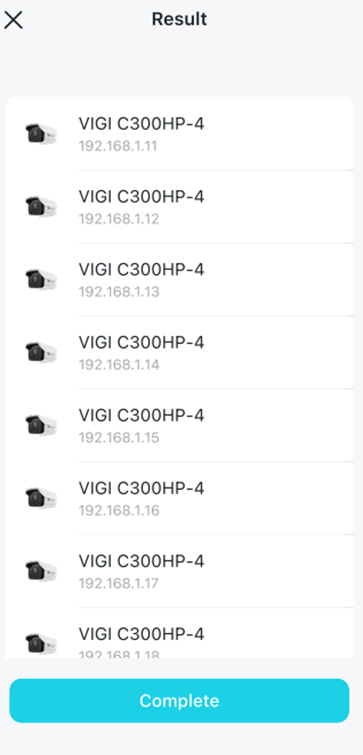
Step 4: Modifying and check the result of IP modification
4.1 Waiting till the page shows the headline of result. Click “complete”, and you will finish all the process.
Get to know more details of each function and configuration please go to Download Center to download the manual of your product.
這篇faq是否有用?
您的反饋將幫助我們改善網站


