How to Install an SD card for my Kasa camera

KC105P2 , EC70 , EC60 , KC420WS , KC410S , KC400 , KC105
Recent updates may have expanded access to feature(s) discussed in this FAQ. Visit your product's support page, select the correct hardware version for your device, and check either the Datasheet or the firmware section for the latest improvements added to your product. Please note that product availability varies by region, and certain models may not be available in your region.
When inserting an SD card, make sure the SD card is in the correct orientation. Do NOT insert at an angle or use force.
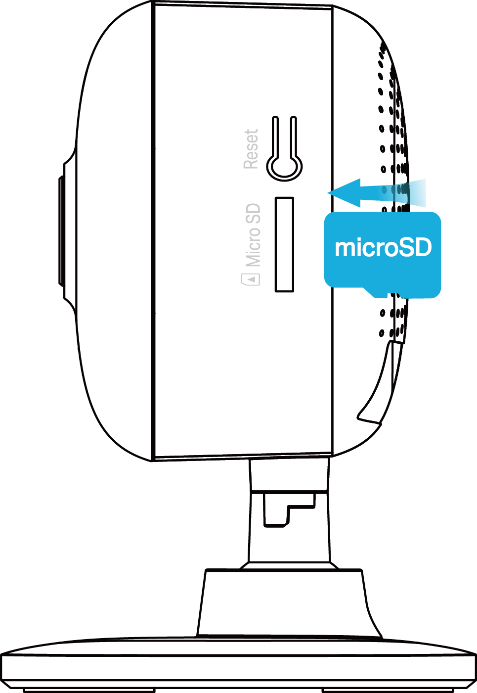
Type 1: For Security Camera
1. Find the SD card slot on the side panel.
2. Holding the card in the correct orientation, carefully insert the SD card into the slot. Push in the SD card until you hear a clicking sound.
Type 2: For Pan&Tilt Security Camera
1. Tilt the camera lens up, then you will find the SD card slot.
2. Holding the card in the correct orientation, carefully insert the SD card into the slot. Push in the SD card until you hear a clicking sound.
Type 3: For Outdoor Security Camera
1. Loosen the screws on the back panel, remove the cover and you’ll find the SD card slot.
2. Holding the card in the correct orientation, carefully insert the SD card into the slot. Push in the SD card until you hear a clicking sound.
Related Articles:
How to Install an SD card for my Tapo camera
What should I do if the SD card doesn’t work properly on my camera?
Which MicroSD cards are supported on Tapo and Kasa Cameras?
How to Verify Fake Micro SD Cards
To get to know more details of each function and configuration please go to Download Center to download the manual of your product.
Is this faq useful?
Your feedback helps improve this site.
What’s your concern with this article?
- Dissatisfied with product
- Too Complicated
- Confusing Title
- Does not apply to me
- Too Vague
- Other
Thank you
We appreciate your feedback.
Click here to contact TP-Link technical support.
Recommend Products

TP-Link Community
Still need help? Search for answers, ask questions, and get help from TP-Link experts and other users around the world.
This website uses cookies to improve website navigation, analyze online activities and have the best possible user experience on our website. You can object to the use of cookies at any time. You can find more information in our privacy policy . Don’t show again
Your Privacy Choices
This website uses cookies to improve website navigation, analyze online activities and have the best possible user experience on our website. You can object to the use of cookies at any time. You can find more information in our privacy policy . Don’t show again
These cookies are necessary for the website to function and cannot be deactivated in your systems.
TP-Link
accepted_local_switcher, tp_privacy_banner, tp_privacy_base, tp_privacy_marketing, tp_top-banner, tp_popup-bottom, tp_popup-center, tp_popup-right-middle, tp_popup-right-bottom, tp_productCategoryType
Youtube
id, VISITOR_INFO1_LIVE, LOGIN_INFO, SIDCC, SAPISID, APISID, SSID, SID, YSC, __Secure-1PSID, __Secure-1PAPISID, __Secure-1PSIDCC, __Secure-3PSID, __Secure-3PAPISID, __Secure-3PSIDCC, 1P_JAR, AEC, NID, OTZ
Analysis cookies enable us to analyze your activities on our website in order to improve and adapt the functionality of our website.
The marketing cookies can be set through our website by our advertising partners in order to create a profile of your interests and to show you relevant advertisements on other websites.
Google Analytics & Google Tag Manager
_gid, _ga_<container-id>, _ga, _gat_gtag_<container-id>
Google Ads & DoubleClick
test_cookie, _gcl_au
Meta Pixel
_fbp
Crazy Egg
cebsp_, _ce.s, _ce.clock_data, _ce.clock_event, cebs
lidc, AnalyticsSyncHistory, UserMatchHistory, bcookie, li_sugr, ln_or