How to configure Dynamic DNS on Archer C50/C20/A5 (new logo)
Before using this feature, you need to sign up for DDNS service providers such as www.comexe.cn, www.dyndns.org, or www.noip.com. The Dynamic DNS client service provider will give you a password or key.
Here takes Archer C20_V4 as demonstration:
1. Log in the router’s management interface. If you don’t know how to do that, please refer to How do I log into the web-based Utility (Management Page) of TP-Link wireless router?
2. Go to Dynamic DNS.
3. Select dynamic DNS Service Provider, for example, Dyndns, the following page will appear.
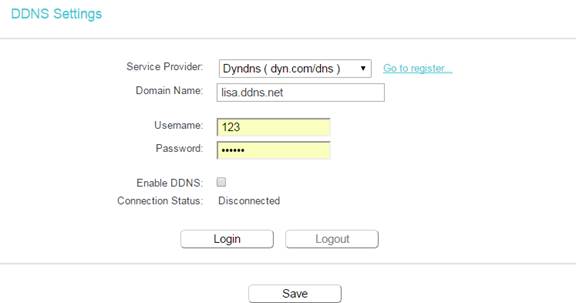
4. Enter the Domain Name (such as lisa.ddns.net) you received from dynamic DNS service provider here.
5. Enter the User Name for your DDNS account.
6. Enter the Password for your DDNS account.
7. Click Login.
8. Click Save.
• Connection Status - The status of the DDNS service connection is displayed here.
• Logout - Click Logout to log out of the DDNS service.
Get to know more details of each function and configuration please go to Download Center to download the manual of your product.
Is this faq useful?
Your feedback helps improve this site.
3.0&4.0-F_normal_1584493102128p.png)

4.0-F_normal_1591236294102s.png)
TP-Link Community
Still need help? Search for answers, ask questions, and get help from TP-Link experts and other users around the world.