Set Up a VPN Client on Your TP-Link Router
The TP-Link VPN client feature routes all selected devices on your network through a third-party VPN server, with no need to install VPN software on each device individually. Supported protocol types include OpenVPN, PPTP, L2TP/IPSec, and WireGuard. This guide covers setup via the web management page at tplinkwifi.net. For the Deco app method, see how to set up VPN on a Deco router.
For a broader overview of VPN options on TP-Link routers, including VPN server setup and protocol comparisons, see how to establish a VPN connection on a TP-Link Wi-Fi router.
Key Takeaways
- The VPN Client feature routes selected devices through a third-party VPN server directly from the router, with no per-device software required.
- Supported protocols are OpenVPN, PPTP, L2TP/IPSec, and WireGuard (select models only for WireGuard).
- Setup is done via Advanced > VPN Client in the router's web management page at tplinkwifi.net.
- Up to six VPN server profiles can be added, but only one can be active at a time.
- You will need VPN credentials and/or a configuration file from your VPN provider before starting.
Before You Begin
Check compatibility. Not all TP-Link routers support the VPN Client feature. Visit the TP-Link website to confirm your model is on the supported list.
Gather your VPN credentials. Have your VPN provider login information ready before starting. For OpenVPN, you will also need the configuration file (.ovpn) that your provider supplies.
Step 1: Log In to Your Router
Go to tplinkwifi.net in your browser and sign in with your TP-Link ID or your local admin password.
Step 2: Enable VPN Client
Go to Advanced > VPN Client. Enable the VPN Client toggle, then click Save.

Step 3: Add a VPN Server Profile
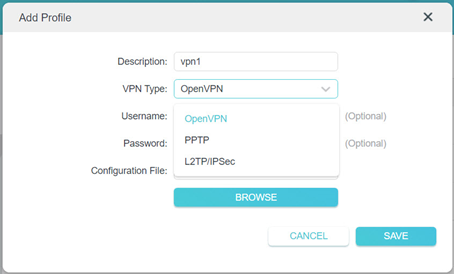
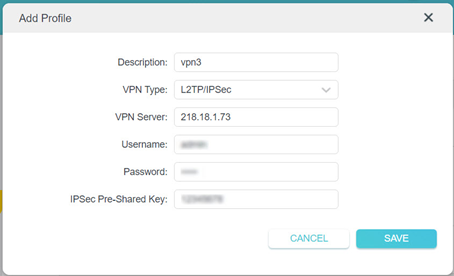
In the Server List section, click Add. Enter a description for the connection and choose your VPN type from the dropdown. The router supports OpenVPN, PPTP, and L2TP/IPSec in this menu. Fill in the fields based on your protocol (see the protocol details below), then click Save.
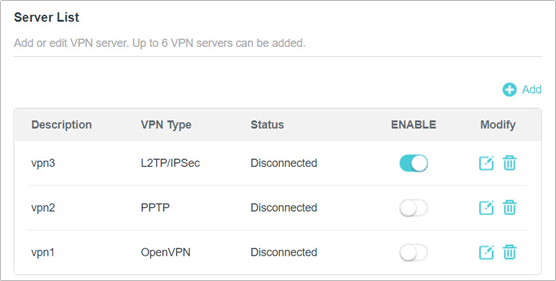
You can add up to six VPN server profiles. Enable the profile you want to use in the Server List.
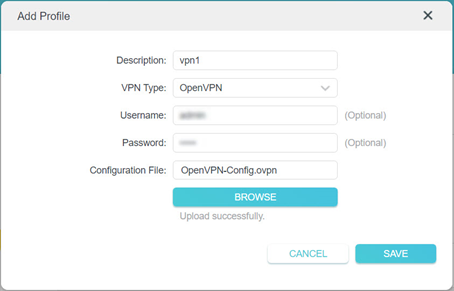
OpenVPN Setup Details
Enter your VPN username and password if your provider requires them (these fields are optional). Then click Browse to upload the configuration file provided by your VPN provider. The file must be under 20 KB.
Note: The VPN Client feature accepts only one configuration file. If your OpenVPN provider supplies several separate files rather than a single unified file, see how to manually create a unified OpenVPN profile before uploading.
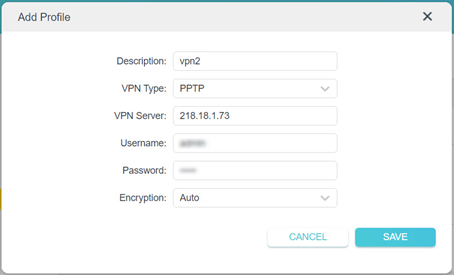
PPTP Setup Details
Enter the VPN server address, your VPN username and password, and the encryption setting provided by your VPN provider.
L2TP/IPSec Setup Details
Enter the VPN server address, your VPN username and password, and the IPSec pre-shared key provided by your VPN provider.
Note: The following IKE and ESP cipher combinations are supported by the L2TP over IPSec client feature, for reference when confirming compatibility with your VPN provider.
IKE: aes-sha1-modp2048, aes-sha256-modp2048, aes-sha384-modp2048, aes-sha512-modp2048, aes-sha1-modp3072, aes-sha256-modp3072, aes-sha384-modp3072, aes-sha512-modp3072
ESP: aes-sha1, aes-sha256, aes-sha384, aes-sha512
Step 4: Select the Devices That Will Use the VPN
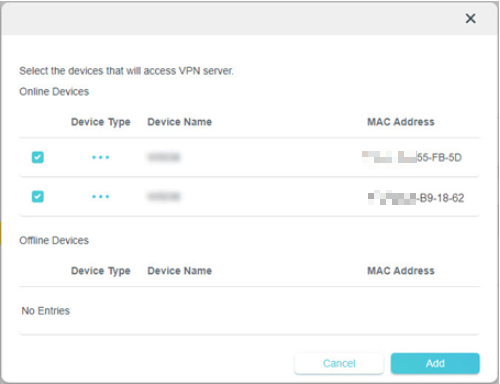
In the Device List section, click Add. Choose the devices you want to route through the VPN and click Add to confirm.
Only the devices you add to this list will use the VPN connection. All other devices on your network will continue to use your regular Internet connection as normal.
Step 5: Save Your Settings
Click Save. The devices you selected can now access the VPN server you enabled.
If your TP-Link VPN client is not working after setup, see what to do if VPN is not working on a TP-Link Wi-Fi router for troubleshooting steps. For OpenVPN connection issues specifically, see how to troubleshoot OpenVPN not connecting.
WireGuard
WireGuard is supported on select TP-Link router models only. For full setup instructions, see how to set up WireGuard VPN on a TP-Link wireless router.
¿Es útil esta pregunta frecuente?
Sus comentarios nos ayudan a mejorar este sitio.


