RE650 V2 User Guide
Chapter 5 Customize Your Network
This chapter guides you on how to configure network settings that are available for this extender.
It contains the following sections:
You can view the internet status of your extender to check whether you have successfully set up the extended network(s).
1.Visit http://tplinkrepeater.net, and log in with your TP-Link ID or the password you set for the extender.
2.Go to Settings > Status to view the internet status of your extender.
•The extender runs normally.

•The extender fails to connect to the host networks. Please go to Settings > Wireless > Connect to Network to check whether the host network passwords are correct. If the problem still exists, relocate the extender closer to the router to achieve better signal quality.

•The extender is connected to the host networks, but is not transmitting data. Please check the internet connection of your router.

•The extender is connected to the router abnormally. Please go to Settings > Network and try setting your extender to obtain an IP address automatically.

Click the icon of the Internet/Router/Range Extender/Clients to view corresponding information.
If you want to extend another host network after Quick Setup, you can refer to this section. Moreover, you can change the wireless settings for your extended networks.
 Tip:
Tip:
If the extender is in your router’s OneMesh network, it will automatically copy wireless settings from your router. No wireless settings is needed for the extender.
Visit http://tplinkrepeater.net, and log in with your TP-Link ID or the password you set for the extender.
 Note:
Note:
Here we take the configuration of the 2.4GHz network as an example. If the 5GHz network is available on your extender, please refer to the instructions to set your 5GHz network.
•To extend another host network:
1.Go to Settings > Wireless > Connect to Network.
2.Enable Connect to 2.4GHz Network and click Wireless Scanner to find all available networks.
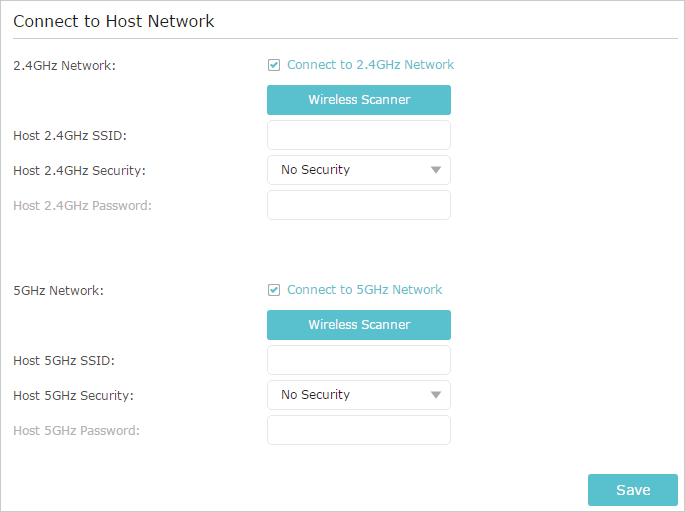
3.Select the 2.4GHz host network you want to extend.
Note:
If the network you want to extend is on but not listed, please try the following steps.
· Move the extender closer to your router, and rescan for networks.
· You can manually enter the SSID (network name) and password of the network you want to extend, and click Save.
4.Once a host network is selected, the SSID and security type will be automatically filled in. If the selected network is encrypted, enter the password in the Password field.
5.Click Save.
•To enable or disable the extended network:
1.Go to Settings > Wireless > Extended Network.
2.Extended networks are enabled by default. If you want to disable the wireless function of a certain band, just clear the Enable checkbox. In this case, all the wireless settings of this band will be invalid.
3.Click Save.
•To change the wireless network name (SSID):
1.Go to Settings > Wireless > Extended Network.
2.Create a new SSID in Extended 2.4GHz SSID or click Copy Host SSID. The value is case-sensitive.

3.Click Save.
Note:
If you have changed the wireless settings via a wireless device, you will be disconnected after the settings are applied. Please write down the new SSID for future use.
•To hide the SSID of the extended network:
1.Go to Settings > Wireless > Extended Network.
2.Select Hide SSID broadcast, and the corresponding SSID will not be displayed when wireless devices scan for local wireless networks. You need to manually enter the SSID to join the network.
3.Click Save.
The extender is preset with a default LAN IP 192.168.0.254, with which you can log in to the web management page. The LAN IP address, together with the Subnet Mask, also defines the subnet that the connected devices are on. If the IP address conflicts with another device on your local network or your network requires a specific IP subnet, you can change it.
1.Visit http://tplinkrepeater.net, and log in with your TP-Link ID or the password you set for the extender.
2.Go to Settings > Network.
3.Select Use the following IP address.
4.Enter a new IP Address as needed and leave the Subnet Mask as the default settings .
5.Enter the gateway that is in the same subnet as the IP address. The gateway is usually the LAN IP address of your router.
6.Enter the DNS IP address provided by your ISP.
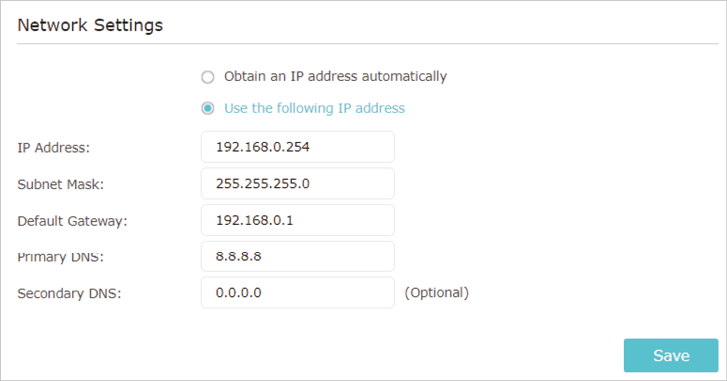
7.Click Save.
You can set the extender’s Wi-Fi coverage depending on how large you want your Wi-Fi area to be.
1.Visit http://tplinkrepeater.net and log in with your TP-Link ID or the password you set for the extender.
2.Go to Settings > Advanced Settings > Wi-Fi Coverage.
3.Select your desired Wi-Fi coverage level for the extender.
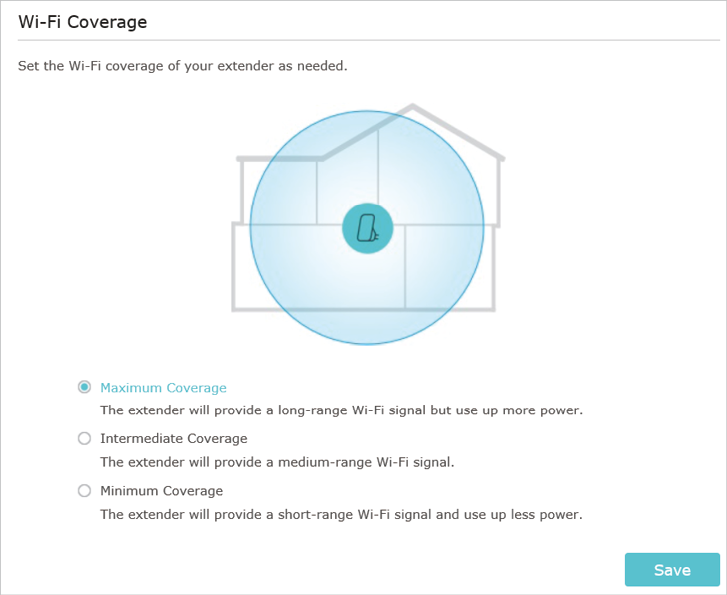
4.Click Save.
Access Control allows you to permit or block specific devices from accessing the internet for a specific period.
Tip:
If the extender is in your router’s OneMesh network, it will automatically copy access control settings from your router. No access control settings is needed for the extender.
1.Visit http://tplinkrepeater.net and log in with your TP-Link ID or the password you set for the extender.
2.Go to Settings > Advanced Settings > Access Control.
3.Enable Access Control.

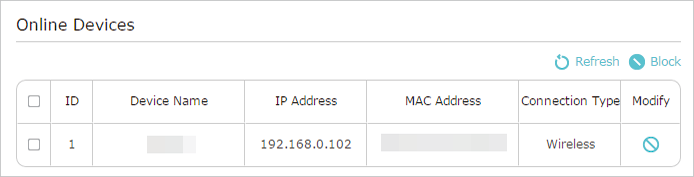
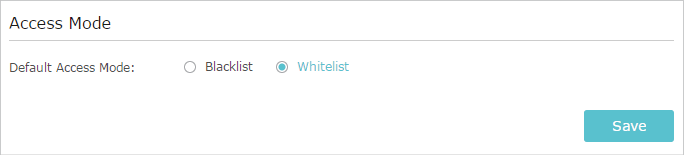
•To block specific device(s):
1.Select Blacklist and click Save.

2.Select the device to be blocked in the Online Devices table by ticking the corresponding checkbox.
3.Click Block and the selected device(s) will be added to the Devices in Blacklist table.
4.Click in the Devices in Blacklist table to set the Effective Time for a certain entry as needed.
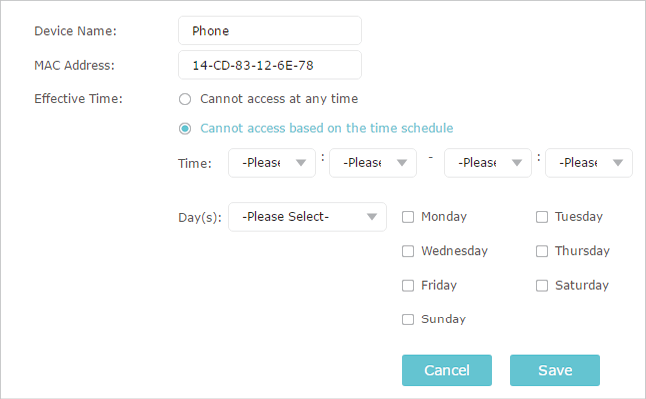
5.Click Save.
•To permit specific device(s):
1.Select Whitelist and click Save.
2.Click Add in the Devices in Whitelist table. Enter the Device Name and MAC Address. And you can set the Effective Time for a certain entry as needed.
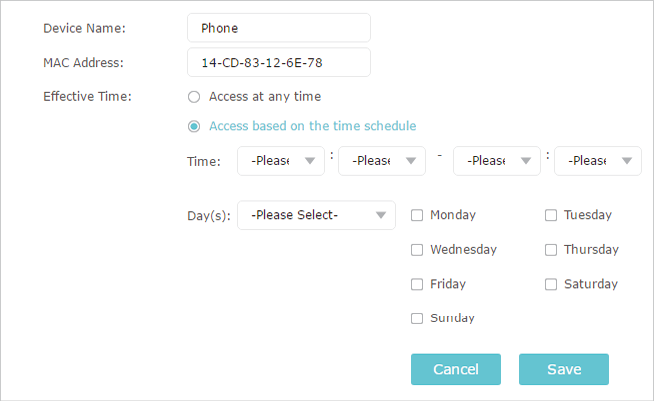
3.Click Save.
The High Speed feature switches off one of the wireless bands to leave one high-performance, super-fast network, ideal for HD streaming and gaming applications.
If most of your devices are connected to one wireless band, this feature can increase the overall performance of your wireless network.
Notes:
1.This function is not available when the extender is in a OneMesh network.
2.Before enabling this feature, please go to Settings > Wireless > Extended Network and check that the 2.4GHz and 5GHz bands are both enabled. Additionally, if you are going to disable the 2.4GHz network, it’s recommended to first make sure all your wireless devices support 5GHz network connection.
1.Visit http://tplinkrepeater.net and log in with your TP-Link ID or the password you set for the extender.
2.Go to Settings > Advanced Settings > High Speed.
3.Enable High Speed Mode.
4.Select the Auto mode. The extender will decide which band the high-speed network will work on based on its wireless connection to your router.
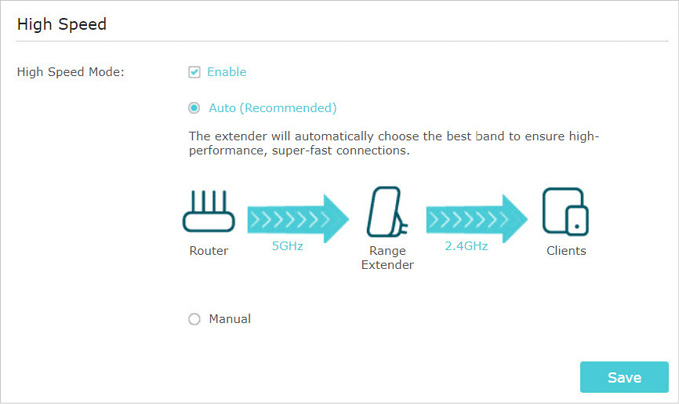
5.Click Save.