RE455 V1 User Guide
Chapter 5 Manage Your Extender
This chapter presents how to manage and maintain your extender.
It includes the following sections:
The System Time of the extender will be used for time-based function such as the Power Schedule function. If you have enabled the Daylight Saving Time feature, the system time will be sychronized with the daylight saving time you configure.
1.Visit http://tplinkrepeater.net, and log in with the password you set for the extender.
2.Go to Settings > System Tools > Time Settings.
To get system time:
1.Select your local Time Zone from the drop-down list.
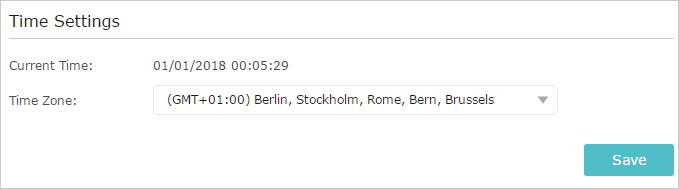
2.Click Save.
To set up Daylight Saving Time:
1.Select Enable Daylight Saving Time.
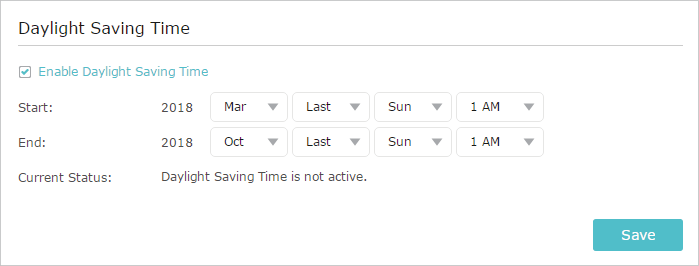
2.Select the Start and End date and time of the daylight saving time at your local time zone.
3.Click Save.
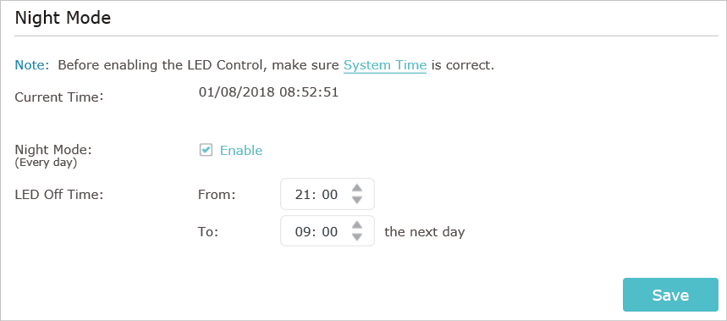
The LEDs of the extender indicate its activities and status. You can turn off LEDs when you don’t need them.
1.Visit http://tplinkrepeater.net, and log in with the password you set for the extender.
2.Go to Settings > System Tools > LED Control.
To turn off the LEDs:
Disable LED Status.

To specify a time period when LEDs are off:
1.Enable Night Mode.
2.Specify the LED off time period.
3.Click Save.
The Power Schdule feature allows you to specify a time period during which the extender is off.
1.Visit http://tplinkrepeater.net, and log in with the password you set for the extender.
2.Go to Settings > Advanced Settings > Power Schedule.
To specify a time period when the extender is off:
1.Click Add.
2.Specify the power off time period and repetitive days.

3.Click Save.
TP-Link is committed to improving product features, giving you a better network experience. You can download the latest firmware file from the Support page at our website www.tp-link.com and upgrade the extender to the latest firmware version.
 Note:
Note:
•Make sure the latest firmware file is matched with the hardware version (as shown in the download section of the Support page).
•Make sure that you have a stable connection between the extender and your computer. It is NOT recommended to upgrade the firmware wirelessly.
•Back up your extender configuration.
•Do NOT power off the extender during the firmware upgrade.
1.Download the latest firmware file for the extender from our website
www.tp-link.com.
2.Visit http://tplinkrepeater.net, and log in with the password you set for the extender.
3.Go to Settings > System Tools > Firmware Upgrade.
4.Click Browse to locate the downloaded new firmware file, and then click Upgrade.
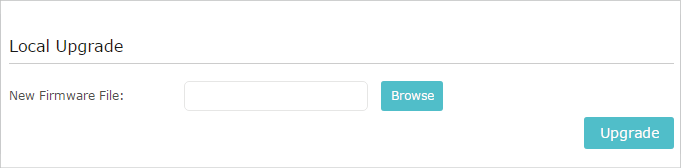
5.Wait a few minutes for the firmware upgrade to complete and the extender to reboot.
5. Backup and Restore Configuration Settings
The configuration settings are stored as a configuration file in the extender. You can back up the configuration file and restore the extender to the previous settings from the back up file when needed. Moreover, if necessary, you can erase the current settings and reset the extender to the default factory settings.
1.Visit http://tplinkrepeater.net, and log in with the password you set for the extender.
2.Go to Settings > System Tools > Backup & Restore.
To backup configuration settings:
Click Backup to save a copy of the current settings to your local computer. A ‘.bin’ file of the current settings will be stored on your computer.

To restore configuration settings:
1.Click Browse to locate the backup configuration file stored on your computer, and click Restore.
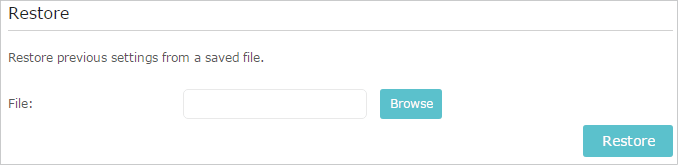
2.Wait a few minutes for the restore and reboot.
Note: During the restore process, do not power off or reset the extender.
To reset the extender to factory default settings:
1.Click Factory Restore to reset the extender.

2.Wait a few minutes for the reset and reboot.
Note:
1.During the reset process, do not power off or reset the extender.
2.We strongly recommend you backup the current configuration settings before resetting the extender.
The account management feature allows you to change your login username and password of the web management webpage.
1.Visit http://tplinkrepeater.net, and log in with the password you set for the extender.
2.Go to Settings > System Tools > Admin Account.
3.Enter the old password. Then enter the new password twice (case-sensitive) and click Save.
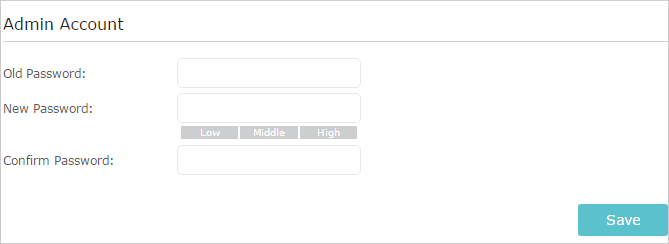
4. Use the new password for future logins.
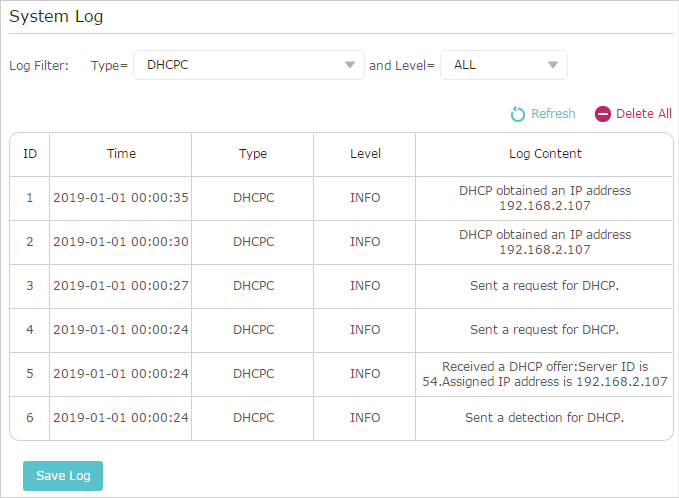
If the extender is not working properly, you can save the system log and send it to our technical support team.
1.Visit http://tplinkrepeater.net, and log in with the password you set for the extender.
2.Go to Settings > System Tools > System Log.
To save the system log locally:
1.Choose the type and level of the system log as needed.
2.Click Save Log to save the system logs to a local disk.