RE455 V1 User Guide
Chapter 2 Set Up Internet Connection
This chapter introduces how to boost your host wireless coverage. Please follow the step-by-step instructions to set up the internet connection.
It contains the following sections:
Power On
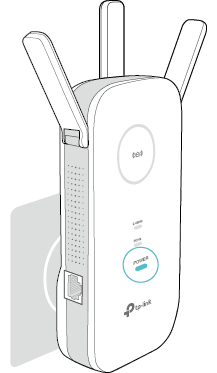
Plug the extender into an electrical outlet near your host router, and then wait until the POWER LED is solid on.
 Note:
Note:
1.For safety, we suggest that you plug the extender in upright directions as shown below.
2.The operating temperature should be between 0°C and 40°C (32°F - 104°F).
Connect and Extend
There are three ways to connect to and extend the host network: via a web browser, via the TP-Link Tether app, or via the WPS button.
1.1. Method 1: Via a Web Browser
1.Connect your computer to the extender via your Ethernet cable, or connect wirelessly as follows:
•For Windows Users
1 )Unplug the Ethernet cable from your computer (if any).
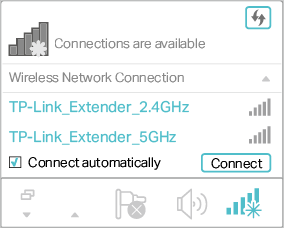
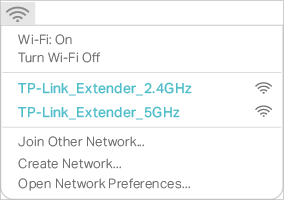
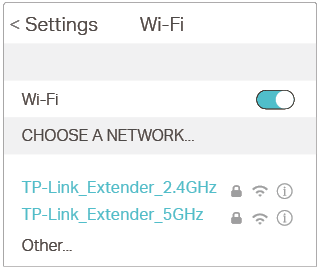
2 )Click the Wi-Fi icon on the taskbar and connect to the extender’s wireless network: TP-Link_Extender_2.4GHz or TP-Link_Extender_5GHz.
•For Mac OS X Users
1 )Unplug the Ethernet cable from your computer (if any).
2 )Click the Wi-Fi icon in the top right corner of the screen, and connect to the extender’s network: TP-Link_Extender_2.4GHz or TP-Link_Extender_5GHz.
2.Follow the instructions of the Quick Setup Wizard to connect the extender to your host router.
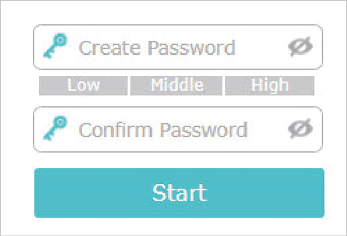
1 )Launch a web browser, enter http://tplinkrepeater.net or http://192.168.0.254 in the address bar, and then create a password for future logins, and click Start.
 Tips: If the login window does not appear, please refer to FAQ.
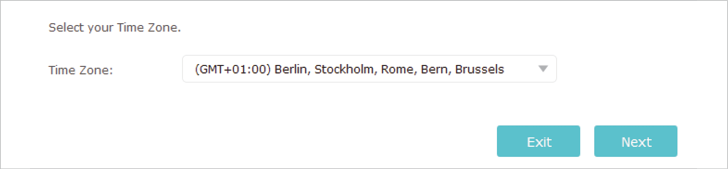
2 )Select your time zone, and click Next.
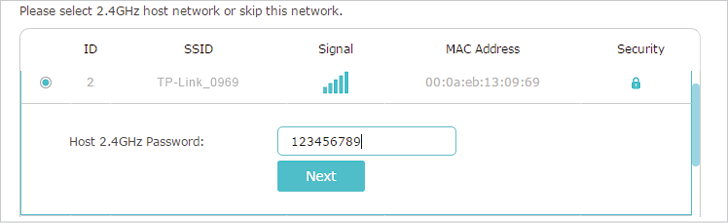
3 )Select your host router’s 2.4GHz SSID (network name), enter its password (NOT the password you just created for management), and click Next.
4 )Select your host router’s 5GHz SSID (network name), enter its password (NOT the password you just created for management), and click Next.
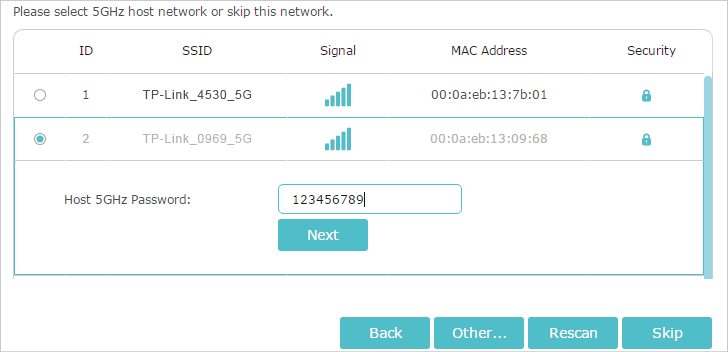
Tips: If your host router does not support 5GHz wireless network, please click Skip to continue.
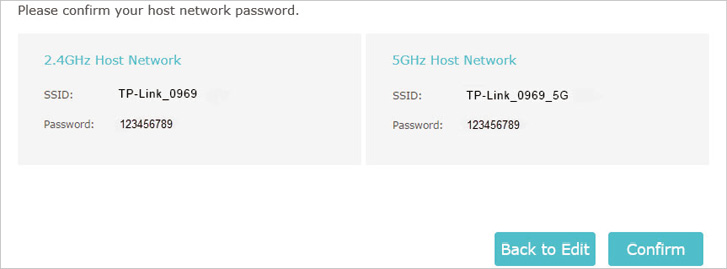
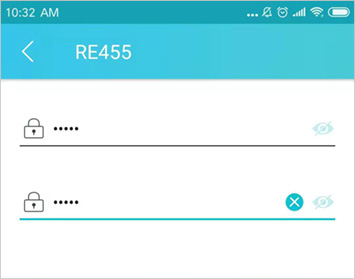
5 )Confirm your host network password.
6 )Either keep the default SSIDs (network names) or customize them for the extended networks, and then click Save.
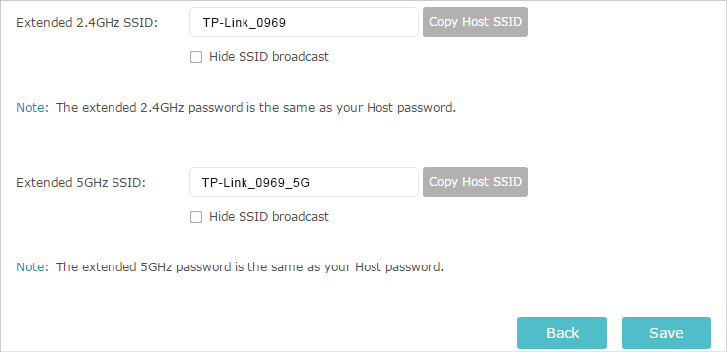
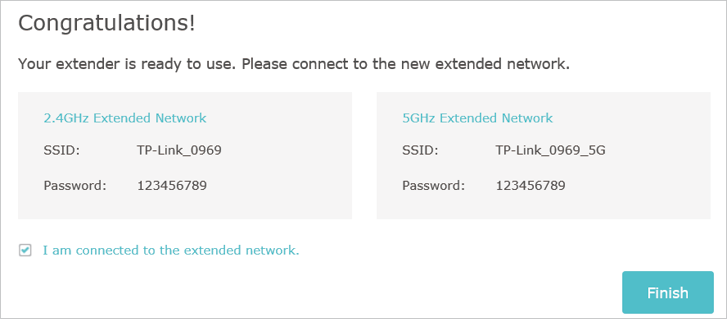
7 )Enjoy! Connect to the extended network and enjoy the internet. Both extended networks share the same wireless passwords as those of your host networks, but may have different network names if you have customized the SSIDs during the configuration.
 Note:
Note:
Since the performance of the extended network will be affected by the distance between the extender and the host router, we highly recommend you to relocate your extender referring to Position Your Extender.
1.2. Method 2: Via the TP-Link Tether App
1.Launch the Apple App Store or Google Play Store and search TP-Link Tether or simply scan the QR code to download and install the app.

2.Go to Wi-Fi Settings and connect your device to the extender’s wireless network:
TP-Link_Extender_2.4GHz or TP-Link_Extender_5GHz.
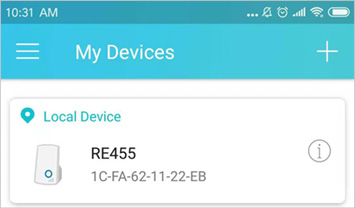
3.Launch Tether and select your extender from the Local Device list.
4.Create a password for future logins and click Create.
5.Follow the on-screen instructions to complete the configuration.
 Tips: You can manage your extender via Tether, such as controlling LEDs, sharing passwords of your networks and blocking devices.
Note: Since the performance of the extended network will be affected by the distance between the extender and host router, we recommend that you relocate your extender by referring to Position Your Extender.
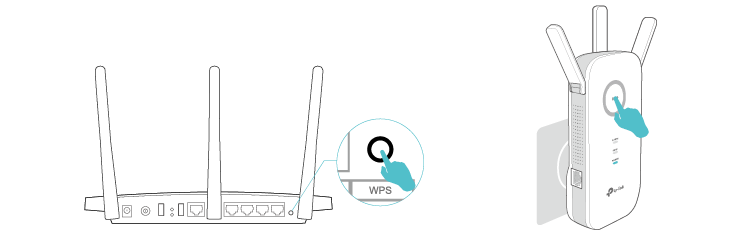
1.3. Method 3: Via the WPS Button
Use this way if your router has a WPS button. The button might look like one of these:  .
.
1.Press the WPS button on your host router, and then press the WPS button on the extender for 1 second within 2 minutes.
Note:
For more information about using WPS button on your host router, please refer to the router manufacturer’s user guide.
2.Wait until the Signal LED  changes to solid on, which indicates that the WPS connection is successful.
3.Enjoy! Connect to the extended network and enjoy the Internet. Both extended networks share the same SSIDs (network names) and passwords as those of your host networks.
Note:
•If the extender connects to a dual-band router but only the 2.4GHz or 5GHz LED is on, repeat Step 1 and 2 to connect to the other band.
•If the WPS method fails, or if you want to customize the extended network name, refer to Method 1: Via a Web Browser or Method 2: Via the TP-Link Tether App.
•Since the performance of the extended networks will be affected by the distance between the extender and the host router, we highly recommend you to relocate your extender by referring to Position Your Extender.
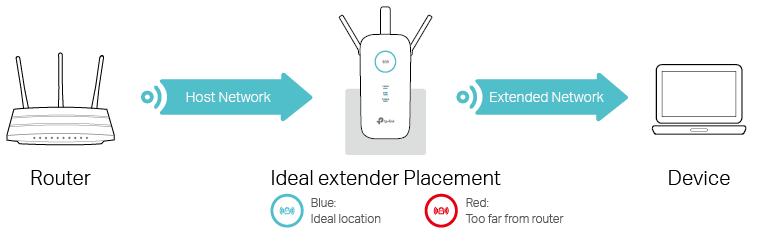
Please follow the instructions below to achieve optimal performance of the extender.
1.Plug the extender into an electrical outlet between your host router and the Wi-Fi “dead“ zone. The location you choose must be within the range of your existing host network.
2.Wait until the Signal LED is lit and solid blue. If it’s not, relocate the extender closer to the host router to achieve better signal quality.
Tips:
To minimize signal interference, please choose a location which is far away from Bluetooth devices and other household electronic devices, such as cordless phones, microwave ovens and baby monitors.