Archer MR600 V1 User Guide
- About This Guide
- Chapter 1 Get to Know Your 4G LTE Router
- Chapter 2 Connect the Hardware
- Chapter 3 Log In to Your 4G LTE Router
- Chapter 4 Set Up Internet Connections
- Chapter 5 QoS
- Chapter 6 Network Security
- Chapter 7 Parental Controls
- Chapter 8 SMS
- Chapter 9 Guest Network
- Chapter 10 NAT Forwarding
- Chapter 11 Specify Your Network Settings
-
Chapter 12 Administrate Your Network
- Set System Time
- Control LEDs
- Test the Network Connectivity
- Update the Firmware
- Back up and Restore Configuration Settings
- Set the Router to Reboot Regularly
- Change the Administrator Account
- Local Management
- Remote Management
- System Log
- CWMP Settings
- SNMP Settings
- Monitor the Internet Traffic Statistics
- Chapter 13 TP-Link Cloud Service
- Chapter 14 OneMesh with Seamless Roaming
- FAQ
- Authentication
Chapter 4 Set Up Internet Connections
This chapter introduces how to connect your router to the internet. The router is equipped with a web-based Quick Setup wizard. It has many ISP information built in, automates many of the steps and verifies that those steps have been successfully completed. Furthermore, you can set up IPv6 connection if your ISP provides IPv6 service.
This chapter includes the following sections:
To set up your router with several easy steps quickly:
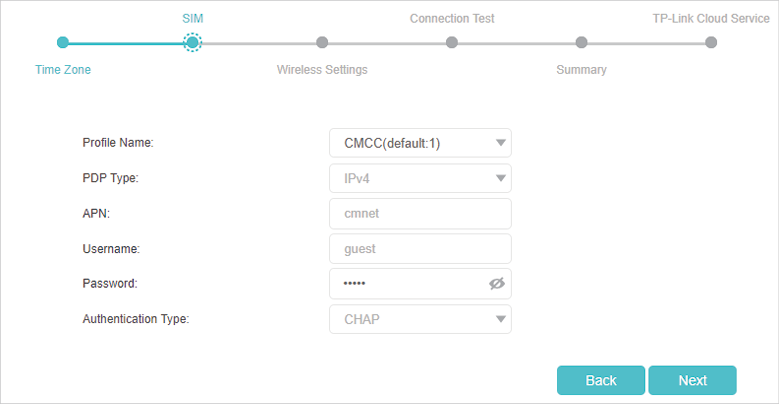
1.Visit http://tplinkmodem.net, and log in with the password or your TP-Link ID.
2.Click Quick Setup, after configuring your time zone, confirm the parameters with the information provided by your ISP in the SIM part and click Next.
 Note:
Note:
1.Quick Setup is not available if your SIM card is locked. Unlock your SIM card according to the prompt.
2.It is recommended to enable Smart Connect to enjoy a seamless connection between dual-band networks. With Smart Connect enabled, the router’s 2.4GHz and 5GHz share the same SSID (network name) and password.
3.Follow the on-screen instructions to complete the setup.
Note:
1.During the quick setup process, you can change the preset wireless network name (SSID) and wireless password. Once done, all your wireless devices must use the new SSID and password to connect to the router.
2.The router supports two operation modes, 3G/4G Router Mode and Wireless Router mode. If you already have a modem or your internet comes via an Ethernet cable from the wall, you can set up the router as a regular wireless router to share the internet. Refer to FAQ > Q6 for details.
2. Create a Connection Profile
If your ISP settings are not detected by the router, you can create an internet connection profile by following the steps below:
1.Visit http://tplinkmodem.net, and log in with the password or your TP-Link ID.
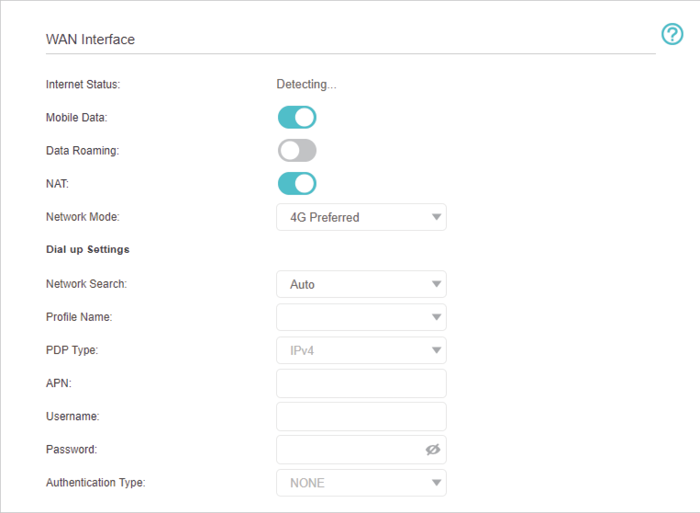
2.Go to Advanced > Network > Internet page.
 Tips:
Tips:
•You can also upgrade the supported ISP information. Refer to Upgrade Your ISP Information to configure.
•You can view all internet connections or edit connections that are set up manually on this page.
•You can change the Network Mode to 4G preferred, 4G Only or 3G Only according to your needs.
•If the Auto network connection displays a wrong ISP profile, you can select a correct network manually:
1.Change the Network Search mode to Manual.
2.When prompted, select the correct ISP network and click Save.
3.Click Create Profile.
4.Specify the Profile Name, Username and Password. Select the PDP Type, APN Type and Authentication Type according to your ISP.
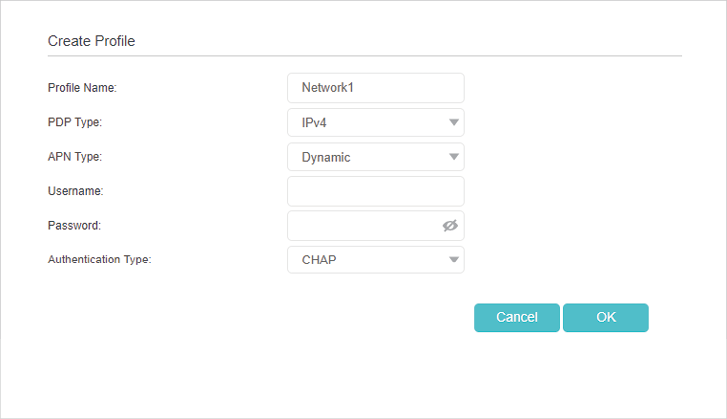
5.Click OK to make the settings effective and the new profile will be used to set up a new connection.
The IPv6 Tunnel feature helps you obtain IPv6 resources based on an IPv4 WAN connection or vice versa.
IPv6 Tunnel is a transition mechanism that allows isolated IPv6 hosts and networks to reach each other over IPv4-only infrastructure before IPv6 completely supplants IPv4. It is a temporary solution for networks that do not support native dual-stack, where both IPv6 and IPv4 run independently.
The router provides three tunneling mechanisms: 6to4, 6rd and DS-Lite. The way to set up 6rd and DS-Lite tunnel are similar.
 Note:
Note:
You must reconfigure the IPv6 Tunnel settings every time you reboot the router. Make sure the desired WAN connection is connected before the configuration.
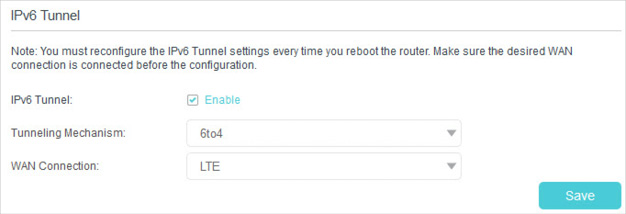
3.1. Use the Public IPv6 Tunnel Service-6to4
The 6to4 tunnel is a kind of public service. If there are any 6to4 servers on your network, you can use this mechanism to access IPv6 service. If your ISP provides you with an IPv4-only connection but you want to visit IPv6 websites, you can try to set up a 6to4 tunnel.
I want to:
Set up the IPv6 tunnel though my ISP doesn’t provide me with the tunnel service.
How can I do that?
1.Visit http://tplinkmodem.net, and log in with the password you set for the router.
2.Go to Advanced > Network > IPv6 Tunnel.
3.Tick the check box, select 6to4 as the tunneling mechanism and select a WAN connection from the drop-down list, then click Save.
Note:
If there is no available WAN connection to choose, make sure you have connected to the internet.
Done!
Now you can visit the IPv6 websites with the 6to4 tunnel.
Note: Still not being able to access IPv6 resources means that not any 6to4 public server was found in your network. You can contact your ISP to sign up for IPv6 connection service.
3.2. Specify the 6rd Tunnel with Parameters Provided by Your ISP
I want to:
Specify the 6rd tunnel with the parameters provided by my 6rd tunnel service provider.
How can I do that?
1.Visit http://tplinkmodem.net, and log in with the password you set for the router.
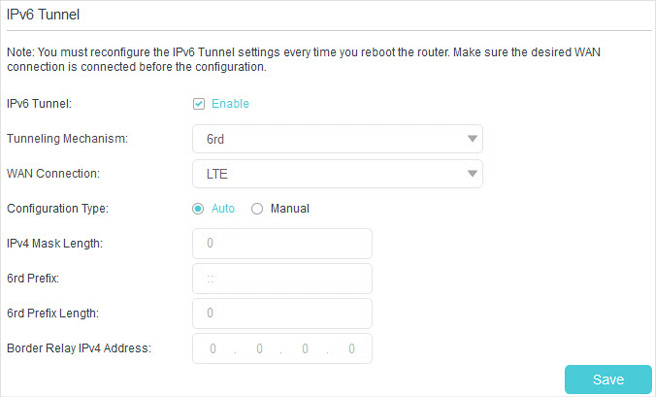
2.Go to Advanced > Network > IPv6 Tunnel.
3.Tick the check box, select 6rd as the tunneling mechanism and select a WAN connection from the drop-down list.
4.According to the parameters provided by your ISP, choose Auto or Manual. More parameters are needed if you choose Manual.
5.Click Save.
Note:
If there is no available WAN connection to choose, make sure you have connected to the internet and the connection type is not Bridge.
Done!
Now you can visit the IPv6 websites with the 6rd tunnel.
 Tips: The way to set up DS-Lite tunnel is similar to that of 6rd tunnel. If you are provided with an IPv6-only WAN connection and have signed up for DS-Lite tunnel service, specify the DS-Lite tunnel by referring to the steps above.
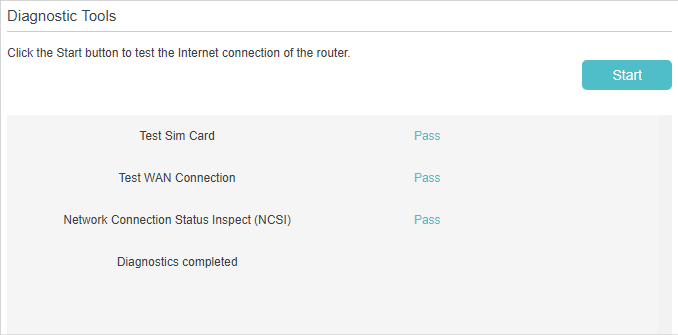
After manually set up the internet connection, you need to know the internet connectivity. The router provides a diagnostic tool to help you locate the malfunction.
1.Visit http://tplinkmodem.net, and log in with the password or your TP-Link ID.
2.Go to Advanced > System Tools > Diagnostics page.
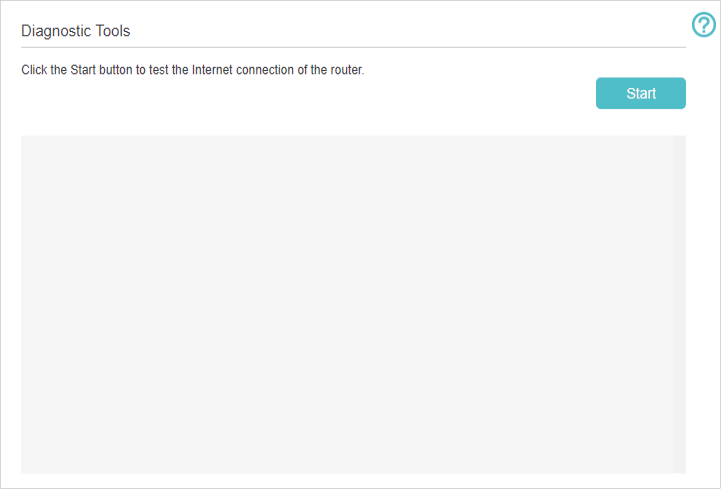
3.Click Start to test the internet connectivity and you will see the test result in the gray box.