How to Set Privacy Mask on Speed Dome PTZ
Contents
Introduction
Speed Dome PTZ cameras support Privacy Masking.
Unlike traditional privacy masks, the Privacy Masking on Speed Dome PTZ cameras can lock onto the real-world position of objects, ensuring that masked areas remain aligned with their targets. Even during pan, tilt, or zoom operations, the mask stays correctly positioned and does not shift with changes in the camera’s field of view, effectively preventing unintended exposure of private areas.
Requirements
- VIGI InSight PTZ5425
- PC
Configuration
Step 1. Access the camera’s web management interface by entering the camera IP address in a web browser.
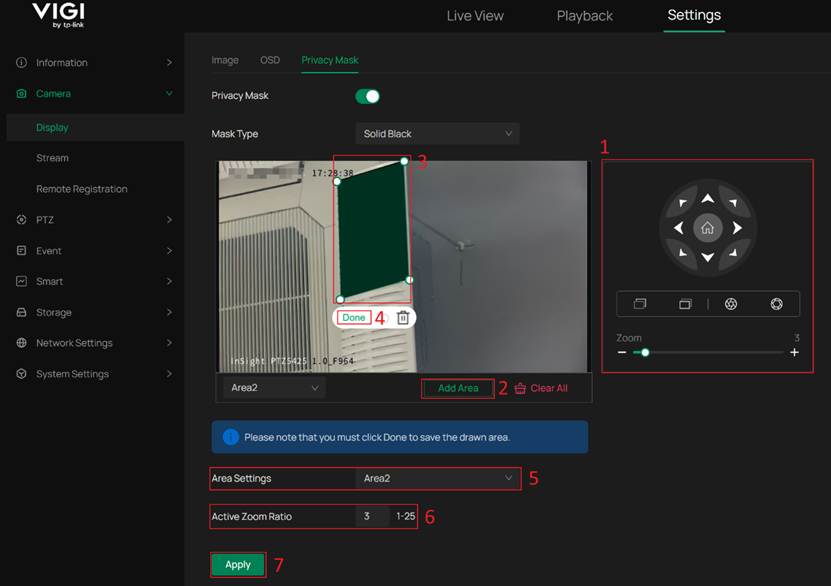
Step 2. Navigate to Settings > Camera > Display > Privacy Mask and enable Privacy Mask. Once Privacy Mask is enabled, and select the desired Mask Type.
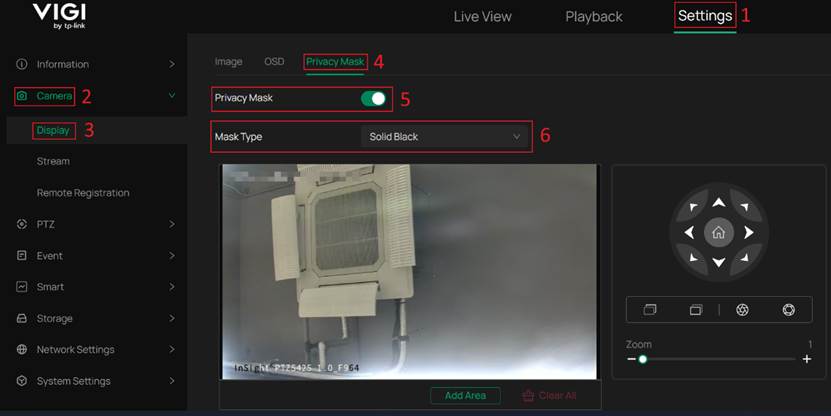
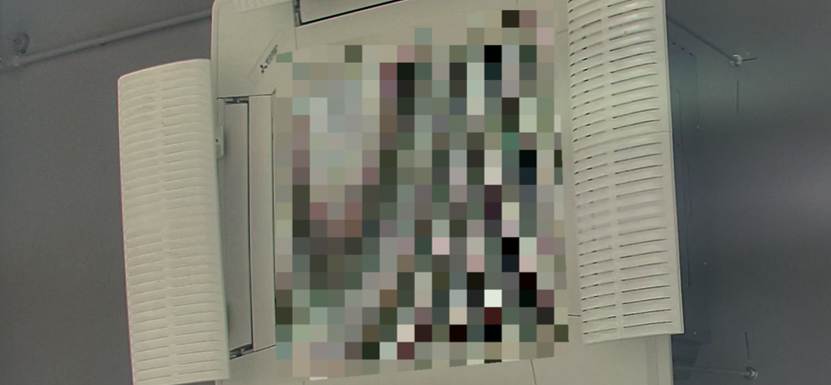
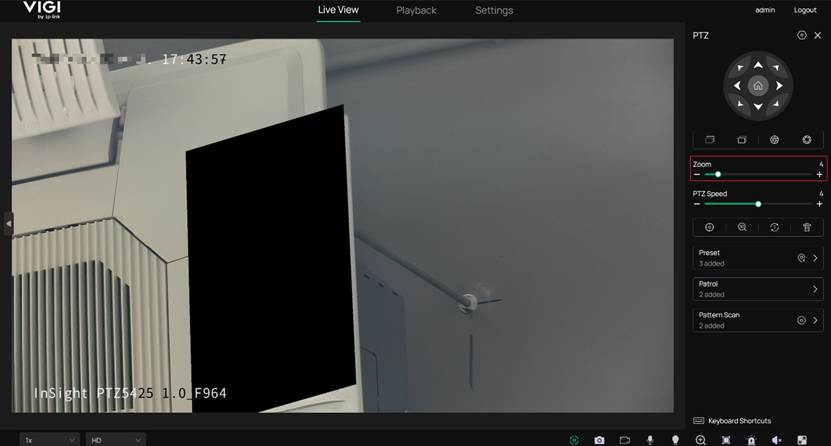
Mask Type: The visual appearance of the privacy mask. Available options include Solid Black and Mosaic. Please refer to the example images below for details.

Step 3. Adjust the camera to the desired position where the privacy mask will be configured. Click Add Area to create a new privacy mask area, then adjust the area to cover the region you want to mask. After configuring the area, click Done. 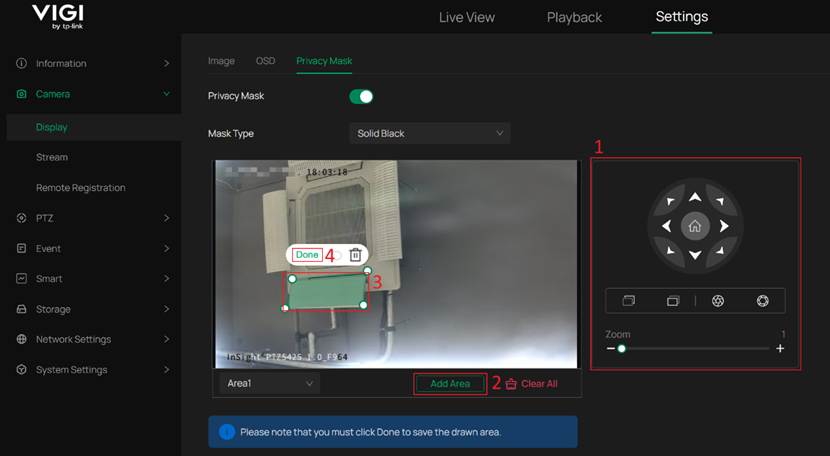
Note: The real-world position of a privacy mask area is saved only after clicking Done and will not change with subsequent camera view or zoom adjustments. If Done is not clicked, the privacy mask area will not be saved.
Step 4. In Area Settings, select the created privacy mask area and configure the Active Zoom Ratio. Click Apply to save and apply the configuration.
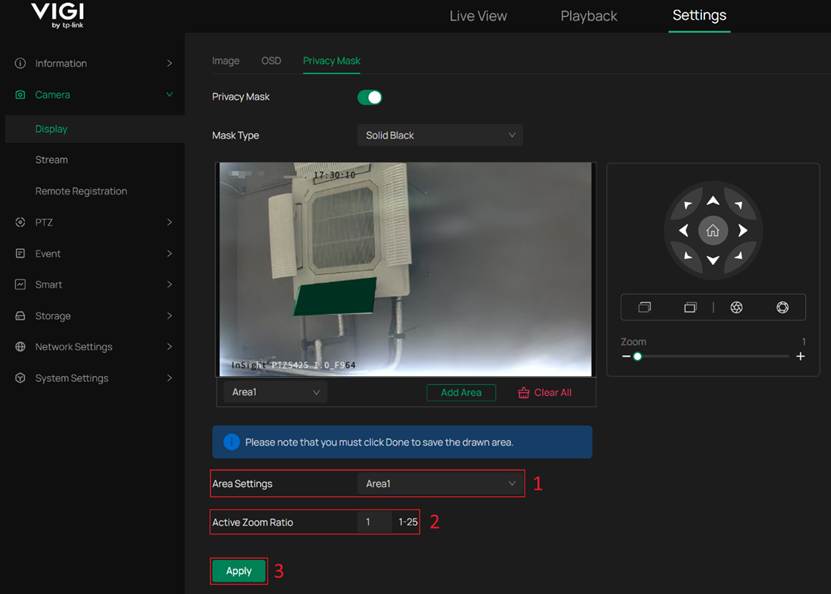
Note: Active Zoom Ratio defines the minimum zoom ratio at which the privacy mask area becomes active.
It is recommended to adjust the camera zoom to the same zoom ratio when configuring this parameter to ensure that the preview view matches the actual masked position.
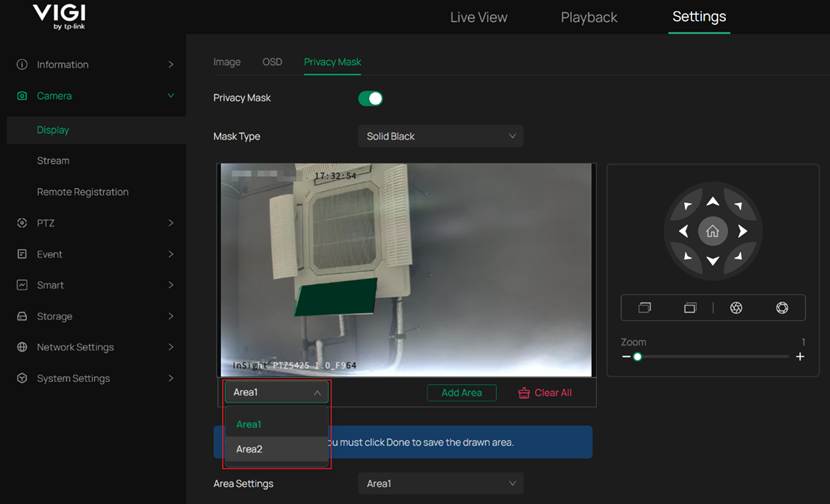
Step 5. (Optional) Adjust the camera position and zoom, then add and configure additional privacy mask areas as needed.
Note: Speed Dome PTZ cameras support up to 4 privacy mask areas.
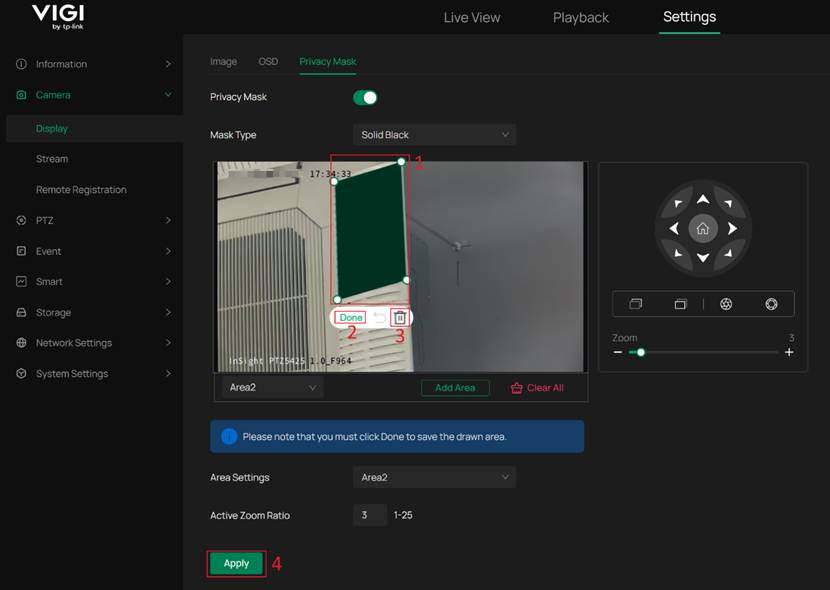
Step 6. (Optional) Edit or delete an existing privacy mask area.
Select the area to be modified, and the camera will automatically adjust its position. Drag the selection box to resize the masked area and click Done, or delete the area via click Delete Icon if required. Click Apply to save and apply the changes.
Verification
Move or adjust the camera to any position. The masked areas will remain aligned with their corresponding real-world locations.
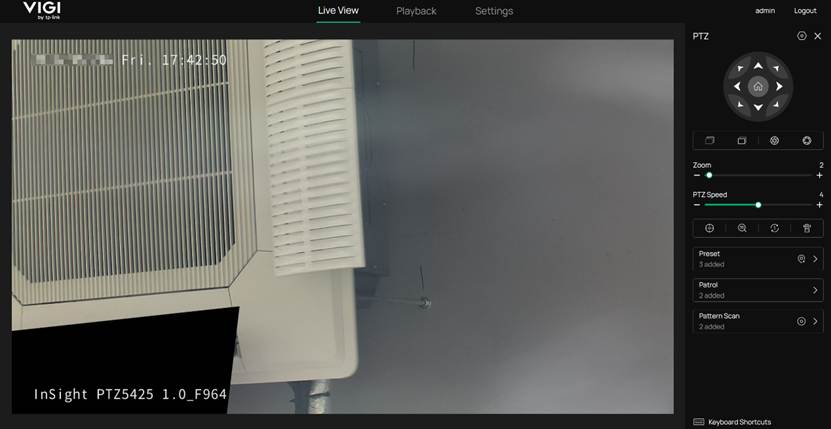
If the Active Zoom Ratio is not set to 1, the privacy mask will only take effect when the zoom ratio is equal to or higher than the configured Active Zoom Ratio.
Conclusion
By following the steps above, you have successfully completed the Privacy Mask configuration.
Get to know more details of each function and configuration please go to Download Center to download the manual of your product.
Is this faq useful?
Your feedback helps improve this site.
TP-Link Community
Still need help? Search for answers, ask questions, and get help from TP-Link experts and other users around the world.