How to Use VIGI Pan/Tilt/Zoom Function
Contents
Introduction
The Pan/Tilt/Zoom (PTZ) function is widely used in surveillance cameras to allow remote adjustment of the viewing direction and field of view, where Pan refers to horizontal left-and-right rotation, Tilt refers to vertical up-and-down movement, and Zoom enables the image to be zoomed in or out, making it possible to switch efficiently between wide-area monitoring and detailed observation.
In this FAQ, we mainly demonstrate how to use Pan/Tilt/Zoom (PTZ) direction and speed control and 3D positioning to operate PTZ cameras on the live view page. You may enter the settings page to perform detailed configurations if you like.
Requirements
- VIGI IPCs (PTZ series)
Configuration
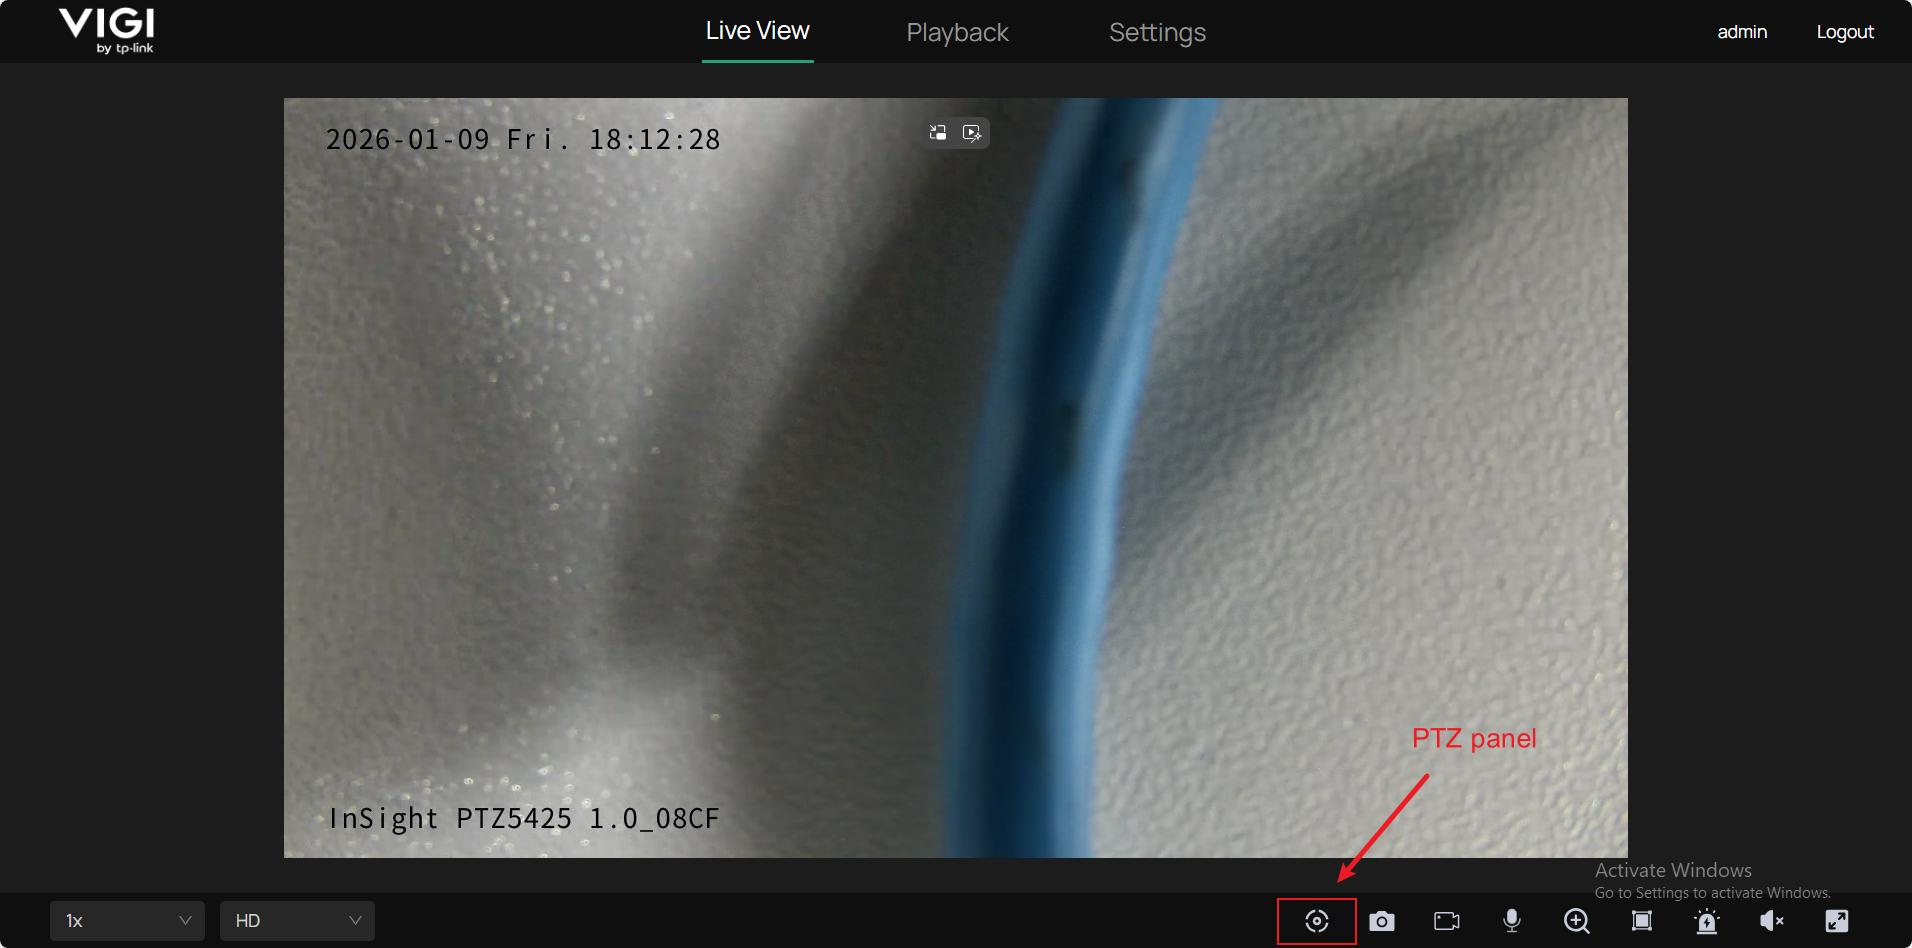
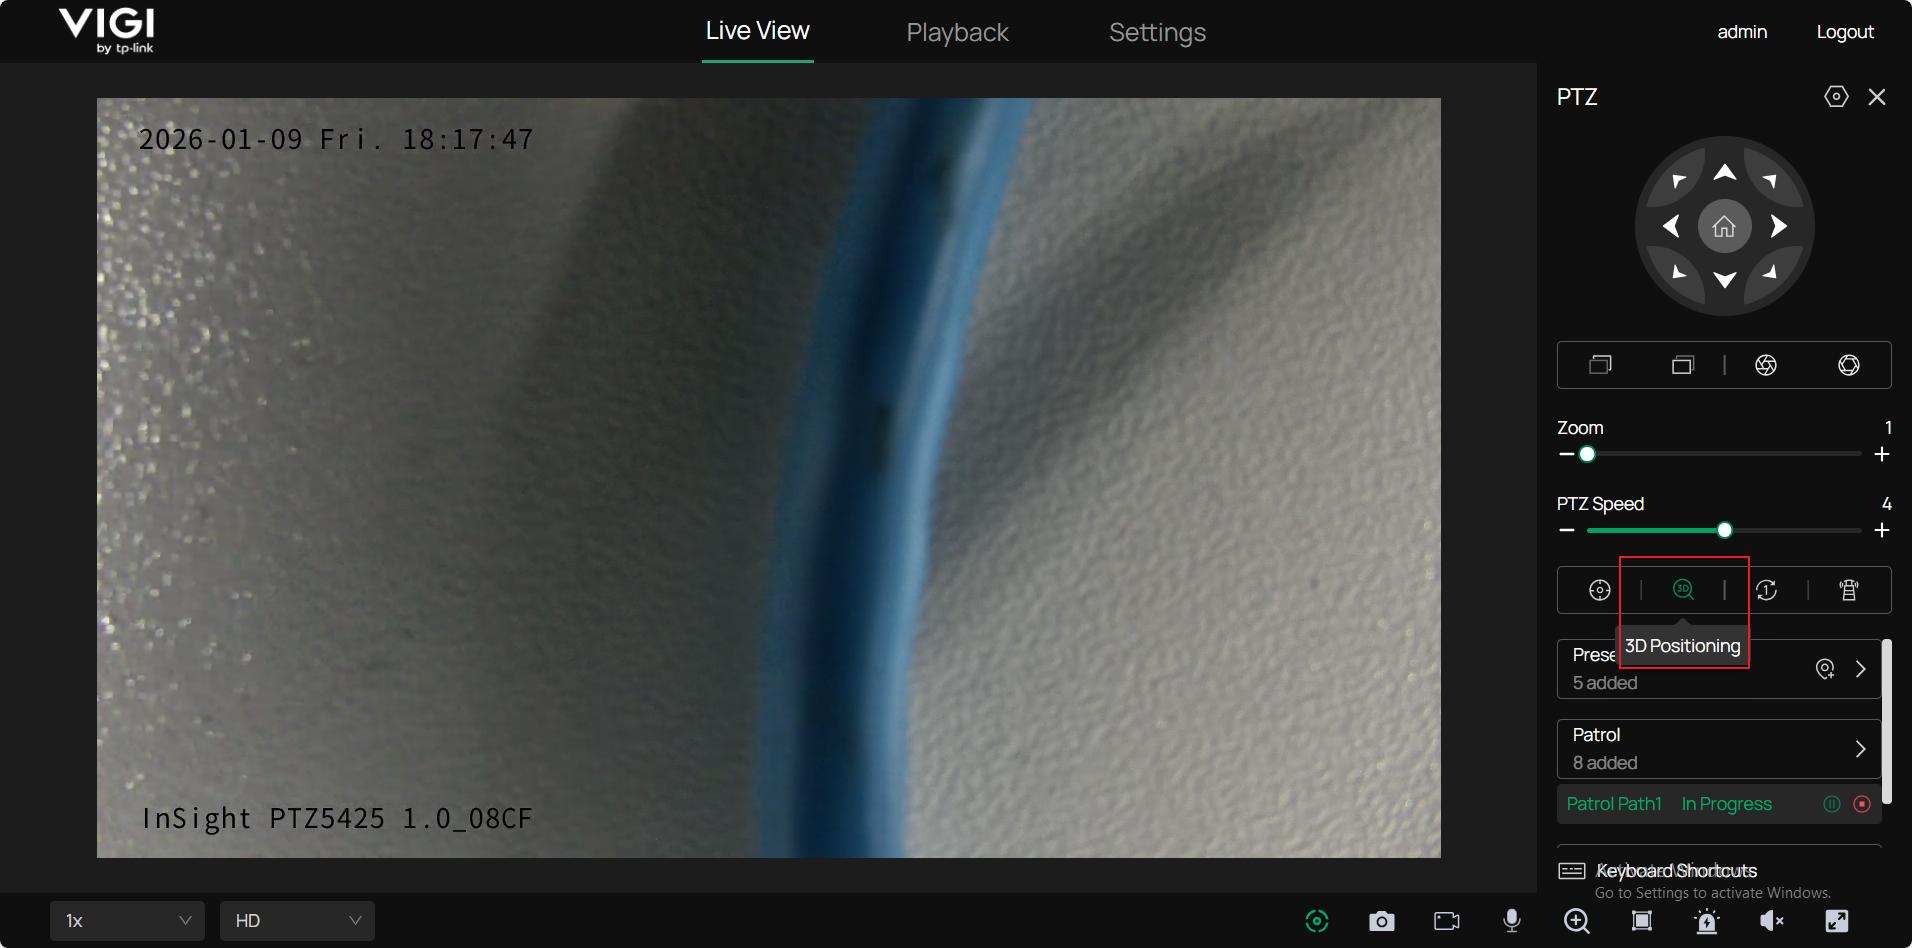
Step 1. Log into the management interface of your VIGI camera. Open the PTZ control panel on the live view page by clicking the icon shown in the attached picture below.
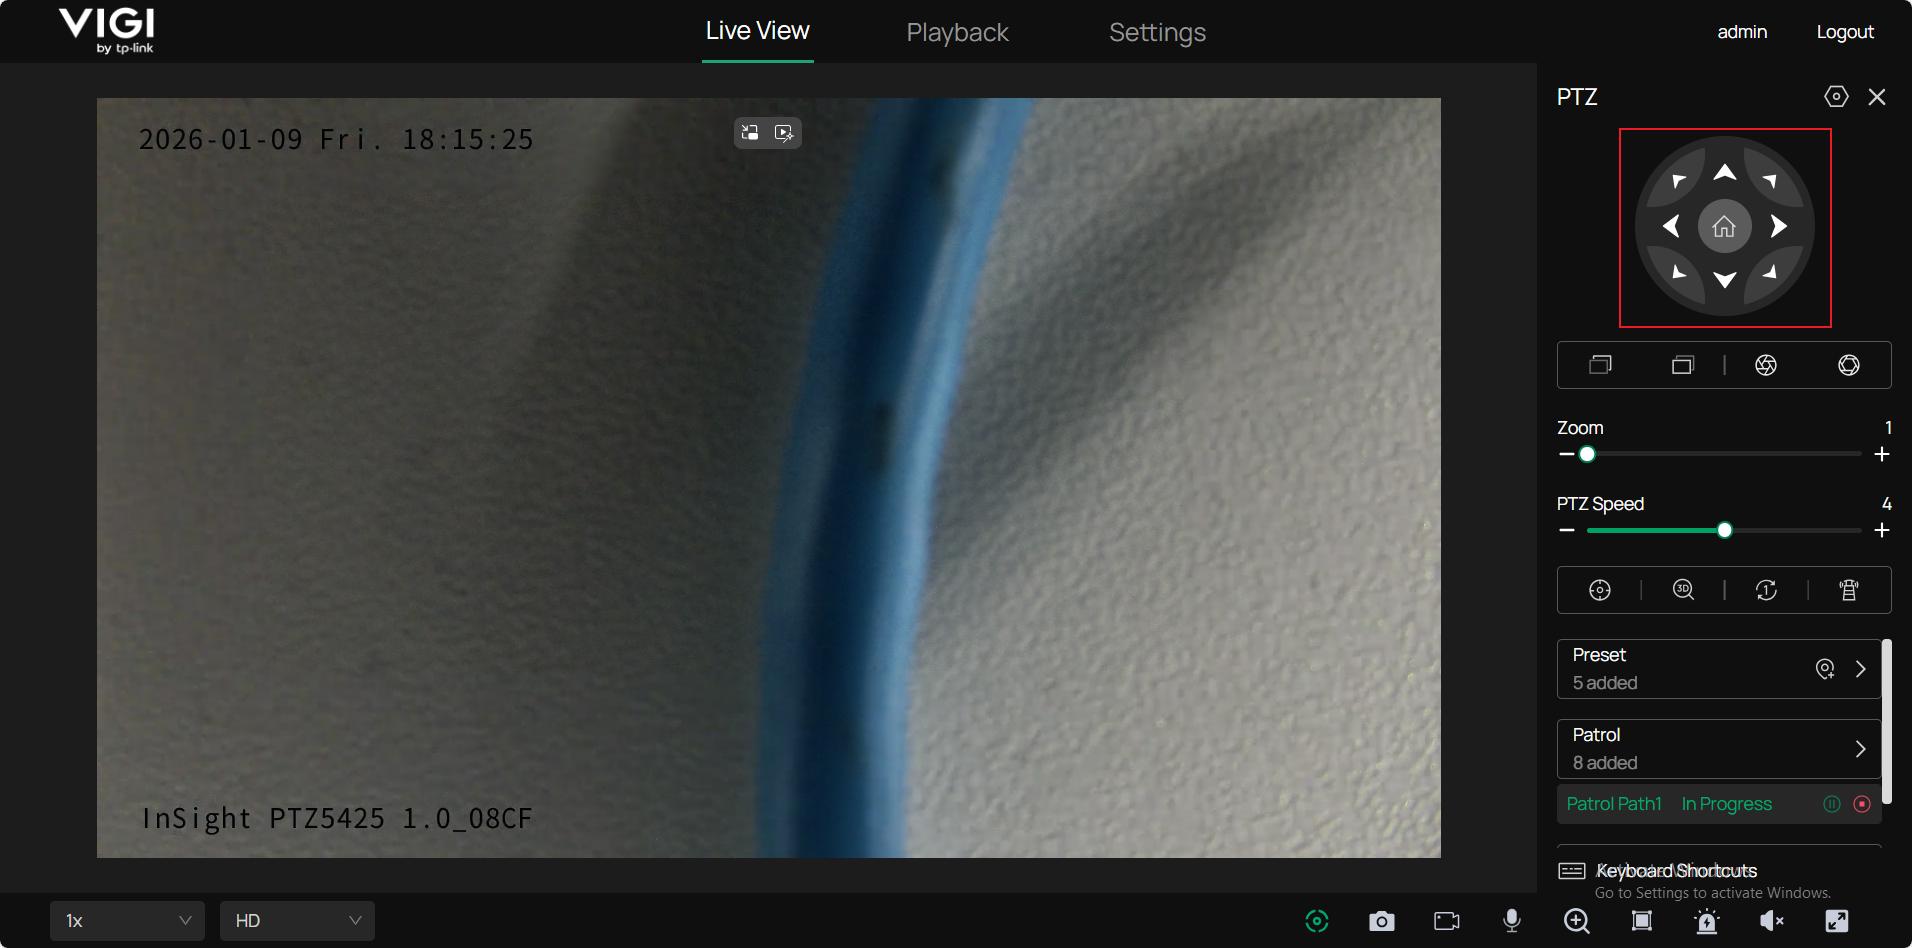
Step 2. Control the pan/tilt/zoom function on the PTZ panel.
After we open the PTZ control panel, you will see an interface on the right side. We will introduce these buttons one by one.
Pan & Tilt control board: You can change the view of the camera by pressing the arrow corresponding to the desired direction. The Pan & Tilt moves accordingly. You can also use your arrow keys on your keyboard to execute the same action. An automatic rotation will be triggered when you turn the camera to the lowest. Upon the center lies the home position button. Once you have finished configuring it in Settings (referring to How to use the Home Position Function | TP-Link), you can press it to return the view of the camera to a default position.
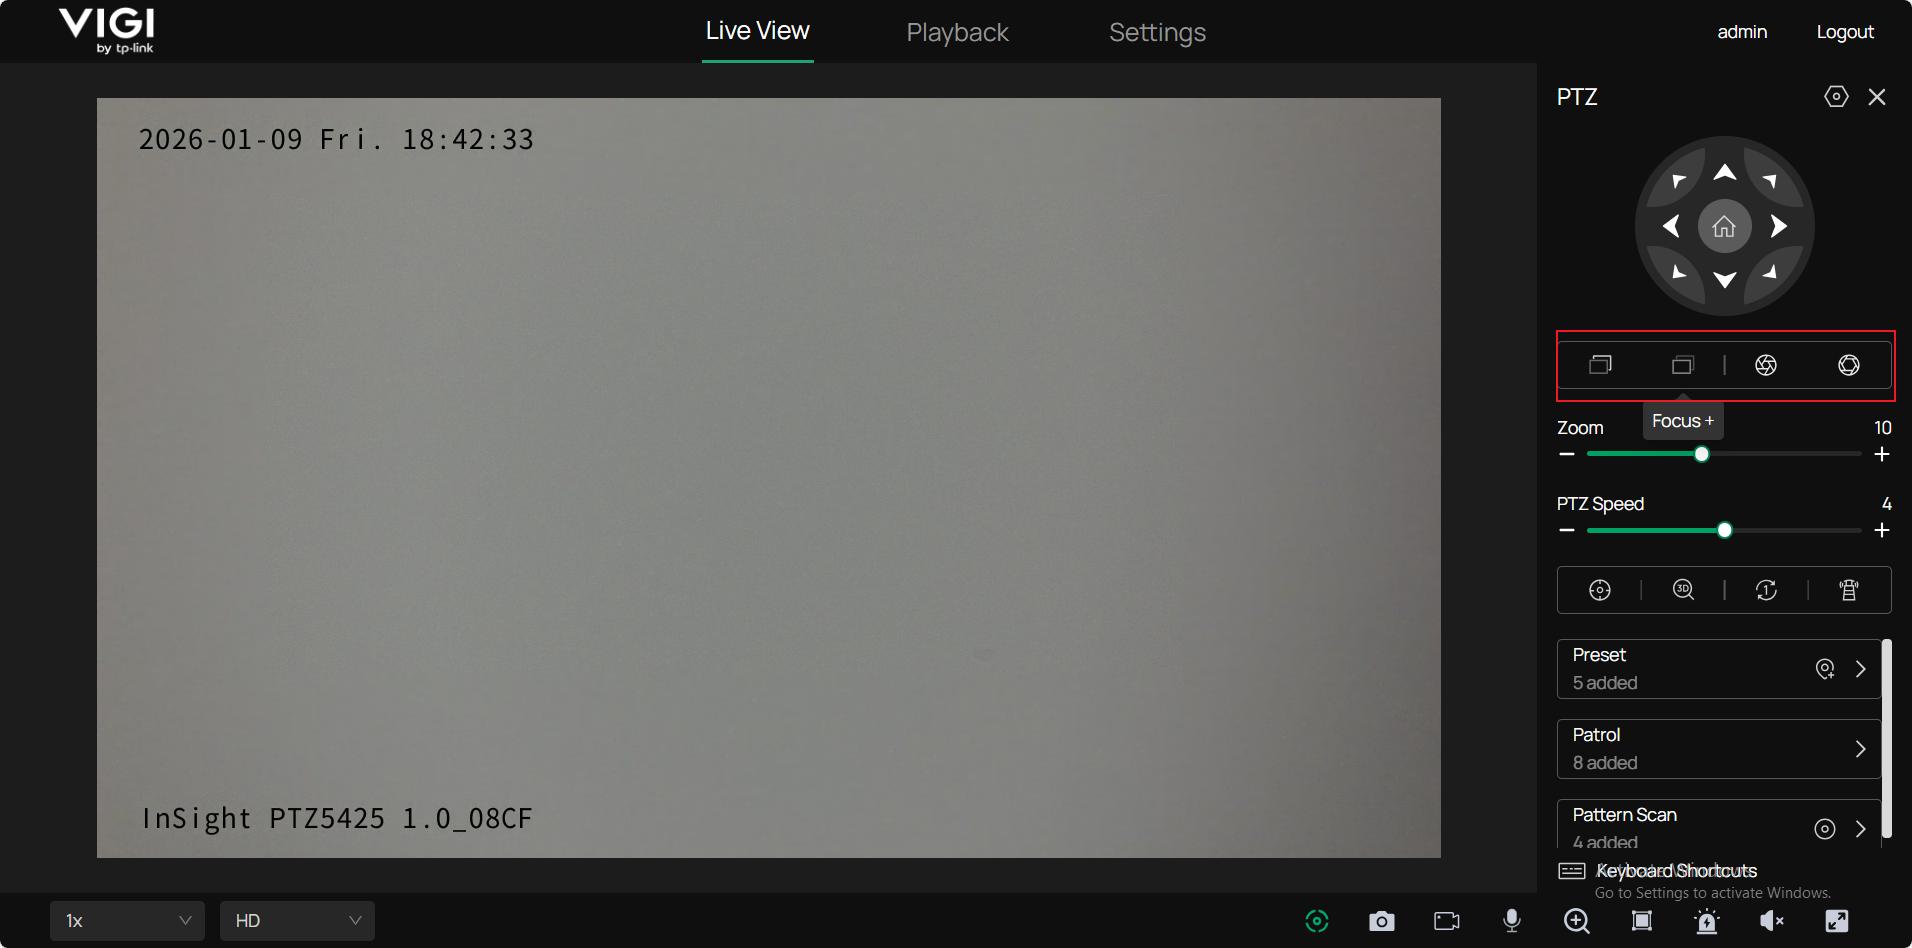
Focus buttons: Focus buttons are used to manually adjust the focus of the camera. The IPC would adjust the focus using its algorithm. However, if the focus is blurry or the focal point is not satisfying, you can use focus buttons to manually adjust the focus to the desired view.
Aperture buttons: You can temporarily adjust the aperture of the camera to have a clear view. Note that the aperture will restore its default size when Pan/Tilt moves and when time is up.
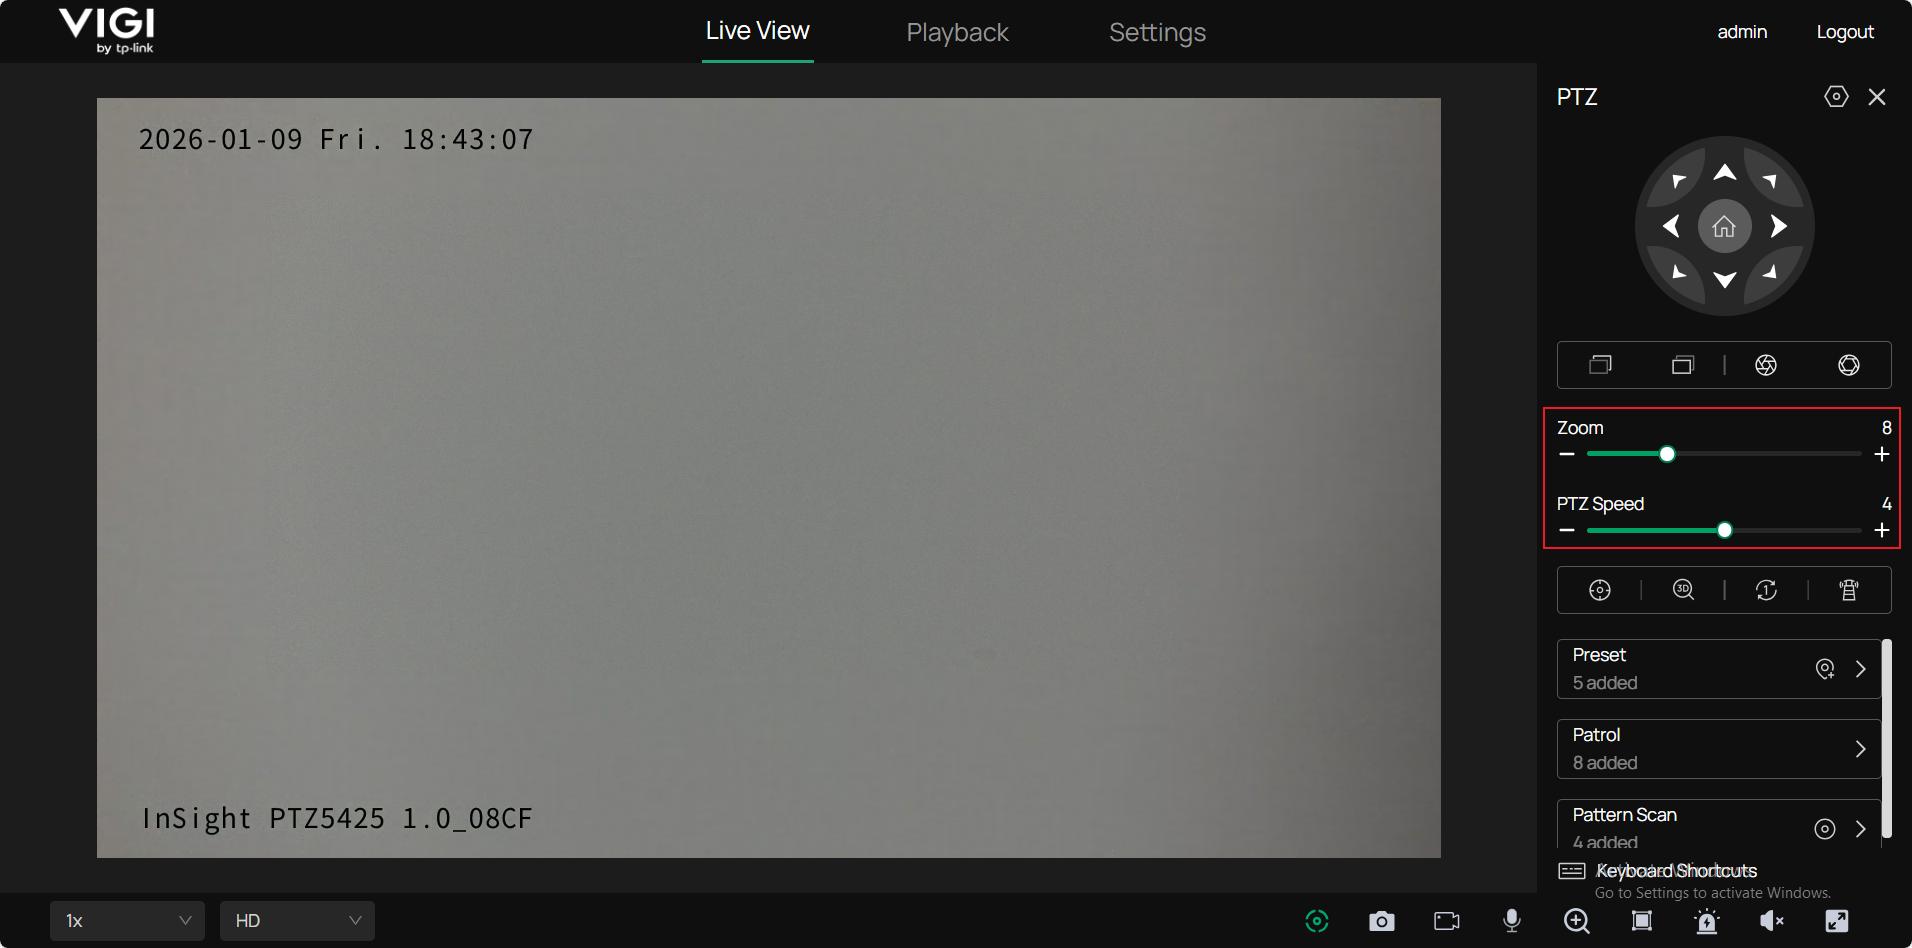
Zoom bar: Zoom bar determines the magnification of the camera.
PTZ speed bar: PTZ speed bar determines PTZ motion speed, in other words, how fast the Pan & Tilt moves.
3D positioning: When enabled, this feature allows you to adjust the view of the camera and place what you have selected in the center. There are three different actions you can perform under 3D positioning, each of which results in different effects.
A left click in the picture: The camera will put what you clicked in the center of the view.
Drag the mouse from left to right to select an object in the picture: The camera will put the selected object in the center and zoom in to a certain degree.
Drag the mouse from right to left to select an object in the picture: The camera will put the selected object in the center and zoom out to a certain degree.
Conclusion
You have now learned how to use Pan/Tilt/Zoom function under live view page.
Get to know more details of each function and configuration please go to Download Center to download the manual of your product.
Is this faq useful?
Your feedback helps improve this site.
TP-Link Community
Still need help? Search for answers, ask questions, and get help from TP-Link experts and other users around the world.