How to configure TP-Link DDNS in IPCs
Contents
Introduction
DDNS (Dynamic Domain Name System) is a service that allows dynamic public IP addresses to be bound to a fixed domain name. Its primary function is to associate the frequently changing public IP address of a user’s device with a consistent domain name in real time. So, DDNS allows devices to maintain a fixed access point, enabling remote access via the public internet.
TP-LINK DDNS supports domain creation, login, domain list viewing, and logout functions. Currently, only second-level domain creation is supported; the top-level domain tplinkdns.com is fixed and cannot be modified. You can create a new domain by customizing the second-level domain, which supports 1 to 20 characters consisting of letters, numbers, or hyphens (“-”).
Requirement
- VIGI IP cameras (IPCs)
- Router with a Public IP address
- TP-Link ID bound
Configuration
Configuration for Scenario 1
The IPC’s IP address is a Private IP address. The router connected to the IPC must have a Public IP address. Meanwhile, the router needs to map the Internet Port to the public network using UPnP or other methods (e.g., the port forwarding feature of the router)
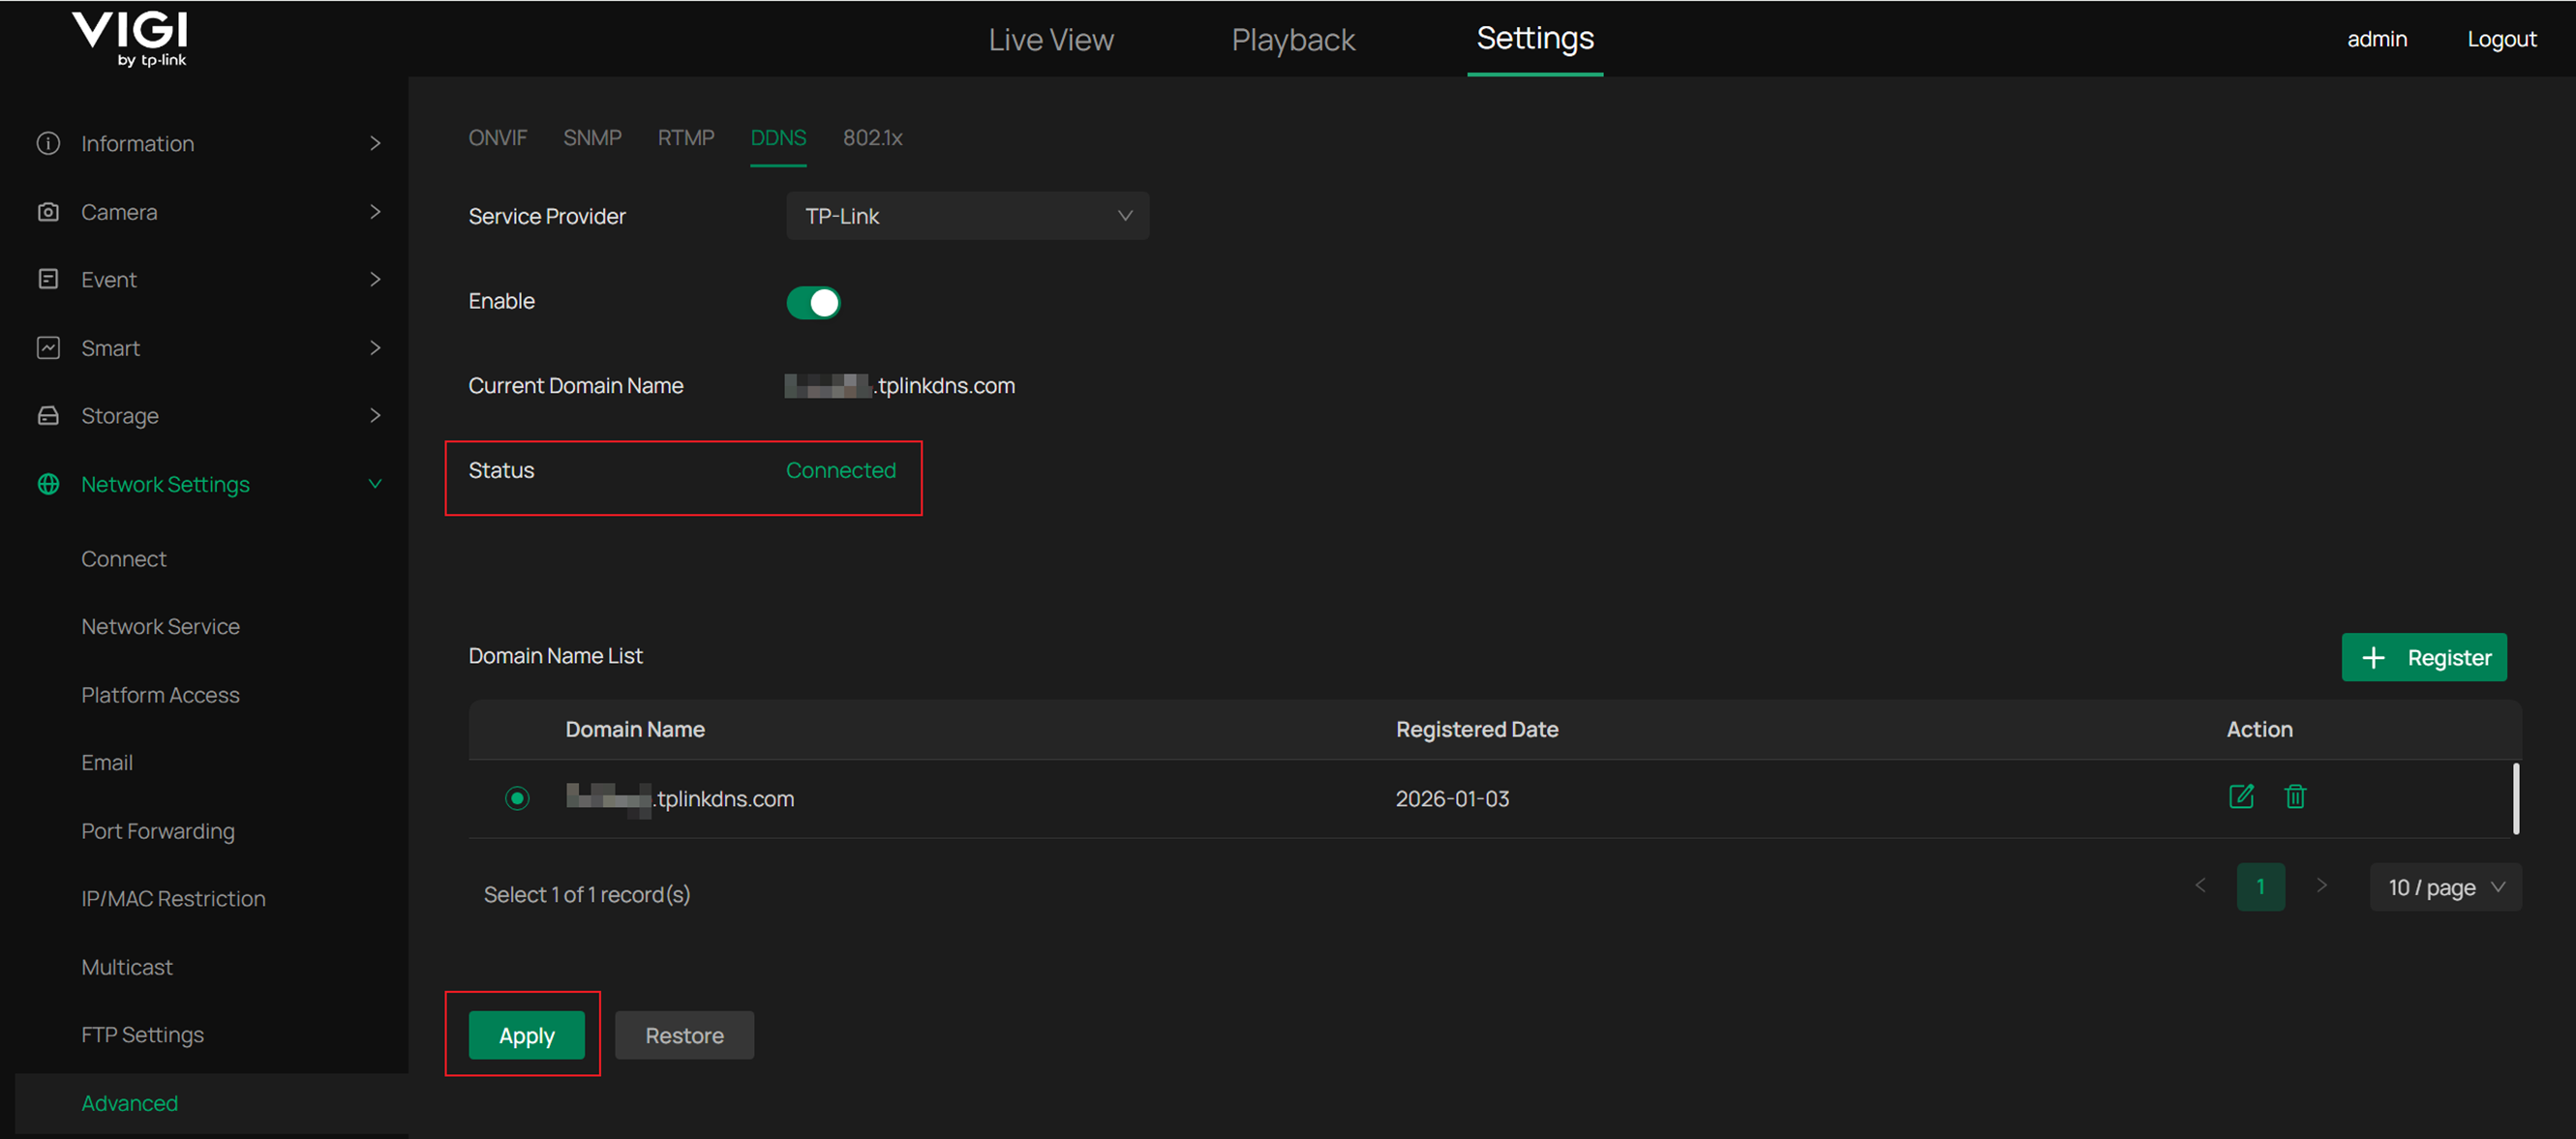
Step 1. Go to Settings > Network Settings > Advanced > DDNS, Enable DDNS, select Service Provider: TP-Link, input Domain Name, then click ‘Save’ and ‘Apply’. Finally, the Status will be connected.
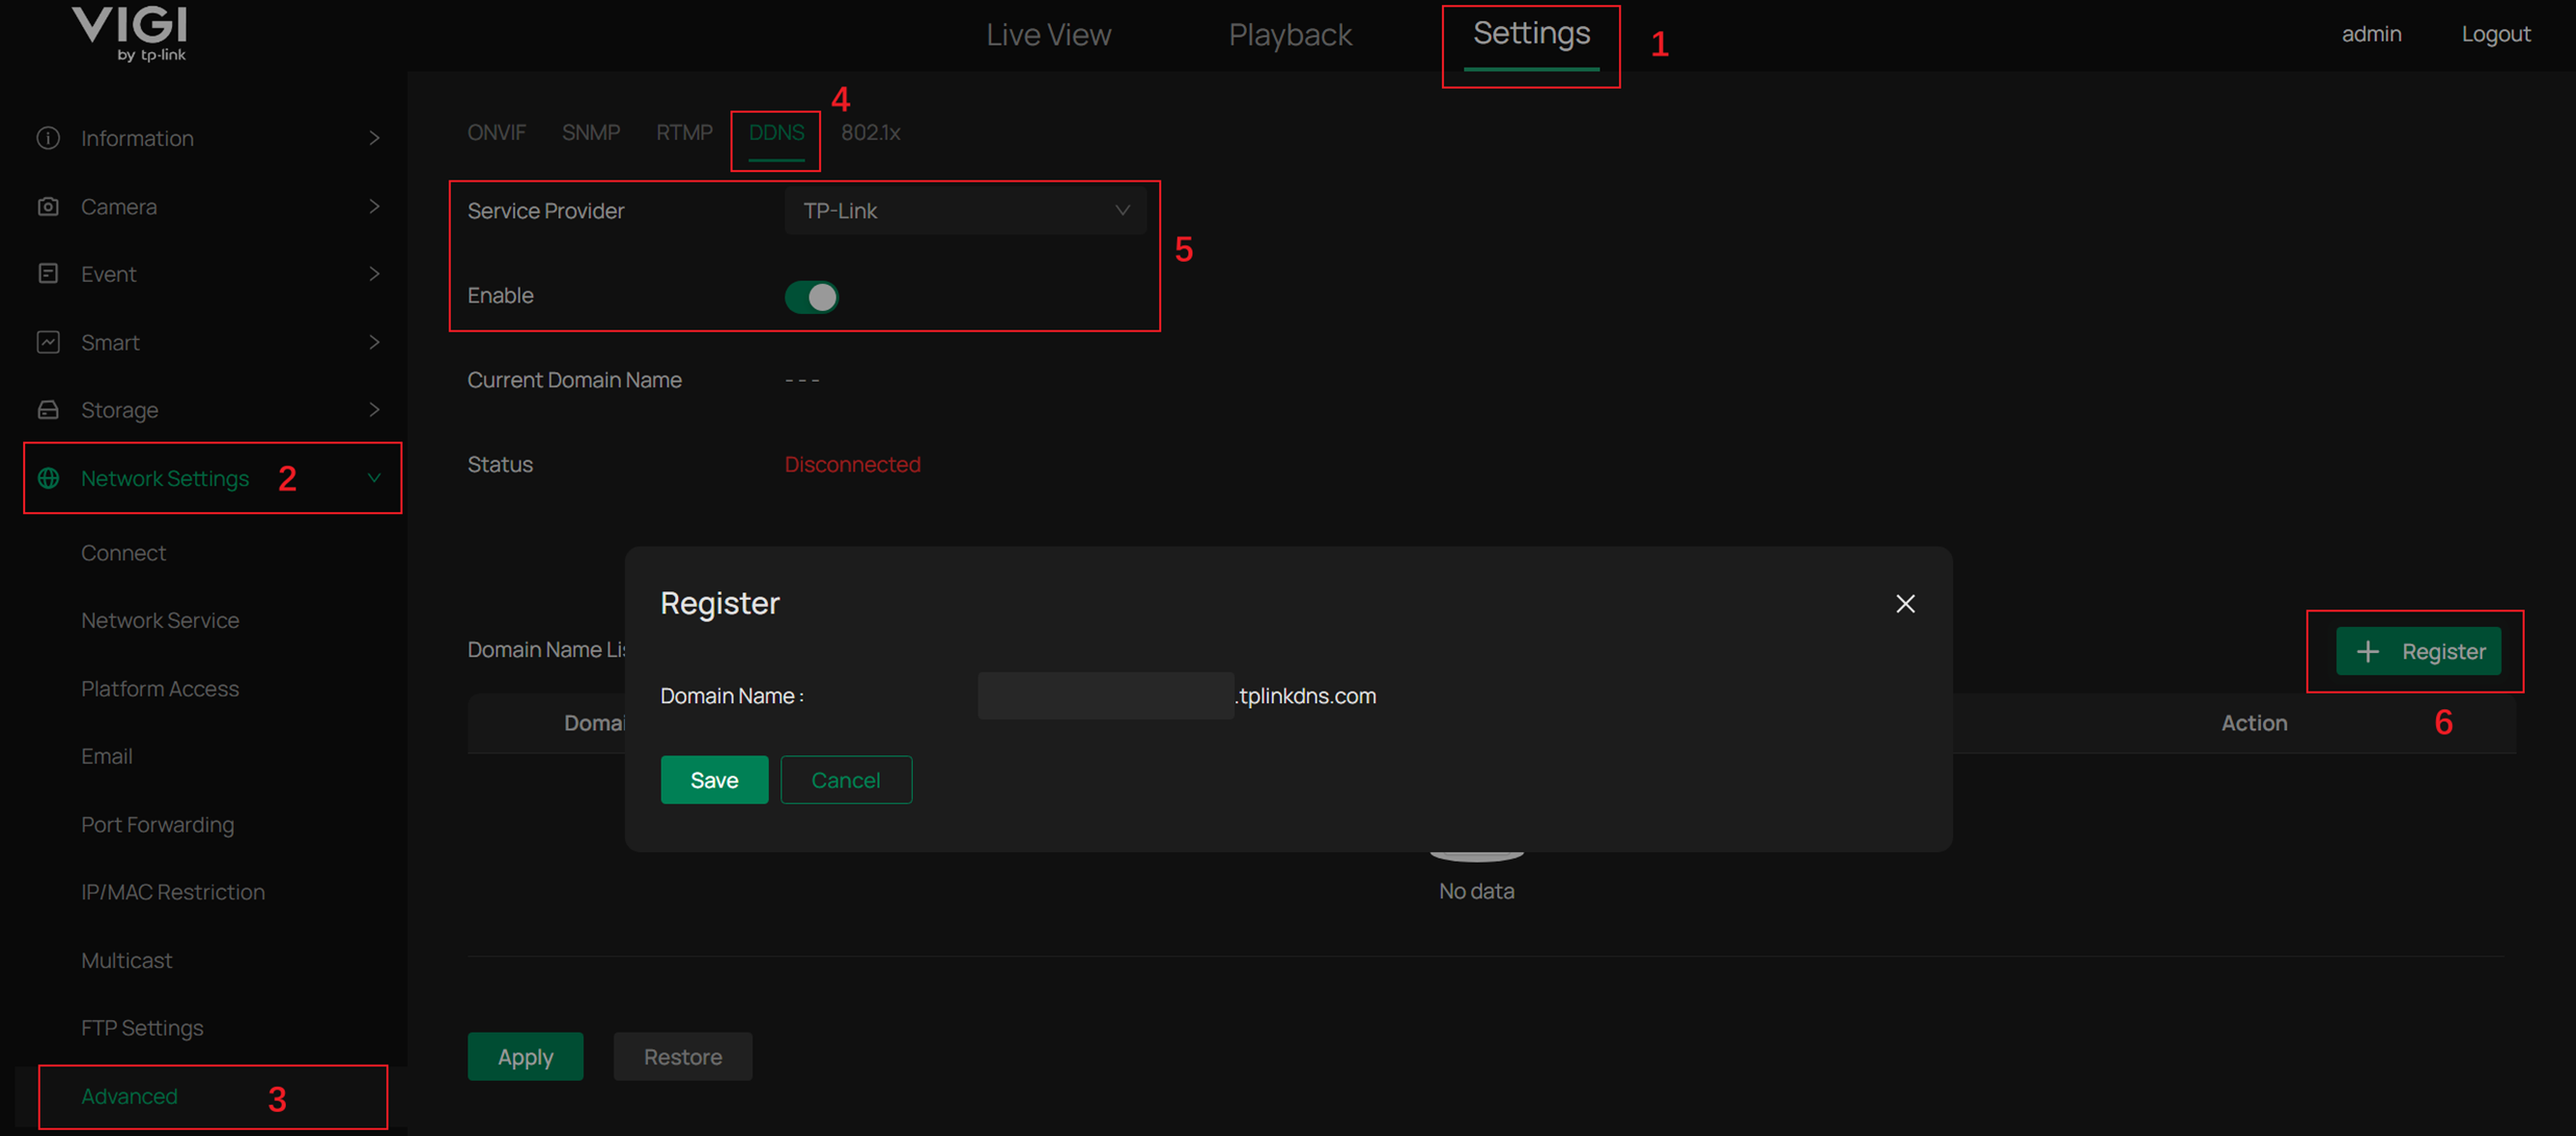
Note: The second-level domain supports 1 to 20 characters consisting of letters, numbers, or hyphens (“-”).
Step 2. Go to Settings > Network Settings > Port Forwarding and enable Port Forwarding to map the internal ports of the IPC to the external ports of the public network. The mapping type can be chosen as Auto or Manual.
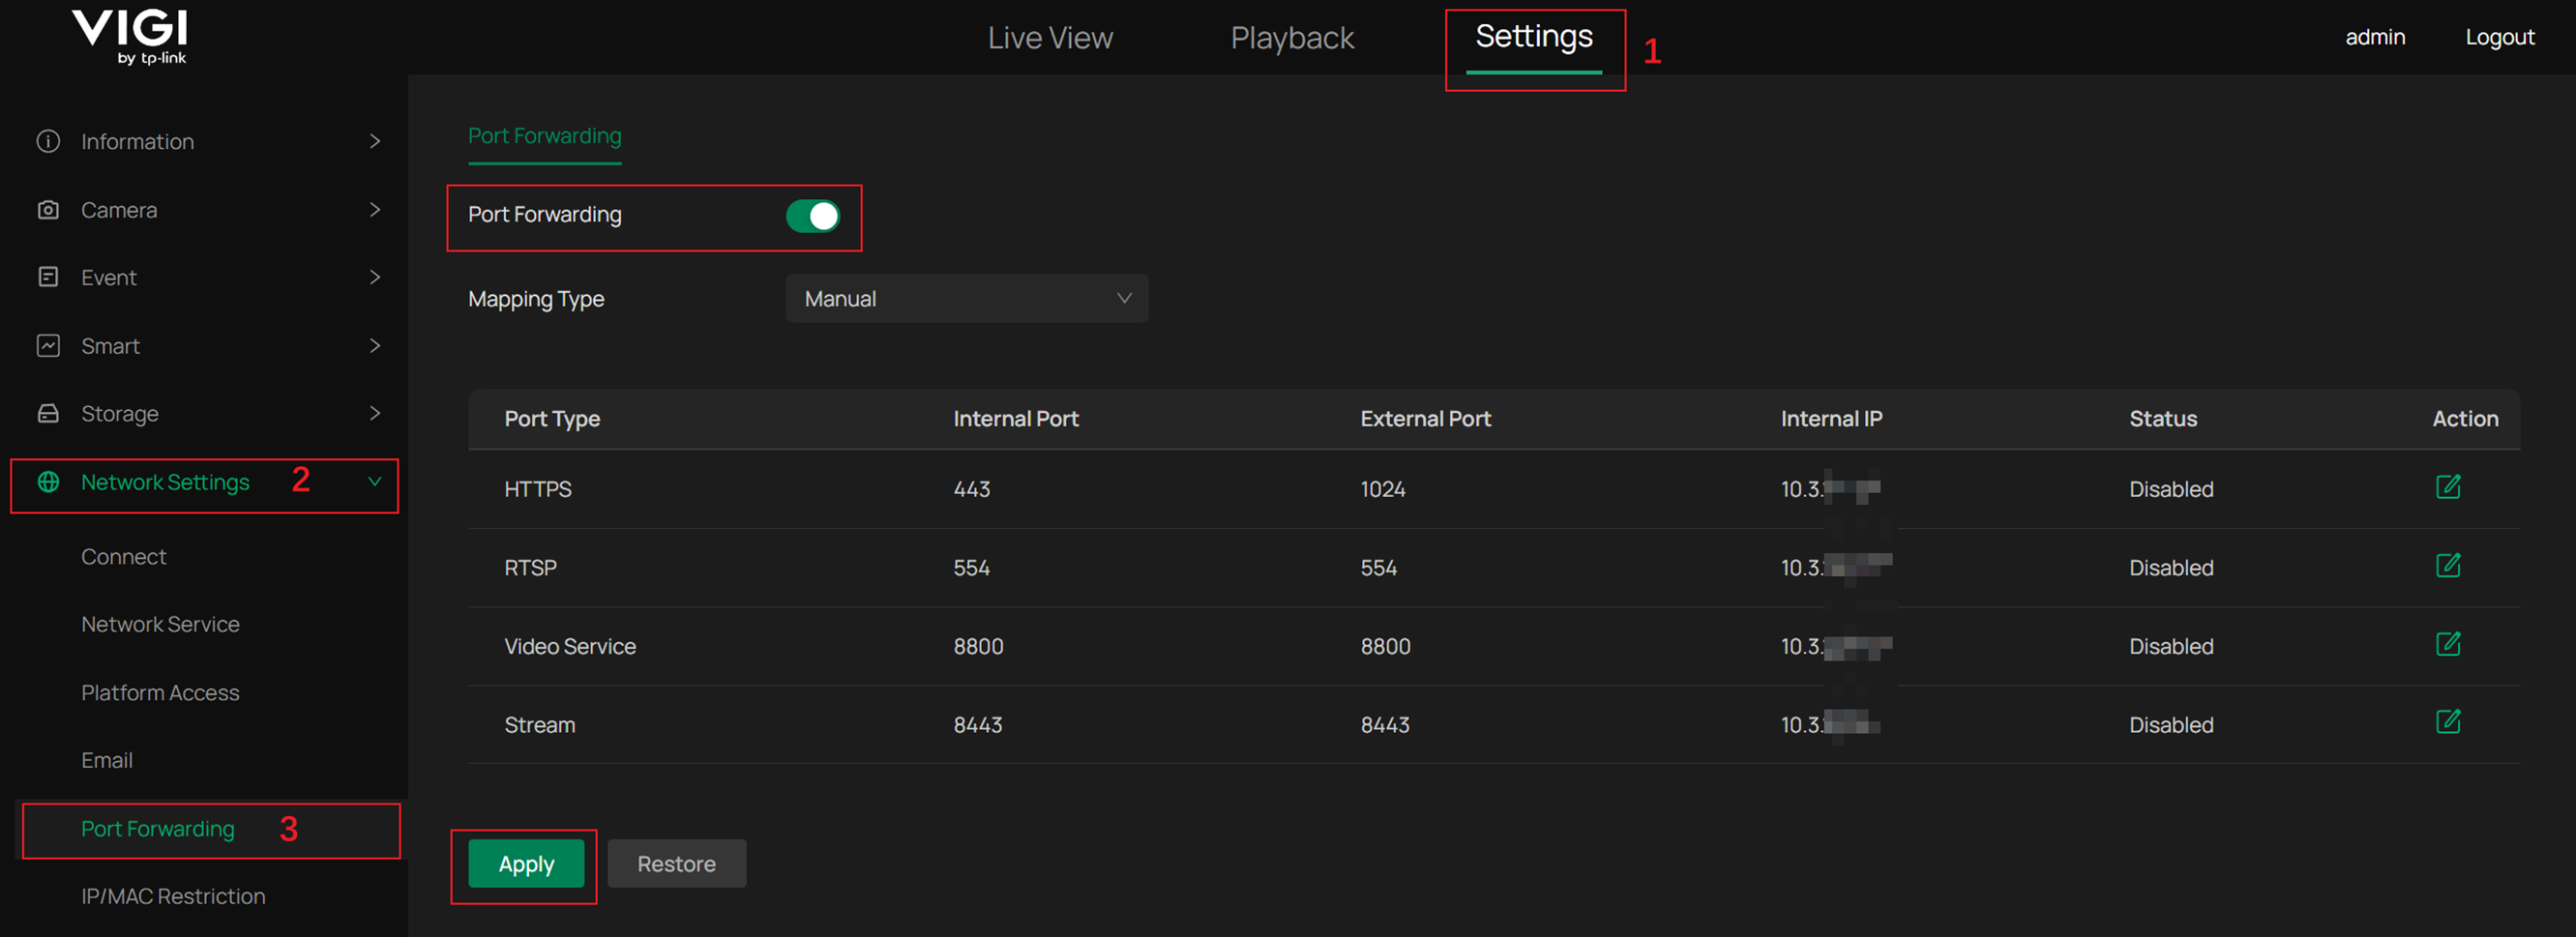
Notes:
1) Auto mapping type: The external port may cause a disconnection when accessing the URL. It needs to be modified to the new port number again.
2) Manual mapping type: Frequent changes to external ports can be avoided, thereby increasing connection stability.
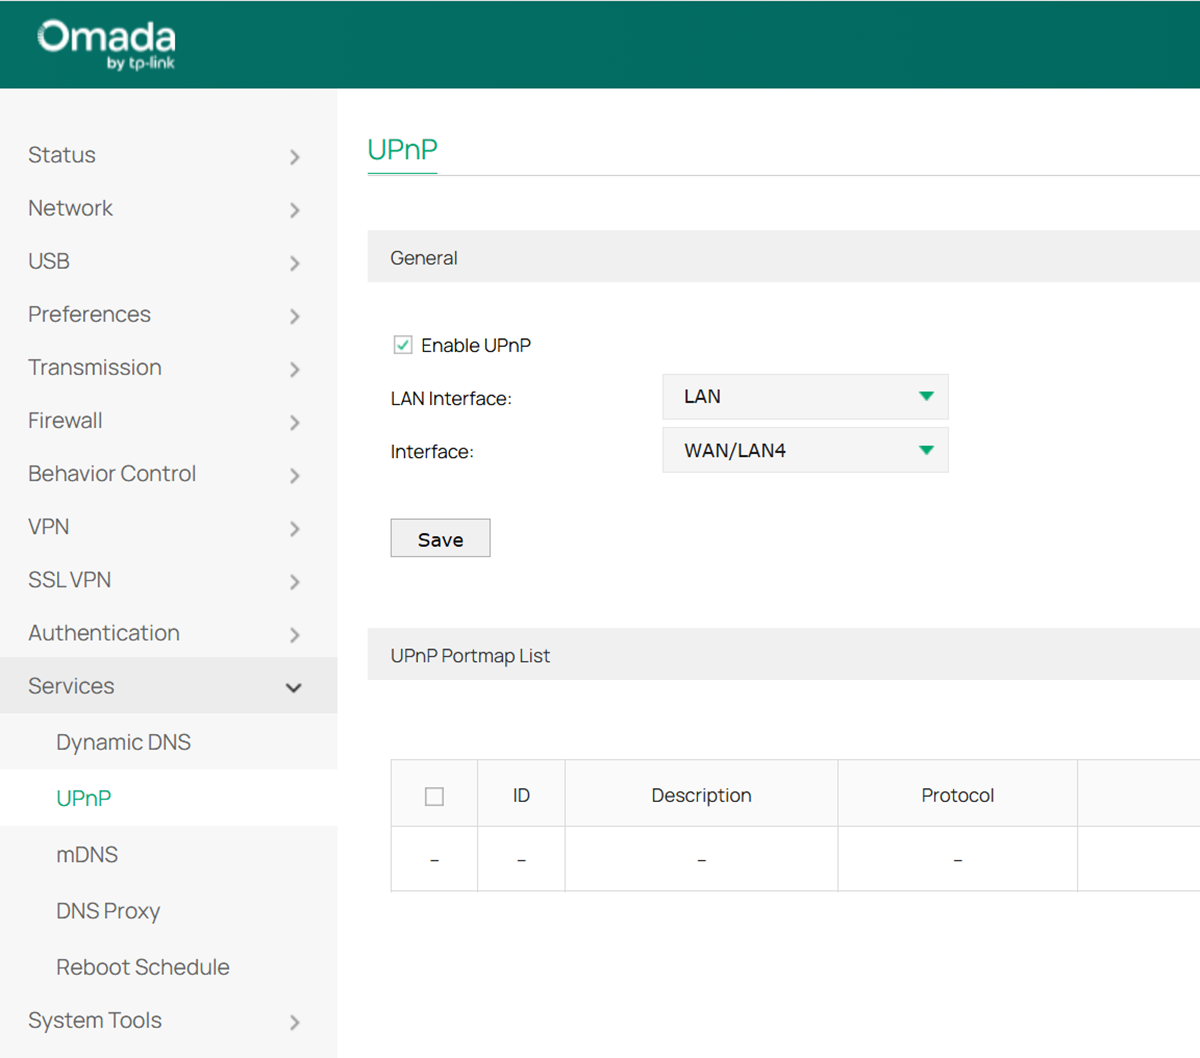
Step 3. Enable the UPnP feature on your Router. Here is just an example of the Omada gateway ER8411.
Step 4. You can input https://domain:external port (e.g., https://xxxx.tplinkdns.com:1024) to log in to the IPC web interface. Then you can configure the settings, live view, and playback remotely.
Configuration for Scenario 2
The IPC’s IP address is a Public IP address. In this case, port mapping would not be required. You can skip steps 3 and 4 in the configuration for Scenario 1.
Step 1. Go to Settings > Network Settings > Advanced > DDNS, Enable DDNS, select Service Provider: TP-Link, input Domain Name, then click ‘Save’ and ‘Apply.’
Step 2. You can input https://domain:external port (e.g., https://xxxx.tplinkdns.com:1024) to log in to the IPC web interface. Then you can configure the settings, live view, and playback remotely.
Conclusion
With the steps above, you have successfully configured TP-Link DDNS on IPC and managed the IPC remotely.
Get to know more details of each function and configuration please go to Download Center to download the manual of your product.
Is this faq useful?
Your feedback helps improve this site.
TP-Link Community
Still need help? Search for answers, ask questions, and get help from TP-Link experts and other users around the world.