How to Use Smart Tracking
Contents
Configuration for Event-Based Smart Tracking
Configuration for Auto Tracking
Introduction
Smart Tracking on the VIGI InSight PTZ5425 includes Auto Tracking and Event-Based Smart Tracking, which are designed for different monitoring scenarios. Auto Tracking is suitable for open and relatively simple environments where moving targets need to be continuously tracked, while Event-Based Smart Tracking is intended for more complex scenarios where tracking is triggered only by configured events.
Requirements
- VIGI InSight PTZ5425
Configuration
Configuration for Event-Based Smart Tracking
Step 1. Access the camera’s web management interface by entering the camera IP address in a web browser.
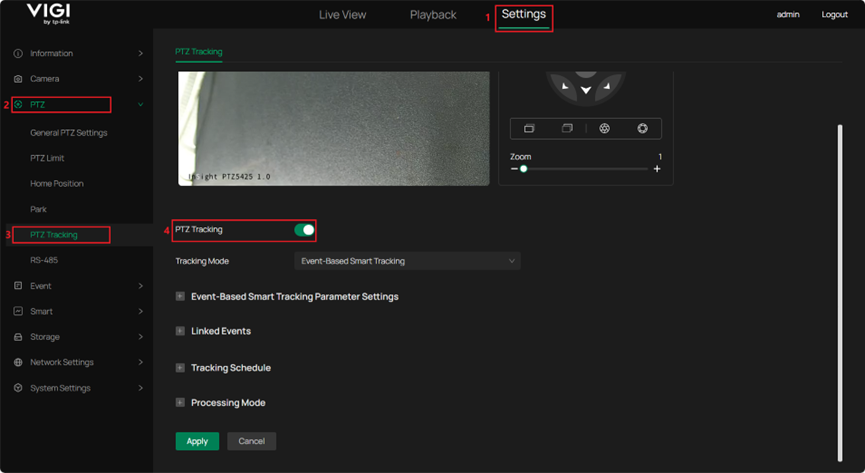
Step 2. Navigate to Settings > PTZ > PTZ Tracking and enable PTZ Tracking. Once PTZ Tracking is enabled, Tracking Mode is set to Event-Based Smart Tracking by default.
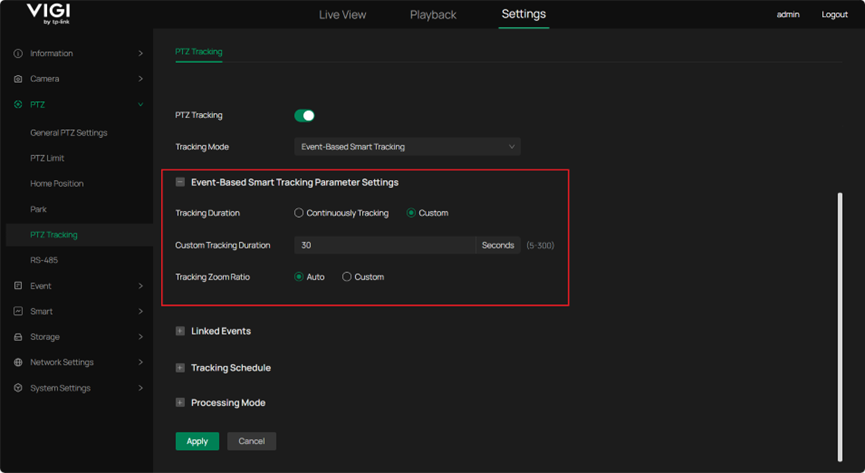
Step 3. Under Event-Based Smart Tracking Parameter Settings, configure the following parameters as required.
Tracking Duration: Set to Continuously Tracking or Custom. When Continuously Tracking is selected, tracking continues until the target disappears from the live view. When Custom is selected, Custom Tracking Duration can be set from 5 to 300 seconds, after which tracking stops automatically. After tracking ends, whether due to the target disappearing or the configured tracking duration being reached, the camera automatically returns to its original position prior to tracking.
Tracking Zoom Ratio: Set to Auto or Custom. When Auto is selected, the zoom ratio is adjusted automatically based on the target size during tracking. When Custom is selected, the tracking zoom ratio can be set within the range of 1 to 25.
Note: When the tracking zoom ratio is set to X, the zoom ratio during tracking will be dynamically adjusted within the range of 1 to X.
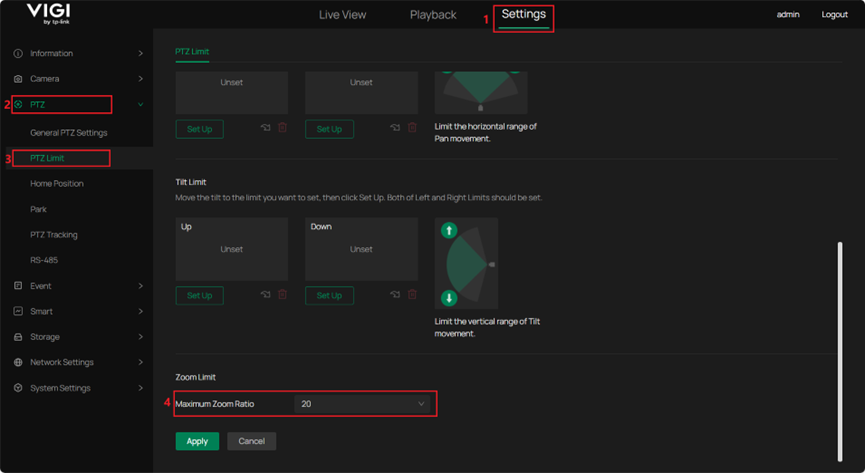
Note: When Tracking Zoom Ratio is set to Custom, the effective Tracking Zoom Ratio is determined as the minimum of the configured Tracking Zoom Ratio and the configured Maximum Zoom Ratio, which is configured under Settings > PTZ > PTZ Limit > Zoom Limit > Maximum Zoom Ratio, as shown below.
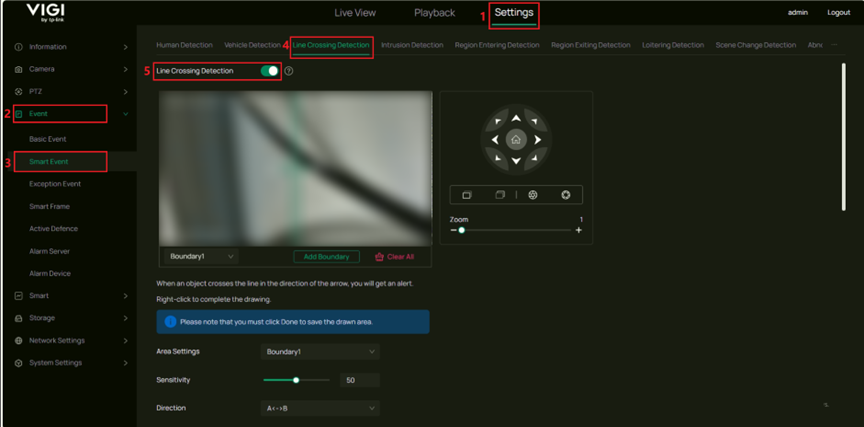
Step 4. Configure Linked Events to specify the events that trigger PTZ tracking. When a linked event is triggered, the device starts PTZ tracking. Supported event types include Motion Detection, Line Crossing Detection, Intrusion Detection, Region Entrance Detection, Region Exiting Detection, and Loitering Detection.

Note: Only events that are enabled can be linked, otherwise, the corresponding options are unavailable (grayed out). Taking Line Crossing Detection as an example, navigate to Settings > Event > Smart Event > Line Crossing Detection, and enable Line Crossing Detection, as shown below.
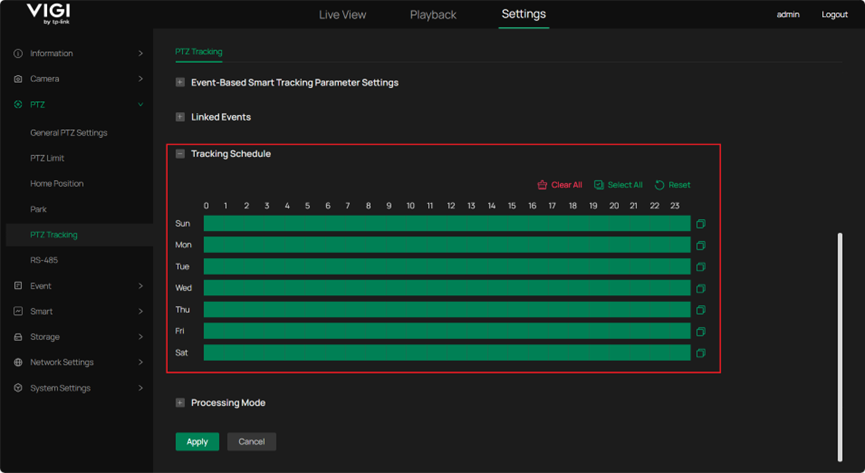
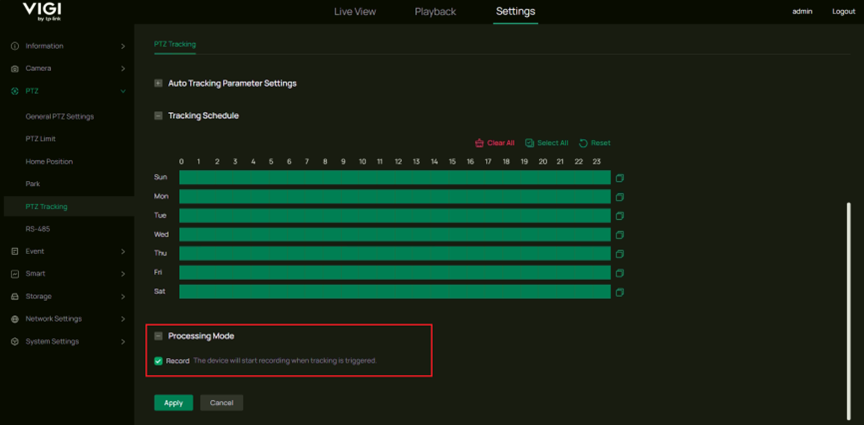
Step 5. Configure Tracking Schedule. PTZ tracking takes effect only within the configured schedule.
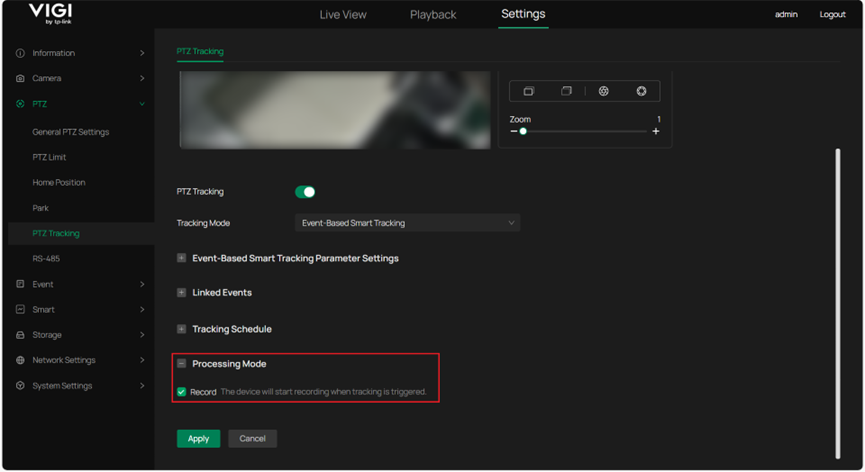
Step 6. Configure Processing Mode. Record is enabled by default, and recording starts when tracking is triggered.
Configuration for Auto Tracking
Step 1. Access the camera’s web management interface by entering the camera's IP address in a web browser.
Step 2. Navigate to Settings > PTZ > PTZ Tracking. Enable PTZ Tracking and select Auto Tracking as the tracking mode.

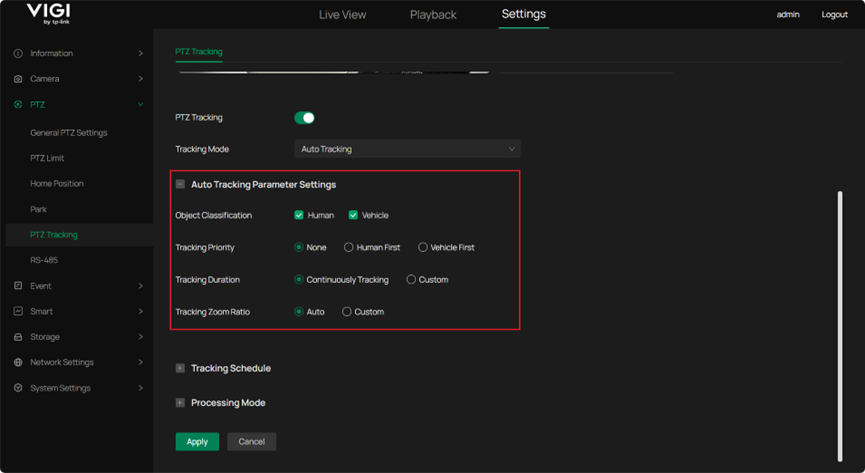
Step 3. Configure Auto Tracking Parameter Settings.
Object Classification & Tracking Priority: Object Classification is used to specify the object types to be tracked. Human and Vehicle are selected by default. For example, when both Human and Vehicle are selected, the camera tracks both human and vehicle targets that appear in the live view. Tracking Priority can be configured to define which target type will be tracked first when both targets appear simultaneously.
Tracking Duration set to Continuously Tracking or Custom: When Continuously Tracking is selected, tracking continues until the target disappears from the live view. When Custom is selected, Custom Tracking Duration can be set from 5 to 300 seconds, after which tracking stops automatically. After tracking ends, whether due to the target disappearing or the configured tracking duration being reached, the camera automatically returns to its original position prior to tracking.
Tracking Zoom Ratio: Set to Auto or Custom. When Auto is selected, the zoom ratio is adjusted automatically based on the target size during tracking. When Custom is selected, the tracking zoom ratio can be set within the range of 1 to 25.
Note: When the tracking zoom ratio is set to X, the zoom ratio during tracking will be dynamically adjusted within the range of 1 to X.
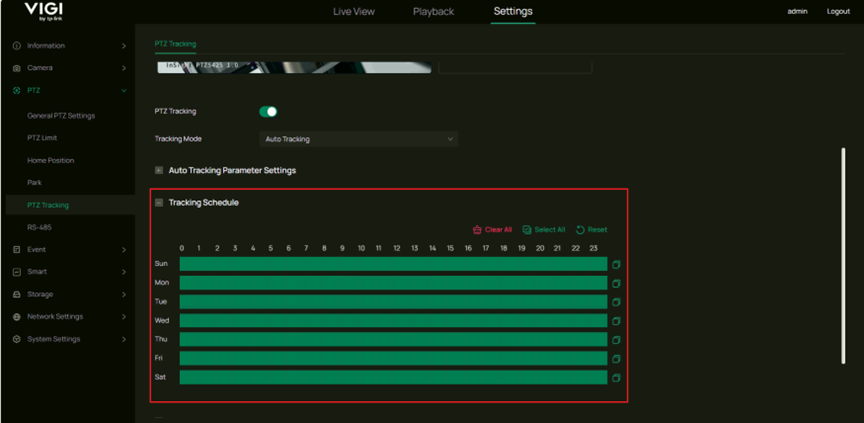
Step 4. Configure Tracking Schedule. PTZ tracking takes effect only within the configured schedule.
Step 5. Configure Processing Mode. Record is enabled by default, and recording starts when tracking is triggered.
Conclusion
By following the steps above, Smart Tracking can be configured appropriately based on the monitoring scenario.
Get to know more details of each function and configuration please go to Download Center to download the manual of your product.
Is this faq useful?
Your feedback helps improve this site.
TP-Link Community
Still need help? Search for answers, ask questions, and get help from TP-Link experts and other users around the world.