How to set Smart Detection on Speed Dome PTZ
Contents
This section describes how to configure event rule regions and rule lines on a Speed Dome PTZ camera, how to switch between regions using PTZ controls, and how to configure additional parameters for different regions.
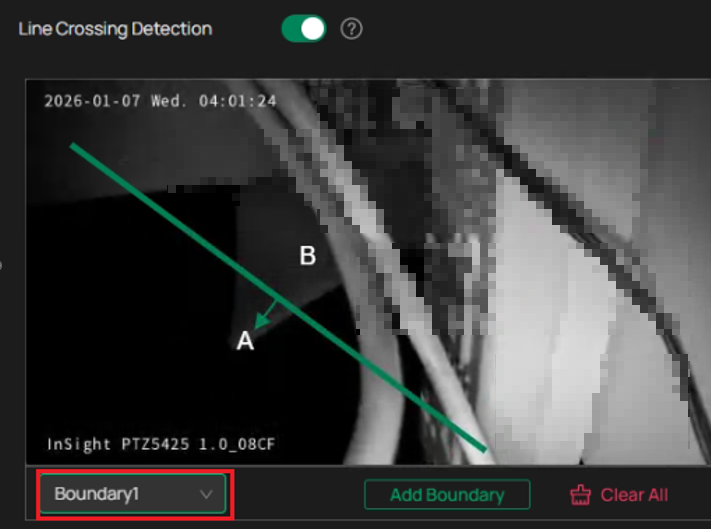
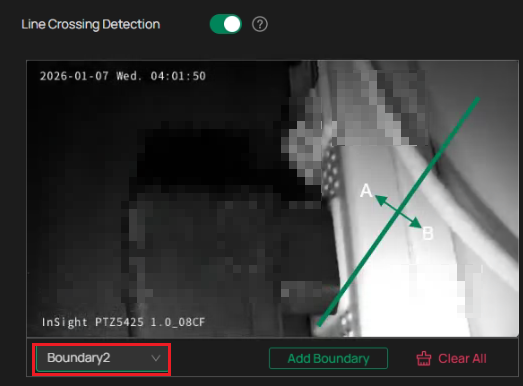
Using line crossing detection within smart events as an example, this article demonstrates that the event detection area of the Speed Dome PTZ camera is anchored to the actual scene and does not shift with camera movement—remaining fixed relative to the monitored objects rather than moving with the pan‑tilt operation or the on‑screen detection line.
- InSight PTZ5425
- PC
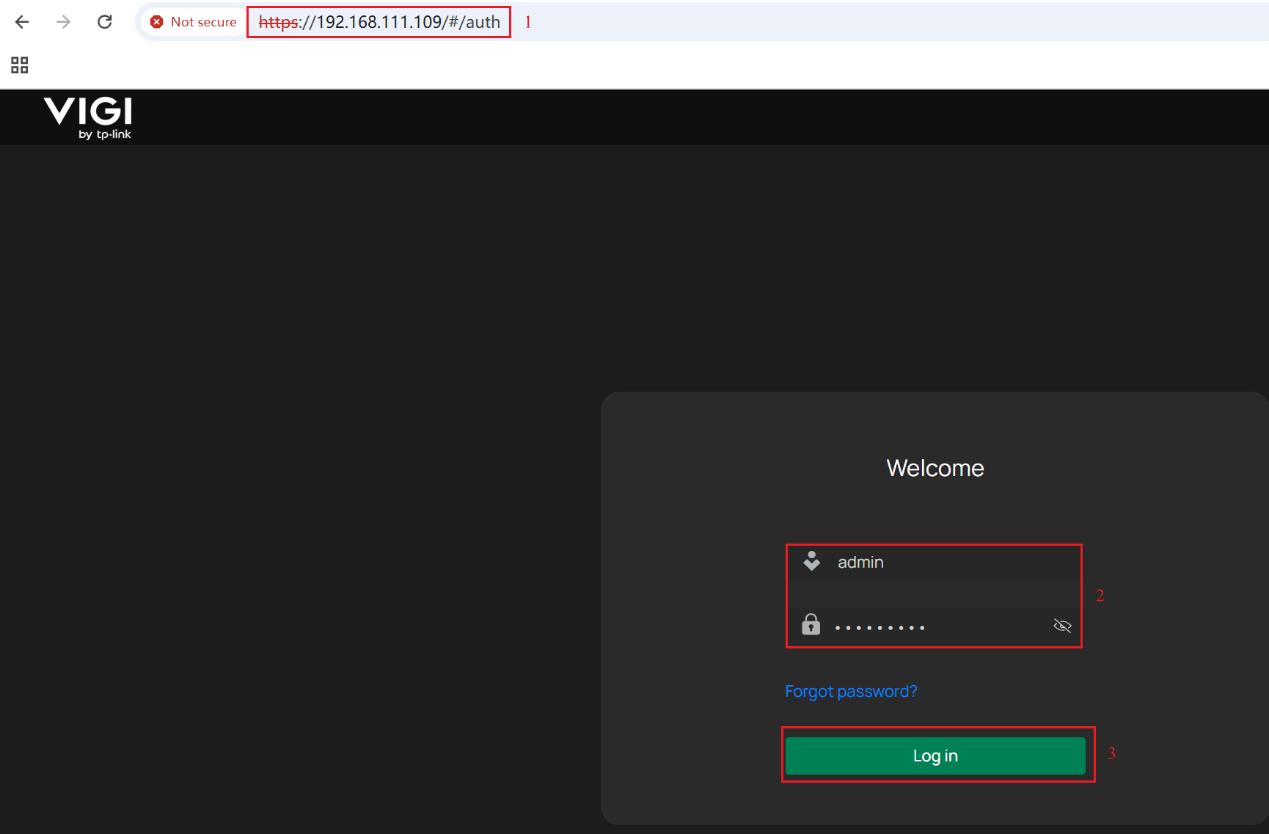
Step 1. Enter the InSight PTZ5425‘s IP in the browser address bar. Enter the username and password, then click Log in.
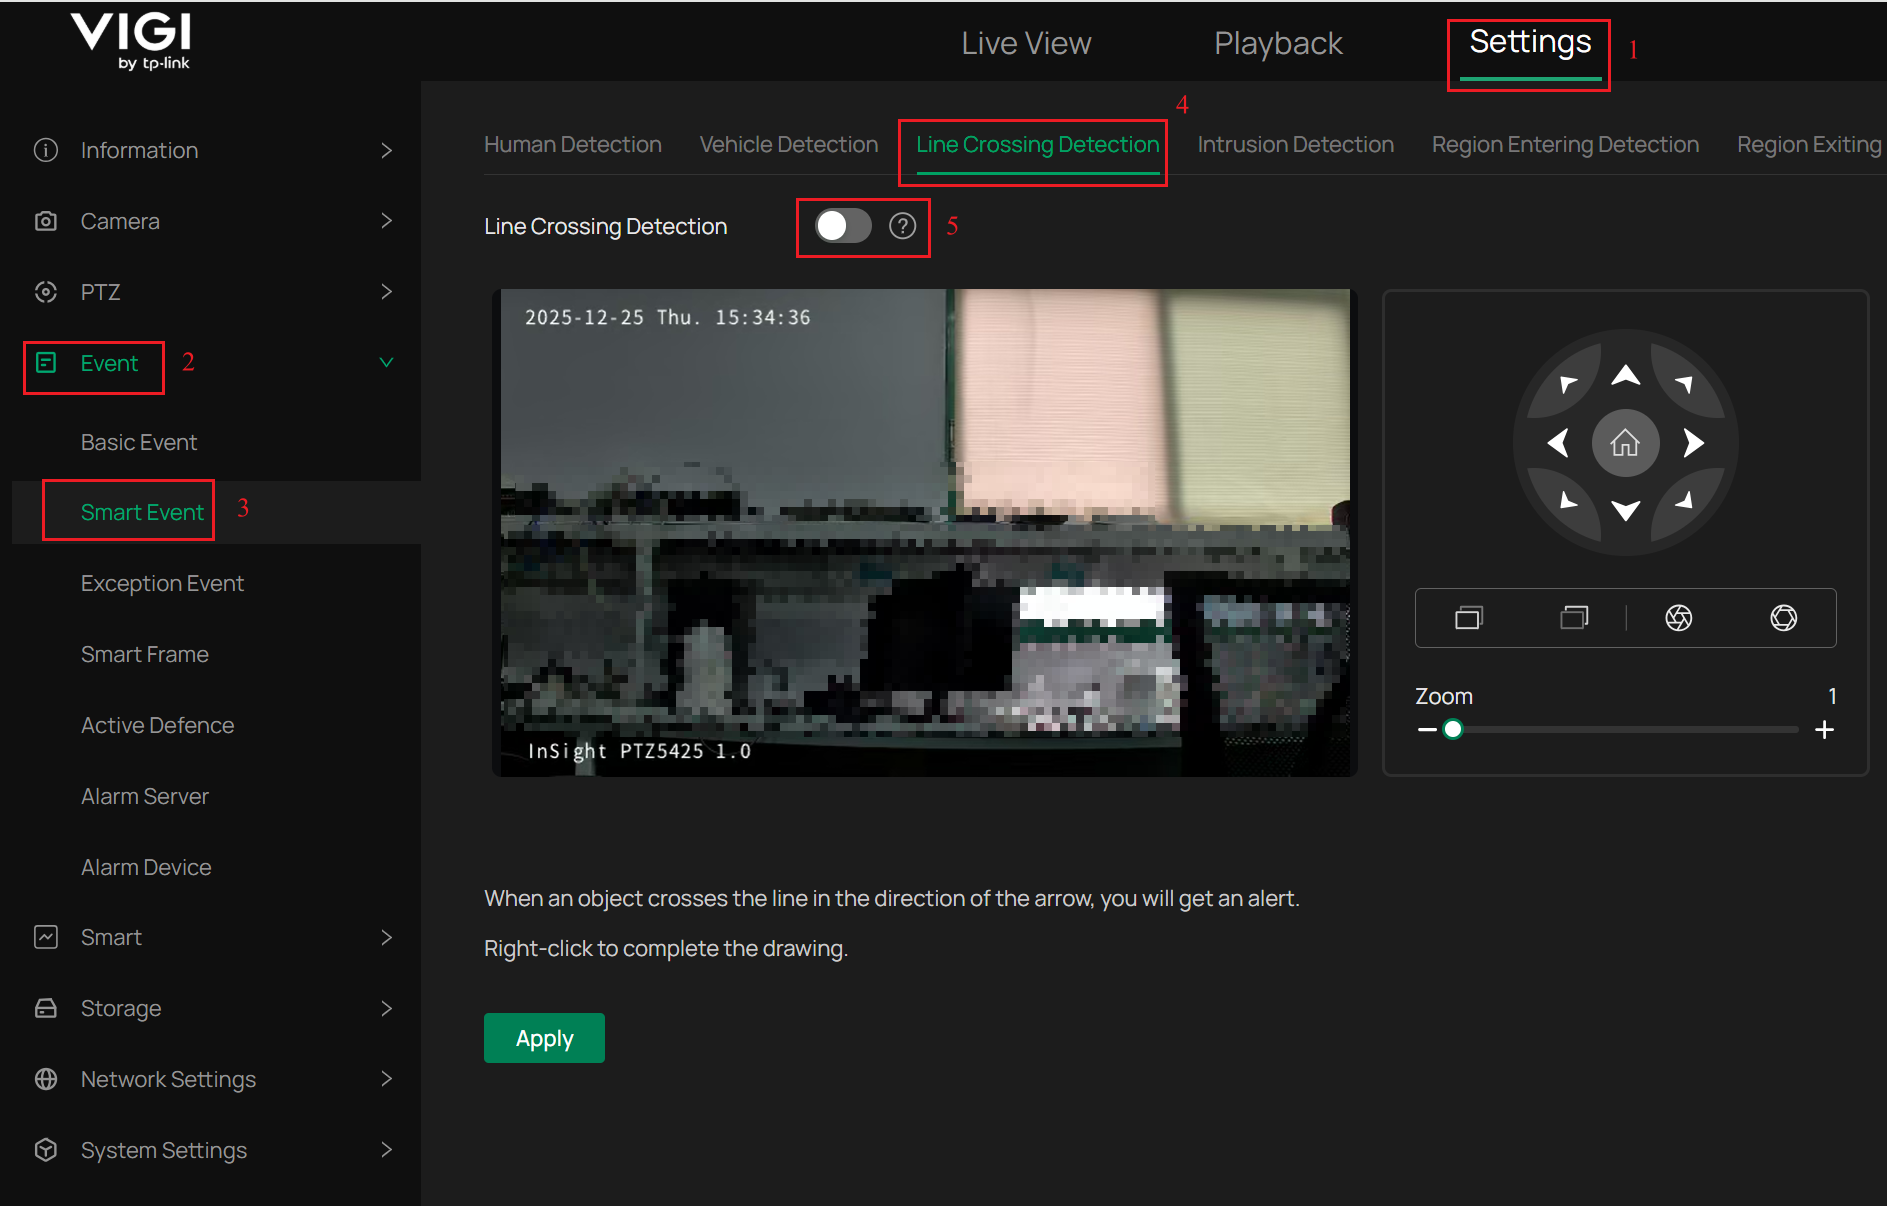
Step 2. Navigate to Settings > Event > Smart Event > Line Crossing Detection, enable Line Crossing Detection.
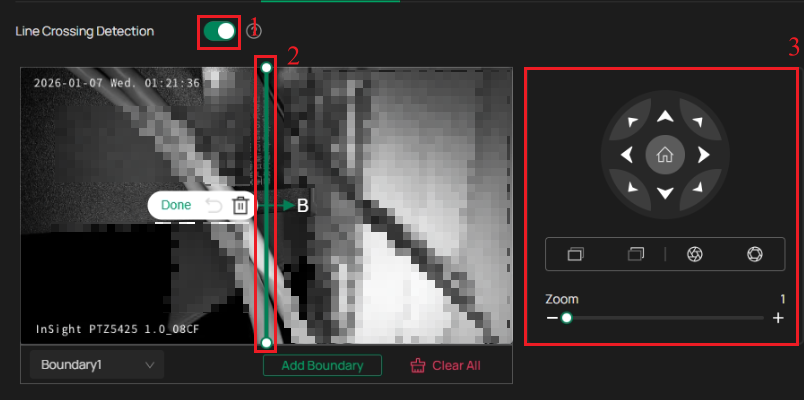
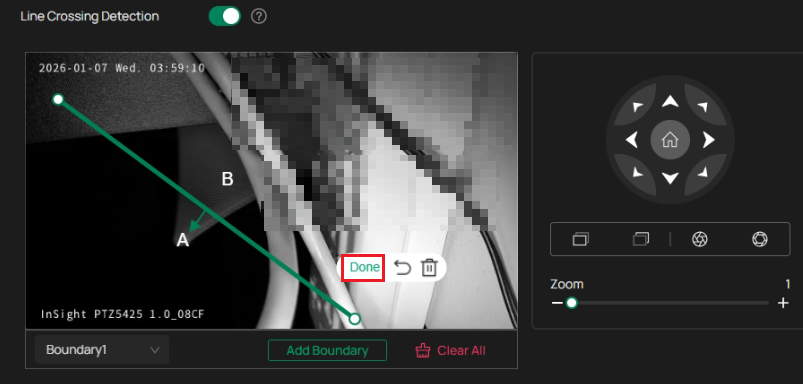
Step 3. After Line Crossing Detection is enabled, a Boundary Line will automatically generate at the default position in the live view window. Then you can drag the Two Endpoints of the detection line with the mouse to adjust its position. At the same time, you can also use the PTZ controls on the right to move the camera’s position and select the desired detection scene based on the intended surveillance area.
Step 4. Configure the parameters of line crossing detection. You can adjust the Sensitivity value (1 to 100) and Smart Detection Confidence level (Low, Medium, or High). The higher the sensitivity value and confidence level, the easier it is to trigger line crossing detection. In the Direction section, three options are provided. Choose the line crossing direction that will trigger the alarm according to your requirements. You can also enable Human Detection or Vehicle Detection. If you enable both options, alerts will only be triggered when the line crossing detection is activated by human or vehicle as the detected object. The Object Filter allows you to filter objects that are too large or too small, helping to prevent false alarms.
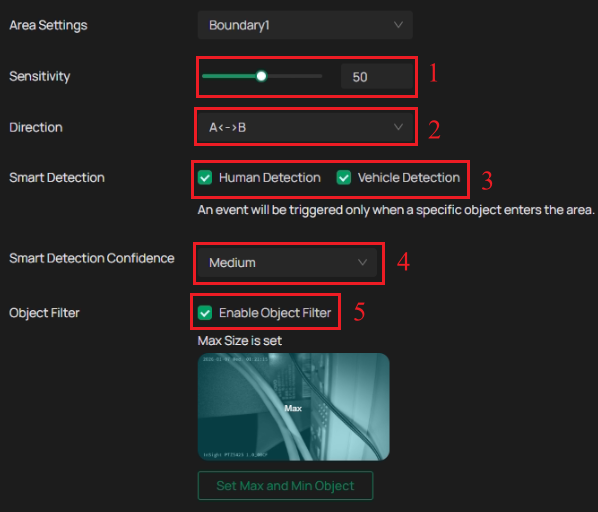
Note: The direction setting offers three options: two unidirectional modes, where only crossing from one specified direction triggers an alert, and one bidirectional mode, where crossing from either direction triggers an alert.
Step 5. Click Done to save the configuration of the boundary line.
Note: Each detection line is only effective within its configured surveillance area. After the camera’s PTZ position is changed, the previously configured boundary line will not take effect in the new surveillance scene. Therefore, you can configure corresponding boundary lines for different surveillance areas to achieve line crossing detection coverage across the entire surveillance area.
Step 6. Click Add Boundary, a Boundary Line will appear by default on the page. Then you can drag the Two Endpoints of the detection line with the mouse to adjust its position. At the same time, you can also use the PTZ controls on the right to move the camera position and select the desired detection scene based on the intended surveillance area.
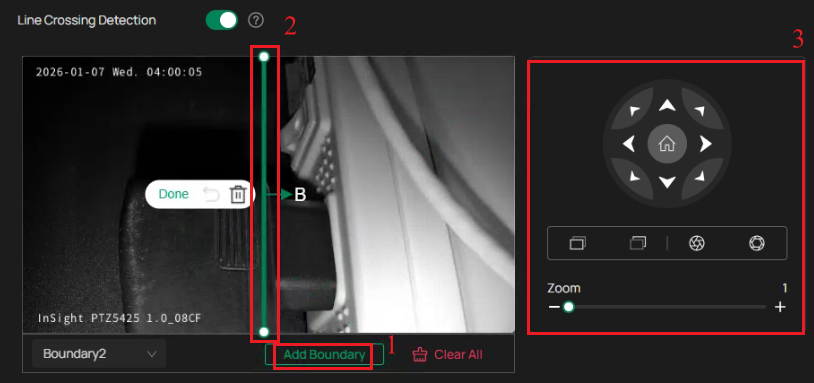
Step 7. Repeat Steps 4 to 5 to create another Boundary Line. You can switch between Boundary 1 and Boundary 2, and the corresponding surveillance area and boundary line will change accordingly in the live view window.
Note: A maximum of four boundary lines can be configured.
Step 8. Configure the Arming Schedule.
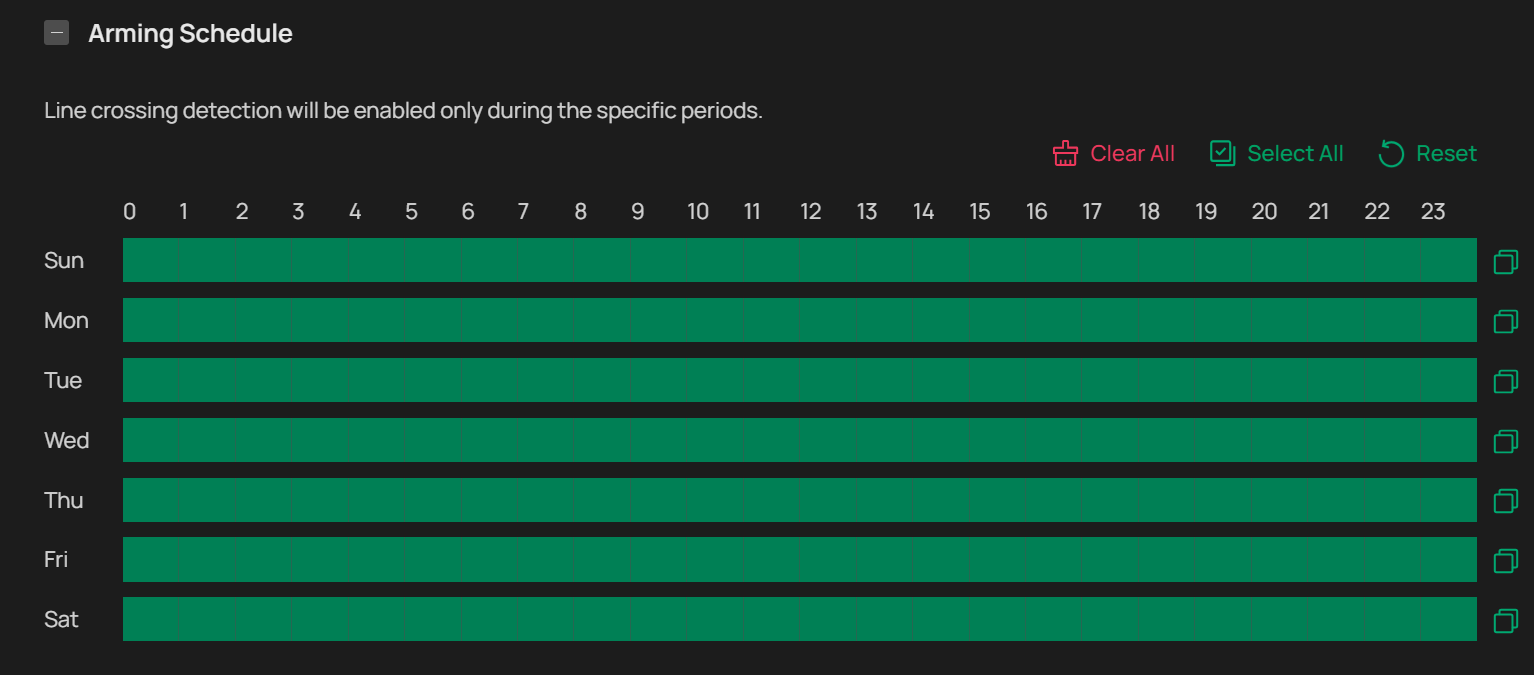
Note: Line crossing detection will be enabled only during the specific periods.
Step 9. Configure the processing mode. You can select the alarm linkage actions to be executed after line crossing detection is triggered. By default, Record and Push Notifications are enabled.

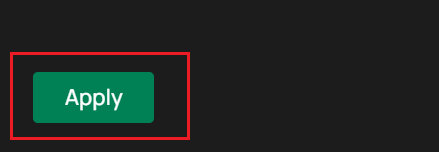
Step 10. Click Apply at the bottom to save the configuration.
Note: The event detection area of the Speed Dome PTZ camera is anchored to the physical scene and does not move with the detection area or boundary lines after the PTZ position is changed. In this article, the two recognition lines drawn will only take effect within their respectively configured surveillance views.
You have successfully configured the line crossing detection function, a representative smart detection feature of the Speed Dome PTZ camera.
Note: After you finish drawing the boundary line, you must click Done to confirm. If Done is not clicked, the drawn boundary lines will not take effect. If you click Apply to complete the configuration without clicking Done, a prompt message will pop up on the web page.

Get to know more details of each function and configuration, please go to Download Center to download the manual of your product.
Is this faq useful?
Your feedback helps improve this site.
TP-Link Community
Still need help? Search for answers, ask questions, and get help from TP-Link experts and other users around the world.