How to configure Net HDD
Contents
Introduction
This section introduces how to configure the NFS shared directory provided by a NAS server as a Net HDD. With this feature, the camera can record and store video data directly to the NAS over the network, without relying on an NVR, enabling centralized storage and backup.
Requirements
This section introduces the required conditions, such as device model, controller type, software version, etc. Each line uses a bullet point to represent one condition.
- VIGI Camera
- PC
- NAS Server
Notes:
- The NAS Server must support the NFS protocol, and the NFS version must be NFS v3 or above.
- Please ensure that the IP address of the VIGI Camera is granted read/write (RW) access to the shared path on the NAS server.
- To maintain stable network access and optimal performance, it is recommended to keep the NAS Server and the VIGI Camera within the same subnet.
Configuration
Step 1. Use the IP address of the VIGI Camera to access its Web Management Interface. Enter the username and password, click Log in.

Step 2. Navigate to Settings > Storage > Storage Management > Net HDD, click “+Add”.
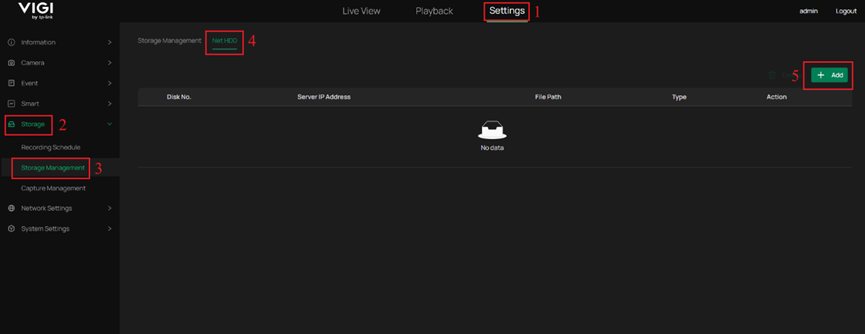
Note: There is a limit to the number of Net HDD entries that can be added. Once the maximum limit of 2 is reached, the “+Add” button will be disabled.
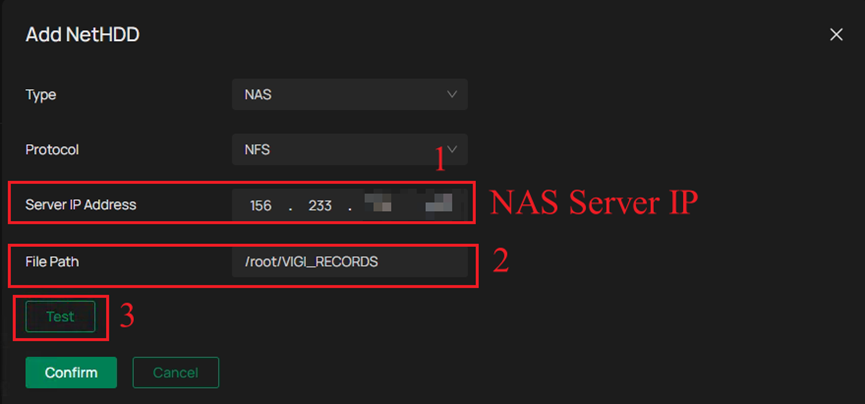
Step 3. Enter the IP address of your NAS Server and the file path of the configured NFS shared directory. Click Test.
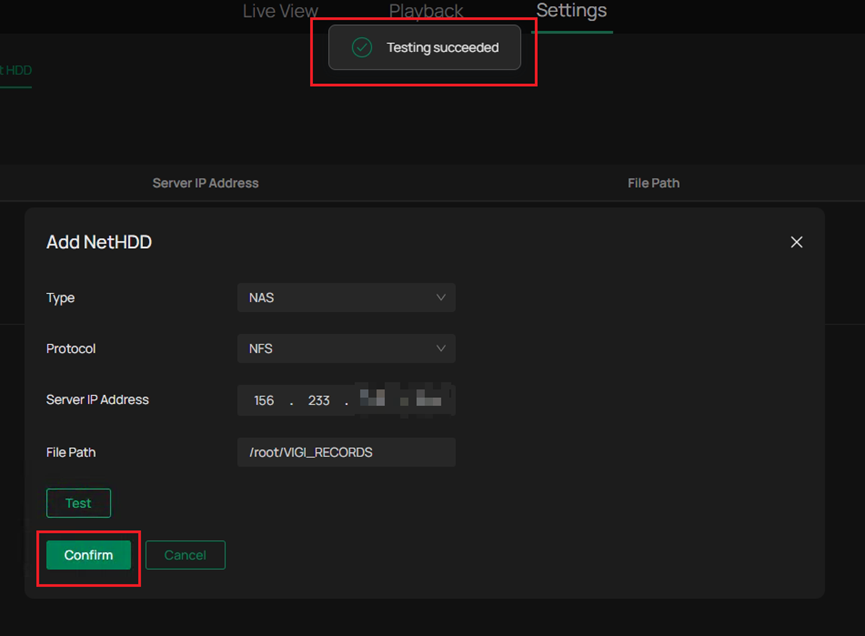
Step 4. A pop-up window indicates that the test was successful. Click Confirm to complete the configuration.
Note: If the device reports “Testing failed,” please follow the steps below to troubleshoot the issue:
- Verify Server Connectivity
Use ping NAS Server’s IP or other tools to ensure the device can reach the NAS Server. If unreachable, check network configuration, subnet settings, and possible firewall or ACL blocks.
- Confirm the Shared Path (Export Path)
Make sure the configured shared path matches the path defined in the server’s exports file exactly. Pay attention to case sensitivity and path structure.
- Check NFS Permissions
Ensure the VIGI Camera’s IP address is granted read/write (RW) permission in the NAS exports configuration.
Step 5. Navigate to Settings > Storage > Storage Management > Storage Management. In the Disk list, you can see the newly added NetHDD-1. At this stage, its attribute is “Read Only”, its status is “initializing”. Click the broom-shaped “Format” icon on the right to format the newly added NetHDD-1.
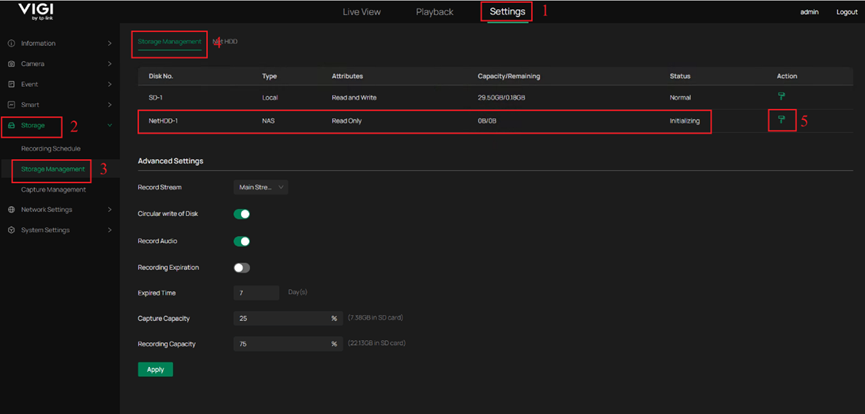
Note: When a VIGI Camera is equipped with both an SD card and a Net HDD, the camera will prioritize saving recordings to the SD card.
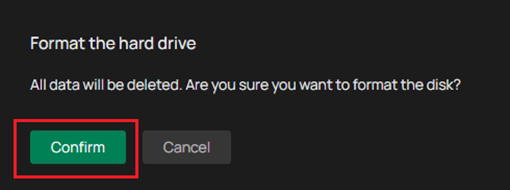
Step 6. A confirmation dialog will appear asking whether you want to format the hard drive. Click Confirm to proceed. A progress window will then appear, showing the formatting process.
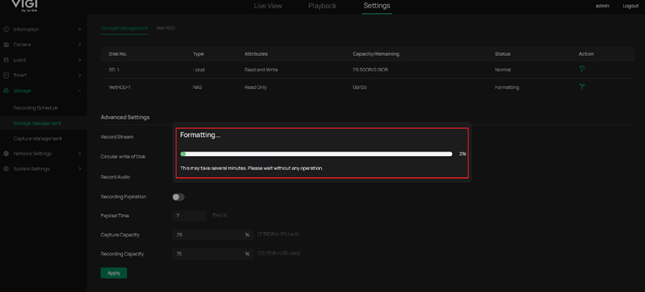
Note: The newly added Net HDD needs to be formatted. If the Net HDD was already formatted before being added, formatting is not required. After the connection stabilizes, its status will automatically change to Normal.
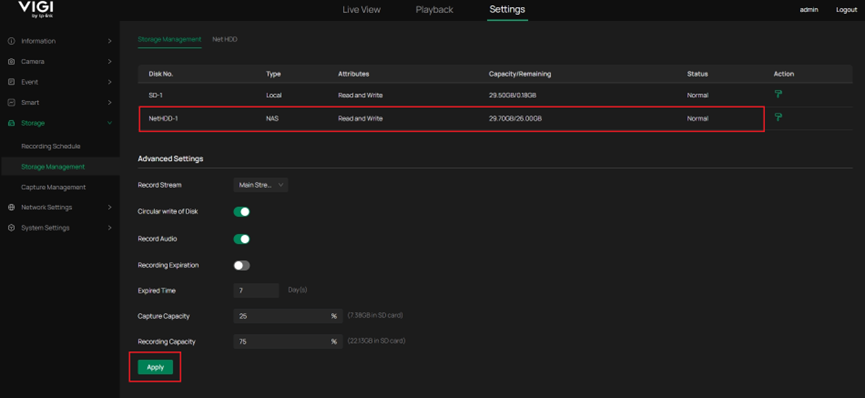
Step 7. After formatting is complete, the NetHDD-1 attribute changes to "Read and Write", correctly displays the disk Capacity and Remaining available space, and the status changes to "Normal". Click Apply to save the configuration.
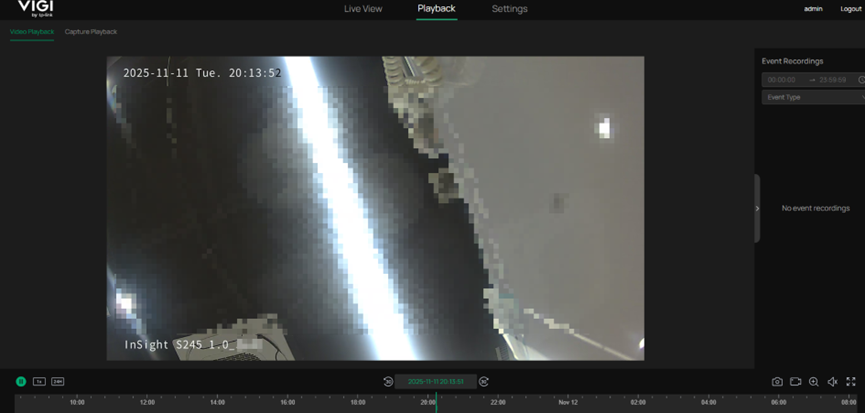
Verification
Navigate to Playback, you can see the recordings on the Net HDD, and its performance is consistent with the playback of recordings from the SD card.
Conclusion
You have successfully configured the Net HDD, allowing the camera to store recorded video files directly on the remote NAS over the network.
Get to know more details of each function and configuration please go to Download Center to download the manual of your product.
This article applies to: https://www.vigi.com/business-networking/vigi-network-camera/
Note: The firmware that supports the Net HDD feature is being released gradually. Some older models may not receive updates to support this functionality. For more information, please visit the support page on the official website.
Is this faq useful?
Your feedback helps improve this site.
TP-Link Community
Still need help? Search for answers, ask questions, and get help from TP-Link experts and other users around the world.