How to use a phone to connect with VIGI devices via ethernet cable
Contents
Introduction
In many initial deployment scenarios, there may be no Wi-Fi available at user’s site, and carrying a laptop may be inconvenient. In this scenario, please use a wired connection by linking the phone to the Router or VIGI Camera/NVR with an Ethernet cable through a docking station. Users can use the VIGI app to configure all discovered VIGI devices within the LAN.
Requirements
- VIGI Camera/NVR
- Router
- USB Type-C docking station with an RJ45 Interface
- Mobile Phone and VIGI APP
Configuration
Connect phone with ethernet cable
Android
Step 1. Disable cellular data and Wi-Fi, then use a USB Type-C docking station with an RJ45 interface to connect the mobile phone to the Router or VIGI Camera/NVR. A pop-up notification will appear to indicate that the Ethernet cable is connected. Here, we use a Samsung phone as an example.
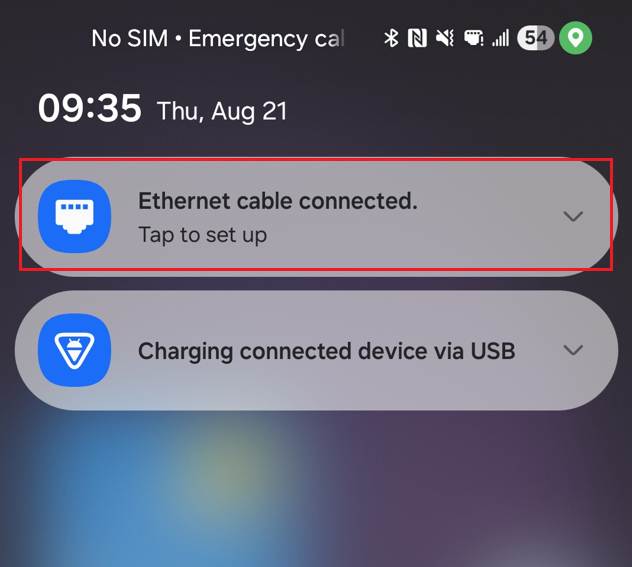
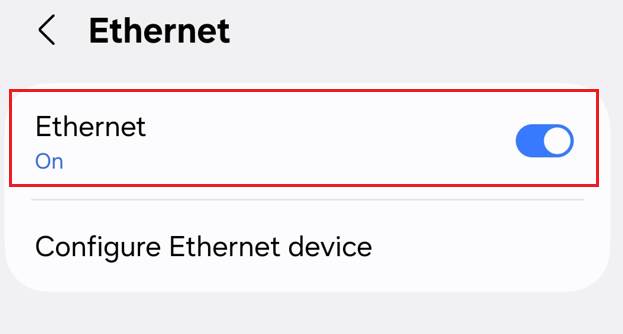
Step 2. Tap to set the settings. On Ethernet settings, enable Ethernet.
Note: If you connect your mobile phone to the router, once you enable Ethernet, the phone will automatically obtain a dynamic IP address on the same subnet as the VIGI Camera/NVR.
Step 3. Navigate to Ethernet > Configure Ethernet device > Connection Type, select Static IP. Enter the IP Address, Netmask, DNS and Default Gateway’s IP, ensure the mobile phone and the VIGI Camera/NVR are on the same subnet.

iOS
Step 1. Disable cellular data and Wi-Fi, then use a USB Type-C docking station with an RJ45 interface to connect the mobile phone to the Router or VIGI Camera/NVR.
Step 2. Navigate to Settings > Ethernet, the iOS phone will automatically recognize it as an Ethernet connection.
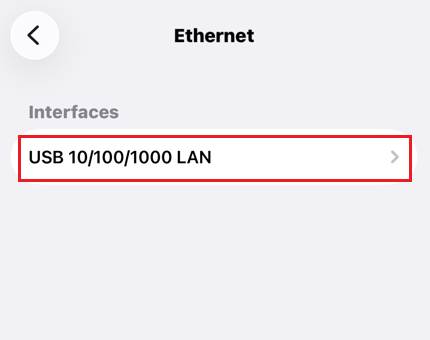
Step 3. Tap USB 10/100/1000 LAN. If you connect the device directly to the router, it will automatically obtain a dynamic IP address on the same subnet as the VIGI Camera/NVR.
The following steps apply only to scenarios where the phone is directly connected to a VIGI Camera/NVR and there is no DHCP server available in the topology to assign dynamic IP addresses.
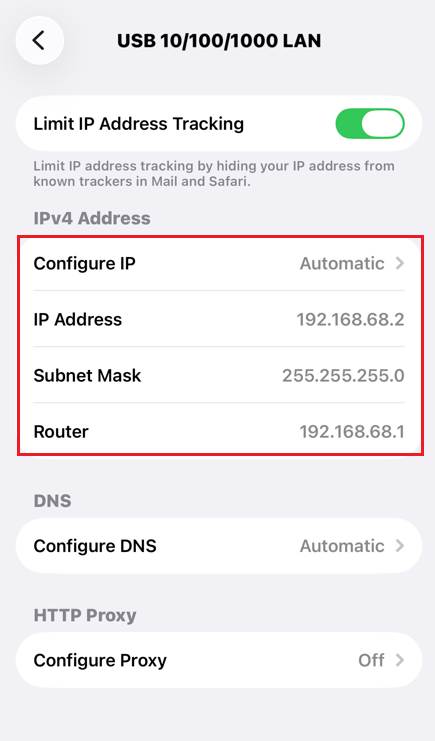
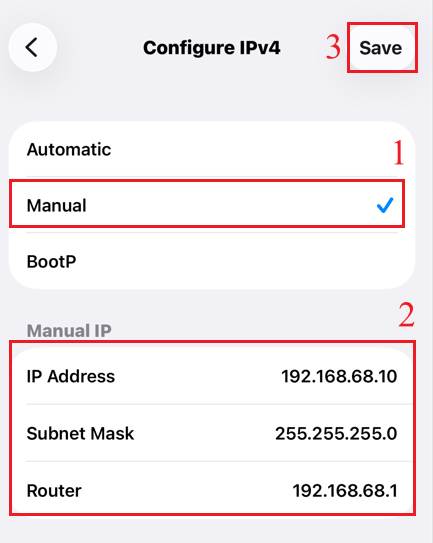
Step 4. Navigate to Settings > Ethernet > Interfaces > Configure IP, select Manual. Enter the IP Address, Subnet Mask and Router’s IP, ensure the mobile phone and the VIGI Camera/NVR are on the same subnet.
Batch Configure Discovered VIGI Devices
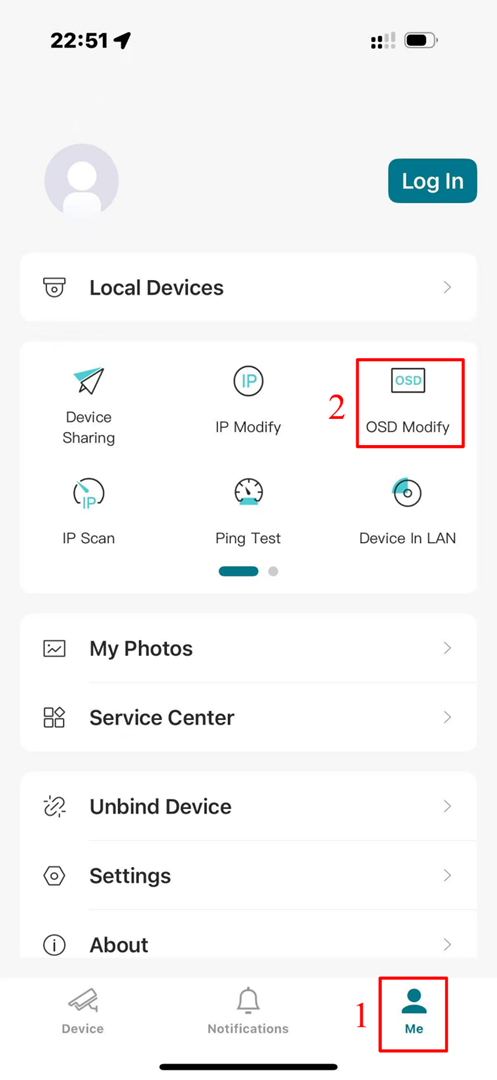
Open the VIGI APP and navigate to Me. You will see two batch configuration options: IP Modify and OSD Modify. By tapping either option, you can batch configure discovered VIGI devices.
IP Modify
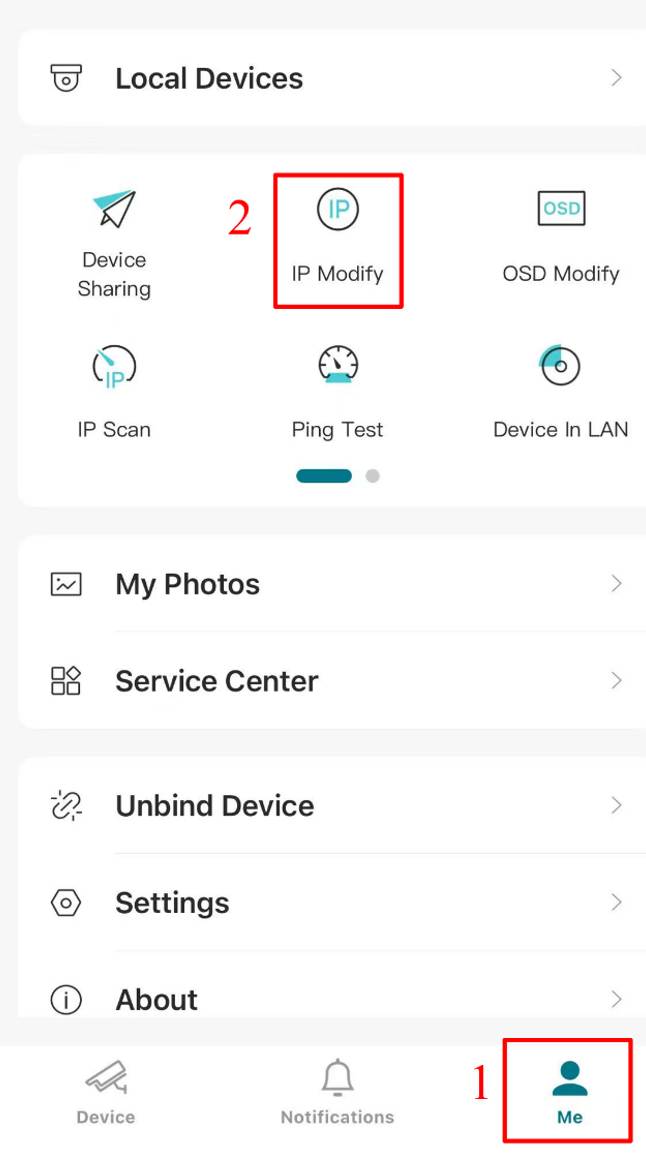
Step 1. Open the VIGI APP and Click Me. Then click IP Modify.
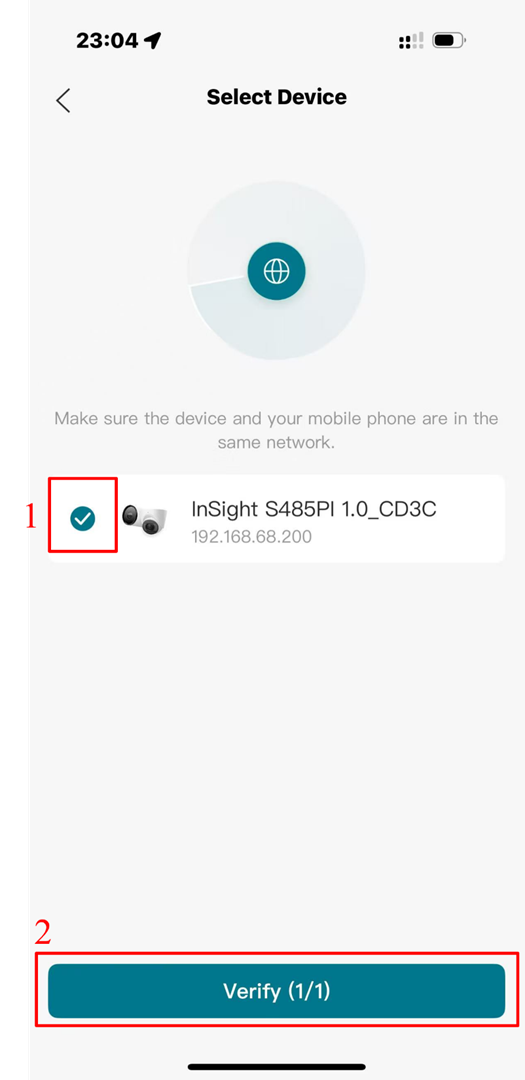
Step 2. The VIGI APP will automatically scan all VIGI devices within the LAN that are connected to the same topology as the mobile phone. Select the discovered VIGI devices and then Click Verify.

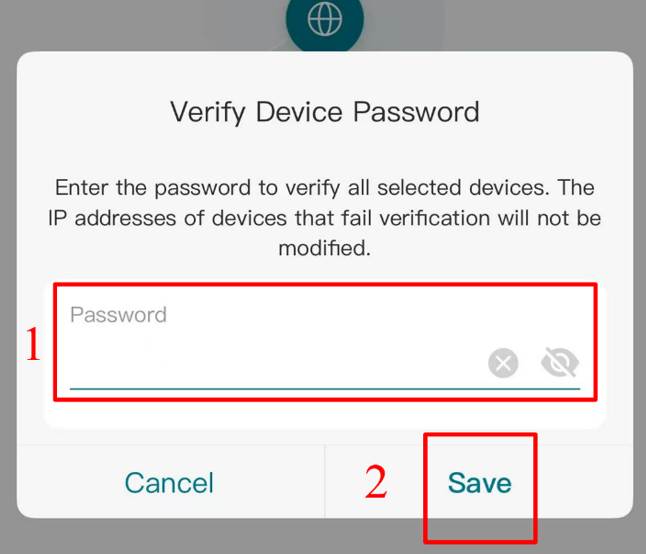
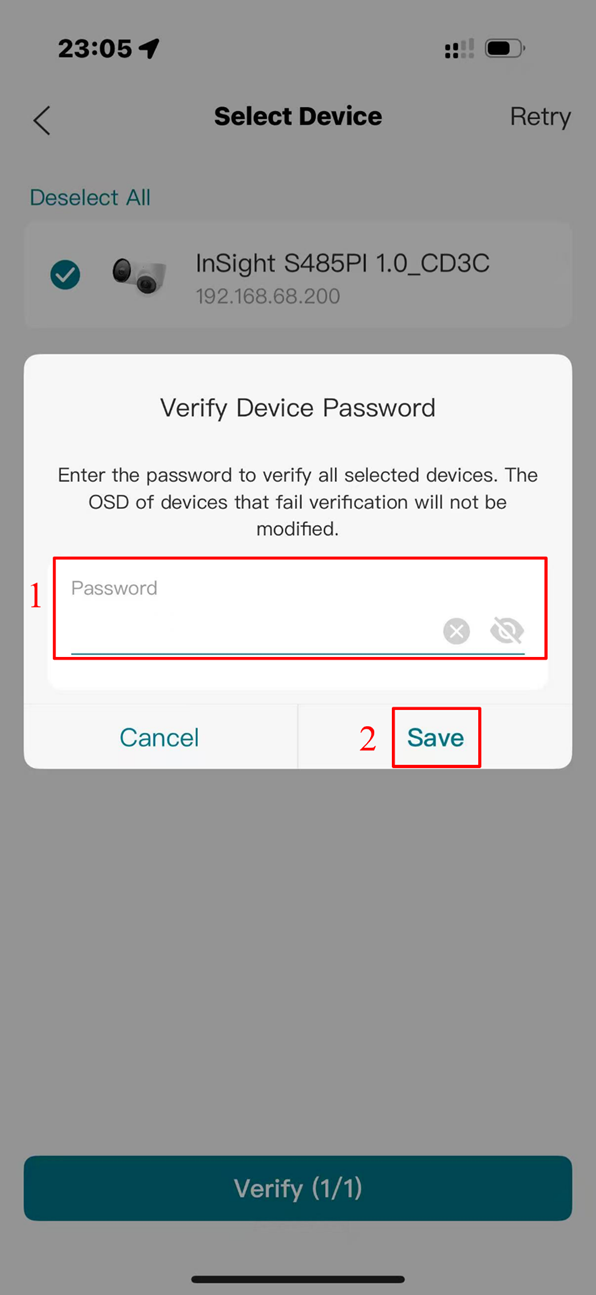
Step 3. In pop-up window, enter the selected device’s password and click Save.
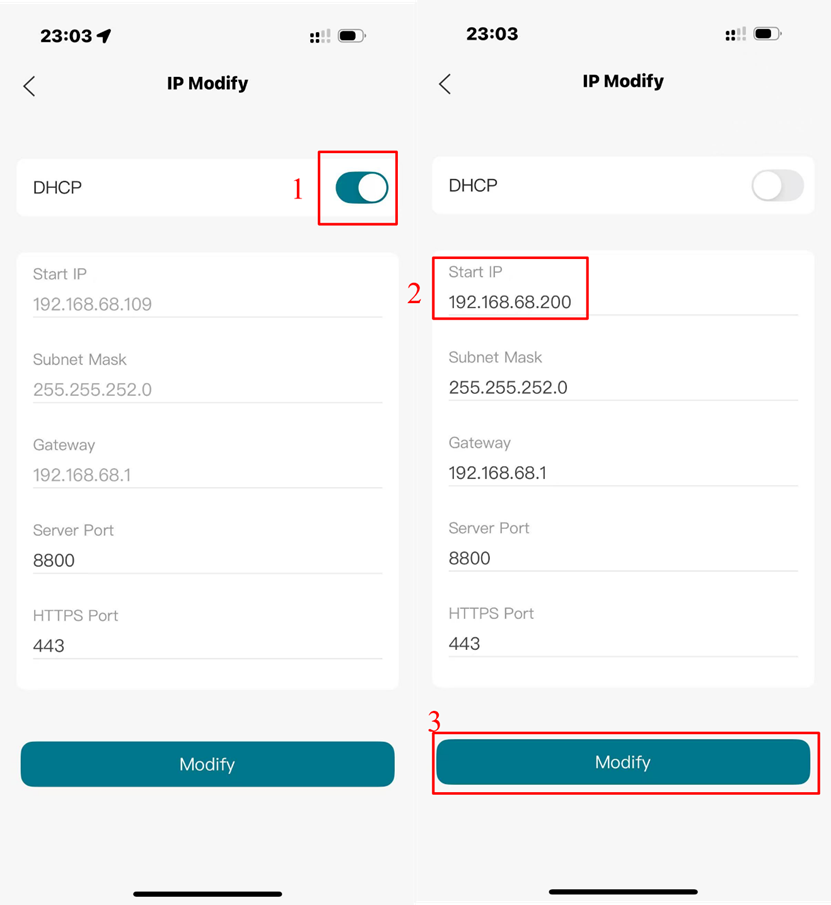
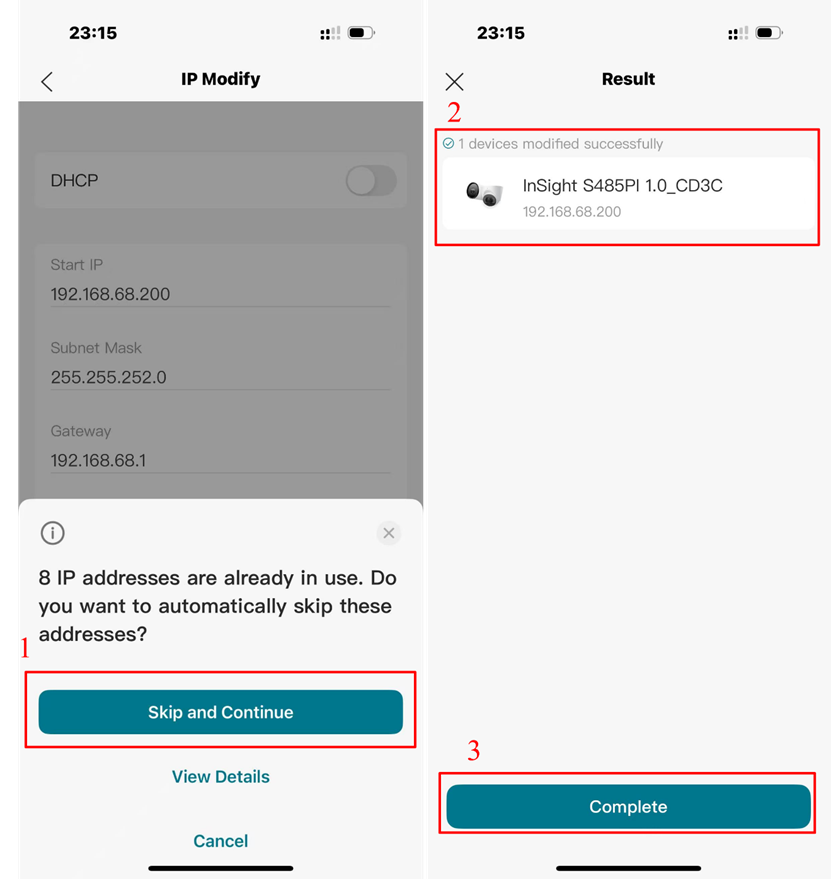
Step 4. On the IP Modify configuration page, disable the DHCP function, manually enter the IP address of the Start IP, and then click Modify.
Step 5. A pop-up window will show how many IP addresses are already in use within the LAN and ask whether to skip these addresses. Please click Skip and Continue, then the VIGI APP will display a message indicating that the devices have been modified successfully. Finally, click Complete.
OSD Modify
Step 1. Open the VIGI APP and navigate to Me. Then click OSD Modify.
Step 2. The VIGI APP will automatically scan all VIGI devices within the LAN that are connected to the same topology as the mobile phone. Select the discovered VIGI devices and then click Verify.
Step 3. In pop-up window, enter the selected device’s password and click Save.
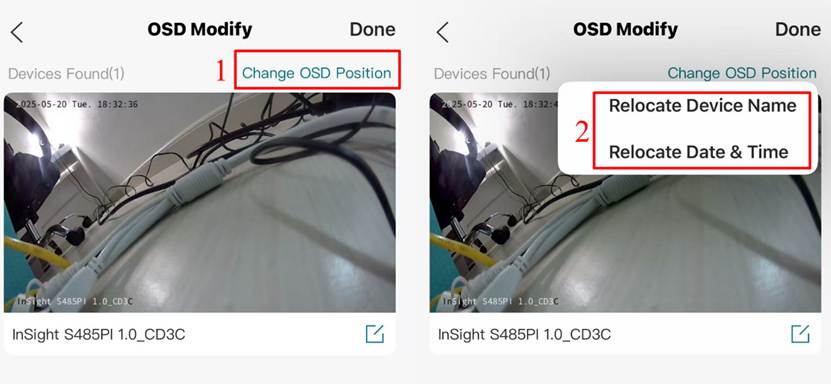
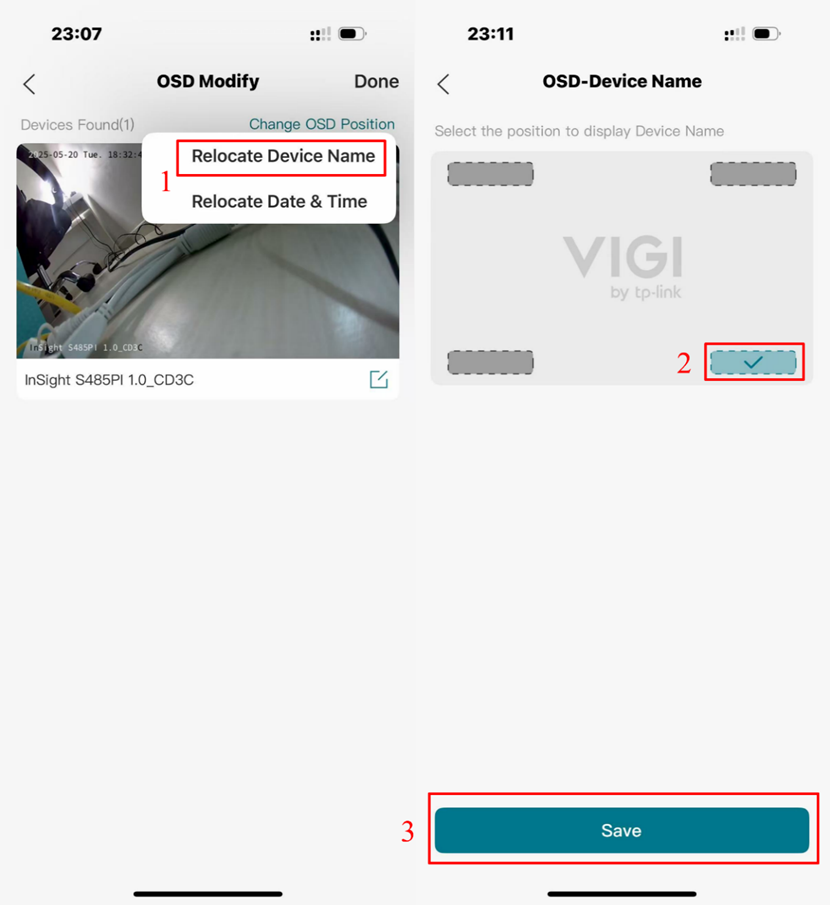
Step 4. Click Change OSD Position. You can choose Relocate Device Name or Relocate Date & Time.
Step 5. Click Relocate Device Name, select the position to display Device Name, then click Save.
Step 6. Click Relocate Date & Time, select the position to display Date & Time, then click Save.

Conclusion
You have successfully connected your mobile phone to the Router or VIGI Camera/NVR via Ethernet cable and used the VIGI APP to batch modify device configurations.
Get to know more details of each function and configuration please go to Download Center to download the manual of your product.
Is this faq useful?
Your feedback helps improve this site.


TP-Link Community
Still need help? Search for answers, ask questions, and get help from TP-Link experts and other users around the world.