How to upgrade the software version of VIGI PC Client
Contents
Introduction
This article explains how to upgrade the software version of VIGI PC Client on Windows. You can do this by installing the Local Installation Package or enabling the auto upgrade feature.
Requirements
- Windows computer
- VIGI PC Client or the Local Installation Package
Configuration
Upgrade Method 1
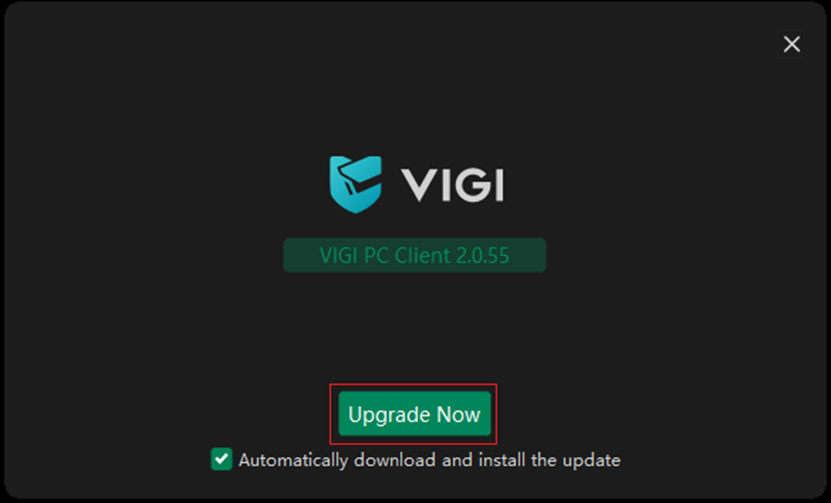
You can upgrade VIGI PC Client by installing the latest Local Installation Package.
Step 1. Double-click the installation package to launch the installation wizard.
Step 2. Click Upgrade Now. Wait until the installation is completed.
Upgrade Method 2
You can enable auto upgrade to automatically download and install the latest version.
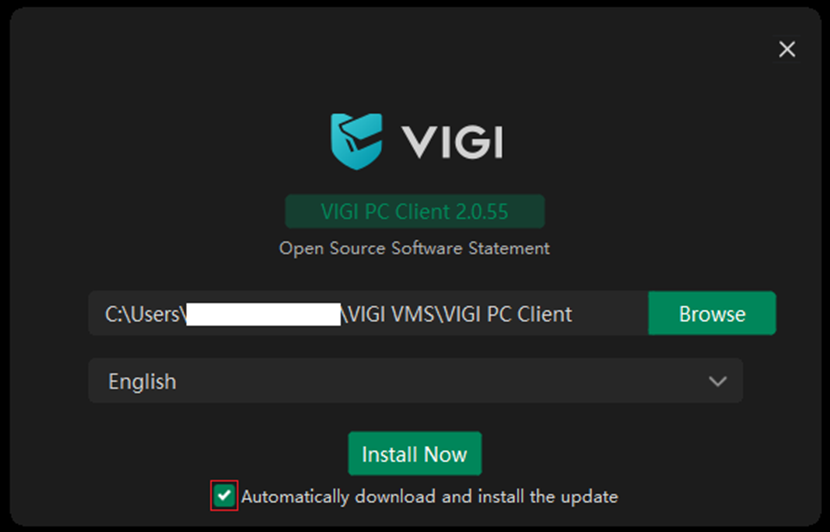
Option 1. Keep auto upgrade enabled when installing the Local Installation Package.
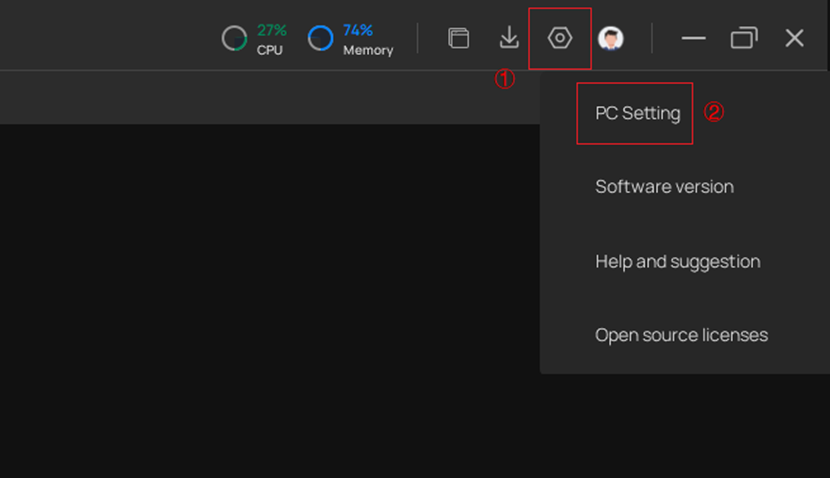
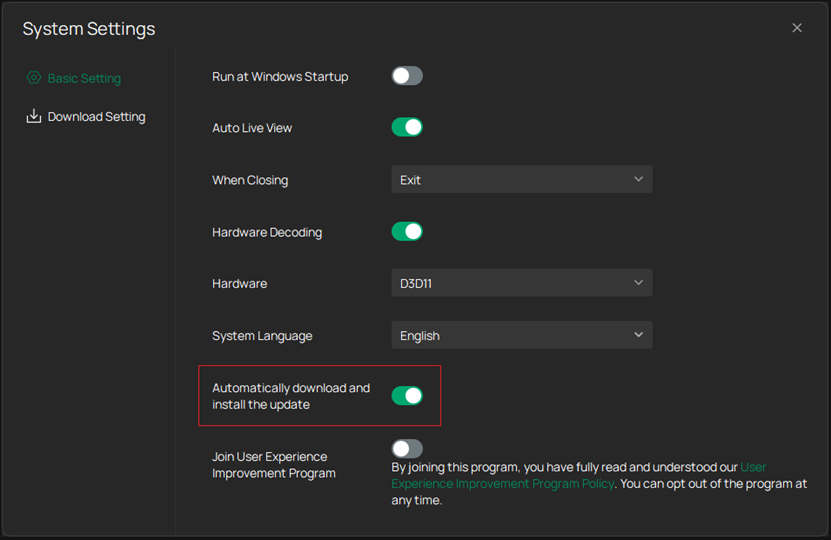
Option 2. Open VIGI PC Client, click the Settings icon, then click PC Setting. In the System Settings window, please enable the feature, Automatically download and install the update.
Verification
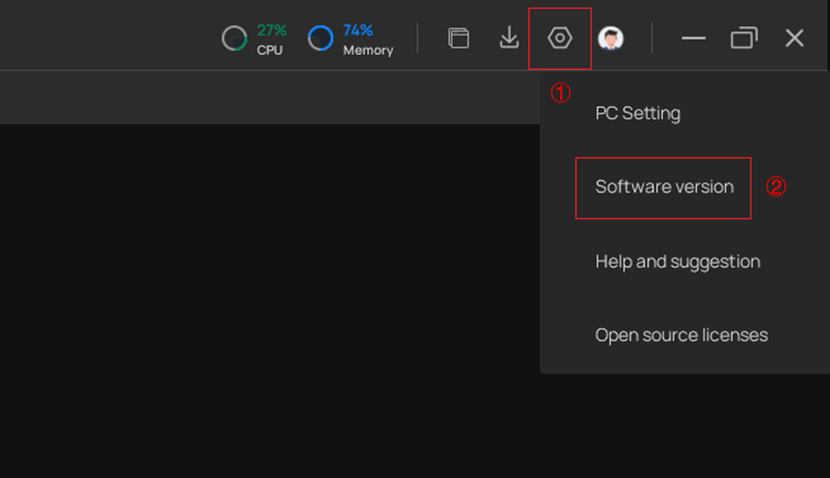
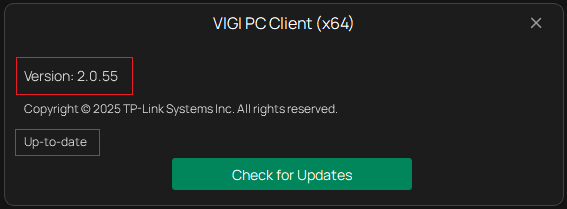
Open VIGI PC Client, click the Settings icon, then click Software Version. In the new window, check the version and confirm it is up to date.
Conclusion
You have successfully upgraded VIGI PC Client.
Get to know more details of each function and configuration please go to Download Center to download the manual of your product.
Is this faq useful?
Your feedback helps improve this site.
TP-Link Community
Still need help? Search for answers, ask questions, and get help from TP-Link experts and other users around the world.