How to Configure and Manage Licenses in VIGI Cloud VMS Standard
Contents
Assign licenses to Organization
Assign and unbind Licenses to VIGI Devices
Manually assign Licenses to devices
Automatically assign Licenses to devices
Export and Import Licenses in a batch
Export activation code from TP-Link ID account
Export activation code from organizations
Import activation code in organizations
Introduction
Each camera must be bound to an active license to manage and configure them through VMS Cloud Standard. Ensure you have purchased the necessary licenses before proceeding with device binding.
Requirements
- VMS Cloud Standard
Check License Status
When purchasing licenses, if you provide a TP-Link ID, the licenses will be bound to your TP-Link ID. You can view them by following the steps below.
If you choose not to provide a TP-Link ID during purchase, you will receive an activation code instead. Please refer to Import activation code in organizations to activate the licenses using the activation code.
Step 1. Visit https://vms.tplinkcloud.com and log in with your TP-Link ID.
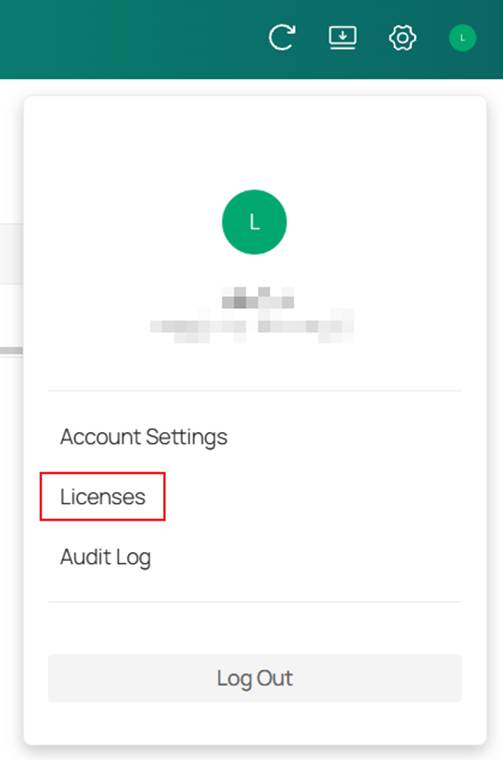
Step 2. Go to Licenses.
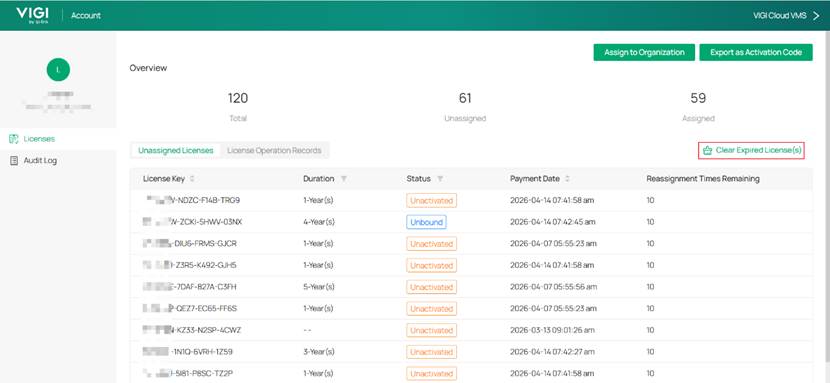
Step 3. You can check your license status on the license list. And tap on Clear Expired Licenses to clear all the expired licenses in the list.
Assign licenses to Organization
Step 1. Visit https://vms.tplinkcloud.com and log in with your TP-Link ID.
Step 2. Go to Licenses.

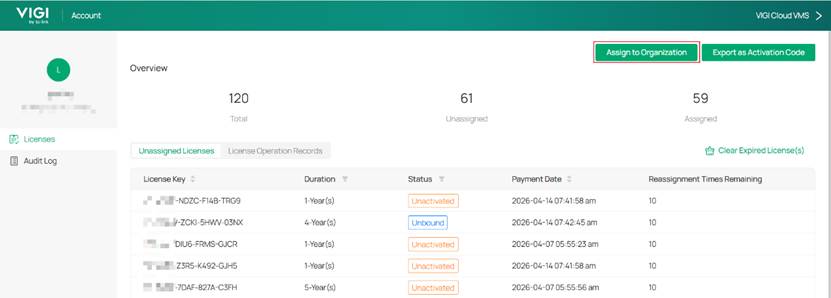
Click Assign to Organization in the upper right corner.
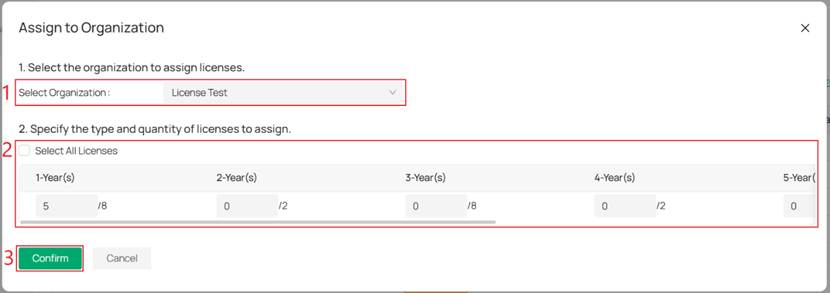
Step 3. Select the organization, check your remaining licenses, and specify the quantity of licenses to assign. Click Confirm, the licenses will be assigned to the selected organization.
Assign and unbind Licenses to VIGI Devices
Manually assign Licenses to devices
Step 1. Visit https://vms.tplinkcloud.com and log in with your TP-Link ID, and enter your organization.
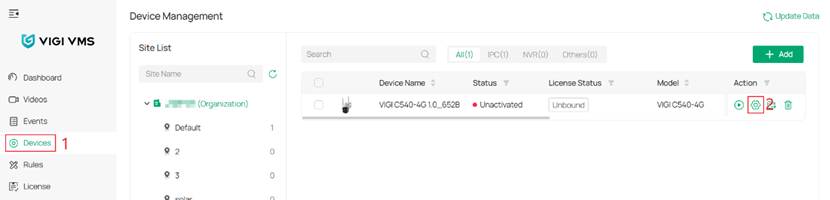
Step 2. After adding a device (refer to How to add VIGI devices on VIGI Cloud VMS ), you will see that the device is in the Unactivated status. Click the Settings icon.
Step 3. You will be redirected to the License Binding page. Select the license you want to bind and click Apply.

Automatically assign Licenses to devices
Step 1. Visit https://vms.tplinkcloud.com and log in with your TP-Link ID, and enter your organization.
Step 2. Go to the License page. Enable Auto-Active, and enable Auto-Rollover for site.
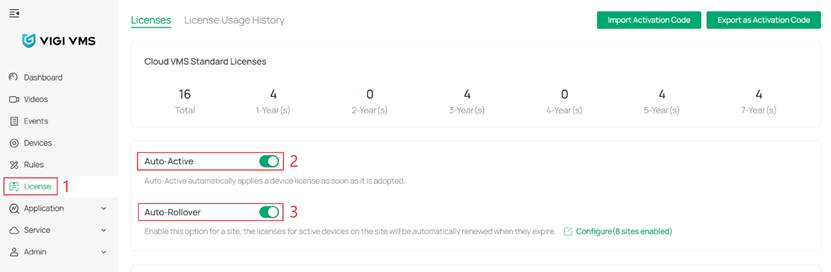
Auto-Active: Auto-Active will automatically apply a device license to a device as soon as your organization adopts it.
Auto-Rollover: If this option is enabled for a site, the organization will automatically reassign new licenses to active devices on the site when their existing licenses expire.
Unbind license from devices
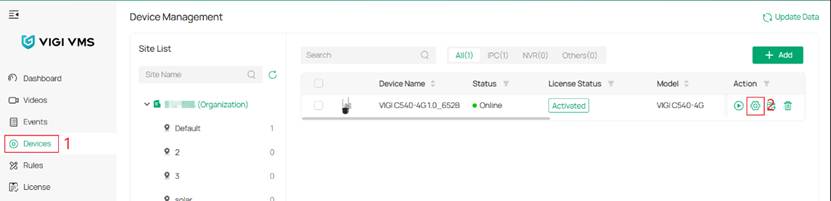
Step 1. Click Settings icon of an activated device to open the settings page.
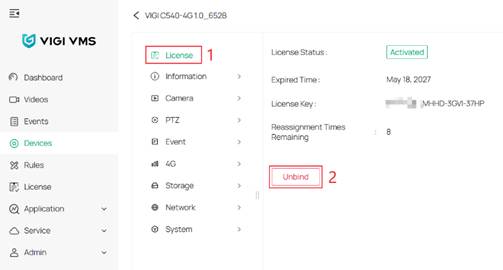
Step 2. In the License section, click Unbind. The license will be unbound and can be bound to another device if needed.
Note:
- When the Reassignment Times Remaining is 0, the license cannot be bound to other devices except the current one.
- Reassignment Times are calculated according to the license year multiplied by 10. If the license duration is 1 year, the Reassignment Times after the device is activated are 10.
Export and Import Licenses in a batch
Licenses can be exported as activation codes and delivered between different organizations through activation codes.
Export activation code from TP-Link ID account
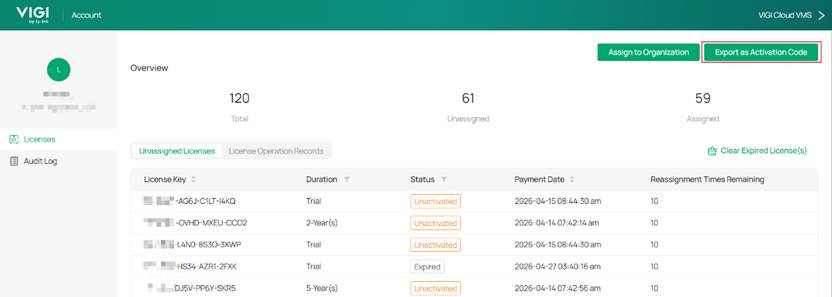
Step 1. Enter Account > Licenses > Export as Activation Code.

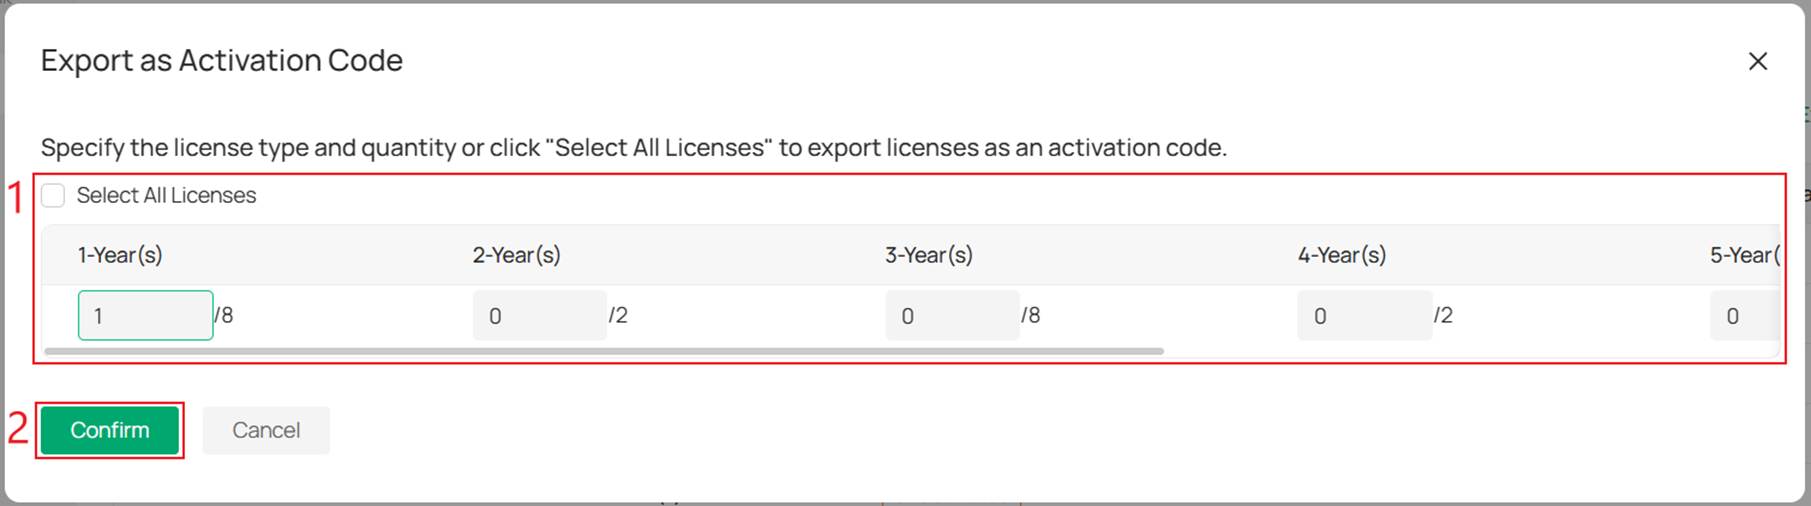
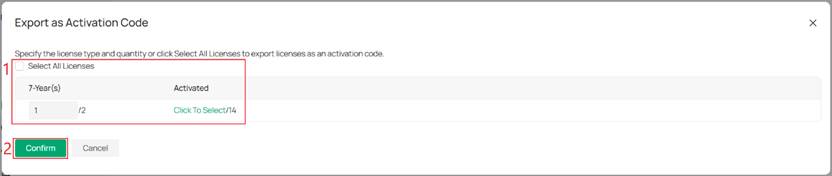
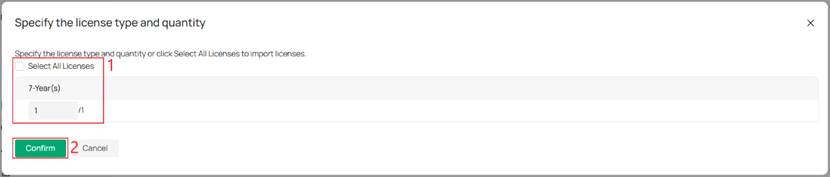
Step 2. Select the license and click Confirm.
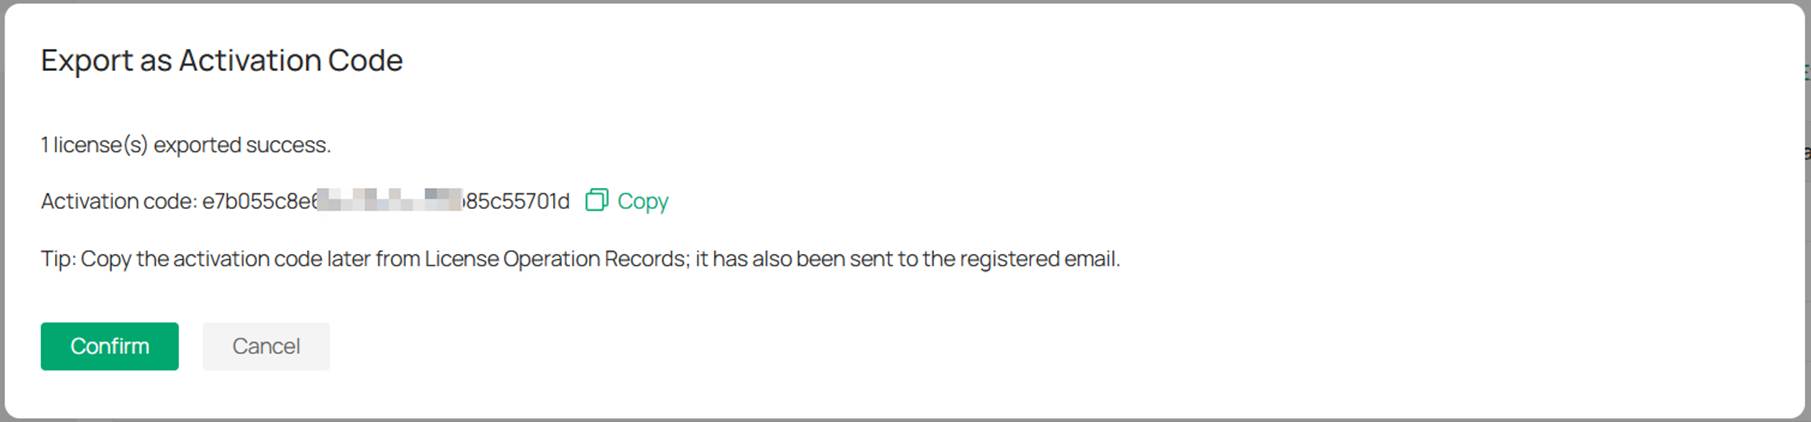
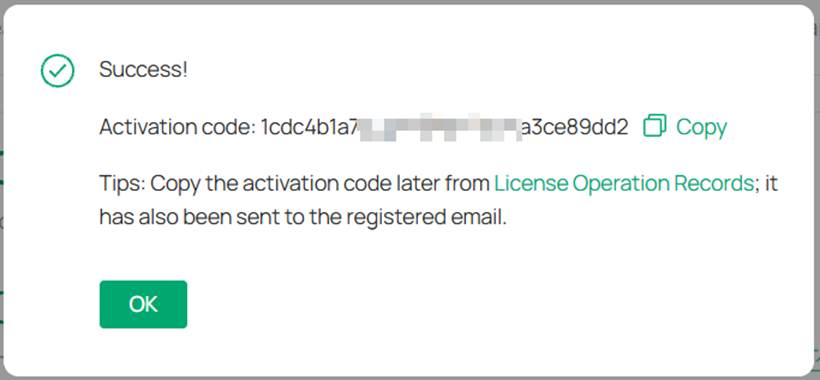
Export successful. Activation code has also been sent to the registered email.
Export activation code from organizations
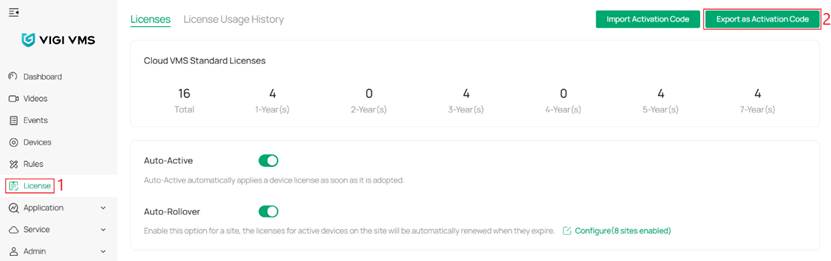
Step 1. Enter Organization and go to License > Export as Activation Code.
Step 2. Select the license and click Confirm. Export successful.
Export successful. Activation code has also been sent to the registered email.
Import activation code in organizations
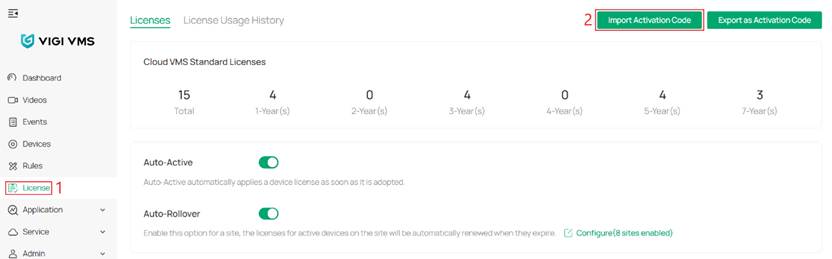
Step 1. Enter Organization and go to License > Import Activation Code
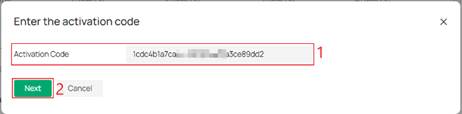
Step 2. Select the license, and click Confirm.
Conclusion
This article introduces how to configure the License for VMS Cloud Standard.
To learn more about each function and configuration, please visit Support Home to download or check the manual for your product.
A fost util acest FAQ?
Părerea ta ne ajută să îmbunătățim acest site.

TP-Link Community
Still need help? Search for answers, ask questions, and get help from TP-Link experts and other users around the world.