How to configure IP&MAC Binding on TL-MR3020 (Router mode--new logo)
IP & MAC Binding, namely, ARP (Address Resolution Protocol) Binding, is used to bind network device’s IP address to its MAC address. This will prevent ARP Spoofing and other ARP attacks by denying network access to a device with matching IP address in the Binding list, but unrecognized MAC address.
Here takes TL-MR3020 for demonstration.
IP&MAC Binding can only be set up after the product has been successfully configure as a 3G/4G router, wireless router or WISP client router.
1. Follow the instructions below to configure the router.
How to configure 3G/4G Router Mode on TL-MR3020 (new logo)?
How to configure Wireless Router Mode on TL-MR3020 (new logo)?
How to configure WISP Client Router Mode on TL-MR3020 (new logo)?
2. Go to Advanced > Security > IP & MAC Binding.
3. Enable IP & MAC Binding.

4. Bind your device(s) according to your need.
To bind the connected device(s):
Click  to add the corresponding device to the Binding List.
To bind the unconnected device:
1) Click Add in the Binding List section.
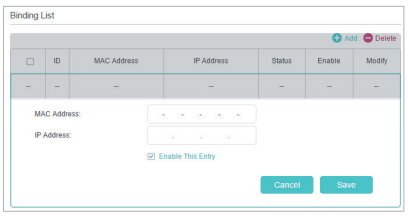
2) Enter the MAC address and IP address that you want to bind.
3) Tick the Enable This Entry checkbox and click Save.
Now you don’t need to worry about ARP spoofing and ARP attacks!
Get to know more details of each function and configuration please go to Download Center to download the manual of your product.
Is this faq useful?
Your feedback helps improve this site.
TP-Link Community
Still need help? Search for answers, ask questions, and get help from TP-Link experts and other users around the world.