How to adjust splicing
Contents
Introduction
A dual-lens panoramic camera adopts a dual-lens splicing architecture. Through image splicing processing, an ultra-wide horizontal field of view of approximately 180° is delivered, enabling comprehensive coverage of wide-area scenes by a single device.
Splicing image quality is affected by the installation conditions and splicing parameter settings. When the splicing distance is improperly configured or the environment is complex, ghosting or blind areas may occur. This guide is intended to improve splicing image quality and ensure complete panoramic images through proper parameter adjustment.
Requirements
- VIGI Dual-Lens Panoramic Camera
Configuration
Configuration for Splicing
Step 1. Installation Check
Before adjusting splicing parameters, make sure that the camera is installed properly and meets the following conditions:
- The primary monitoring targets are within a reasonable viewing distance (recommended ≥ 2 m).
- The primary monitoring targets are located within the common field of view of both lenses.
- There are no close-range obstacles in the center area of the image.
Step 2. Log in to the camera web UI by entering the IP address in a web browser, then navigate to Settings > Camera > Display > Splicing > Splicing Distance and adjust the splicing distance according to the actual monitoring distance.
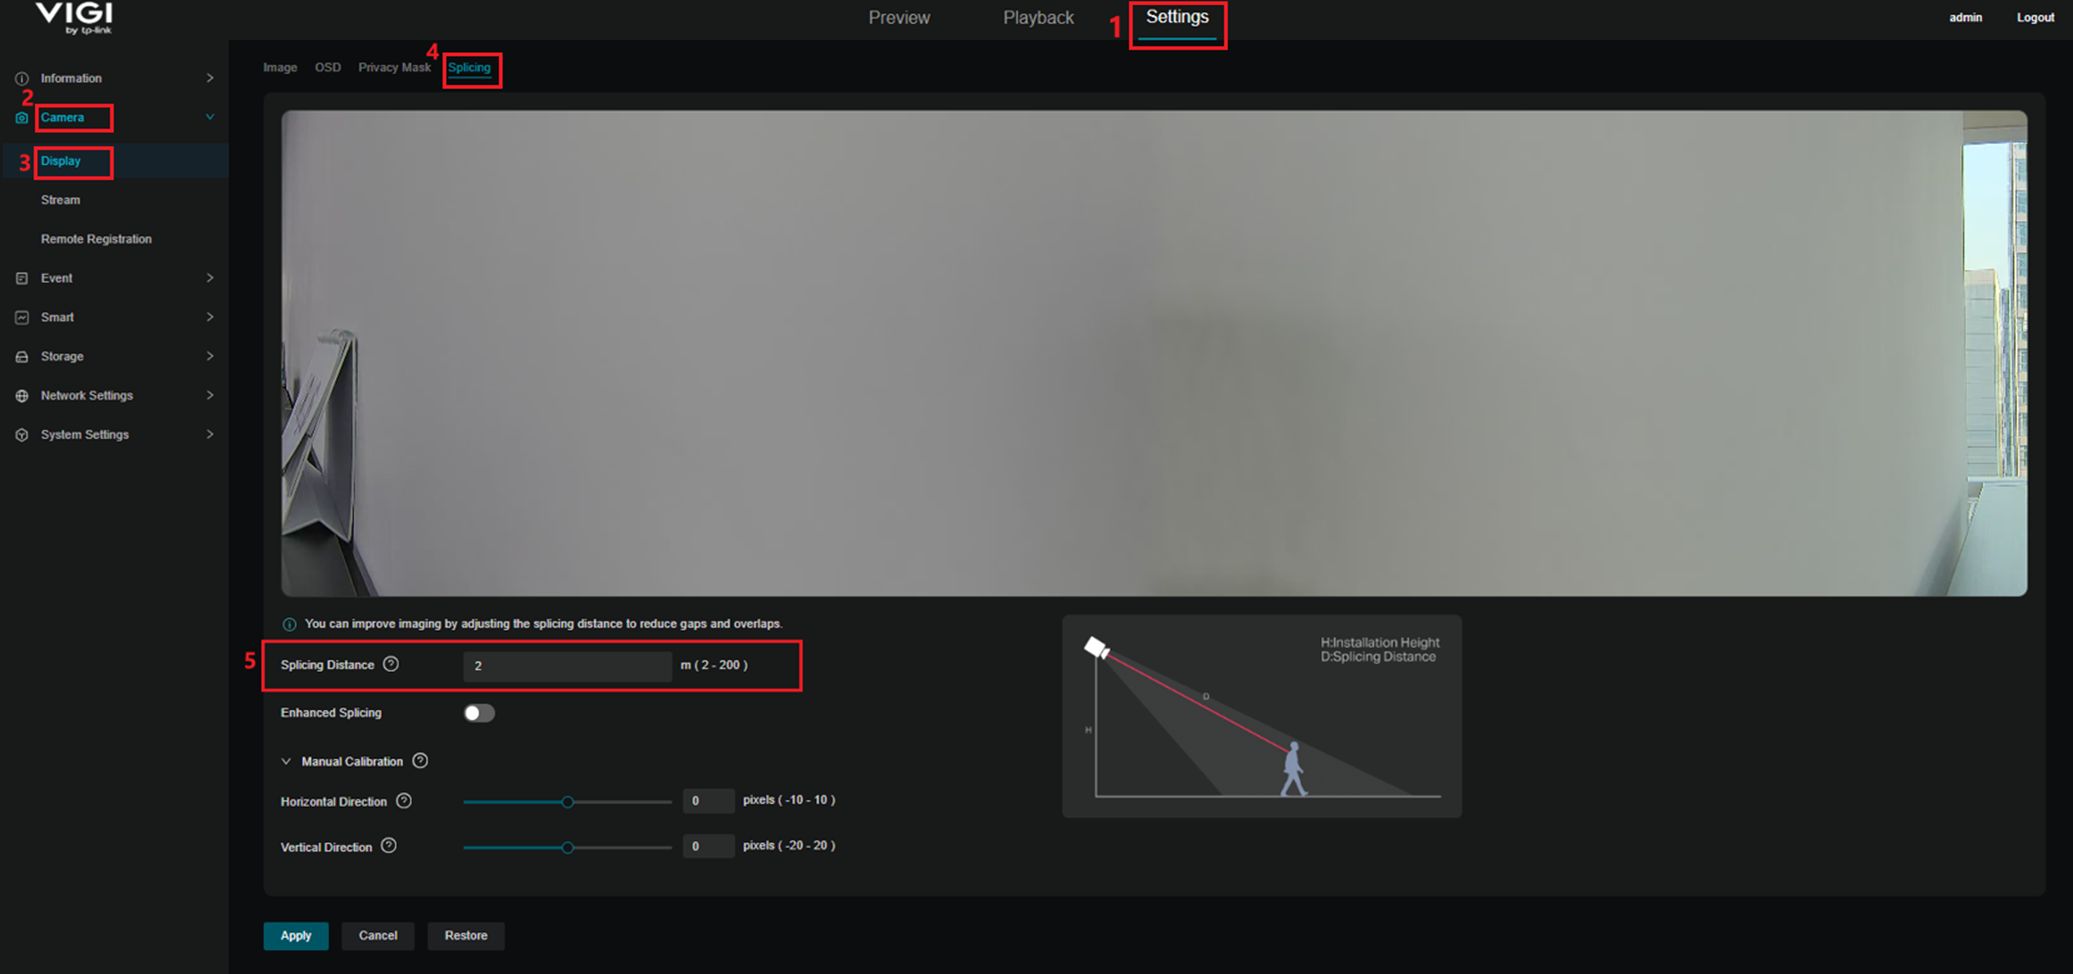
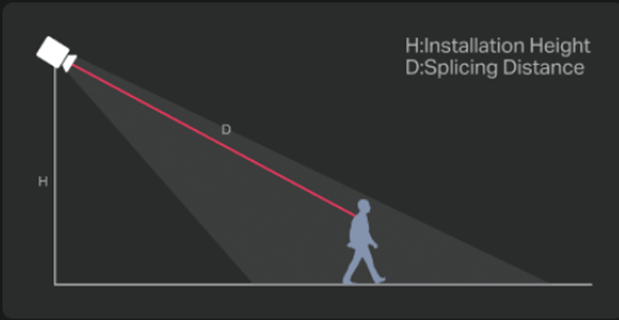
Note: Splicing Distance (D) refers to the distance from the camera to the primary monitoring targets in the scene. It should be configured based on the actual distance of the primary targets monitored.
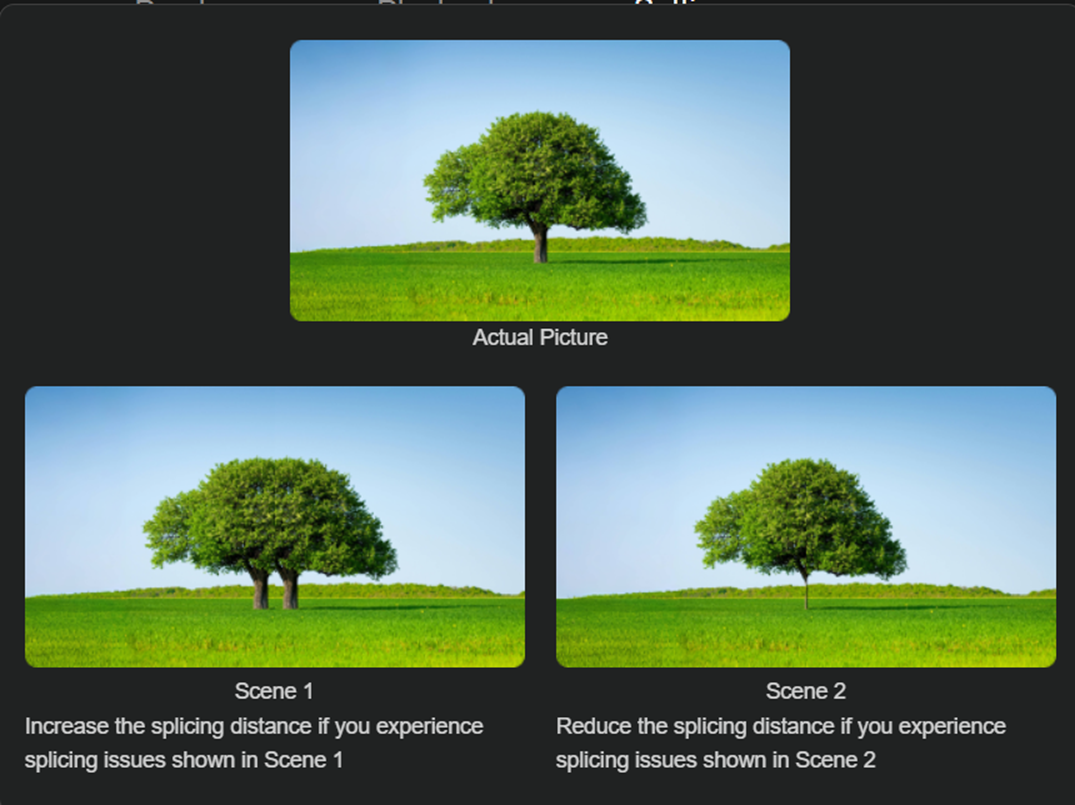
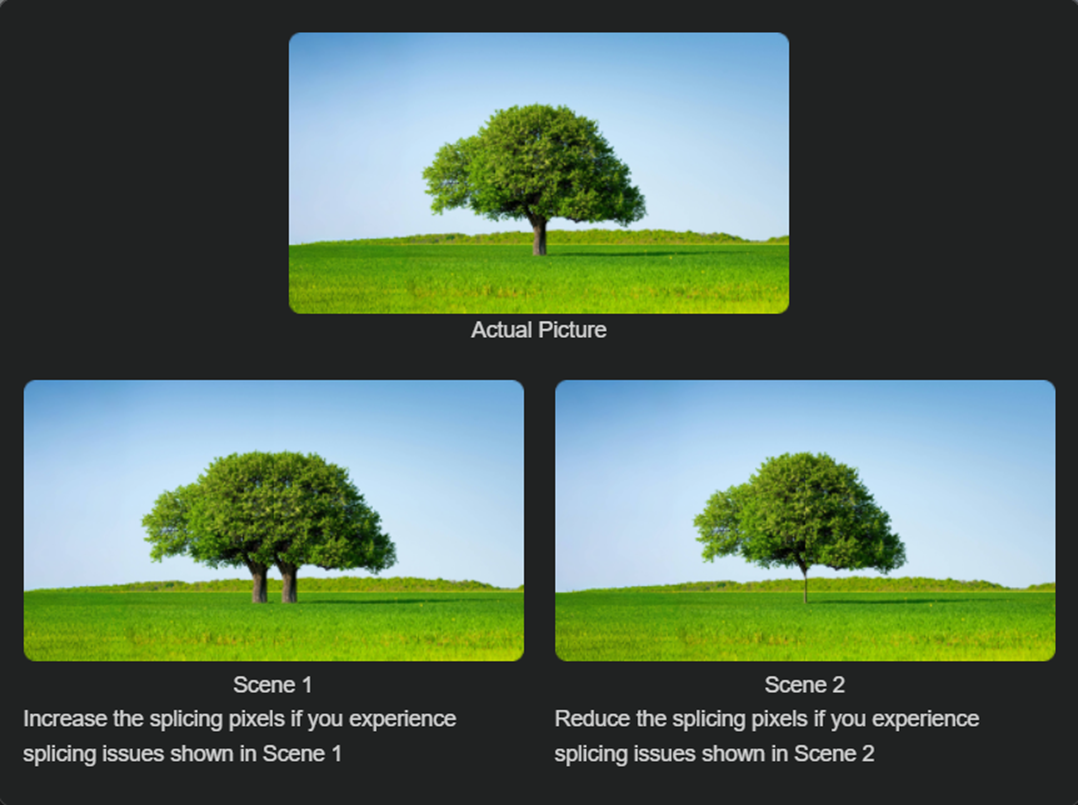
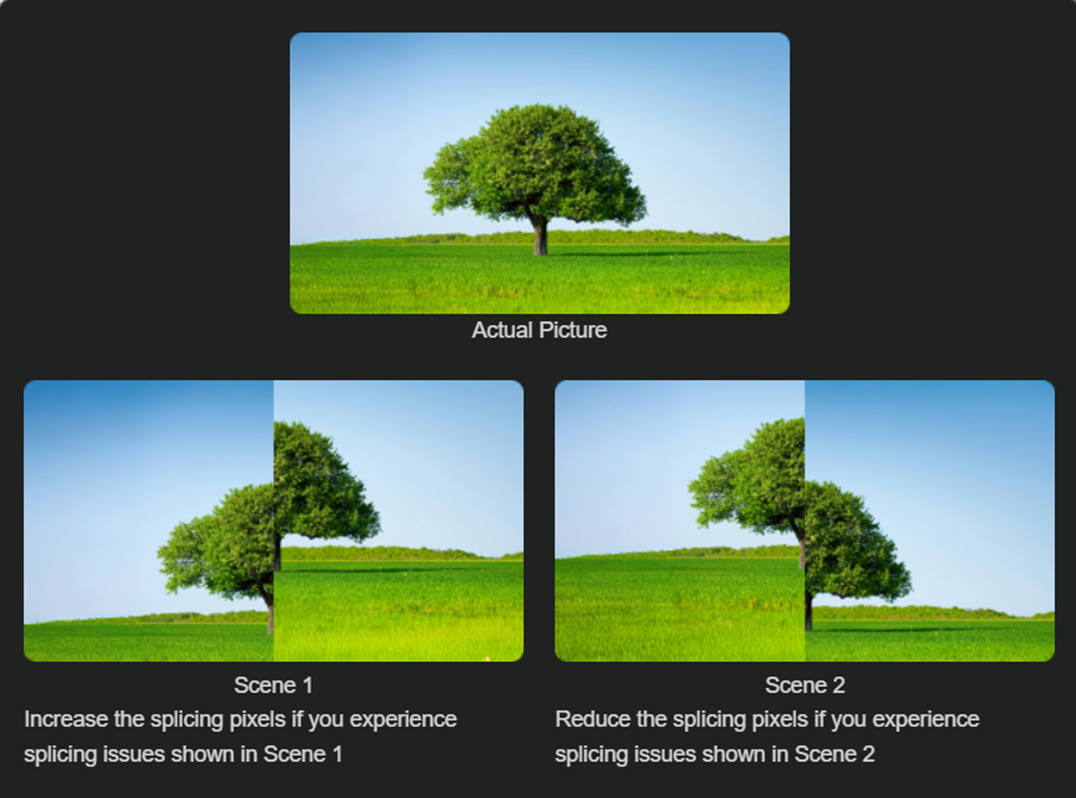
As shown in the figure below, if duplicated images appear in the center area of the image as shown in Scene 1, the configured splicing distance is shorter than the actual target distance and should be increased. If objects in the center area of the image appear partially missing as shown in Scene 2, the configured splicing distance is longer than the actual target distance and should be reduced. Adjust the splicing distance until it matches the actual distance of the primary monitoring targets.
Step 3. Open the live view on the web interface or APP and check whether ghosting or blind areas appear in the center area of the image.
Step 4. Further Adjustment.
Based on the image display, adjust the Splicing Distance and Manual Calibration on the Splicing Configuration Page to achieve better splicing results.
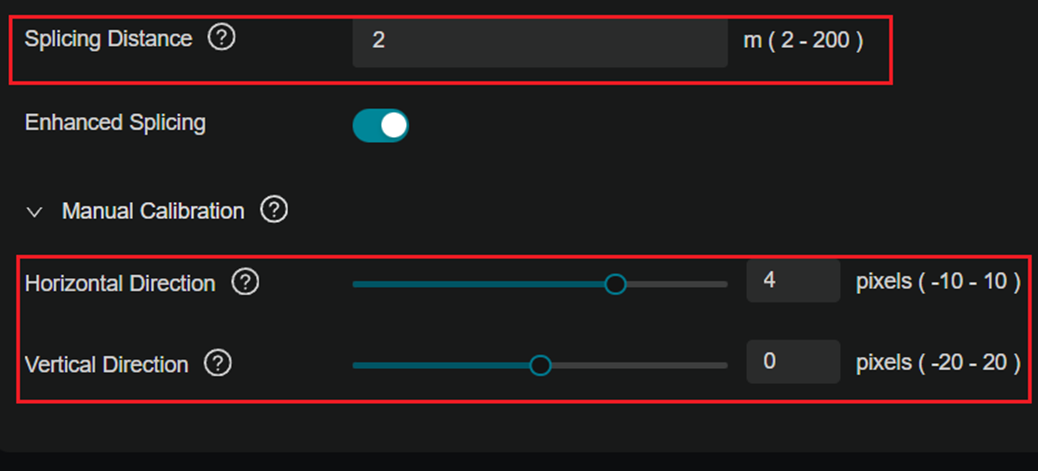
- If ghosting appears, increase the splicing distance and decrease the value of Horizontal Direction. If blind areas appear, decrease the splicing distance and increase the value of Horizontal Direction.
- If vertical misalignment appears, adjust the value of Vertical Direction.
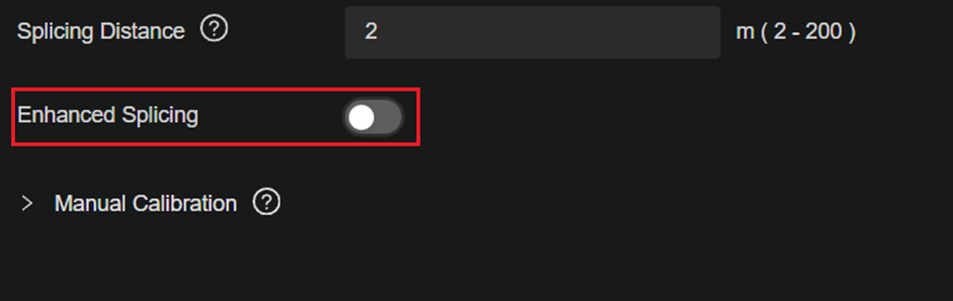
Step 5. If the issue persists after completing the steps above, adjust the physical installation position of the camera or disable Enhanced Splicing on the Splicing Configuration Page to ensure clear and complete images. After disabling Enhanced Splicing, the panoramic image uses standard splicing processing.
Conclusion
With the configuration above, the splicing image quality can be improved through proper parameter adjustment.
Get to know more details of each function and configuration please go to Download Center to download the manual of your product.
QA
Q1: What should I do if ghosting appears in the center area of the image?
A1: If ghosting or duplicated images of the same object appear in the center area of the image, such as overlapped outlines of a person or a vehicle, the splicing distance may be set too short. This may result in excessive overlap of binocular views in distant areas. To resolve this issue, increase the splicing distance to shift the splicing focus farther away and improve the splicing effect.
Q2: What should I do if blind areas appear near the center area of the image?
A2: If blind areas appear near the center area of the image, or objects appear partially missing, such as a person appearing “disconnected” when passing through the image, the splicing distance may be set too long. This may result in insufficient overlap of the left and right views for near objects. Blind areas may also occur if there are obstacles in the near-center area in front of the camera (such as columns, flowerpots, or walls) that block one of the lenses. To resolve this issue, reduce the splicing distance to increase image overlap in near areas and eliminate blind areas.
Is this faq useful?
Your feedback helps improve this site.