How to Configure Wireless Networks on VIGI Wireless Camera
Contents
Objective
VIGI wireless camera supports to configure the wireless network connection via VIGI App, VIGI VMS, VIGI Config Tool, and the device's web management page. This article will introduce the method of configuring the wireless network on VIGI wireless camera. This article applies to VIGI wireless camera that has been initialized by VIGI App or initialized by wired connection.
Requirements
- VIGI wireless camera
- Wireless AP
- Optional:VIGI VMS / VIGI Config Tool / VIGI APP
Configuration
Web Management Interface
Step 1. Access to VIGI Camera web management page with VIGI Camera IP Address.
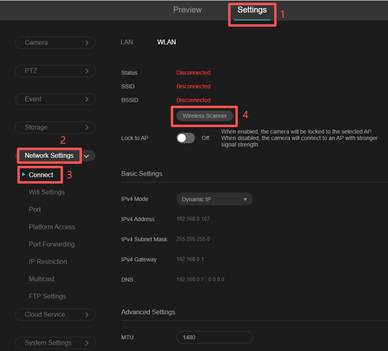
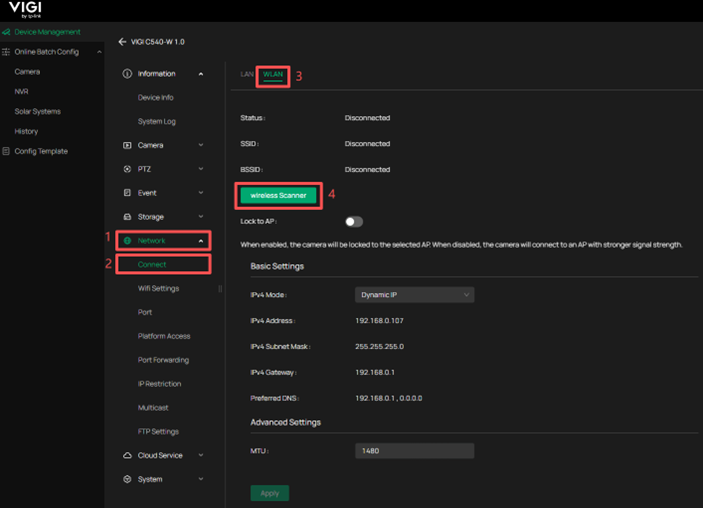
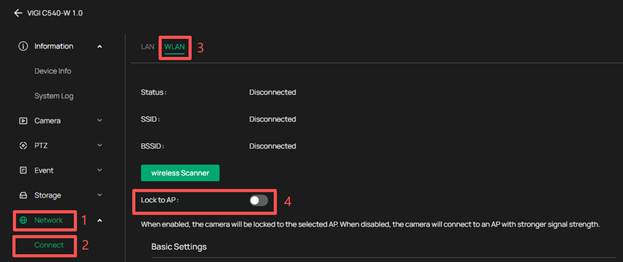
Step 2. Go to Settings > Network Settings > Connect > WLAN, click Wireless Scanner.
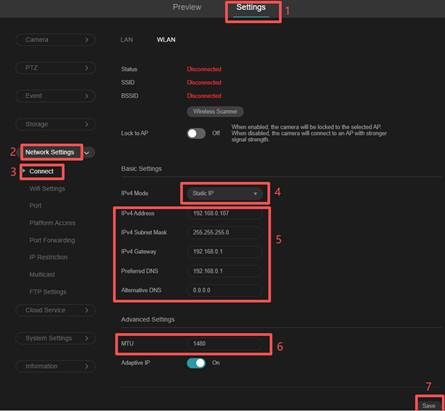
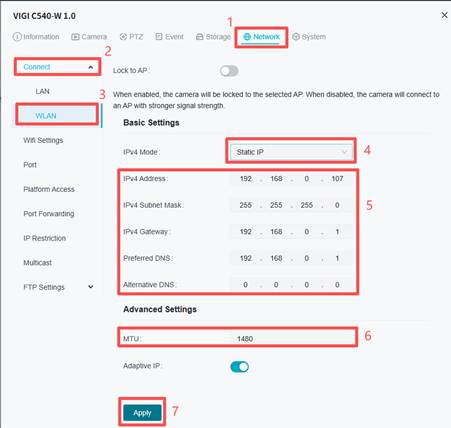
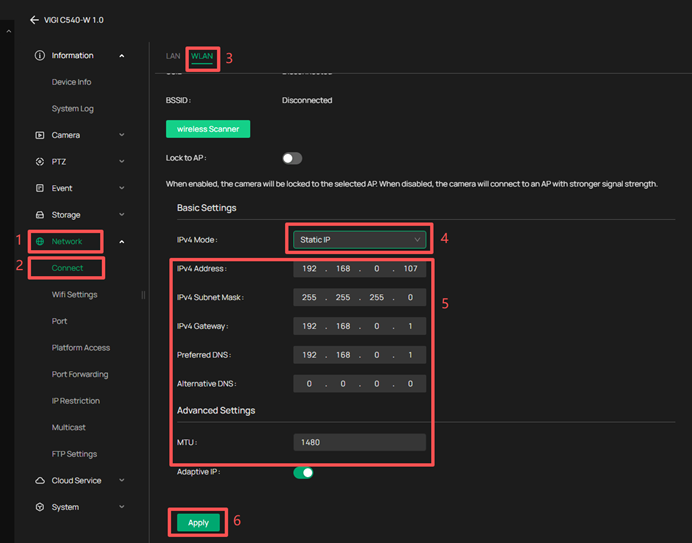
Note: If you want to set static IP for wireless camera, please go Settings > Network Settings > Connect > WLAN > Basic Settings. Choosing the IPv4 mode as Static IP, Configure the information, such as: IPv4 Address, IPv4 Subnet Mask, IPv4 Gateway, Preferred DNS, Alternative DNS and MTU. Then save the settings.
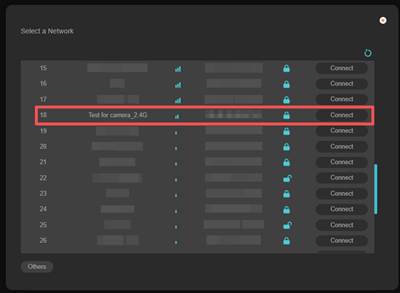
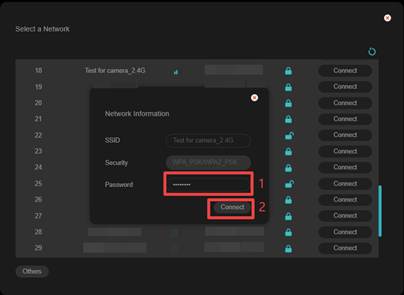
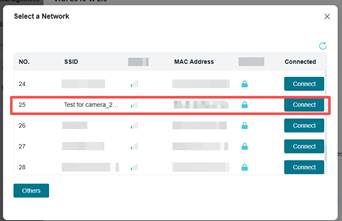
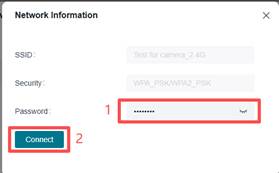
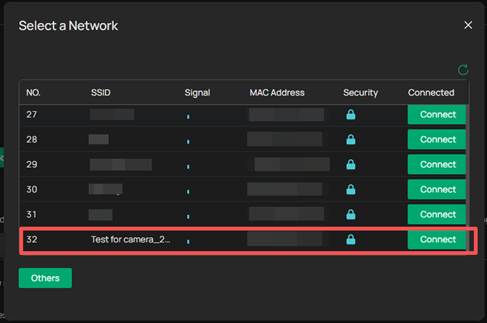
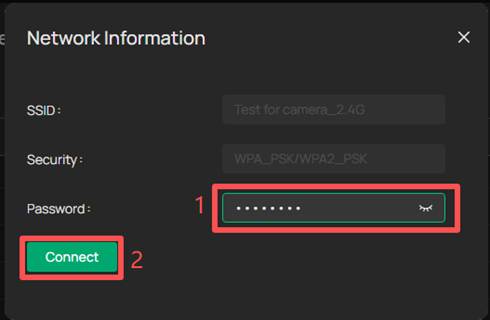
Step 3. Select the SSID you want to connect, click Connect, enter the SSID password. During the connection, the camera will voice prompt “Connecting to Wi-Fi”. When connect successfully, there will be a voice prompt “Wi-Fi Connected”.
Step 4. If the camera was wired connect to router or AP, after completing the above steps, please manually disconnect the wired connection, camera will automatically connect to the wireless AP. If it was connected to router or AP wirelessly, you can connect to a new SSID through the above steps.
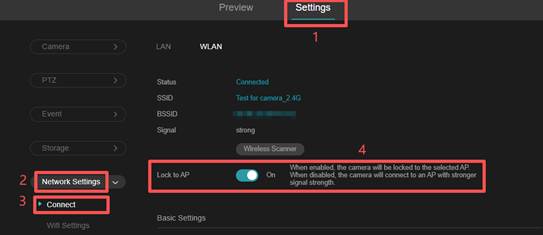
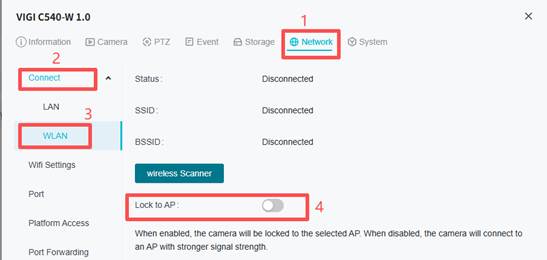
Note: If your network has different SSIDs, you can use “Lock to AP” to lock your camera to selected AP. You can go Settings > Network Settings > Connect > WLAN to enable this option.
VIGI VMS
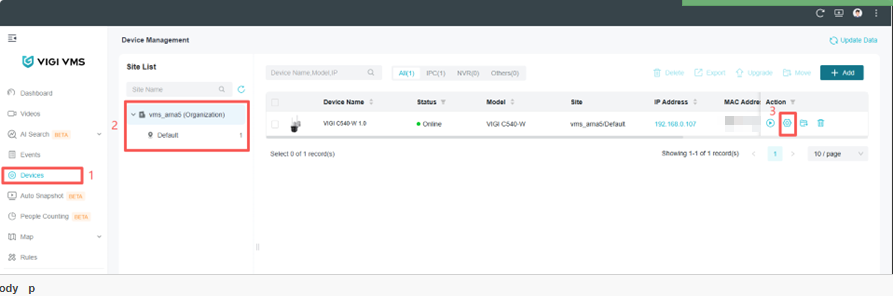
Step 1. Access to VIGI VMS. Go to Devices, choose the Site, then choose device which need to be configured, and click “Edit”.
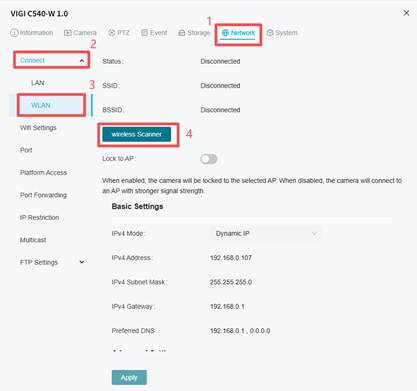
Step 2. Go to Network > Connect> WLAN,click Wireless Scanner.
Step 3. Select the SSID you want to connect, click Connect, enter the SSID password. During the connection, the camera will voice prompt “Connecting to Wi-Fi”. When connect successfully, there will be a voice prompt “Wi-Fi Connected”.
Note: If you want to set static IP for wireless camera, please go Settings > Network > Connect > WLAN > Basic Settings. Choosing the IPv4 mode as Static IP, Configure the information, such as: IPv4 Address, IPv4 Subnet Mask, IPv4 Gateway, Preferred DNS, Alternative DNS and MTU. Then save the settings.
Step 4. If the camera was wired connect to router or AP, after completing the above steps, please manually disconnect the wired connection, IPC will automatically connect to the wireless AP. If it was connected to router or AP wirelessly, you can connect to a new SSID through the above steps.
Note: If your network have different SSID, you can use “Lock to AP” to lock your camera to selected AP. You can go Settings > Network > Connect > WLAN to enable this option.
VIGI App
Step 1. Log in to the VIGI A with your TP-Link ID.
Step 2. Add the IPC to your VIGI App. You can refer to How to configure VIGI wireless Camera in VIGI App.
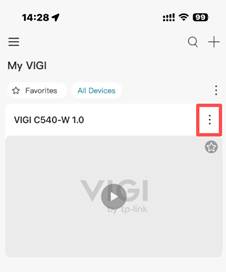
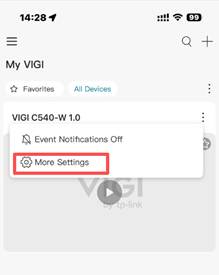
Step 3. Tap on your camera and go to the Live View page. Then, tap on More Settings.
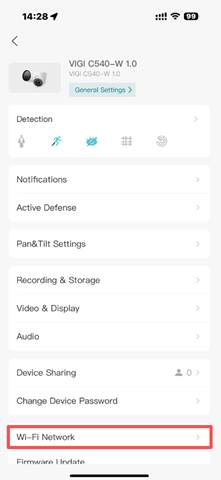
Step 4. Go to Wi-Fi Network.
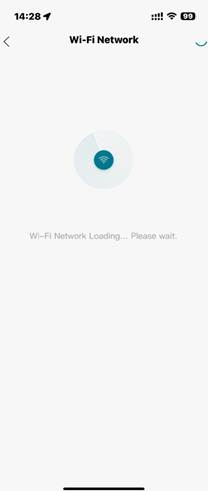
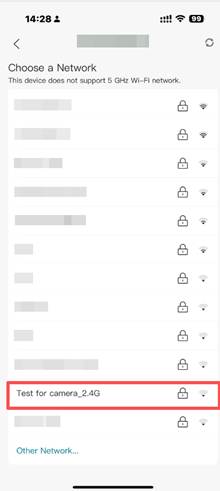
Step 4. Waiting for the page to load, then select the SSID you want to connect.
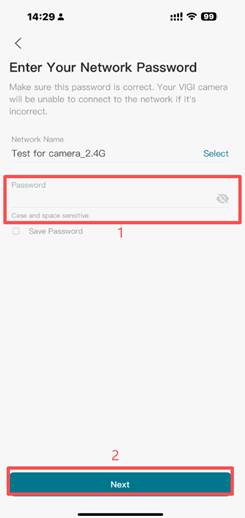
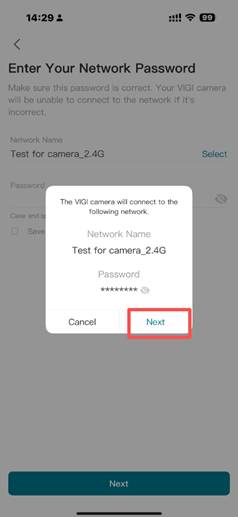
Step 5. Enter the SSID password. Click Next. It will prompt a windows, click Next and waiting for connect. During the connection, the camera will voice prompt “Connecting to Wi-Fi”. When connect successfully, there will be a voice prompt “Wi-Fi Connected”.
Step 6. If the camera was wired connect to router or AP, after completing the above steps, please manually disconnect the wired connection, IPC will automatically connect to the wireless AP. If it was connected to router or AP wirelessly, you can connect to a new SSID through the above steps.
VIGI Config Tool
Step 1. Connect the PC and the VIGI device to the same network and run the VIGI Config Tool.
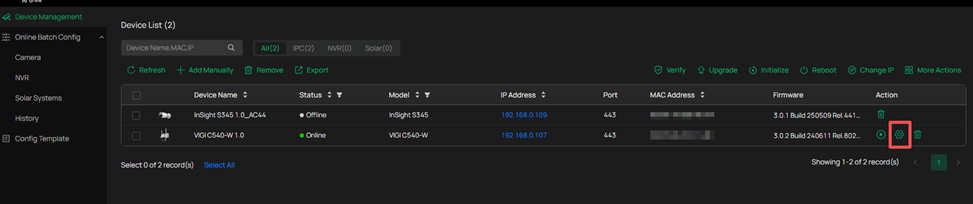
Step 2. Go to Devices list, and choose device which need to be configured, click “Edit”.
Step 3. Go to Network > Connect > WLAN, click Wireless Scanner.
Step 4. Select the SSID you want to connect, click Connect, enter the SSID password. During the connection, the camera will voice prompt “Connecting to Wi-Fi”. When connect successfully, there will be a voice prompt “Wi-Fi Connected”.
Note: If you want to set static IP for wireless camera, please go Settings > Network > Connect > WLAN > Basic Settings. Choosing the IPv4 mode as Static IP, Configure the information, such as: IPv4 Address, IPv4 Subnet Mask, IPv4 Gateway, Preferred DNS, Alternative DNS and MTU. Then save the settings.
Step 5. If the camera was wired connect to router or AP, after completing the above steps, please manually disconnect the wired connection, IPC will automatically connect to the wireless AP. If it was connected to router or AP wirelessly, you can connect to a new SSID through the above steps.
Note: If your network has different SSIDs, you can use “Lock to AP” to lock your camera to selected AP. You can go Settings > Network > Connect > WLAN to enable this option.
Conclusion
You have learned how to configure wireless networks of VIGI wireless camera.
Get to know more details of each function and configuration please go to Download Center to download the manual of your product.
Is this faq useful?
Your feedback helps improve this site.