How to configure the PoE channel on VIGI PoE NVR
Contents
Introduction
The PoE channel is mainly used to check the status of NVR PoE ports and power usage. In the PoE channel, you can check the port status, rated power, change the port status, and configure the port settings to determine whether the port can provide a power supply.
Requirements
- VIGI PoE NVR
- PC
Configuration
The PoE channel setting requires the NVR to support the PoE function. This article provides a detailed configuration guide for the PoE channel when the NVR is managed via the web UI.
Step 1. Power on the NVR and connect it to the network. Then, log in to the NVR’s web UI using its IP address. Go to Settings > Camera > PoE channel.
If the NVR is managed via the NVR GUI, please right-click the Live View screen on the monitor and select Settings from the pop-up Main Menu. Then go to Camera > PoE Channel.
The following figure shows an example of the NVR web UI:
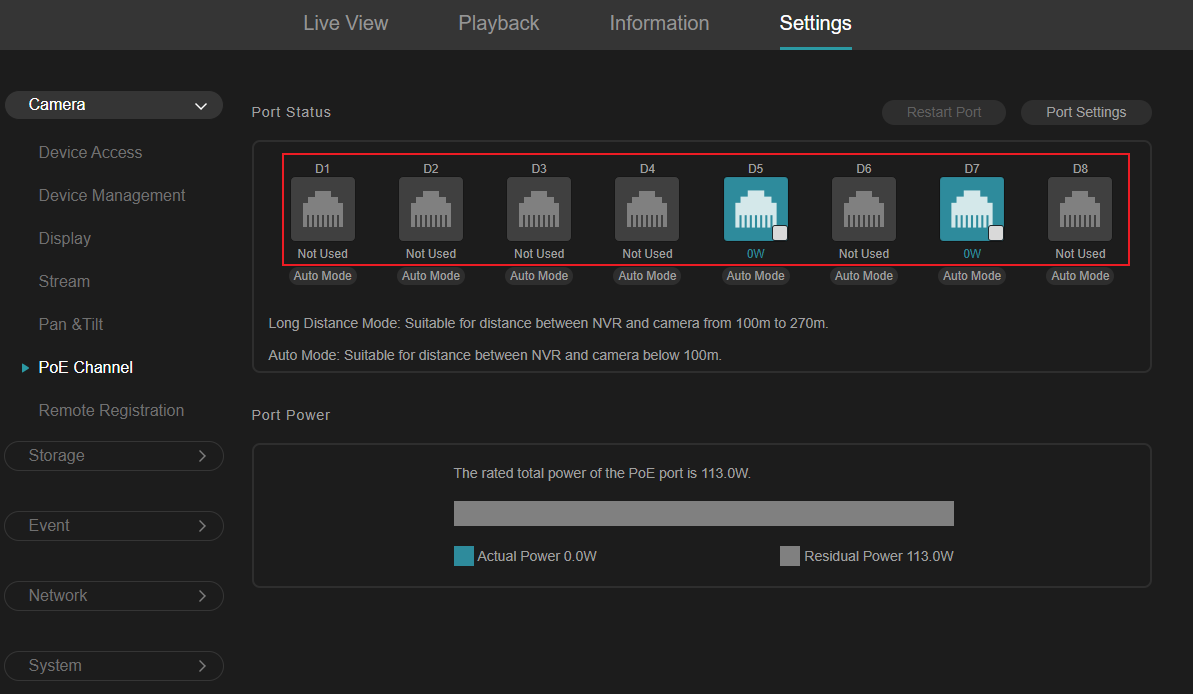
At the top of this screen, you can check the Port Status of NVR.
When the port is not connected to a device, the port status displays as "Not Used," and the port icon is grayed out. When the port is connected to a PoE device, the port icon displays a blue background with the power value shown below. When the port is connected to a non-PoE device, the port icon displays a blue background with "0W" indicated below.
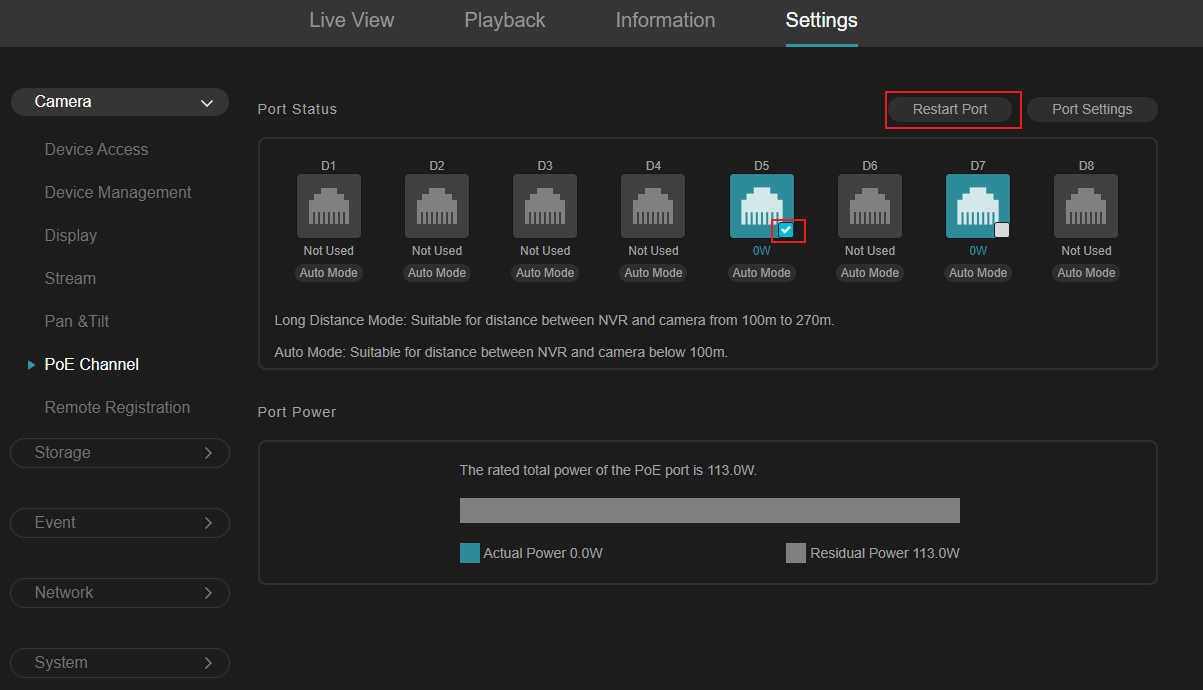
The Restart Port option will only be displayed normally when a specific port is selected. Otherwise, it will be grayed out. After restarting the port, the port LED will turn off and then turn back on, and the IPC will power off and restart.
Note: Only POE ports support this function.
When clicking the "Auto Mode" button, it will switch to "Long Distance Mode." When clicking the "Long Distance Mode" button, it will also switch back to "Auto Mode." You can choose the mode according to your needs.
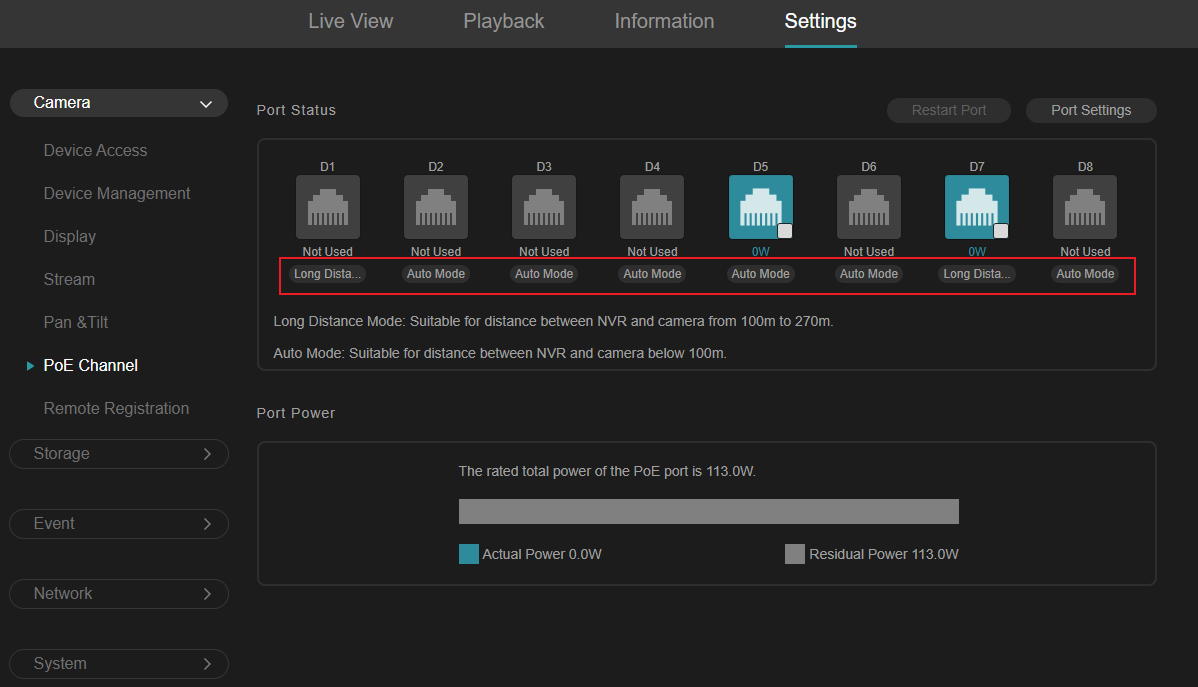
- Auto Mode: This mode is suitable for distances between the NVR and camera of less than 100m.
- Long Distance Mode: This mode is suitable for distances between the NVR and camera from 100m to 270m.
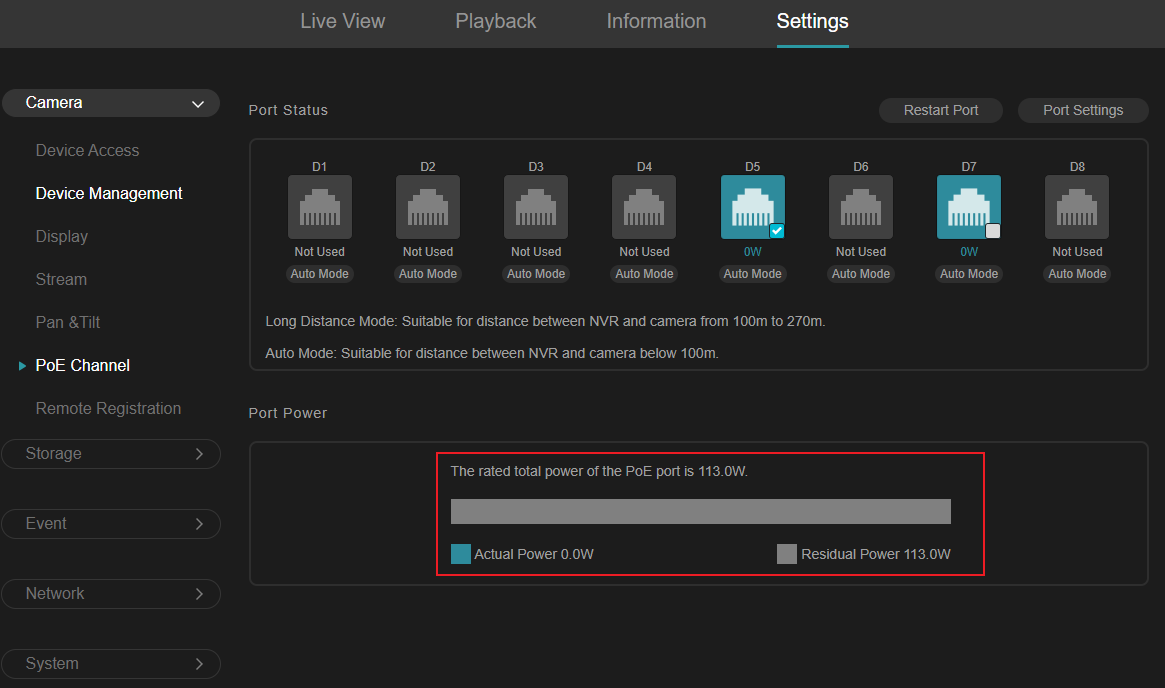
At the bottom of this screen, you can check the Port Power of the NVR. You will see the rated total power, Actual power, and Residual power of the PoE port.
Step 2. Go to Settings > Camera > PoE Channel > Port Settings to configure the port settings of the NVR. Tick the ports you want to set. You can configure a single port or batch configure multiple ports.
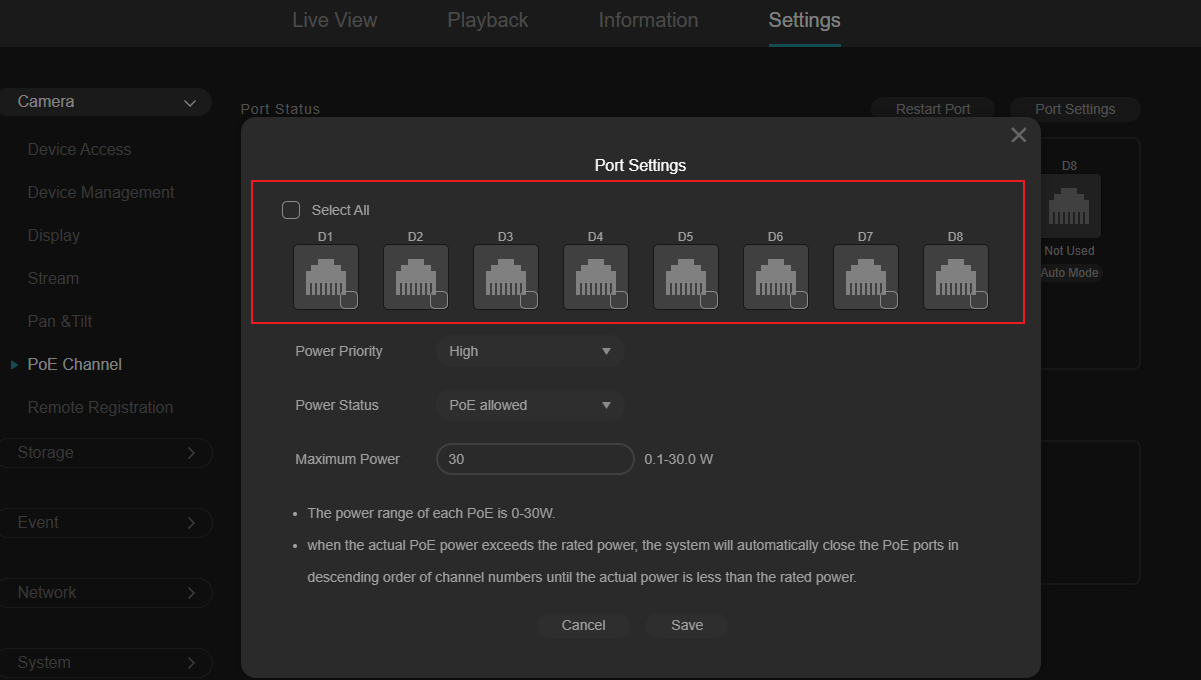
Step 3. Go to Port Settings > Power Priority to set the power supply priority of the selected PoE port.
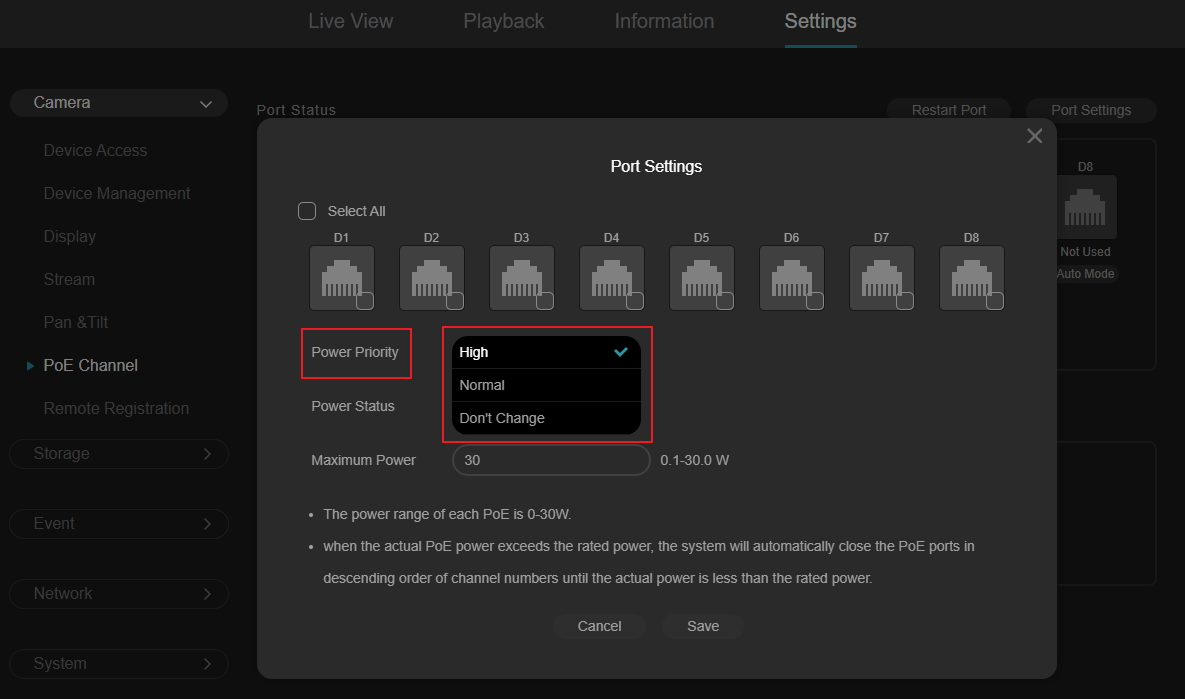
Note: Don't Change means that when configuring ports in bulk, each port will keep its current configuration unchanged.
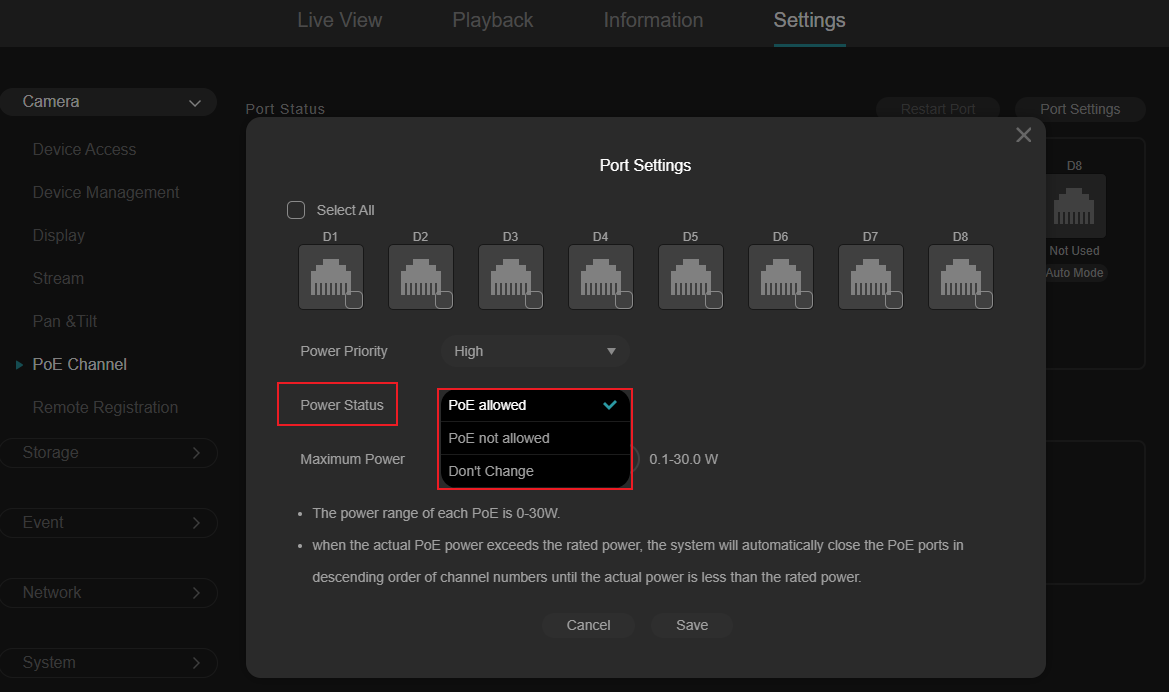
Step 4. Go to Port Settings > Power Status to configure the power status of the selected PoE port. You can turn the POE power on or off for that port.
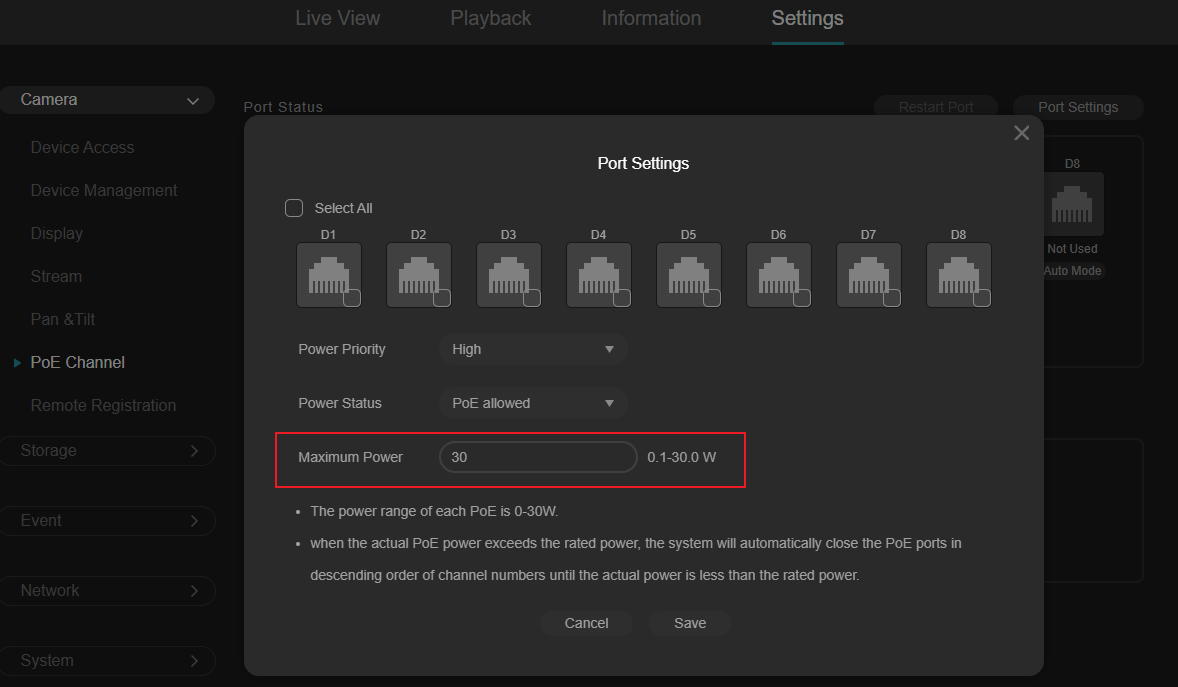
Step 5. Go to Port Settings > Maximum Power to set the maximum power value for the selected PoE port. The maximum power that can be set for each PoE port is 30W.
Note:
When the power of the port or the total power consumption exceeds the rated power, NVR will alarm to alert.
When the actual PoE power exceeds the rated power, the system will automatically close the PoE ports in descending order of channel numbers until the actual power is less than the rated power.
Conclusion
With the steps above, you have successfully configured the PoE channel on the VIGI PoE NVR.
Get to know more details of each function and configuration please go to Download Center to download the manual of your product.
Ez a GY.I.K. hasznos volt?
Véleménye segíti az oldal fejlesztését
1.0-A-package_normal_20231211023159r.png)

