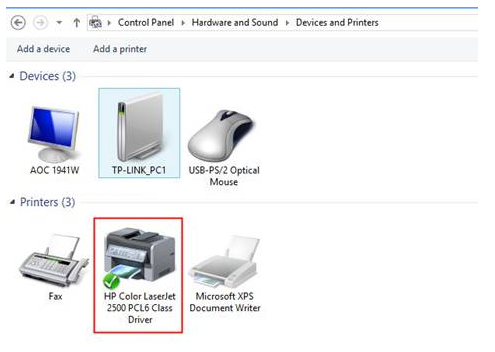
How to install a Standard TCP/IP Printer on Windows 8
User Application Requirement
Mis à jour06-29-2022 01:54:36 AM162722
Ce document concerne les modèles suivants :
TL-PS310U , TL-PS110P , TL-WPS510U , TL-PS110U
Recent updates may have expanded access to feature(s) discussed in this FAQ. Visit your product's support page, select the correct hardware version for your device, and check either the Datasheet or the firmware section for the latest improvements added to your product. Please note that product availability varies by region, and certain models may not be available in your region.
Windows 8 is a new operating system of Microsoft, it changed greatly compared with the former versions. Since it also supports TCP/IP printing, it is compatible with our Print Servers, like TL-PS110U/TL-PS110P/TL-PS310U/TL-WPS510U. Here is the configuration guide.
Note: Before the installation, please make sure the printer works fine if it is connected to computer directly.
Step 1 Please move your mouse to the right corner and you will see Search. Click it and search Control Panel.
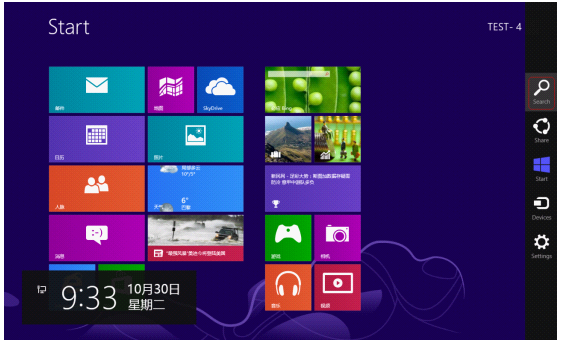
Step 2 Go to Control Panel->Hardware and Sound page, and click Advanced printer setup.
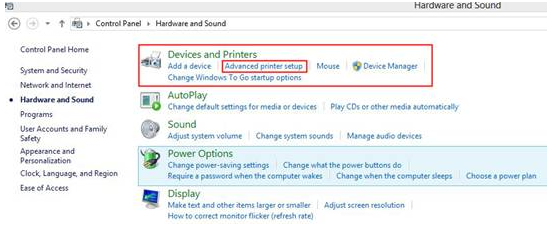
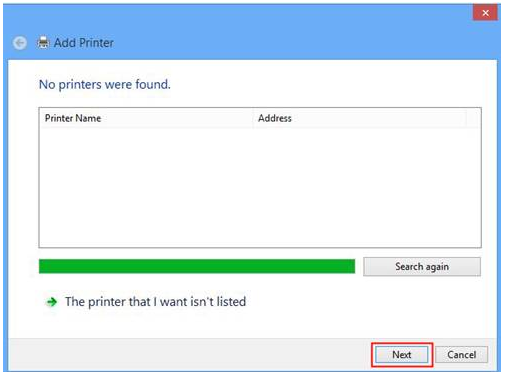
Step 3
A window will pop out to search the printers automatically, please ignore it and click Next button.
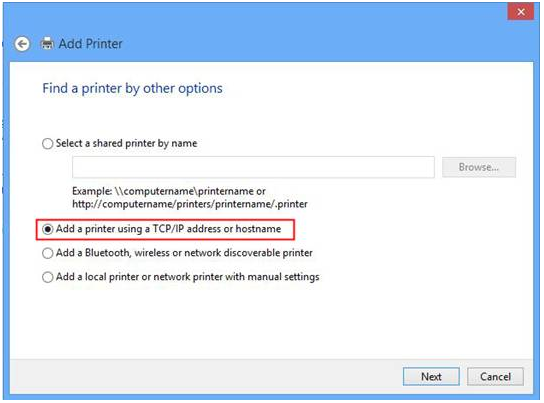
Step 4 Please Select Add a Printer using a TCP/IP address or hostname, click Next.
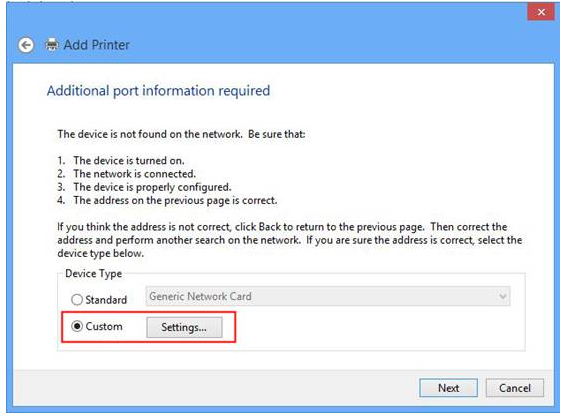
Step 5 Please select Custom and click Settings.
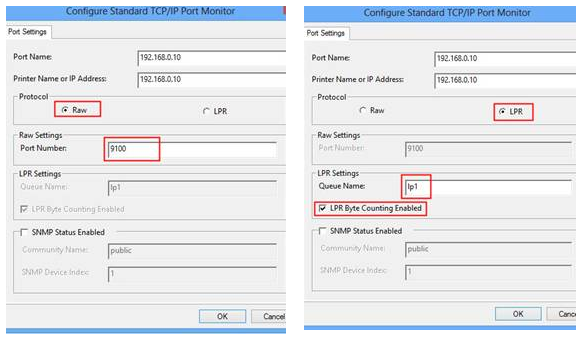
Step 6 Please type the IP address of your Print Server in Hostname or IP address. The print server’s IP should in same subnet with your router. As default, the Protocol is Raw. You can keep it still or select LPR. The two protocols support different printing languages. You can try one first, if can’t print, delete it and try another one.
Step 7 Select the correct driver for your printer. If you can’t find the model of your printer, please connect your printer to PC with USB cable and install the driver first. Click Next.
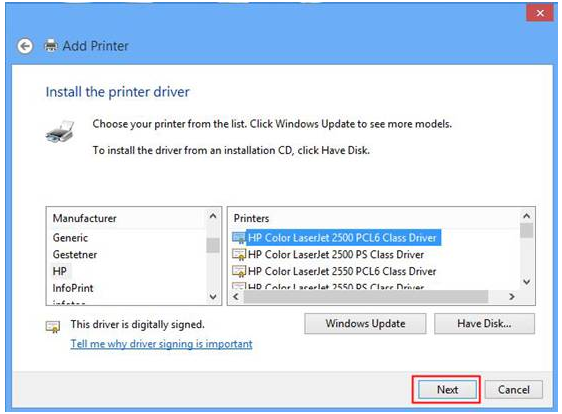
Step 8 Click Next.
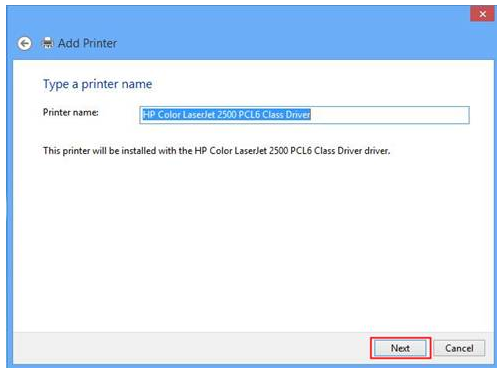
Step 9 Click Finish.
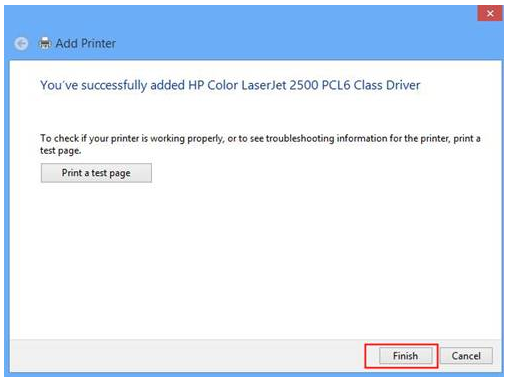
Until now, you have finished the installation. You can find the newly added Printer on Control Panel-> Hardwareand Sound-> Devices and Printers page.
Est-ce que ce FAQ a été utile ?
Vos commentaires nous aideront à améliorer ce site.
Quelle est votre préoccupation avec cet article ?
Mécontent du produit
Trop compliqué
Titre déroutant
Ne s'applique pas à moi
Trop vague
Autre
Merci
Pour nous écrire. Cliquer ici pour contacter le service support TP-Link.
Ce site Web utilise des cookies pour améliorer la navigation sur le site Web, analyser les activités en ligne et offrir aux utilisateurs la meilleure expérience sur notre site Web. Vous pouvez vous opposer à tout moment à l'utilisation de cookies. Vous pouvez obtenir plus d'informations dans notre politique de confidentialité .
Your Privacy Choices
Ce site Web utilise des cookies pour améliorer la navigation sur le site Web, analyser les activités en ligne et offrir aux utilisateurs la meilleure expérience sur notre site Web. Vous pouvez vous opposer à tout moment à l'utilisation de cookies. Vous pouvez obtenir plus d'informations dans notre politique de confidentialité .
Cookies basiques
Ces cookies sont nécessaires au fonctionnement du site Web et ne peuvent pas être désactivés dans vos systèmes.
Les cookies d'analyse nous permettent d'analyser vos activités sur notre site Web pour améliorer et ajuster les fonctionnalités de notre site Web.
Les cookies marketing peuvent être définis via notre site Web par nos partenaires publicitaires afin de créer un profil de vos intérêts et pour vous montrer des publicités pertinentes sur d'autres sites Web.