


How to implement VLAN unidirectional access through ACL configuration of Business Router
Note: This article only applies to ER7206_v1 and the router needs to be upgraded to v1.2 firmware, only supported in Standalone mode.
User’s Application Scenario
Administrators can access computers in all VLANs for data backup, while computers in other VLANs are not allowed to access the administrator's VLAN to improve data security..
How can I do that?
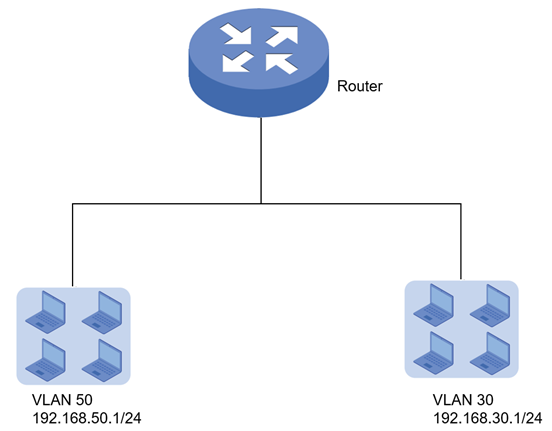
Suppose two VLANs are created on the router: VLAN 30 (192.168.30.1/24) and VLAN 50 (192.168.50.1/24), it is required that devices in VLAN 50 cannot access devices in VLAN 30, while devices in VLAN 30 can access Devices with VLAN 50.
Configuration
Step 1. Create VLAN 50 and VLAN 30 on the router.
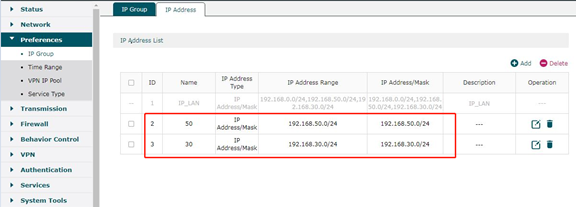
Step 2. Create IP Groups corresponding to VLAN 50 and VLAN 30.
Go to Preference----IP Group, First create an IP address range corresponding to the VLAN, and then apply the created IP address to the IP Group.
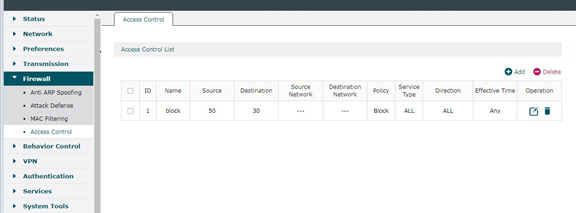
Step 3. Create an ACL to block access from VLAN 50 to VLAN 30.
Go to Firewall-----Access Control, create an ACL entry as shown in the figure below, please note that the Direction should be selected as ALL.
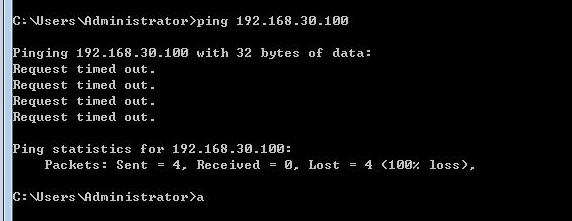
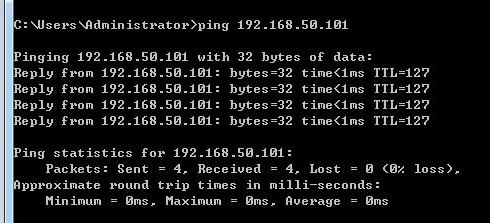
Step 4. Verification process
Devices in VLAN 50 cannot ping devices in VLAN 30, while devices in VLAN 30 can ping devices in VLAN 50.
Get to know more details of each function and configuration please go to Download Center to download the manual of your product.
Is this faq useful?
Your feedback helps improve this site.
TP-Link Community
Still need help? Search for answers, ask questions, and get help from TP-Link experts and other users around the world.