How to add multiple VIGI Cameras using the VIGI APP
Contents
Introduction
The VIGI APP is an application for mobile devices. With the VIGI APP, you can remotely view live video, manage VIGI devices, and get instant alerts. This article will introduce three different methods for adding VIGI cameras to the VIGI APP.
Requirements
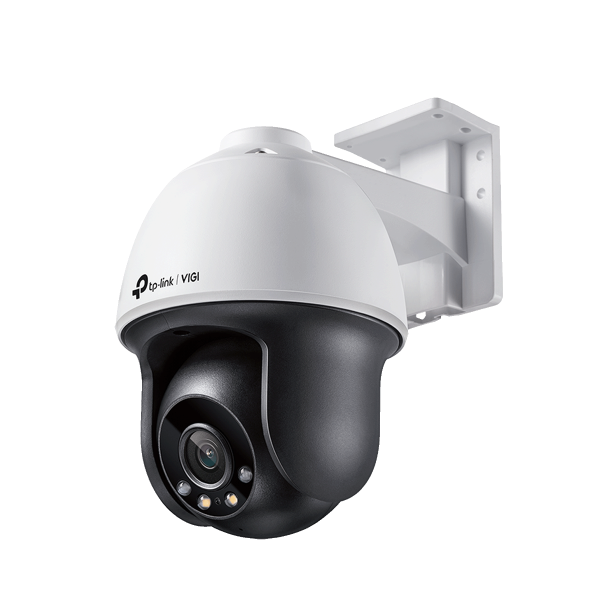
- VIGI Camera
- VIGI APP
Configuration
Before configuration, please download the latest VIGI APP from the Google Play or Apple APP Store. Then you can log in to the VIGI APP using your TP-Link ID and select My VIGI (Personal Edition) as the organization. After that, you can choose from three methods to configure cameras: Scan/Add Device, Auto discovery, or Manually add.
Note: For Apple devices, please ensure ”allows local network access” is enabled in the phone settings for the VIGI APP.
Method 1: Scan/Add Device
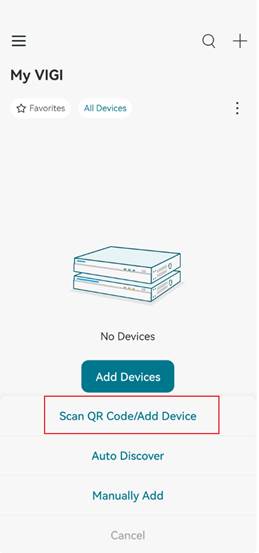
Step 1. To add your VIGI devices successfully, ensure that your VIGI devices are connected to the internet. Open the VIGI APP, log in with your TP-Link ID, and click Add Devices or the plus (+) sign (at the upper right corner) and choose Scan/Add device.
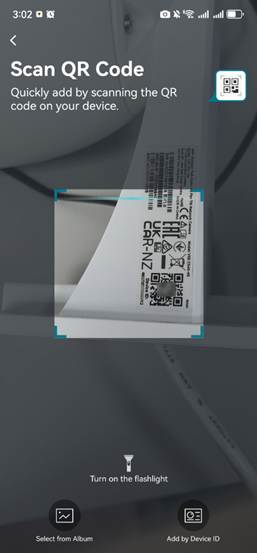
Step 2. Scan the QR code of the VIGI device to discover and add the camera,
Note: The device QR code is on the label sticker at the back or rear panel of the camera.
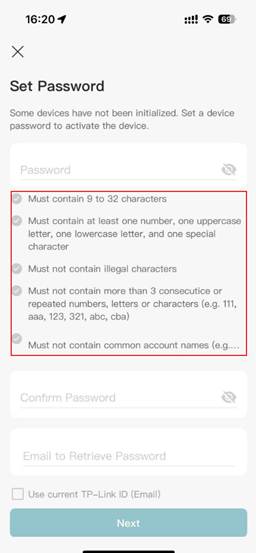
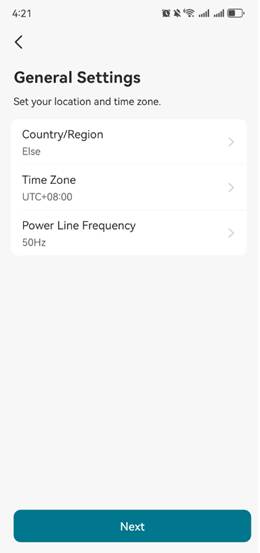
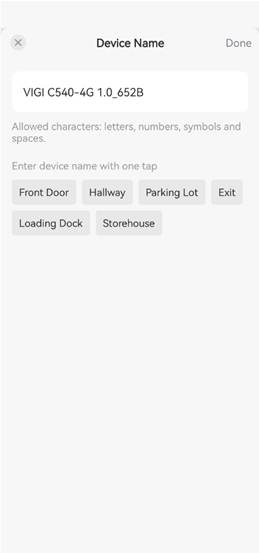
Step 3. After the scanning device is successfully detected, you will hear a beep. Then you can set the password, location, and time zone of the VIGI camera. You can also customize the device name of the camera.
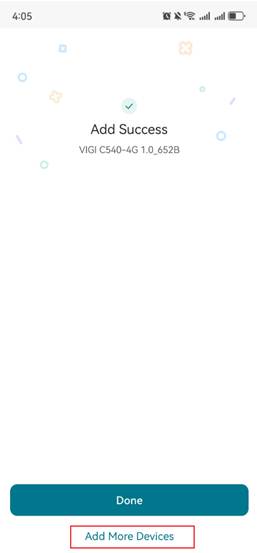
Step 4. Click “Add More Devices” to repeat the process to add another VIGI Camera or click Done to finish the configuration.
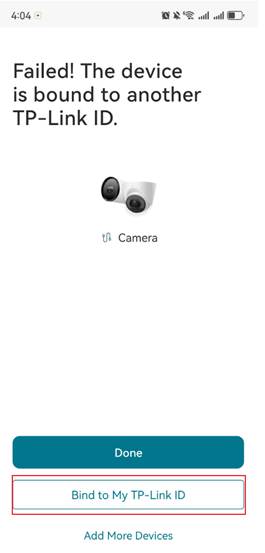
Note: If the device has been previously bound to another TP-Link ID, an error will be displayed: Failed! The device is bound to another TP-Link ID. Please choose Bind to My TP-Link ID to continue and add the camera to your network.
Method 2: Auto Discover
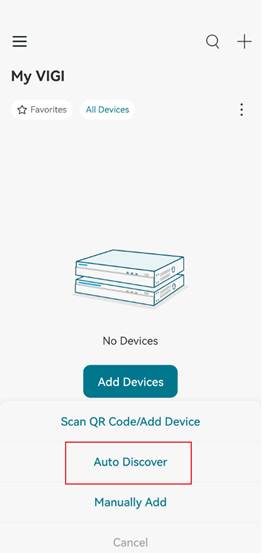
Step 1. To add your VIGI devices successfully, ensure that your VIGI devices are in the same subnet as your phone. Open the VIGI App, log in with your TP-Link ID, click Add Devices or the plus (+) sign (at the upper right corner) and choose Auto Discover. The system will auto-search the cameras in the same network.
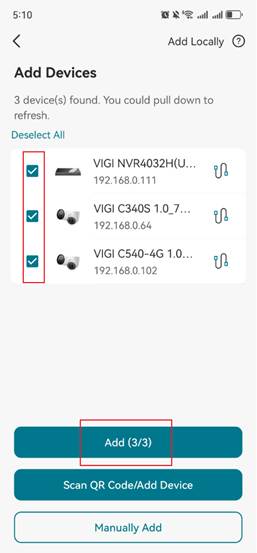
Step 2. Select the desired cameras and follow the APP instructions to add your cameras.
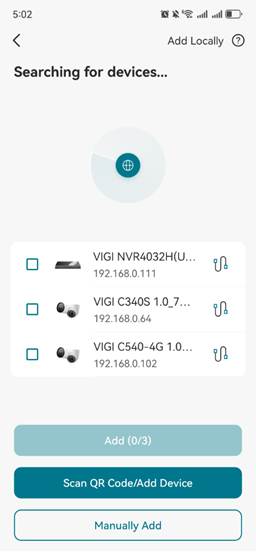
After the search is successful, select the device and click the Add button.
Step 3. As with Method 1, you can set up the camera password, your location, and time zone according to the APP instructions, and customize the name of your VIGI camera.
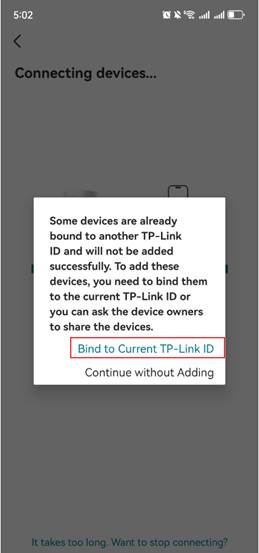
Note: If any of these cameras are already bound to other TP-Link IDs, select Bind to Current TP-Link ID to continue.
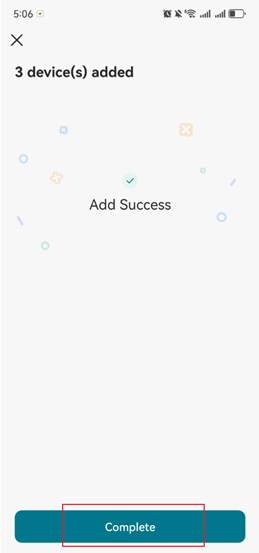
Step 4. Tap Complete to finish the set up. Now you can view and manage the camera through the APP.
Method 3: Manual Add
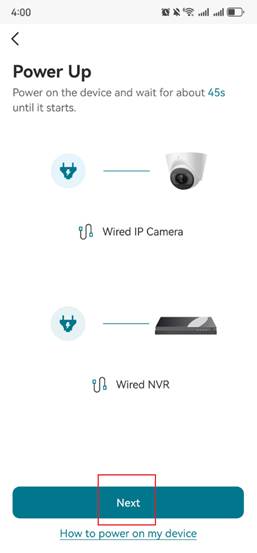
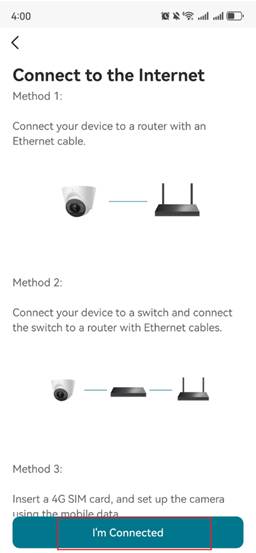
Step 1. To add your VIGI devices successfully, ensure that your VIGI devices are connected to the internet. Open the VIGI App, log in with your TP-Link ID, click Add Devices or the plus (+) sign and choose Manually Add.
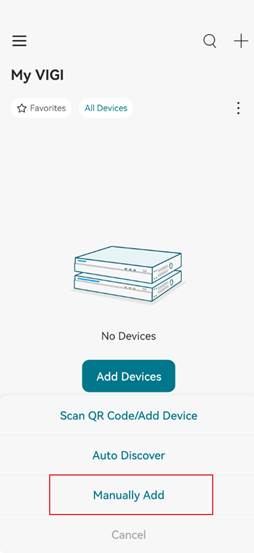
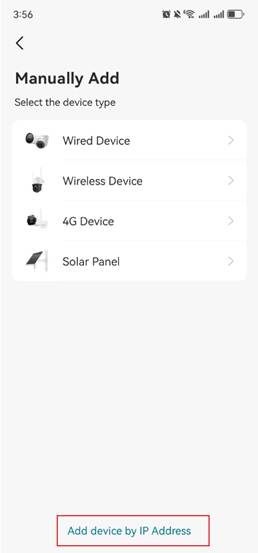
Step 2. Select the device type based on your needs and follow the APP instructions.

Step 3. Select the device you want to add. As with Method 1, you can set up the camera password, your location, and time zone according to the APP instructions, and customize the name of your VIGI camera.
Step 4. Tap Complete to finish the setup. Now you can view live video and manage the camera.

Alt. Add device by IP address.
If you know the IP address of the camera, you can manually add it using “Add device by IP address” feature at the bottom of the Manually Add page, and follow the same APP instructions to set up and manage the camera.
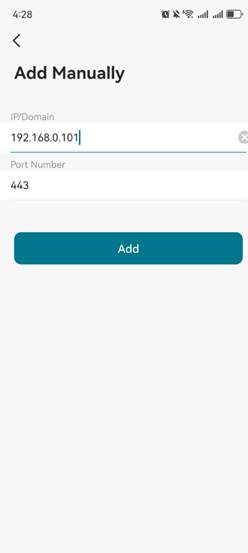
Note: By default, HTTPS port of the VIGI Camera is 443.
Verification
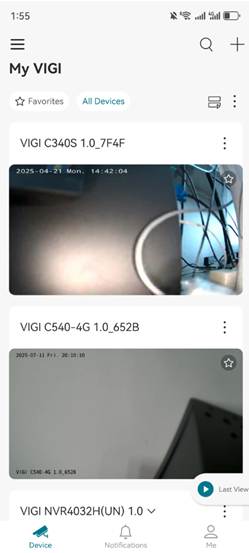
After successful configuration, you can click on the device on the main page to view the live video and perform other configurations.
Conclusion
Adding multiple VIGI devices in the VIGI APP is designed to be simple and easy, without relying on an additional monitor or computer. Please ensure that both the VIGI device and your mobile phone are properly connected to the network.
Get to know more details of each function and configuration please go to Download Center to download the manual of your product.
QA
What should I do if the VIGI APP fails to see VIGI camera?
Re: Make sure that the camera is properly connected to the network and has obtained a valid IP address. If the camera does not appear on the network, try using a shorter Ethernet cable (if necessary) and check for any advanced settings (such as VLAN or access control settings) that may be blocking it.
Is this faq useful?
Your feedback helps improve this site.
TP-Link Community
Still need help? Search for answers, ask questions, and get help from TP-Link experts and other users around the world.