How do I upgrade the firmware of my EAP device via web browser?

EAP225-Wall , EAP115 V4 , EAP225-Outdoor , EAP245 , EAP320 , EAP220 , EAP120 , EAP620 HD , EAP110 V4 , EAP115 , EAP610 , EAP655-Wall , EAP225 V3 , EAP615-Wall , EAP110-Outdoor V3 , EAP660 HD , EAP225 V2 , EAP110 , EAP330 , EAP235-Wall , EAP225 , EAP110-Outdoor , EAP650-Wall , EAP610-Outdoor , EAP115-Wall
Recent updates may have expanded access to feature(s) discussed in this FAQ. Visit your product's support page, select the correct hardware version for your device, and check either the Datasheet or the firmware section for the latest improvements added to your product. Please note that product availability varies by region, and certain models may not be available in your region.
Notice:
- It is recommended to back up the current settings so that you can restore the settings after the upgrade.
- It is recommended to upgrade the firmware with Chrome and Firefox.
- Do NOT turn off the power or cut down the Ethernet cable during upgrade process.
Follow the steps below to upgrade the firmware of your EAP device:
Step 1 Go to the website https://www.tp-link.com and search your EAP model. Download the proper firmware file on the support page of the EAP. Use decompression software, such as WinZIP or WinRAR to extract the firmware file to a folder. The firmware file is a .bin file.
Step 2 Power on the EAP and connect to the SSID of the EAP wirelessly.
Note:
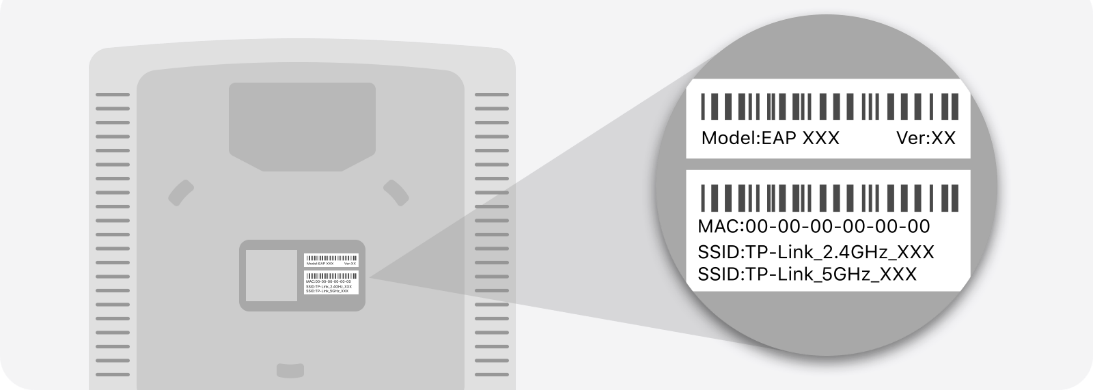
If your EAP is a brand new EAP, use the default SSID (format: TP-Link_2.4GHz/5GHz_XXXXXX) printed on the product label.
Step 3 Launch a web browser and enter http://tplinkeap.net in the address bar.
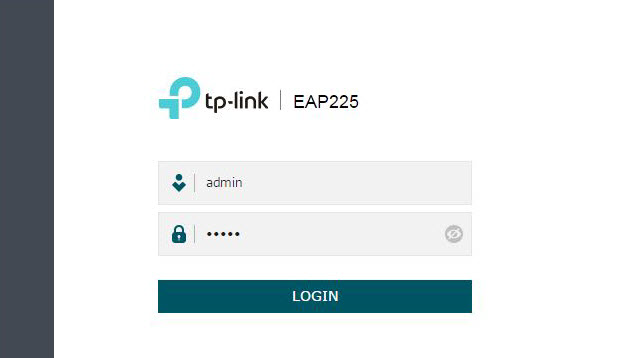
Step 4 Enter the username and password of your EAP to log in.
Note:
If your EAP is a brand new EAP, use the default username and password that are both admin.
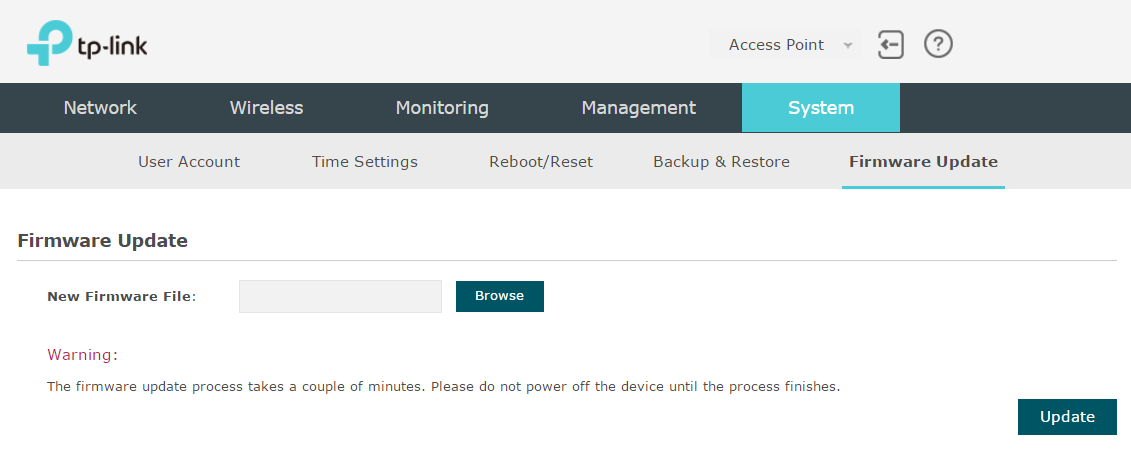
Step 5 Go to the System > Firmware Upgrade page. Click the button, locate and choose the correct firmware file from your host. Then click the
button to update the firmware of the EAP. After upgraded, the EAP will be rebooted automatically.
Buscando mas
¿Es útil esta pregunta frecuente?
Sus comentarios nos ayudan a mejorar este sitio.
¿Cuál es tu preocupación con este artículo?
- Insatisfecho con el producto
- Muy complicado
- Titulo confuso
- Eso no aplica a mi
- Demasiado vago
- Otro
Gracias
Agradecemos sus comentarios.
Haga clic aquí para comunicarse con el soporte técnico de TP-Link.
Este sitio utiliza cookies. Si continúa navegando por el sitio, acepta el uso que hacemos de las cookies. No volver a mostrar Más información .
Your Privacy Choices
Este sitio utiliza cookies. Si continúa navegando por el sitio, acepta el uso que hacemos de las cookies. No volver a mostrar Más información .
Cookies basicas
TP-Link
SESSION, JSESSIONID, accepted_local_switcher, tp_privacy_banner, tp_privacy_base, tp_privacy_marketing, tp_top-banner, tp_popup-bottom, tp_popup-center, tp_popup-right-middle, tp_popup-right-bottom, tp_productCategoryType
Youtube
id, VISITOR_INFO1_LIVE, LOGIN_INFO, SIDCC, SAPISID, APISID, SSID, SID, YSC, __Secure-1PSID, __Secure-1PAPISID, __Secure-1PSIDCC, __Secure-3PSID, __Secure-3PAPISID, __Secure-3PSIDCC, 1P_JAR, AEC, NID, OTZ
Zendesk
OptanonConsent, __cf_bm, __cfruid, _cfuvid, _help_center_session, _pendo___sg__.<container-id>, _pendo_meta.<container-id>, _pendo_visitorId.<container-id>, _zendesk_authenticated, _zendesk_cookie, _zendesk_session, _zendesk_shared_session, ajs_anonymous_id, cf_clearance
Cookies de análisis y marketing
Las cookies de análisis nos permiten analizar sus actividades en nuestro sitio web para mejorar y adaptar la funcionalidad de nuestro sitio web.
Nuestros socios publicitarios pueden configurar las cookies de marketing a través de nuestro sitio web para crear un perfil de sus intereses y mostrarle anuncios relevantes en otros sitios web.
Google Analytics y Google Tag Manager
_gid, _ga_<container-id>, _ga, _gat_gtag_<container-id>
Google Ads y DoubleClick
test_cookie, _gcl_au