How to export or back up recordings from VIGI NVR GUI
Contents
Export recording from the Playback page
Export recording from the Export File page
Introduction
You can export the recordings stored on the hard drive according to your needs. These recordings can be played on your media devices.
Requirements
- VIGI NVR
- Monitor
- External storage device
Configuration
To back up the recordings, an external storage is required. Please prepare an external storage device and plug it into the USB slot of the NVR. Please connect your monitor to the HDMI or VGA port that it supports.
Export recording from the Playback page
In Playback, you can effortlessly search for the desired recordings based on channel, time, recording types, tags, and events, and back them up in batches. Please follow the steps below to search for and back up recordings.
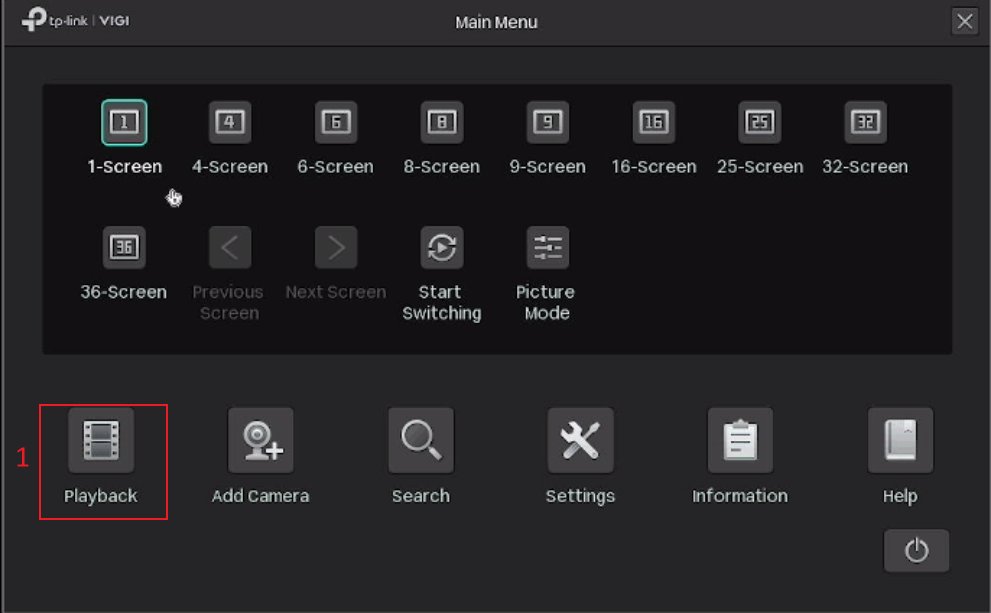
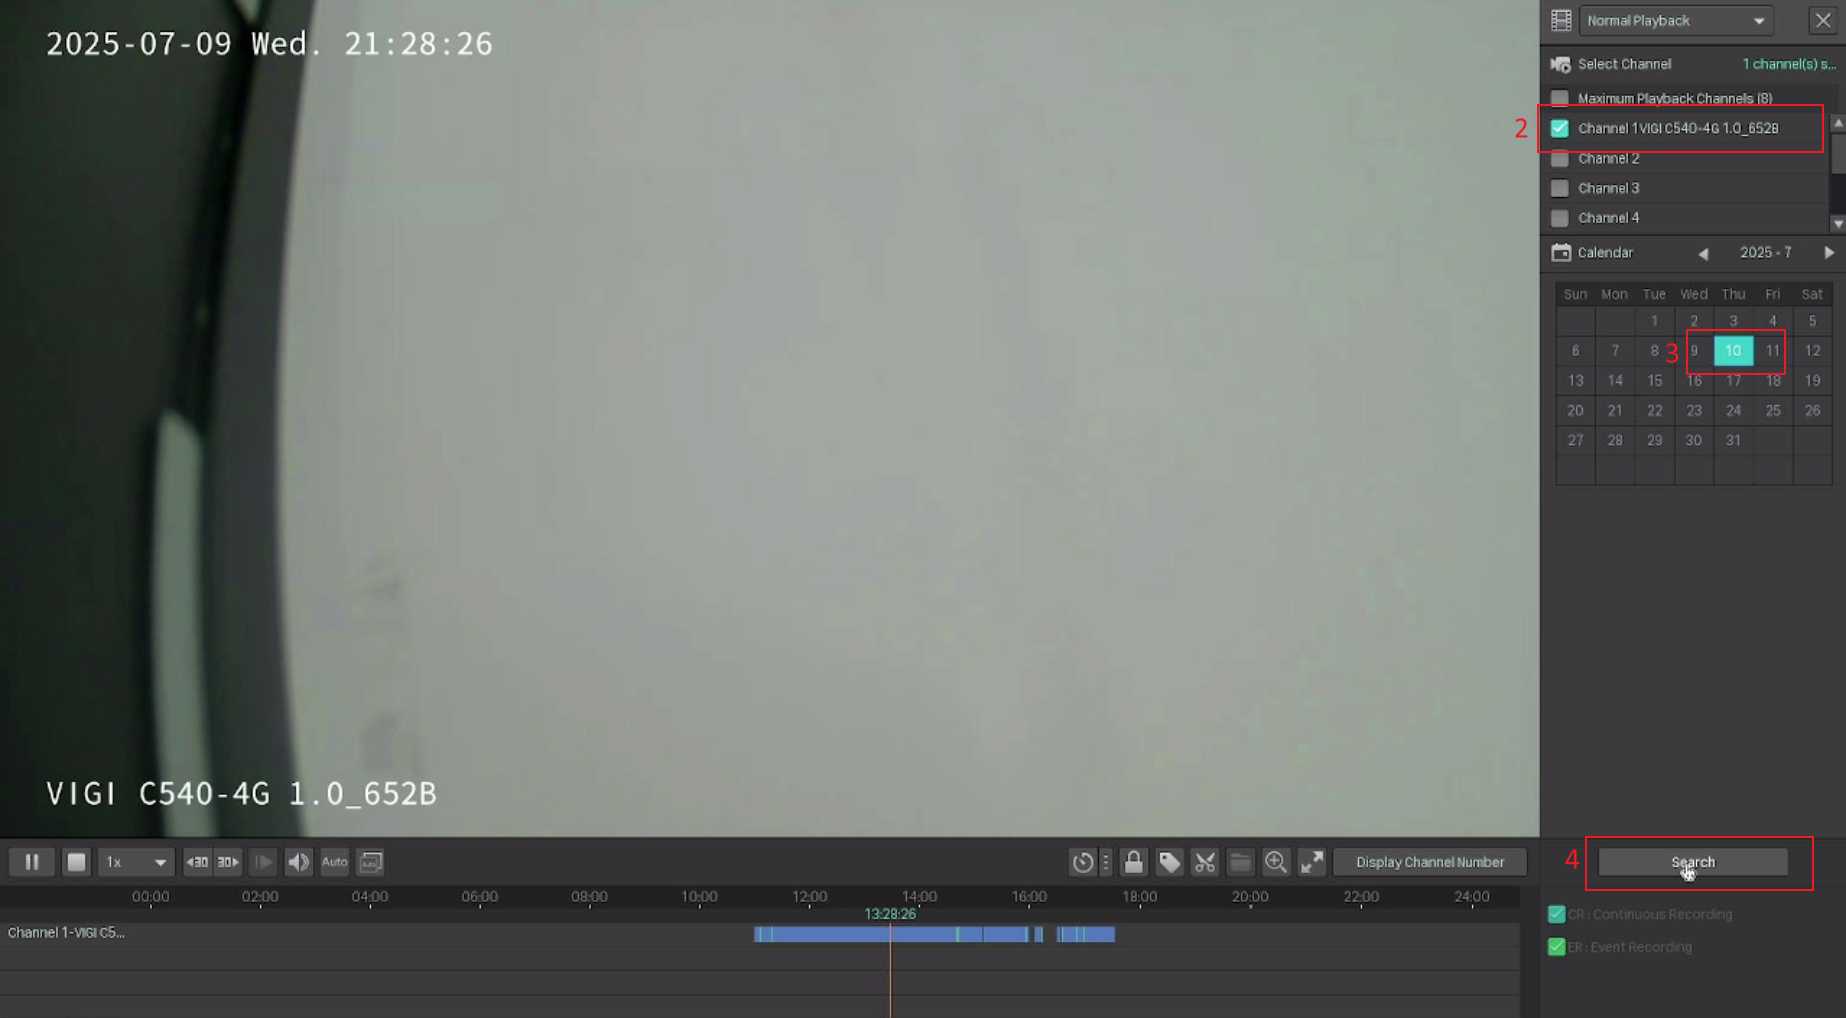
Step 1. Right-click to open the Main Menu, go to Playback, specify the playback mode, channels, and time range, then click Search to search for recordings.
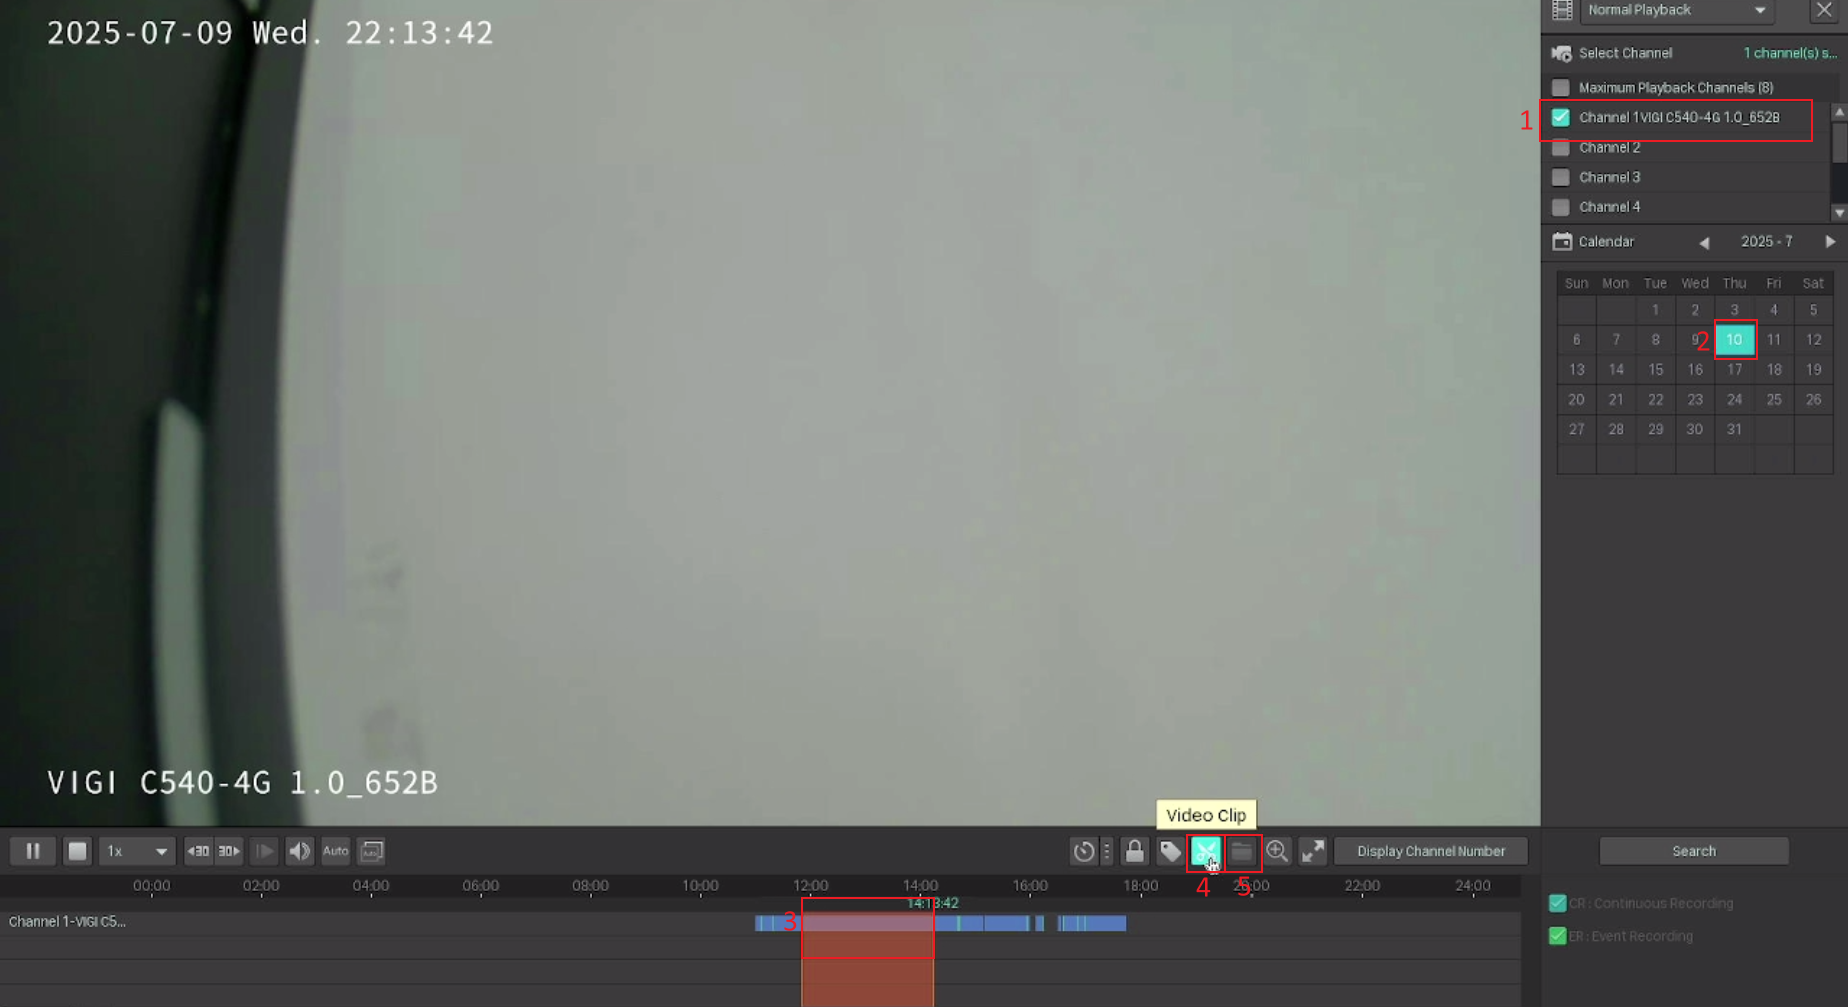
Step 2. The recording files are listed on the right panel. Click the checkbox to select the recordings to be exported, and click Export Recordings. Specify the path to export the recordings. Click Export Recordings and wait until the export is completed.

Note: You can also click the scissors icon (Video Clip), select any period on the timeline to produce a clip, then click on the Export Clip next to the Video Clip to export it.
Export recording from the Export File page
Follow the steps below to export recordings.
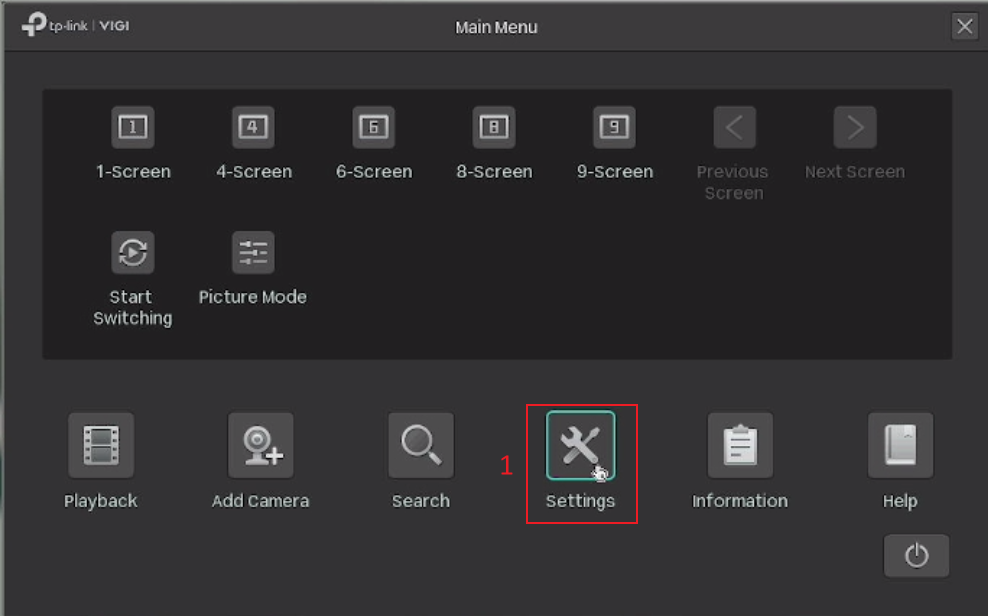
Step 1. Right-click to open the Main Menu. Go to Settings > Storage > Export File. Select the camera channel, time, and type to filter the video.
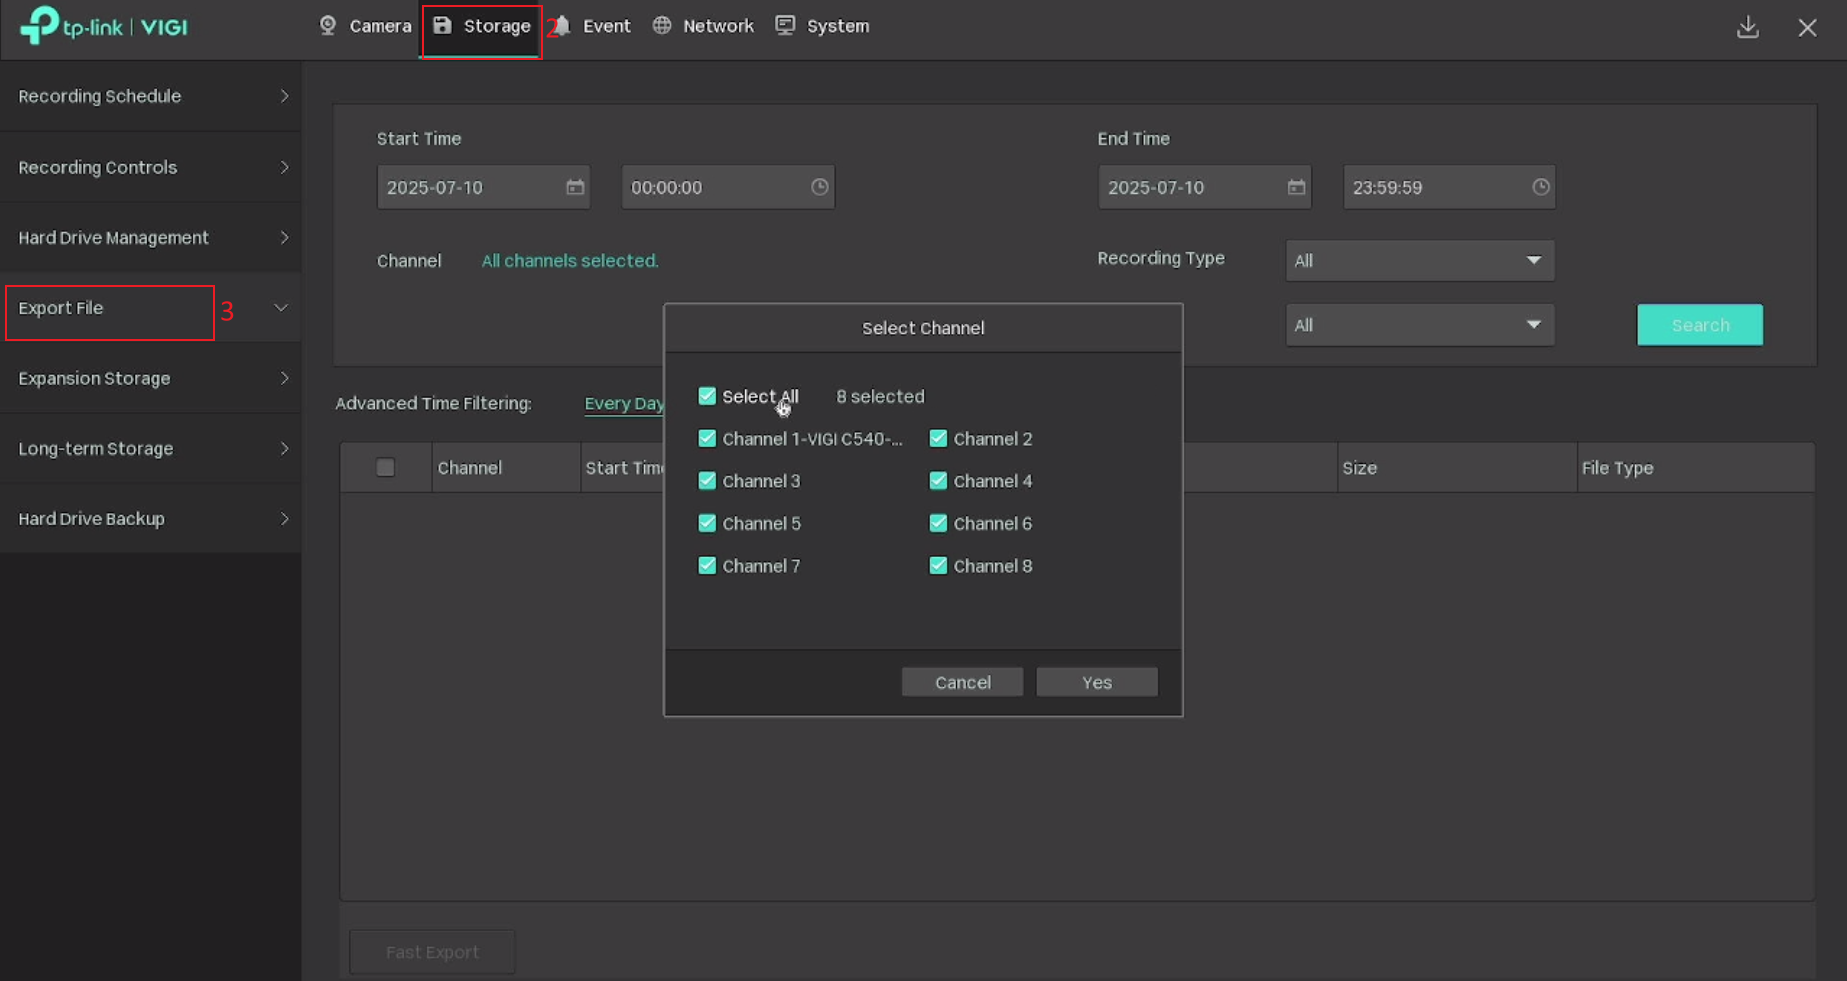
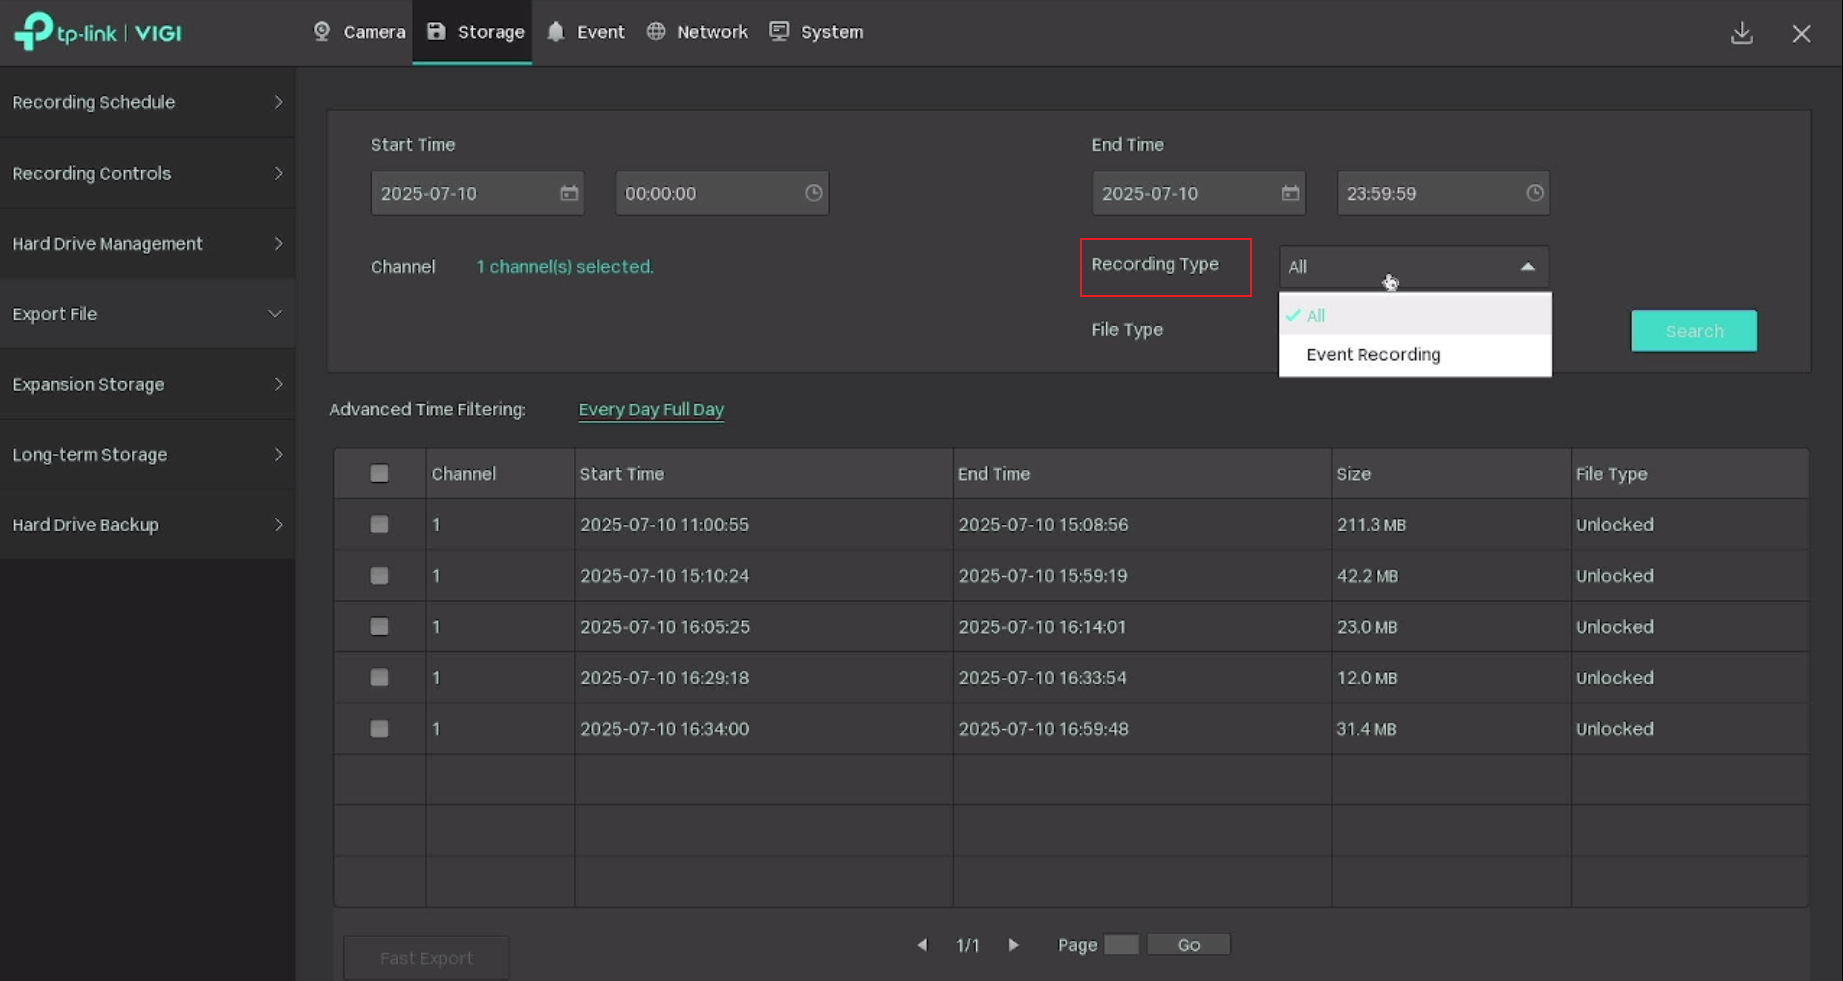
You can choose the Recording Type and File Type according to your needs. In the recording type, you can also choose to export only Event Recording if you don't want to export all recordings.

Note:
All: Display the locked and unlocked files.
Unlocked: Files will be overwritten when loop recording is enabled.
Locked: Files will not be overwritten when loop recording is enabled.
Step 2. Select the recordings and click the Fast Export.
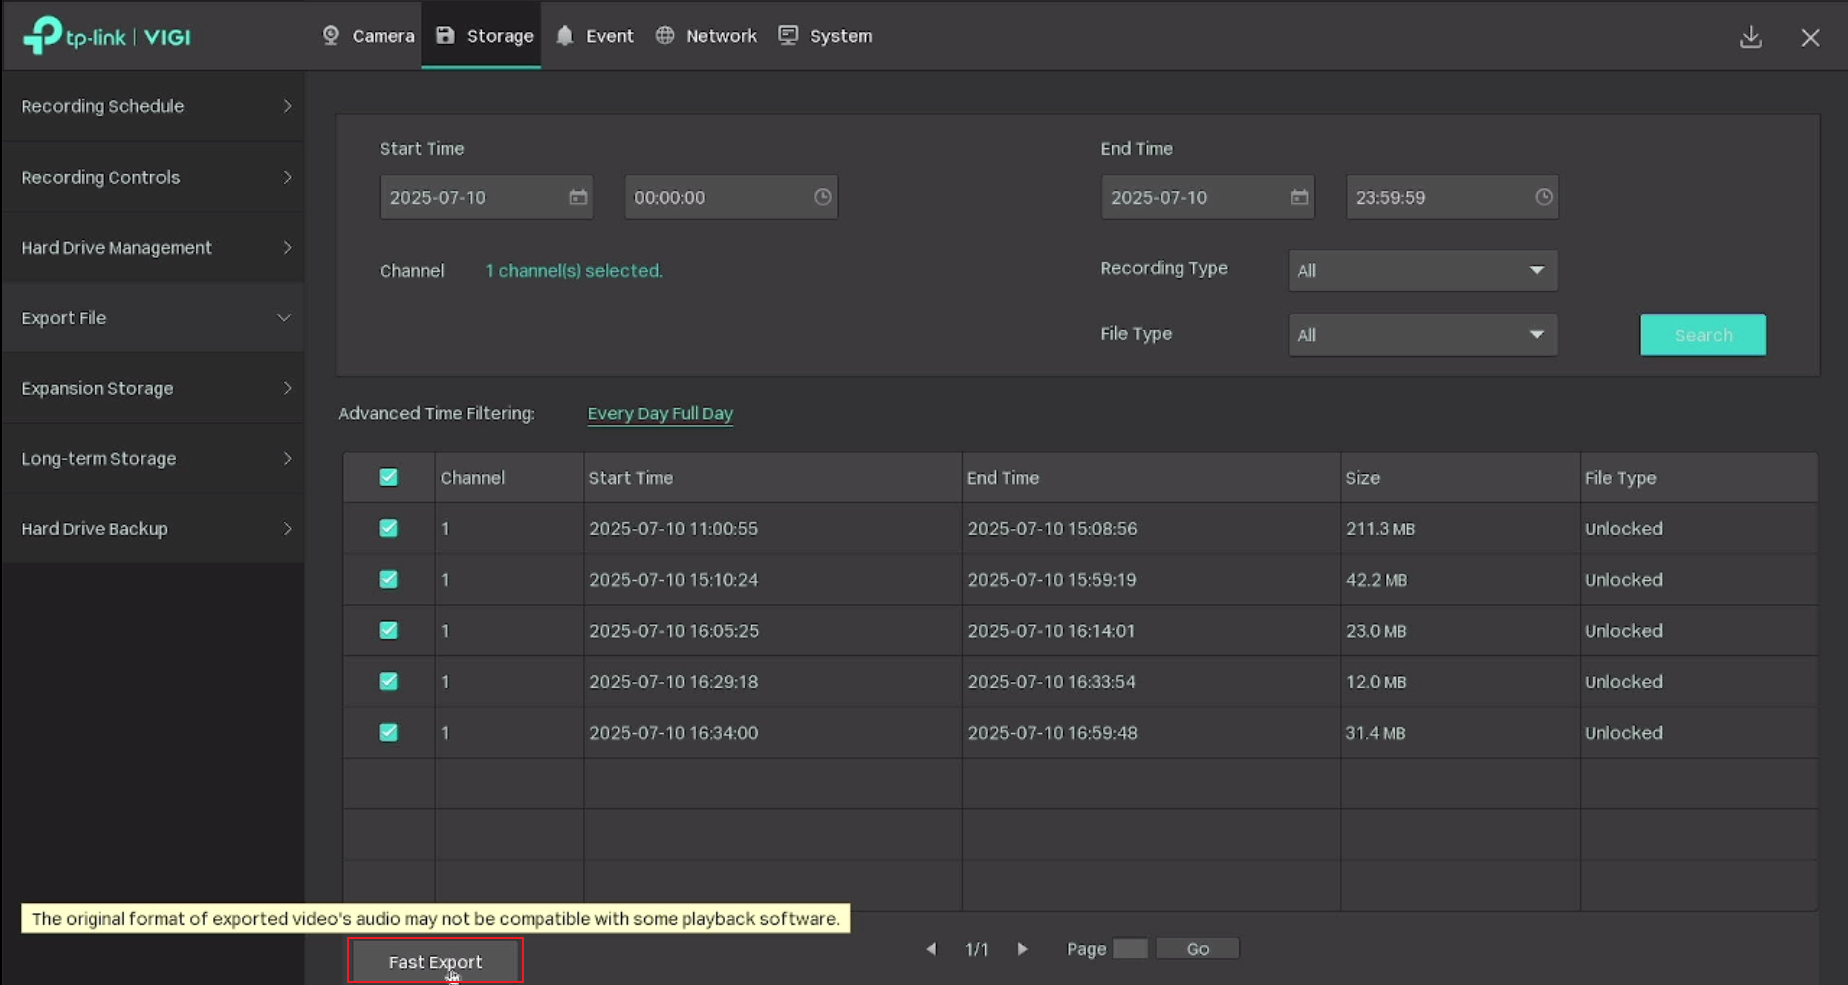
Note: The format of the audio in exported videos may be incompatible with some playback software.
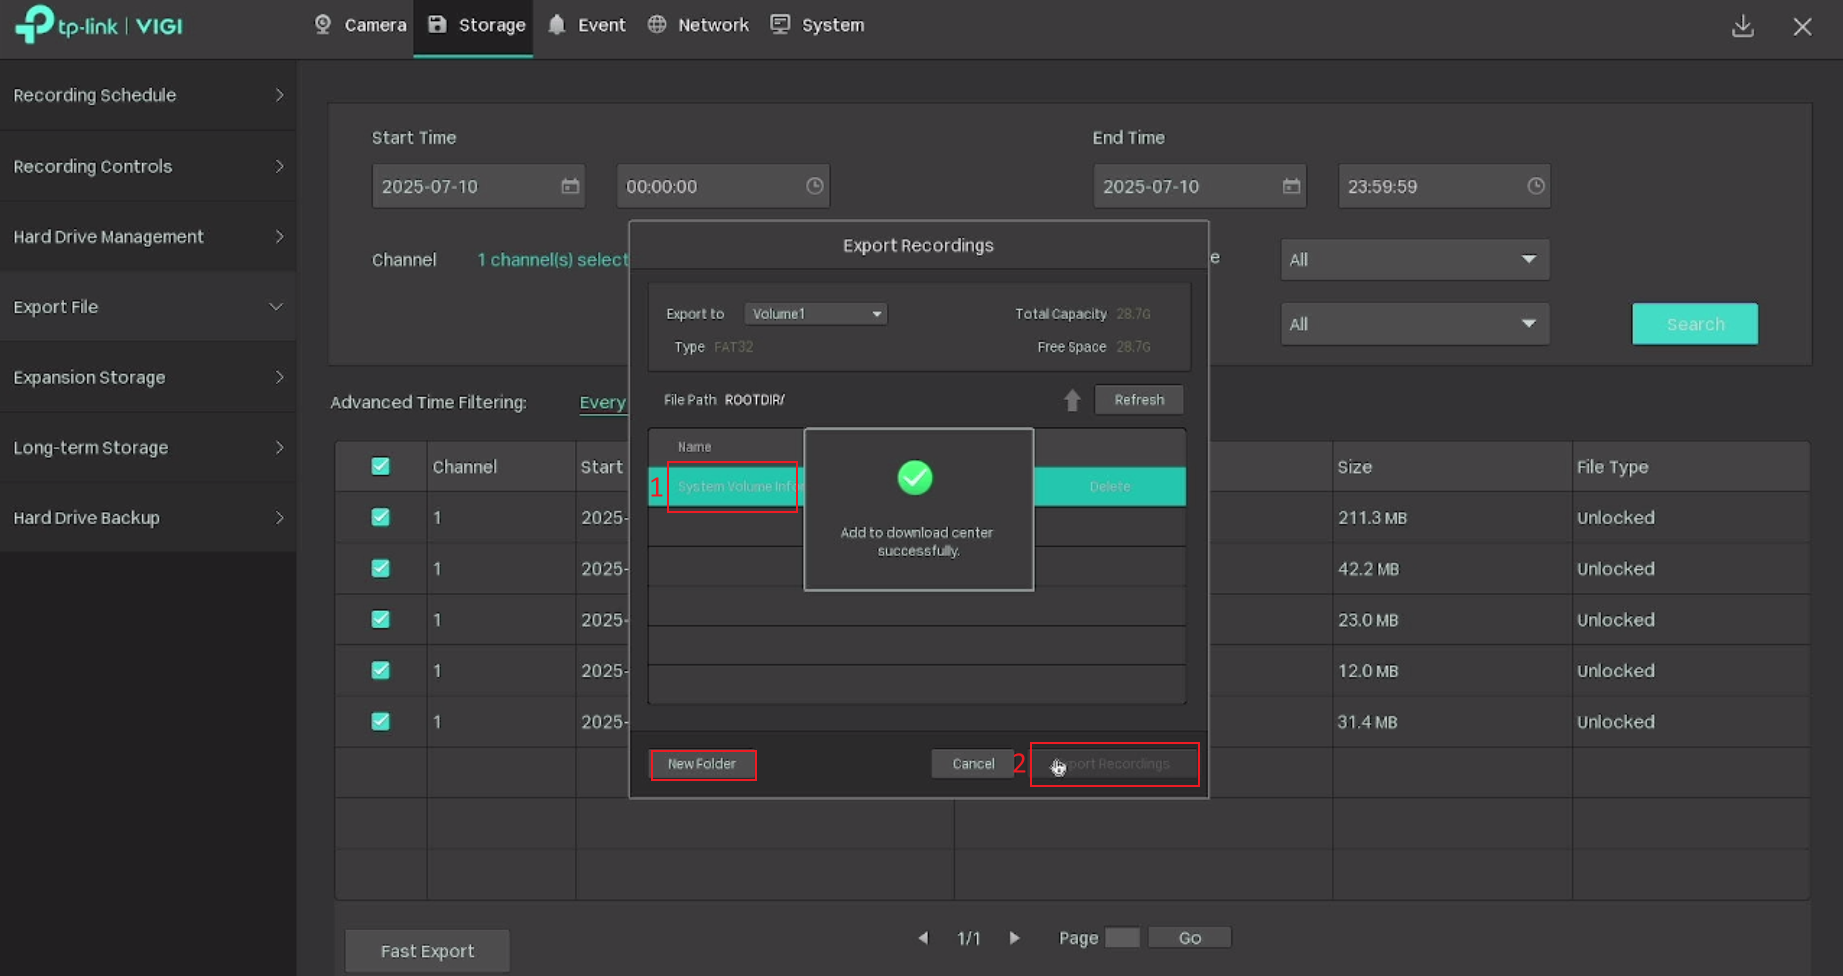
Step 3. Select the folder or create a new one, then click Export recordings to transfer the files to your USB drive.
Conclusion
Now you have learned how to export recordings from the NVR GUI.
Get to know more details of each function and configuration please go to Download Center to download the manual of your product.
Is this faq useful?
Your feedback helps improve this site.


TP-Link Community
Still need help? Search for answers, ask questions, and get help from TP-Link experts and other users around the world.