How to configure Parental Controls on AC VDSL/ADSL Modem Router
Introduction
This article provides step-by-step instructions for configuring Parental Controls on AC VDSL/ADSL Modem Router via web interface and Tether App.
Configuration
There are currently two methods of the Parental Controls configuration. Please follow the instructions under the scenario that corresponds to your configuration method. Here we use the Archer VR2100v as an example.
Scenario 1: Via web-based management page
Step 1. Log in to the web interface of the modem router.
Step 2. Go to Basic or Advanced > Parental Controls and enable Parental Controls.
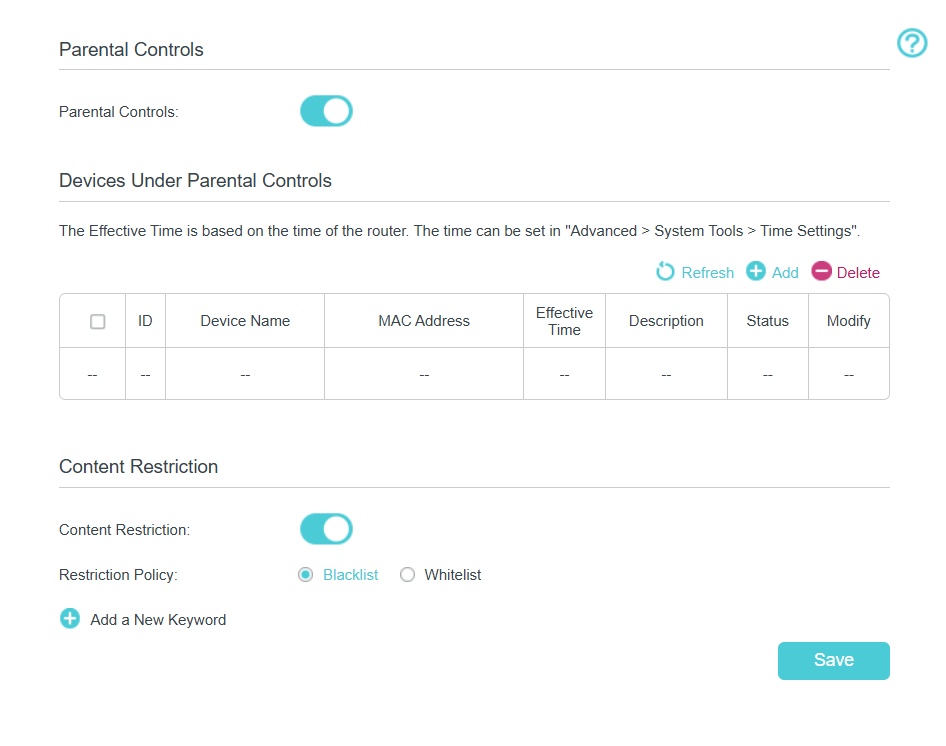
Step 3. Click Add.
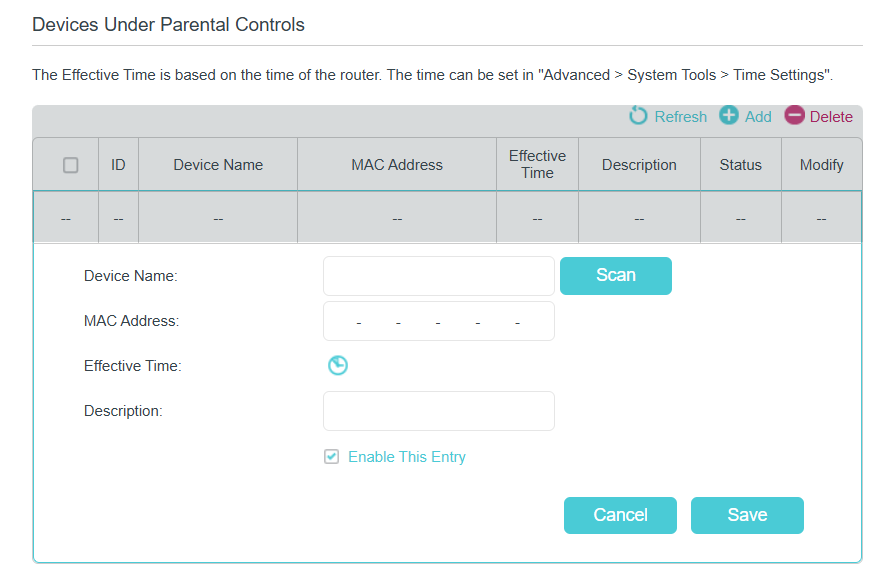
Step 4. Click Scan, and add the device to be controlled. Or enter the Device Name and MAC Address manually.
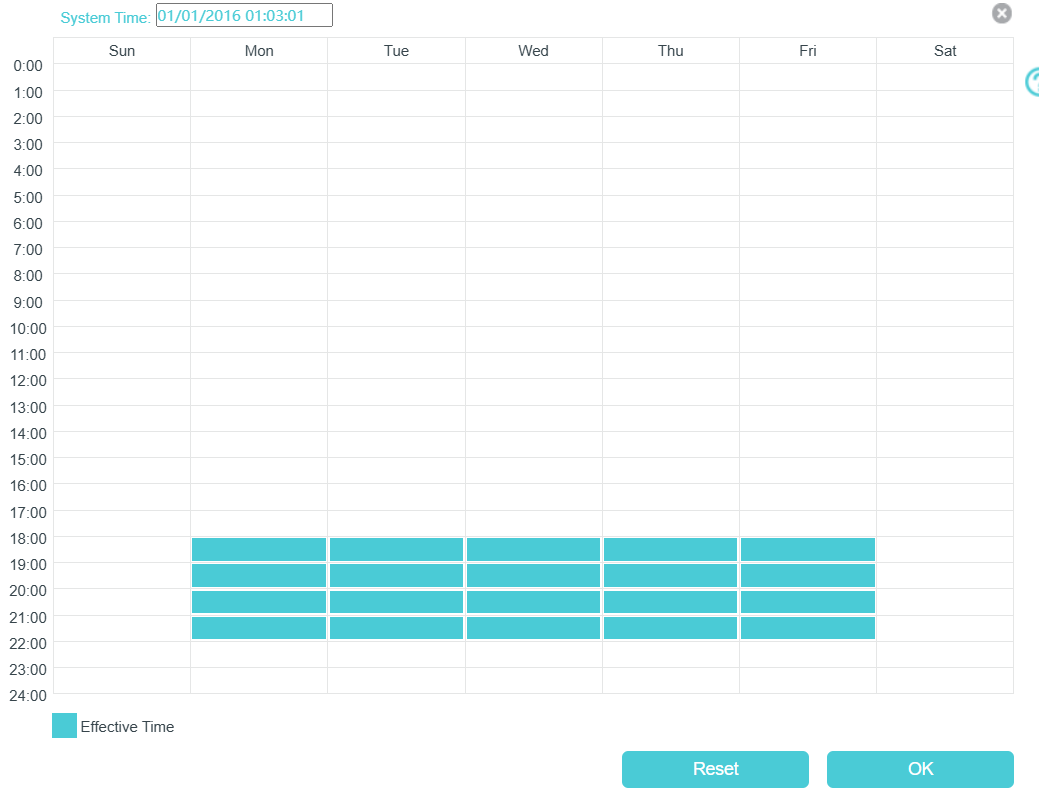
Step 5. Click the icon to set the Effective Time. Drag the cursor over the appropriate cell(s) and click OK.
The effective time is the time that allows or blocks to access certain websites that depend on Whitelist or Blacklist mode.
Step 6. Enter a Description for the entry.
Step 7. Select the check box to enable this entry and click OK.
Step 8. Enable Content Restriction and select the restriction mode. Click Add a New Keyword. You can add many keywords for both Blacklist and Whitelist. Below are some sample entries to allow access.
- In Blacklist mode, the controlled devices cannot access any websites containing the specified keywords during the Effective Time period. Outside the Effective Time period, the controlled devices can access any website.
- In Whitelist mode, the controlled devices can only access websites containing the specified keywords during the Effective Time period. Outside the Effective Time period, the controlled devices cannot access any websites.
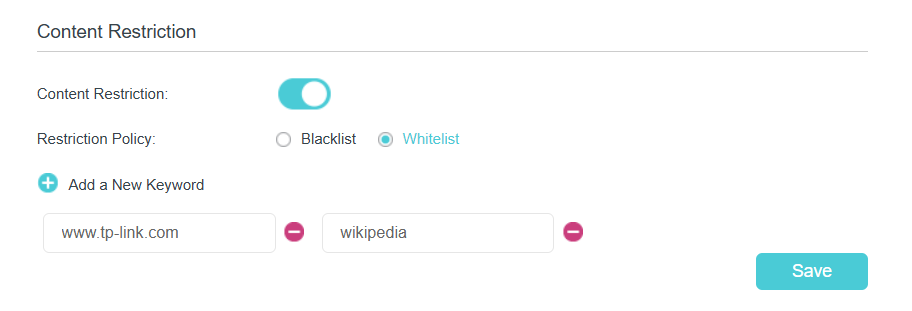
- Enter a web address (for example, www.tp-link.com) or a web address keyword (for example, wikipedia) to only allow or block access to the websites containing that keyword.
- Specify the domain suffix (for example, .edu or .org) to allow access only to the websites with that suffix.
Done! Now you can control your children's internet access according to your needs.
Scenario 2: Via Tether app
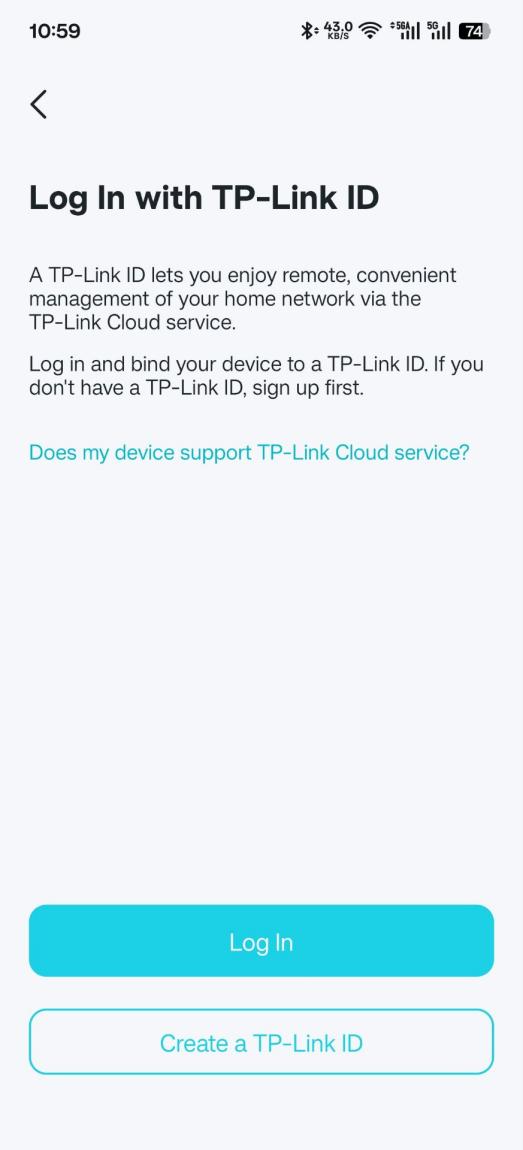
Step 1. Launch the Tether app. Log in your TP-Link ID. If you don't have one, please click on Sign Up to create a TP-Link Cloud ID.
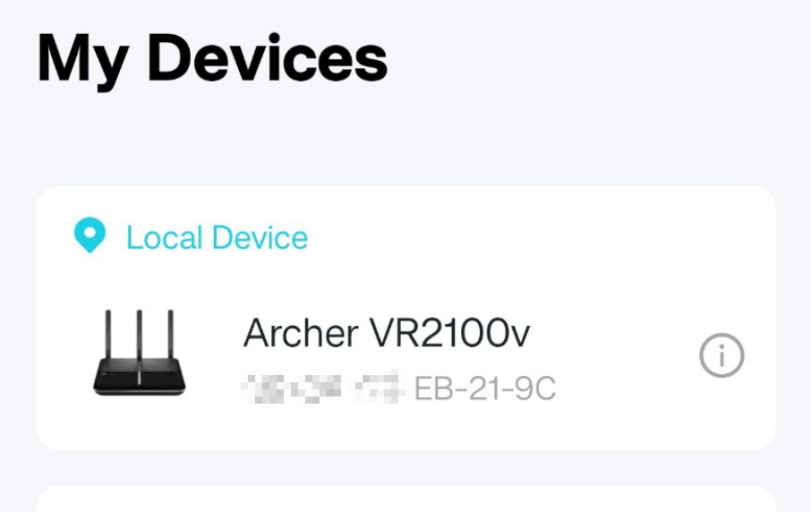
Step 2. Once logged, please click the icon of your TP-Link device and access it.
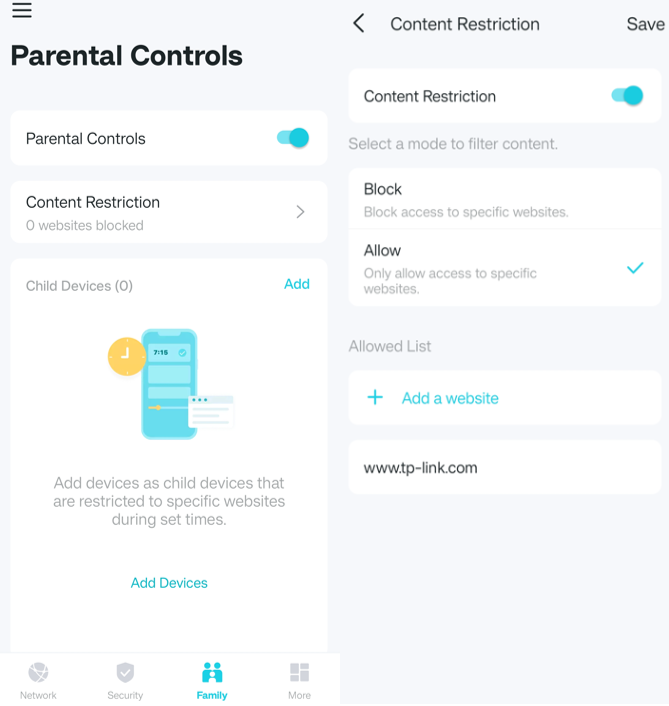
Step 3. Go to Family > Parental Controls > Content Restriction, set Block mode or Allow mode. You may enter the website for the List.
Step 4. Click Save, and now you can control your children's internet access according to your needs.
Get to know more details of each function and configuration, please go to the Download Center to download the manual of your product.
Is this faq useful?
Your feedback helps improve this site.


TP-Link Community
Still need help? Search for answers, ask questions, and get help from TP-Link experts and other users around the world.