How to configure Capture and view captured images on VIGI camera
Contents
Configure Scheduled Capture on a VIGI Camera
Configure Event-Triggered Capture on a VIGI Camera
Introduction
The Capture allows the camera to automatically save key images under specified conditions, making it easy to review scenes and collect evidence afterward.
With Scheduled Capture and Event-Triggered Capture, you can periodically record the scene at fixed time intervals or automatically capture images when specific events occur.
This article will explain how to configure Capture on a VIGI Camera and how to view captured images.
Requirements
- VIGI Camera
- SD Card
Configuration
Configure Scheduled Capture on a VIGI Camera
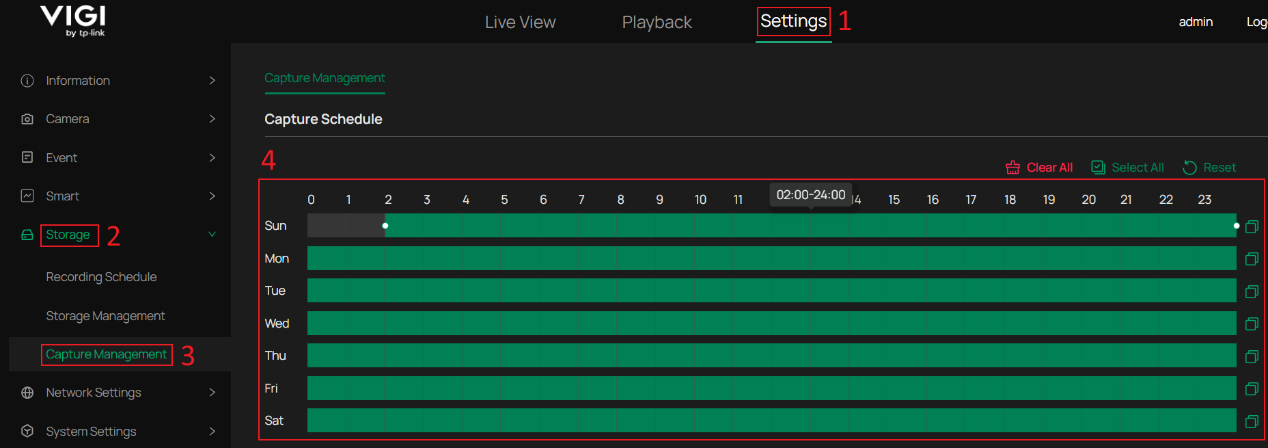
Step 1. Log in to the Web UI and go to Settings > Storage > Capture Management > Capture Schedule. Select the time periods during which Capture should be enabled.
Step 2. On the same page, scroll down to Capture Settings. Enable Scheduled Capture and configure the Capture Interval and Stream Type according to your requirements. Then, click Apply to apply and save the configuration.
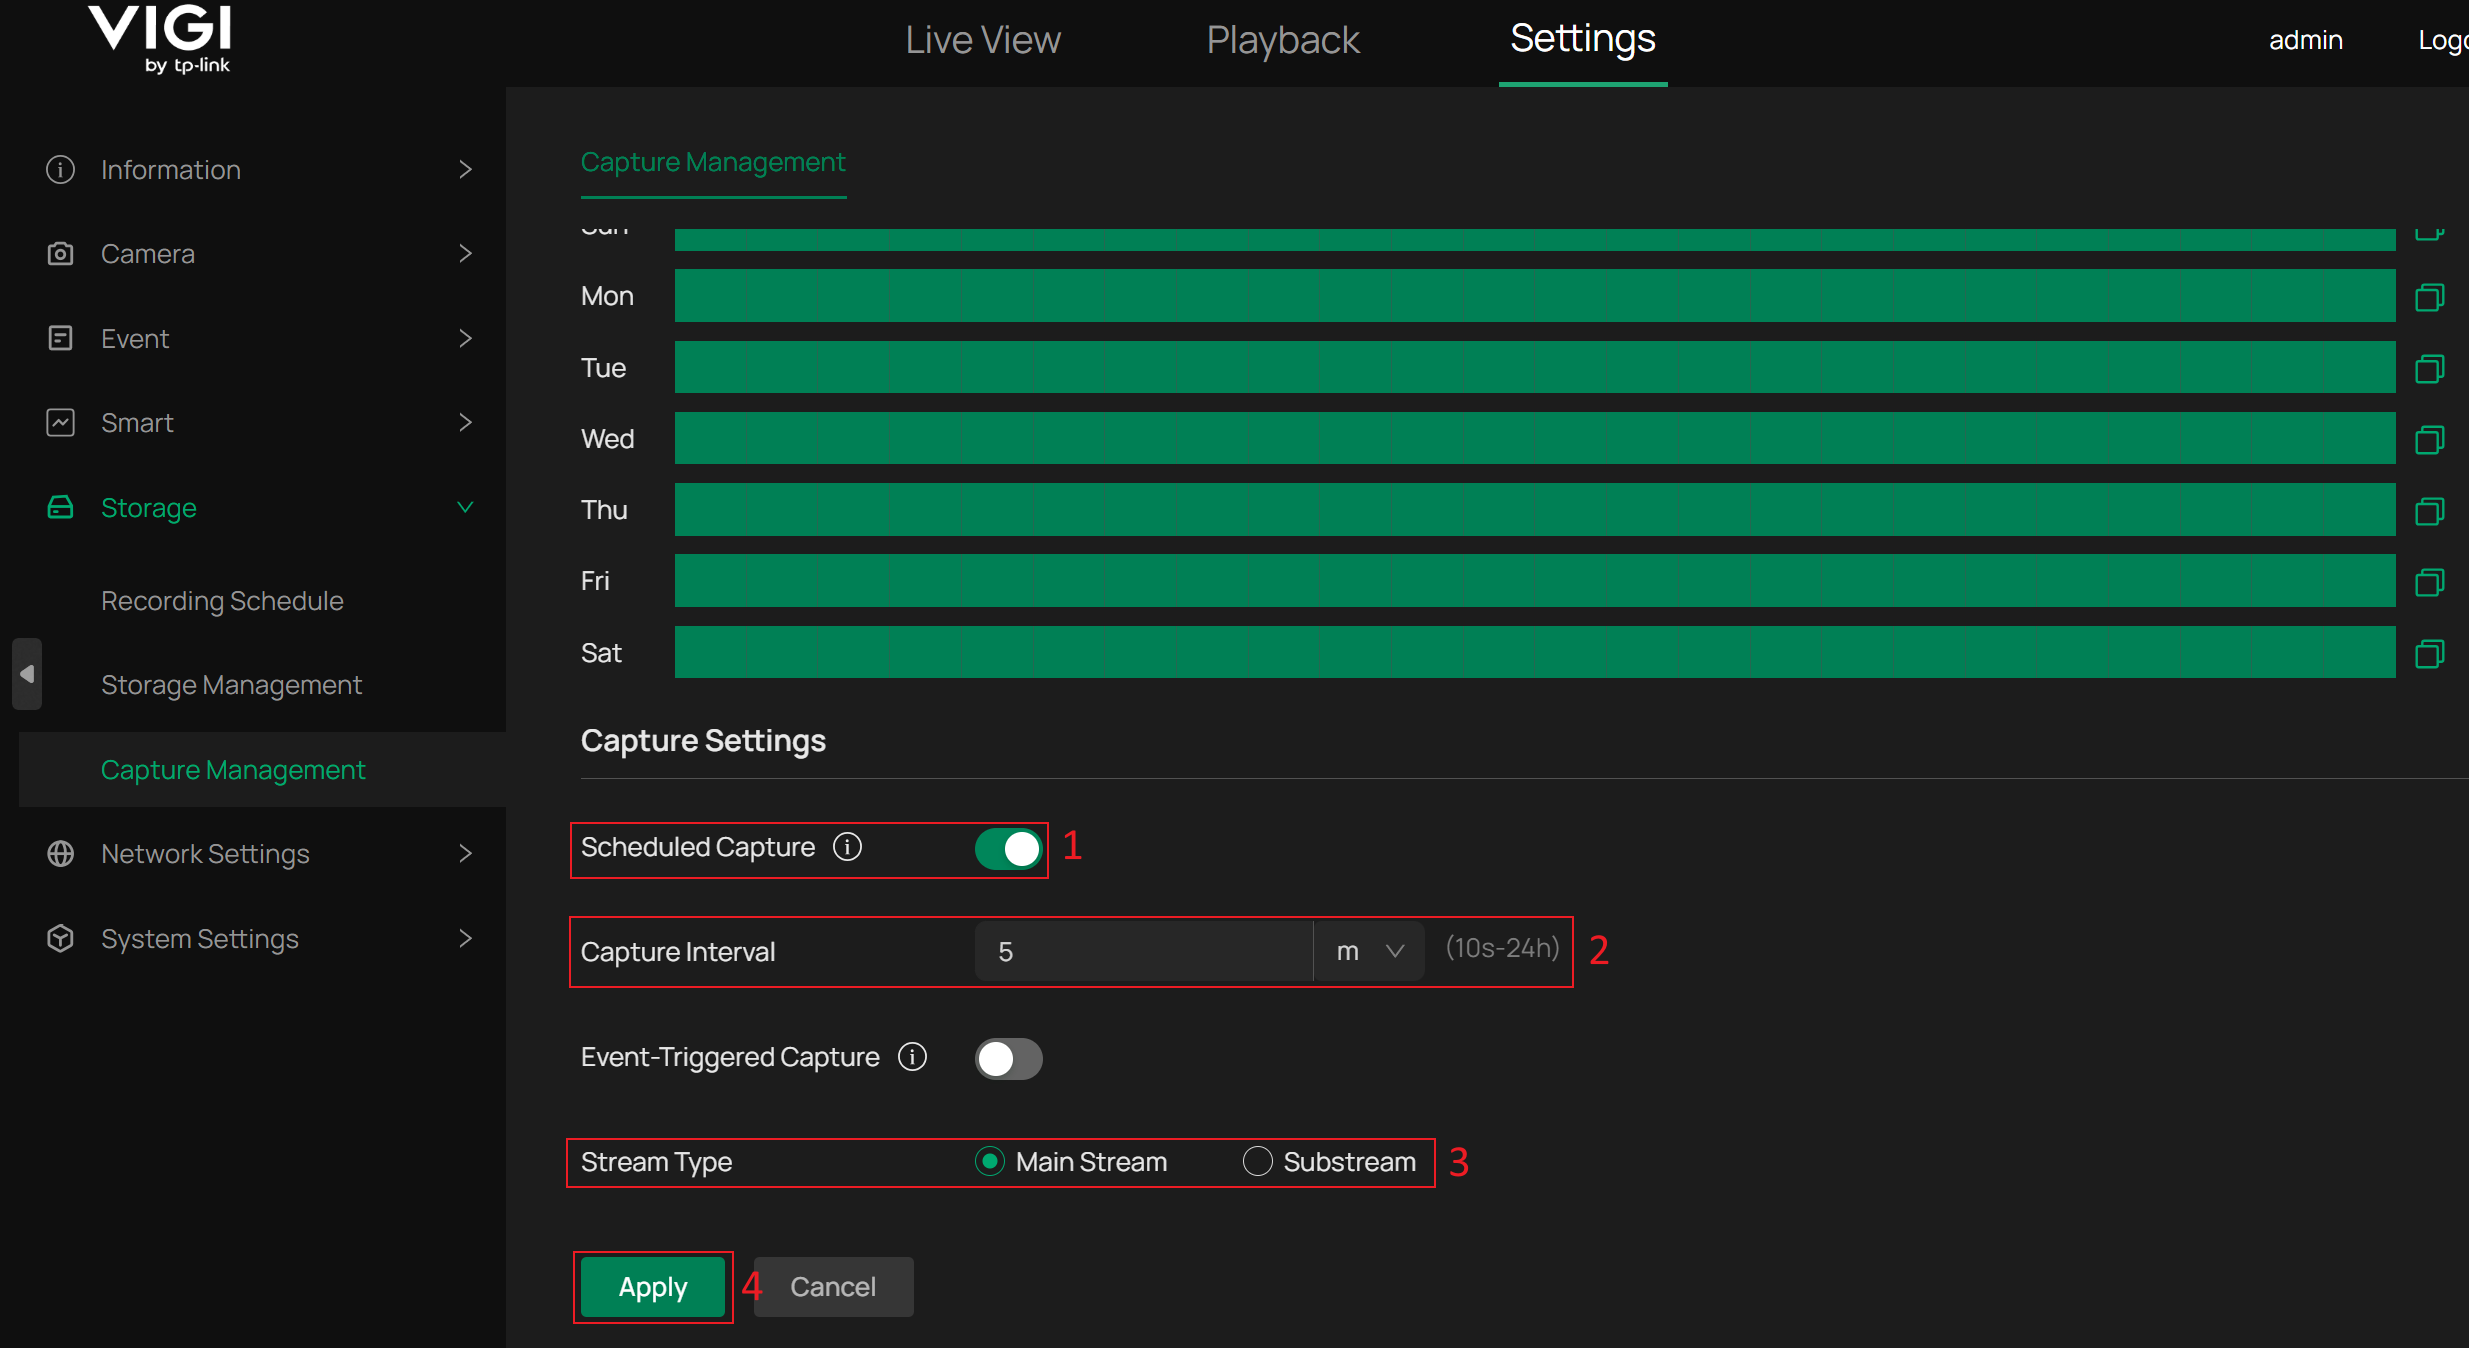
Capture Interval: Specify the time interval between consecutive captures.
Stream Type: Specify which stream is used to capture images.
Note: Stream Type takes effect on both Scheduled Capture and Event-Triggered Capture.
Configure Event-Triggered Capture on a VIGI Camera
Step 1. Log in to the Web UI and go to Settings > Storage > Capture Management > Capture Schedule. Select the time periods during which Capture should be enabled.

Step 2. On the same page, scroll down to Capture Settings. Enable Event-Triggered Capture and configure the Capture Interval, Max Number of Captures, and Stream Type based on your needs. Then, click Apply to apply and save the configuration.
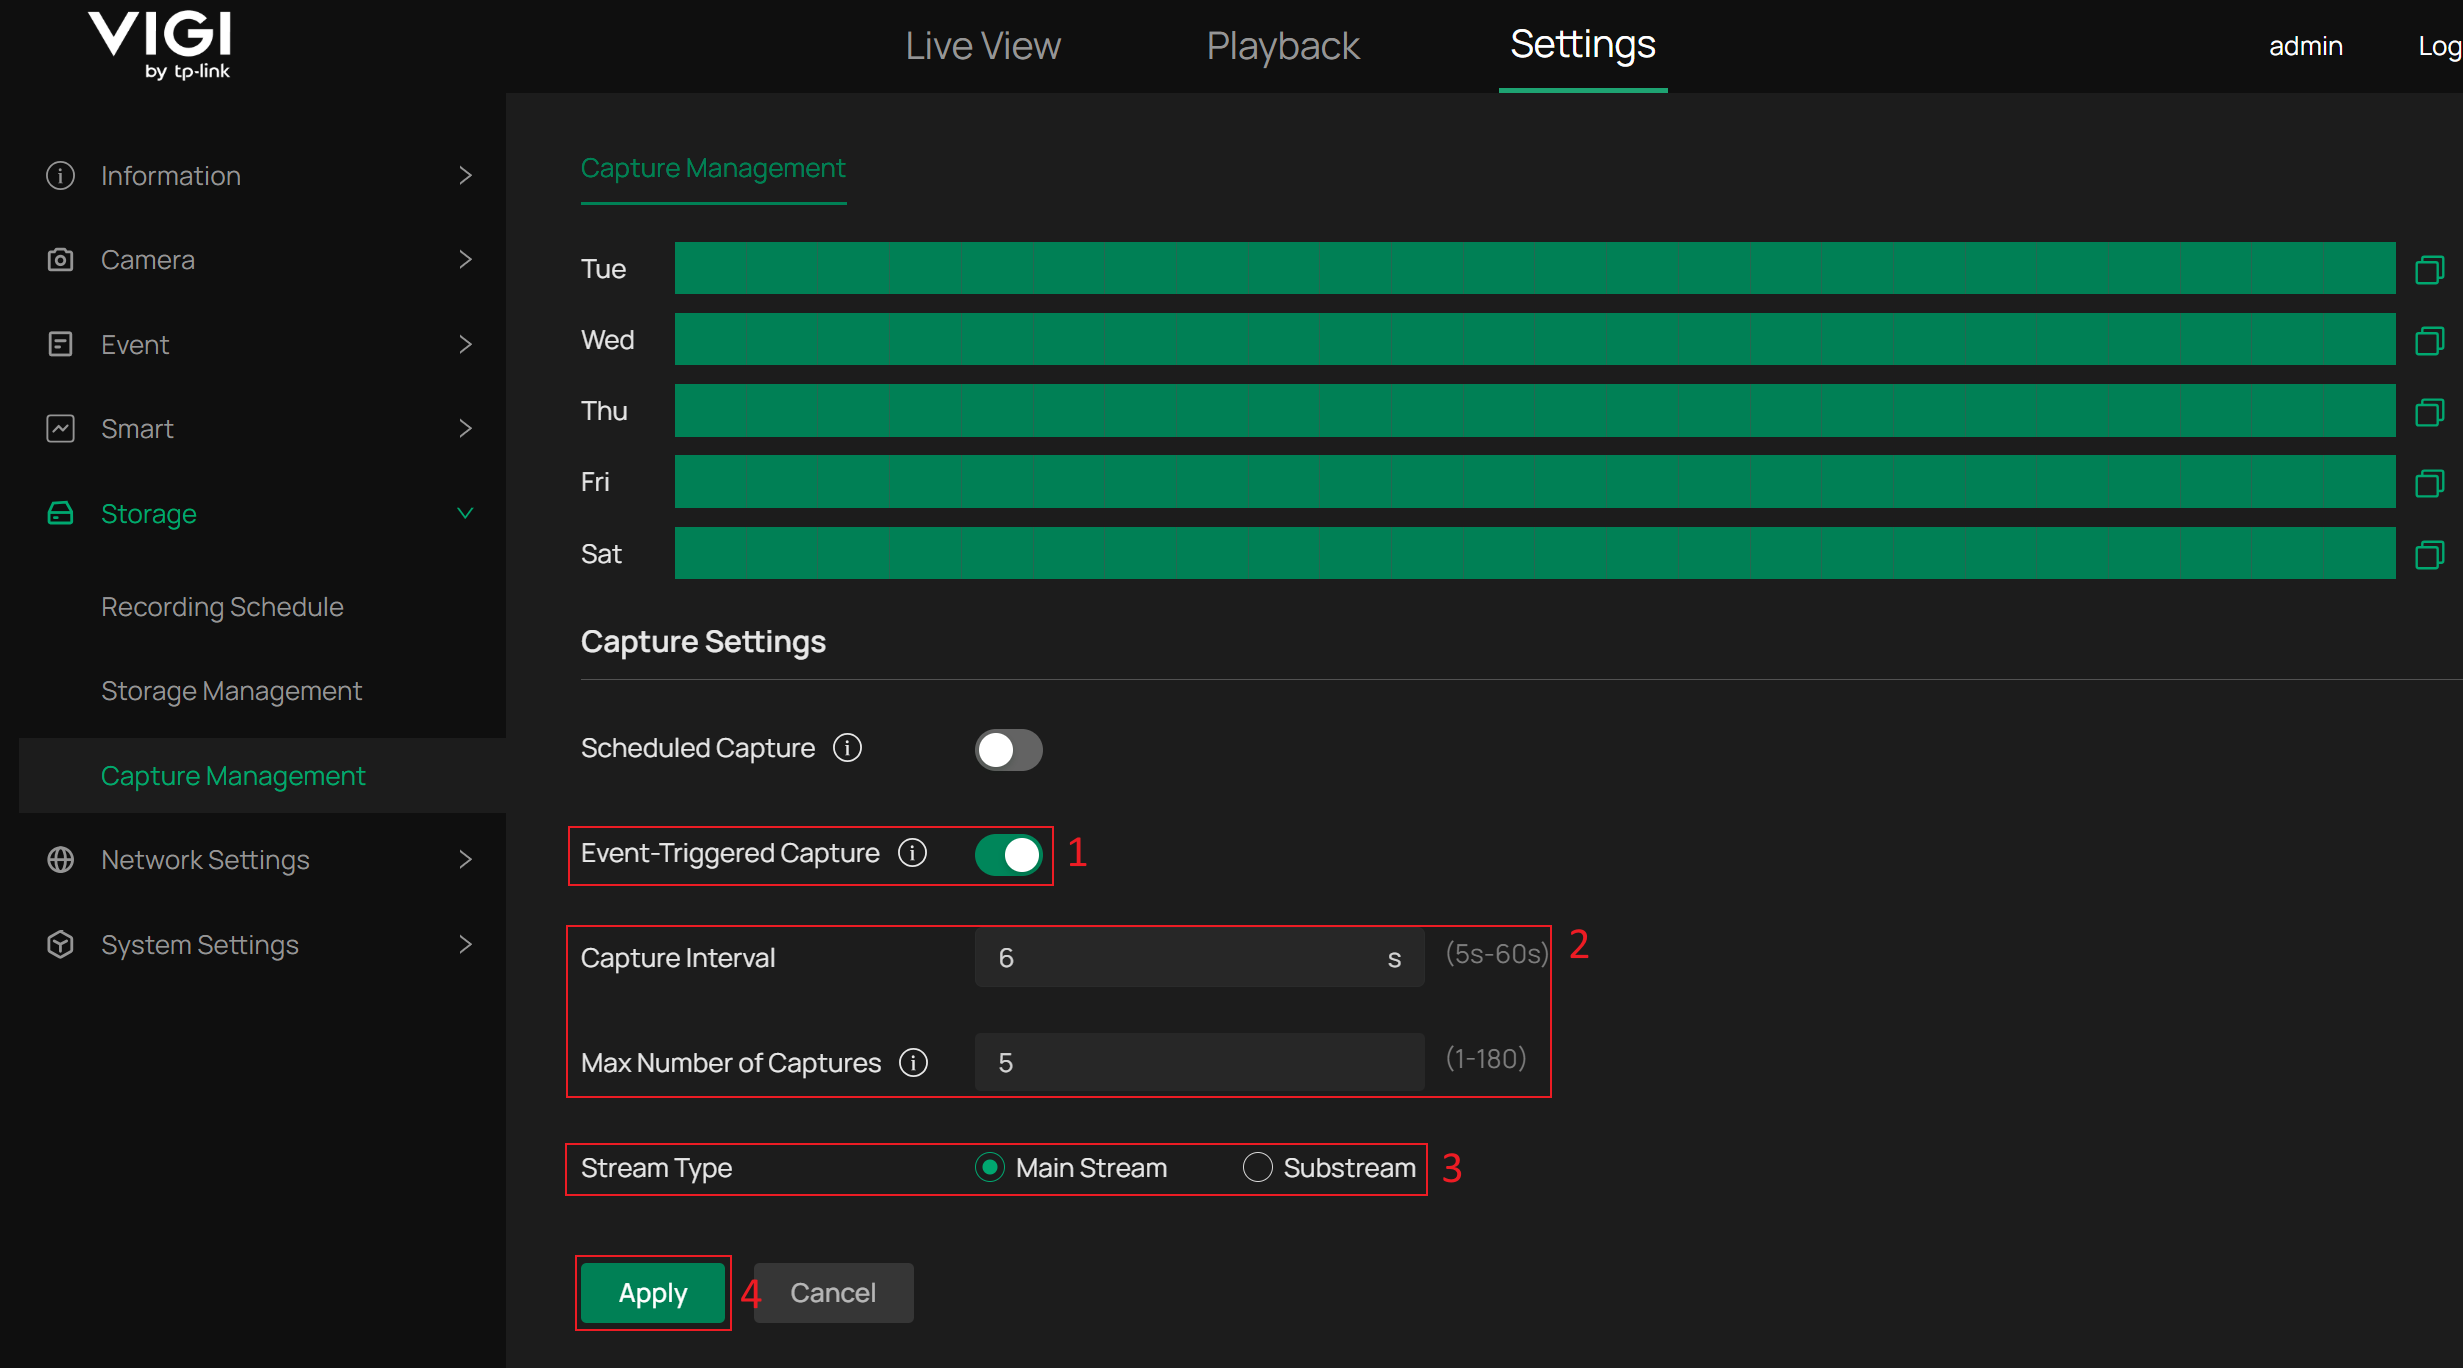
Capture Interval: Specify the time interval between consecutive captures.
Max Number of Captures: Specify the maximum number of captures triggered by the same event.
Stream Type: Specify which stream is used to capture images.
Note: Stream Type takes effect on both Scheduled Capture and Event-Triggered Capture.
Step 3. Go to Settings > Event and open the event configuration page where Event-Triggered Capture is required. In this example, navigate to Basic Event > Motion Detection. In the Processing Mode, select Upload Capture. Then, click Apply to apply and save the configuration.
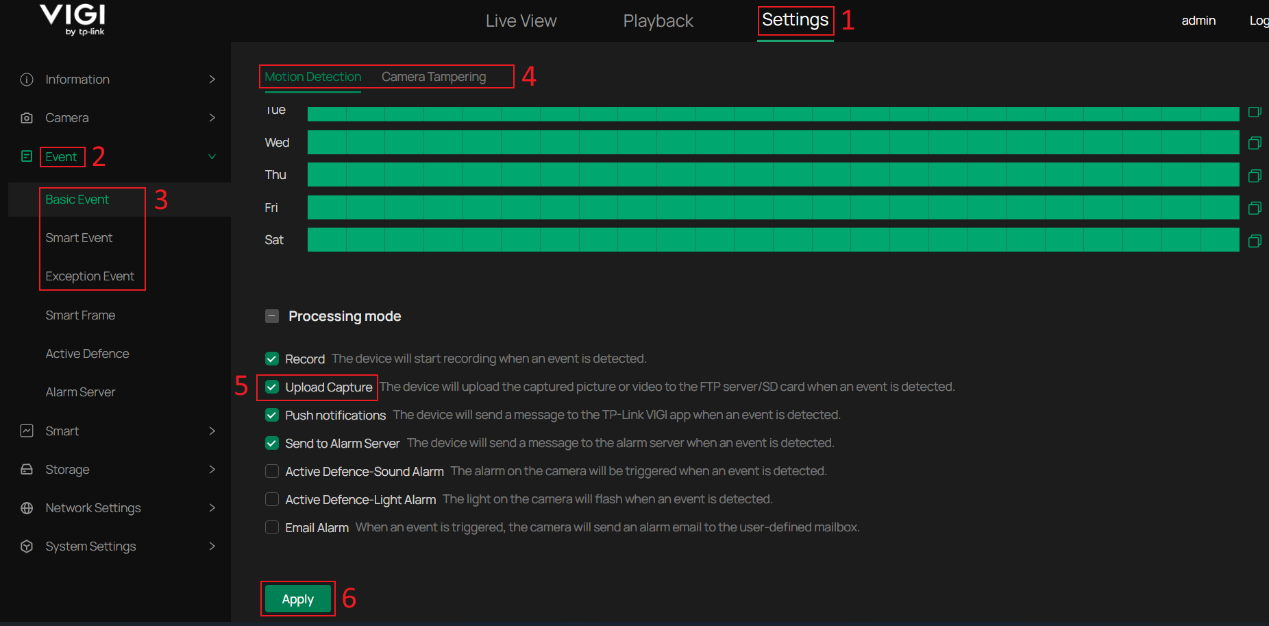
You can configure Event-Triggered Capture for multiple events at the same time based on your requirements.
Verification
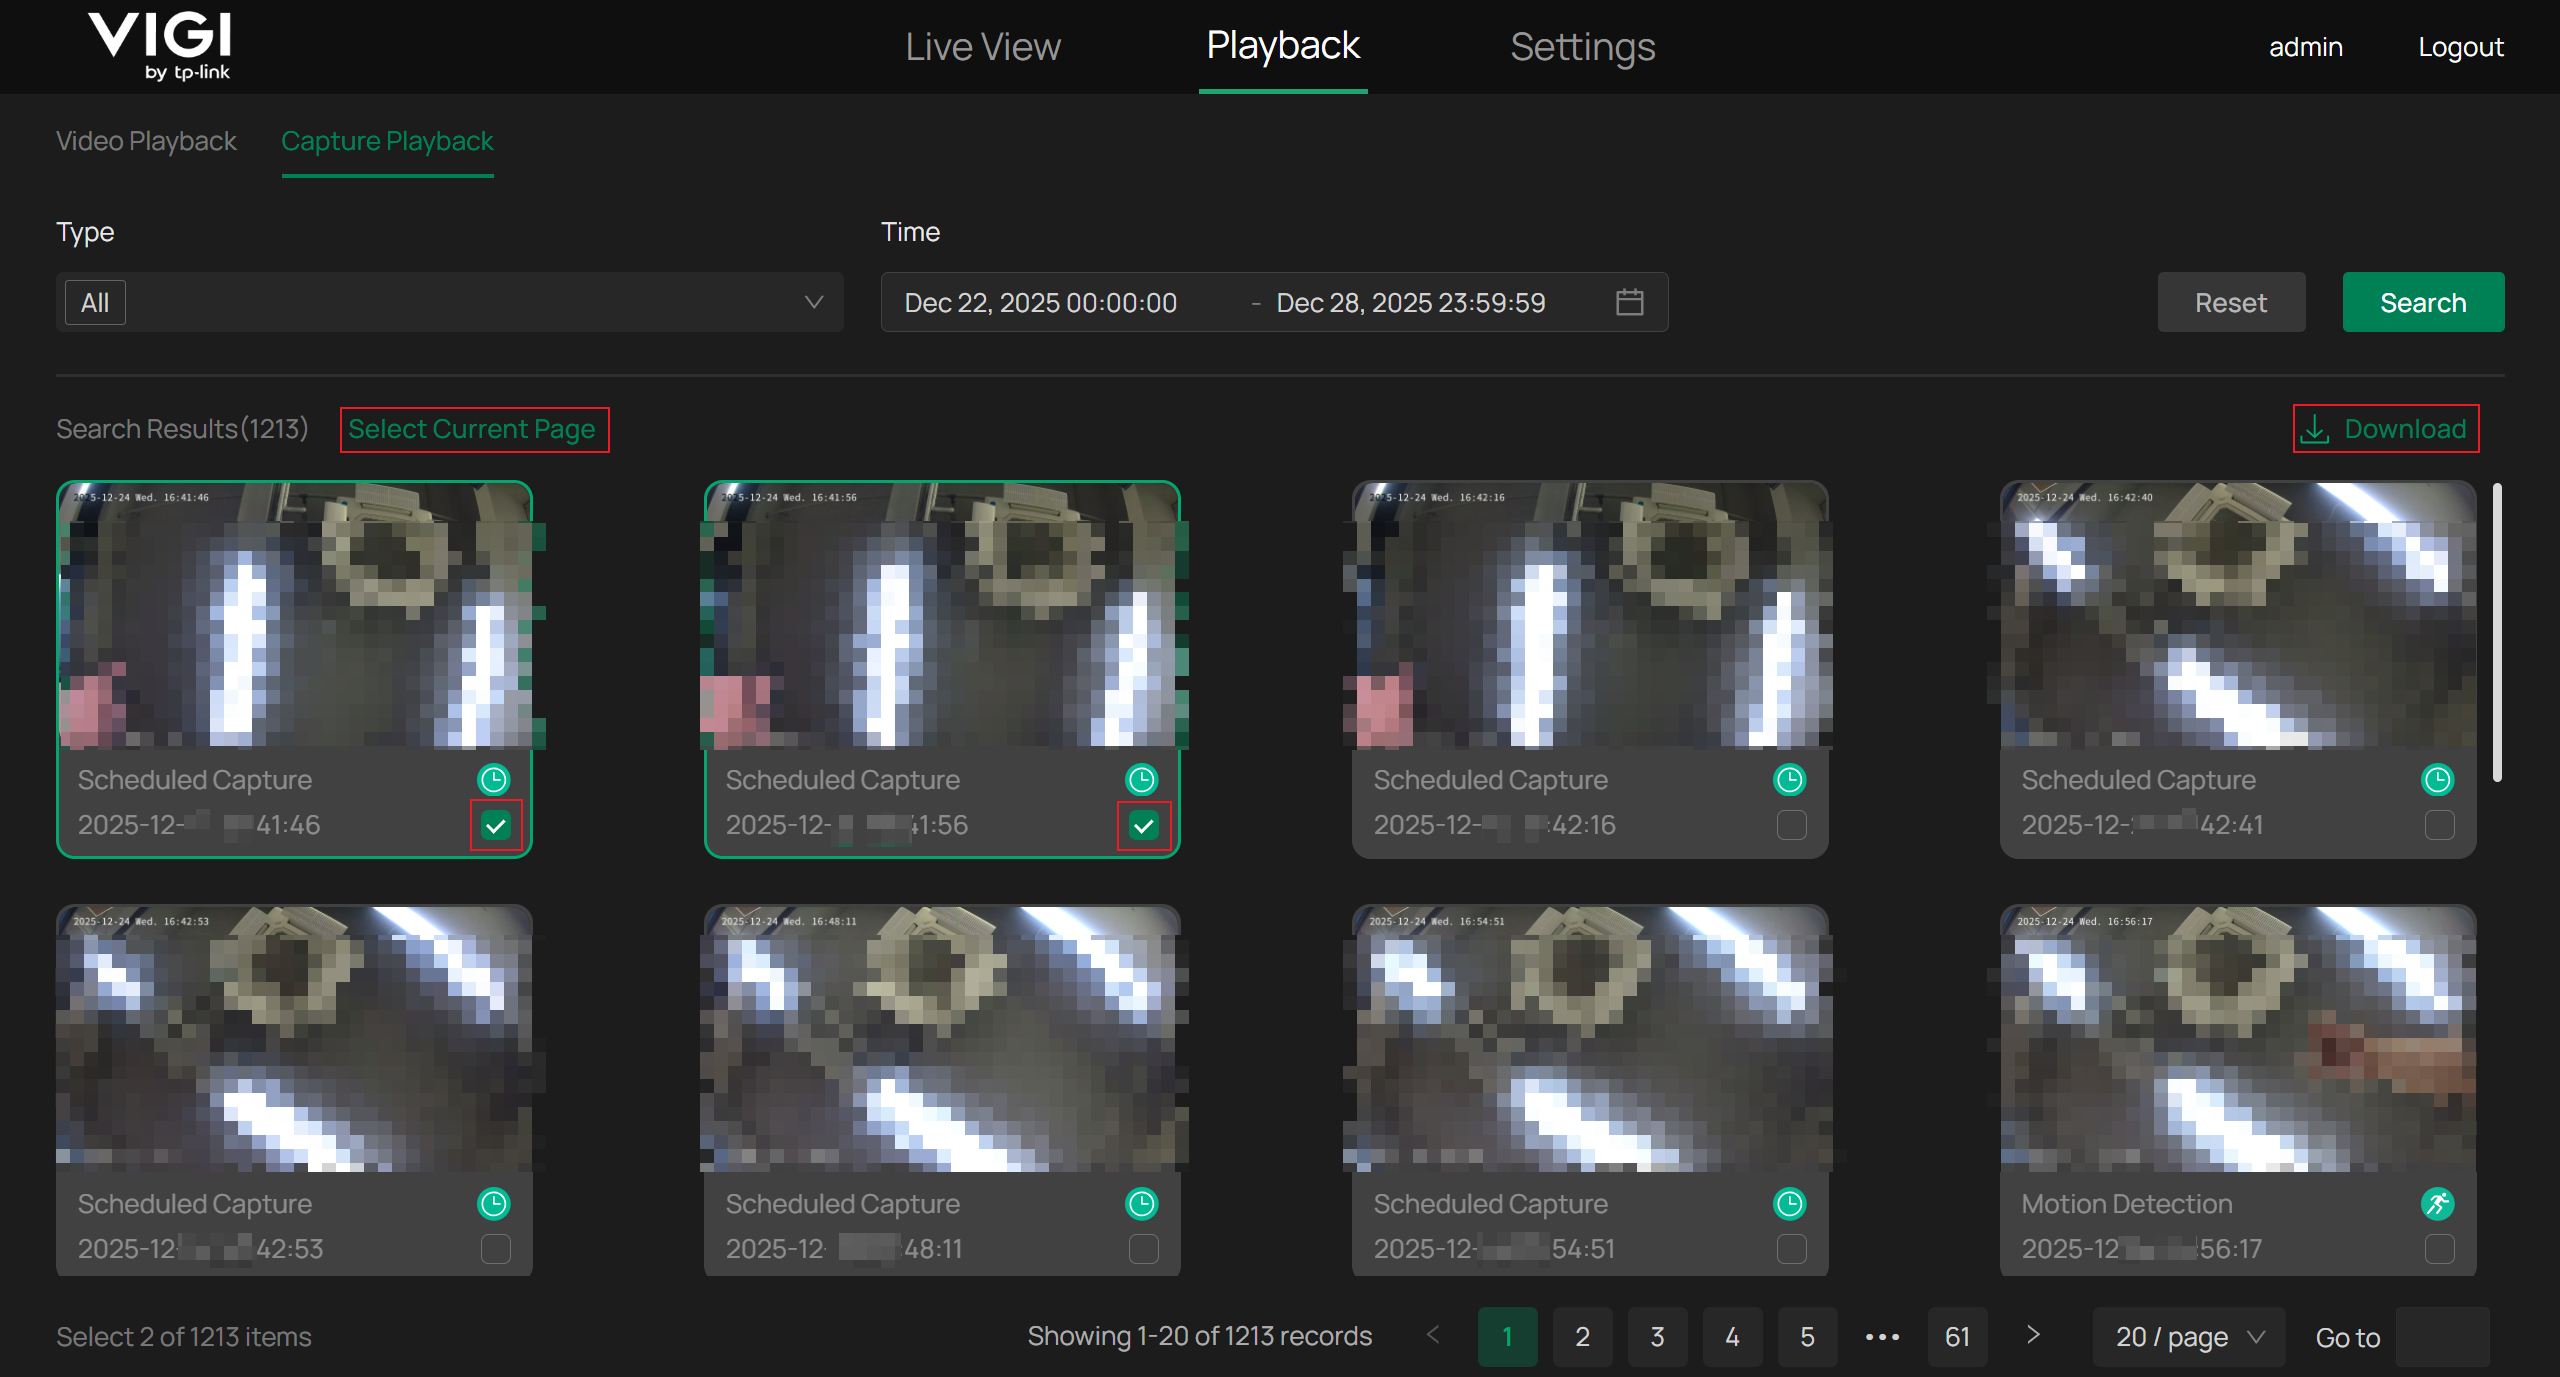
Capture Playback Overview
Go to Playback > Capture Playback to view the captured images. Each image is labeled with its type and time.
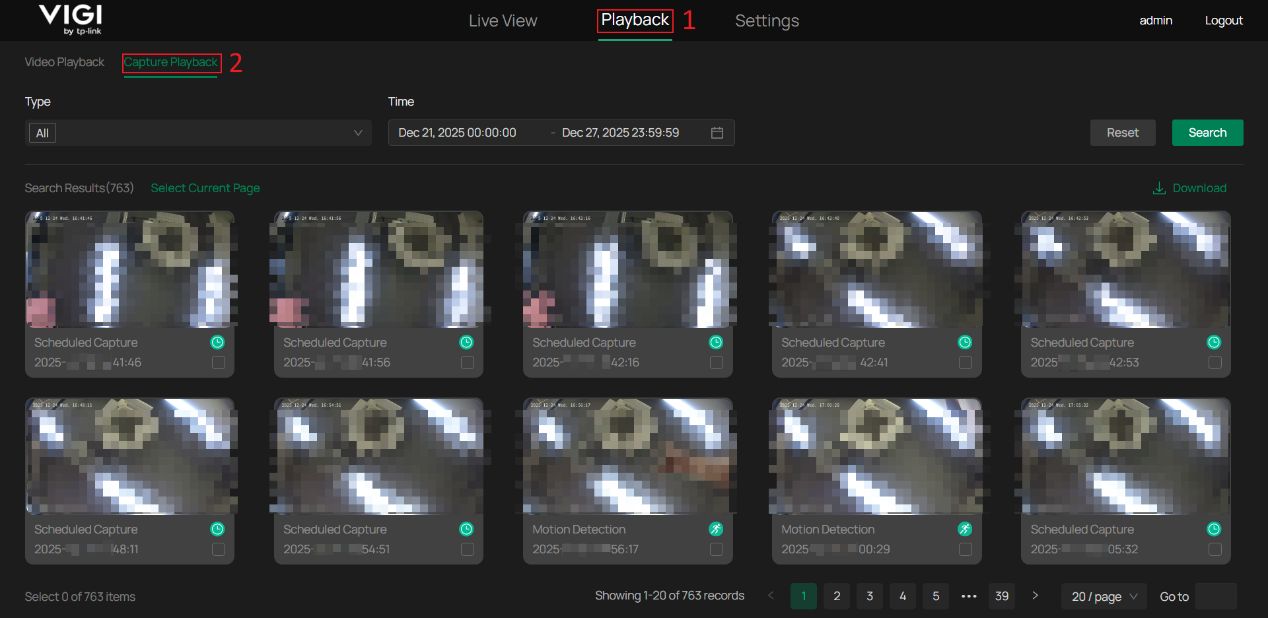
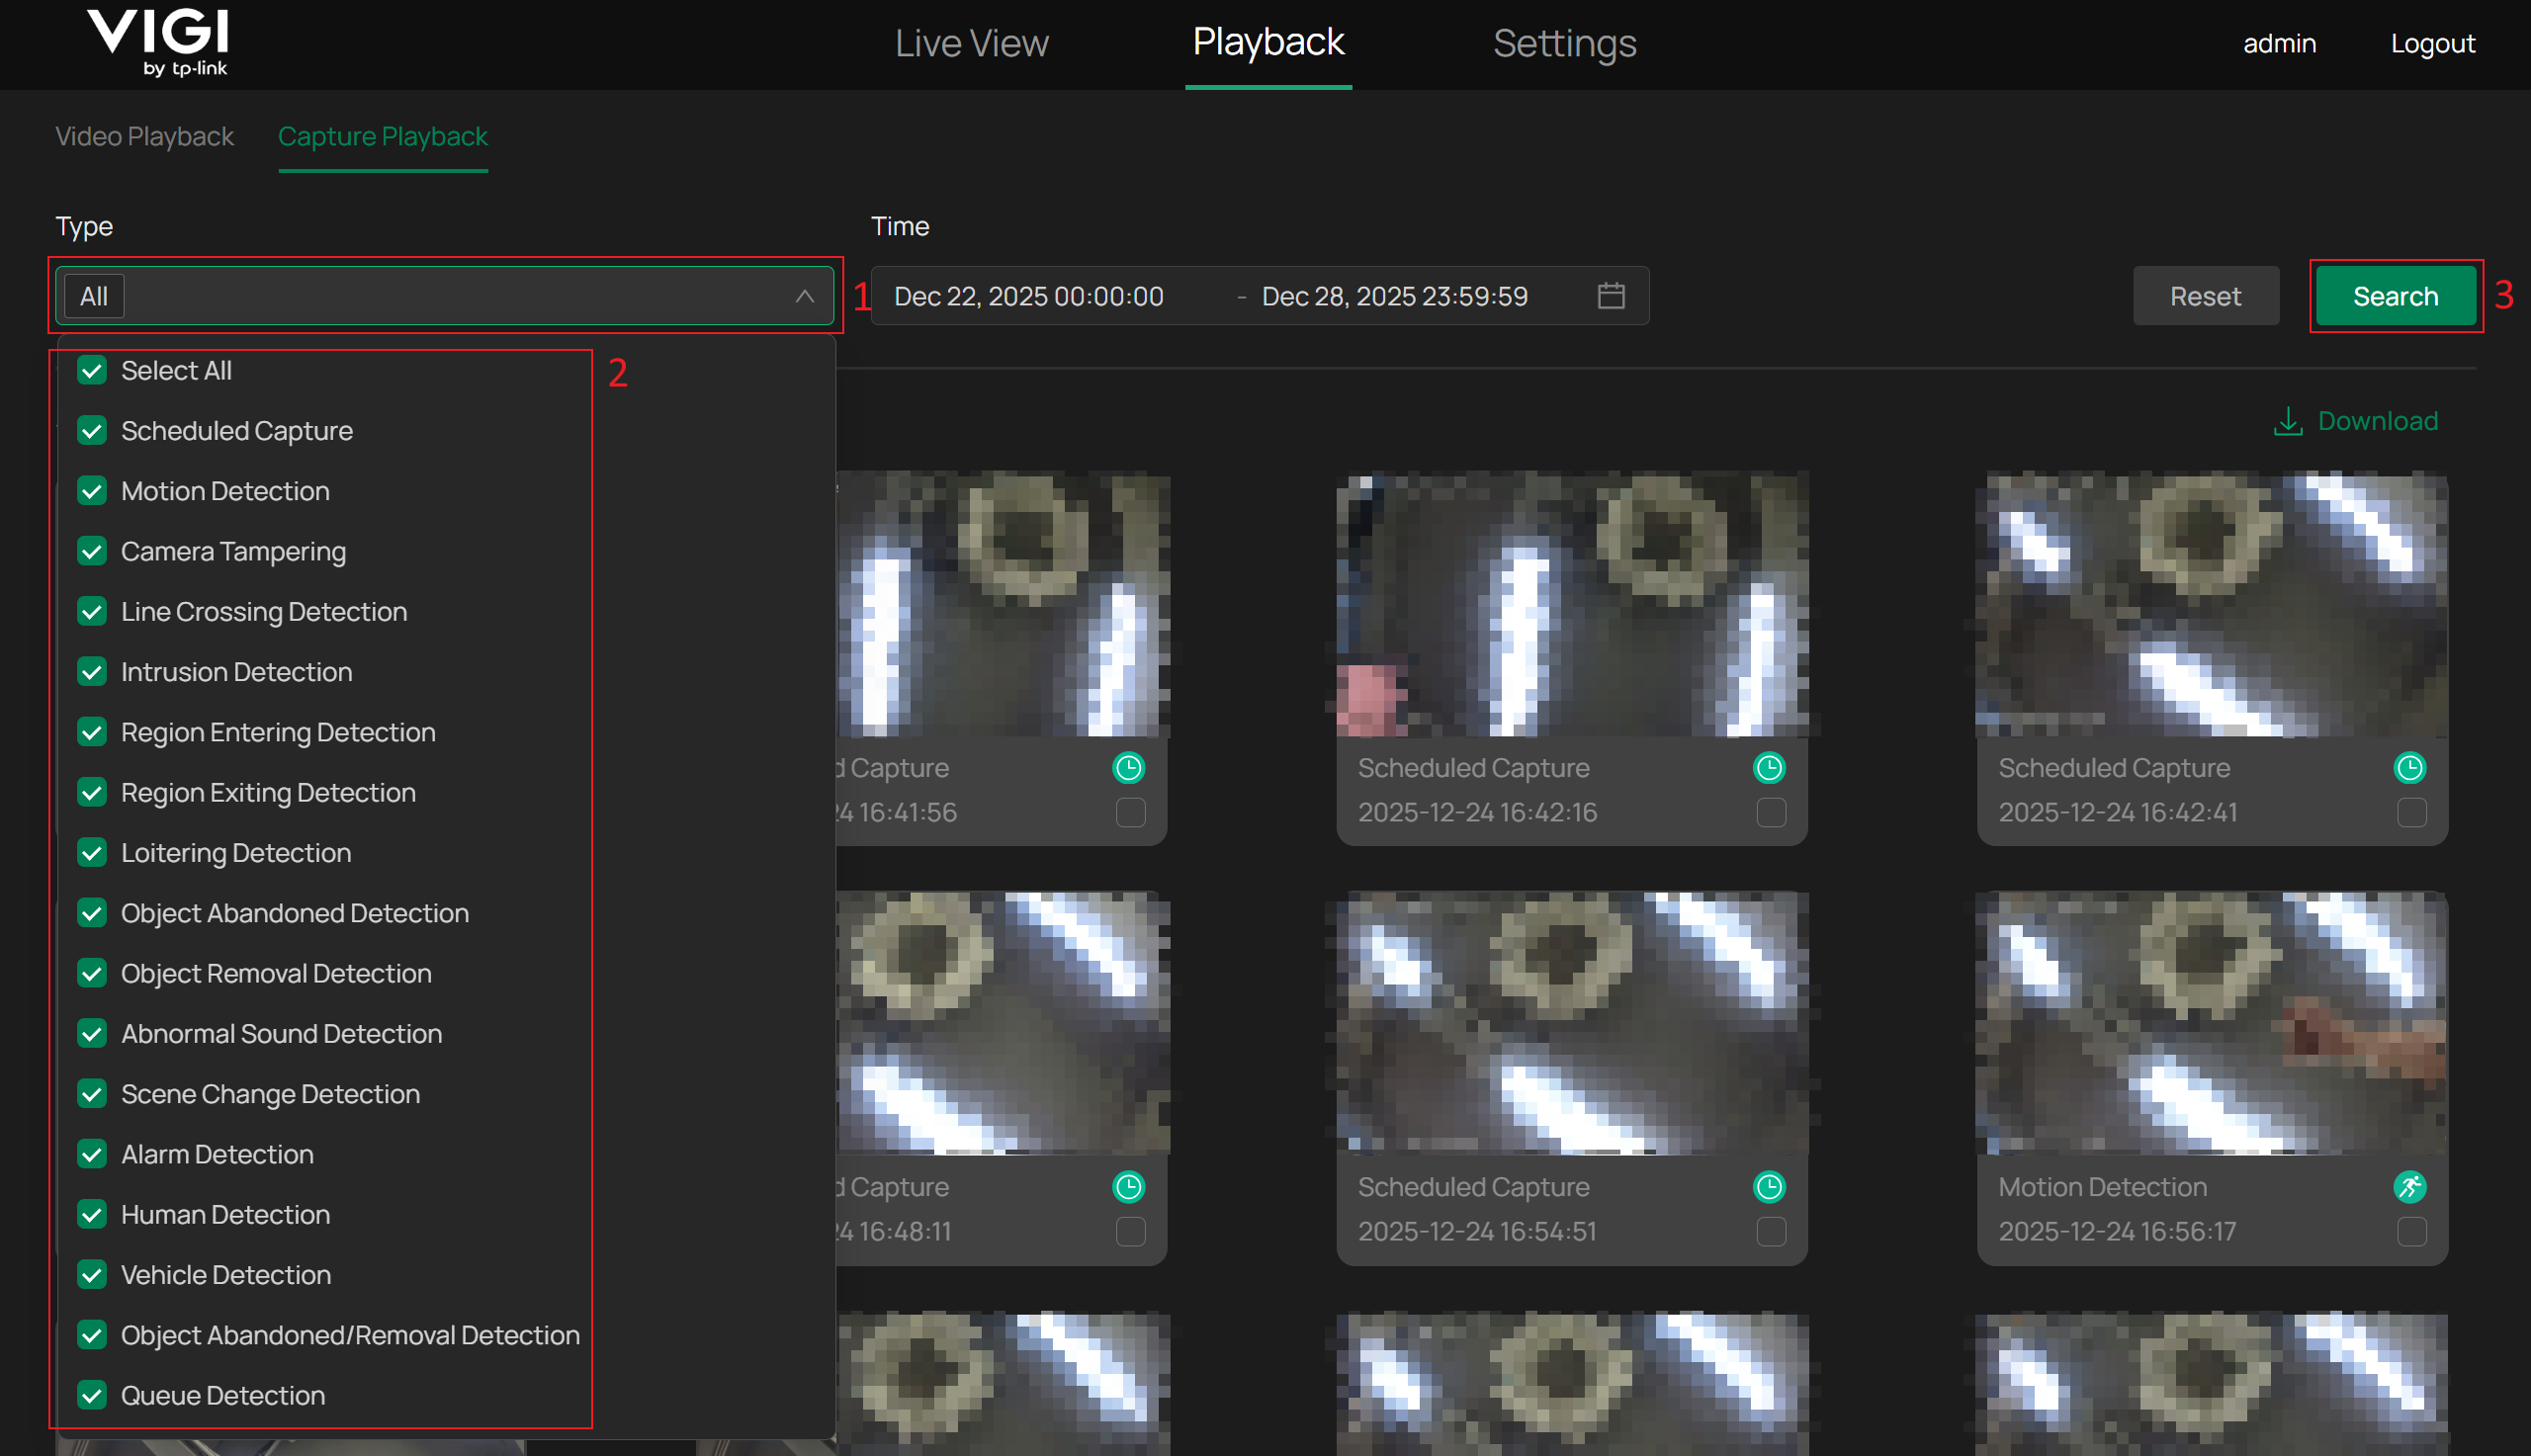
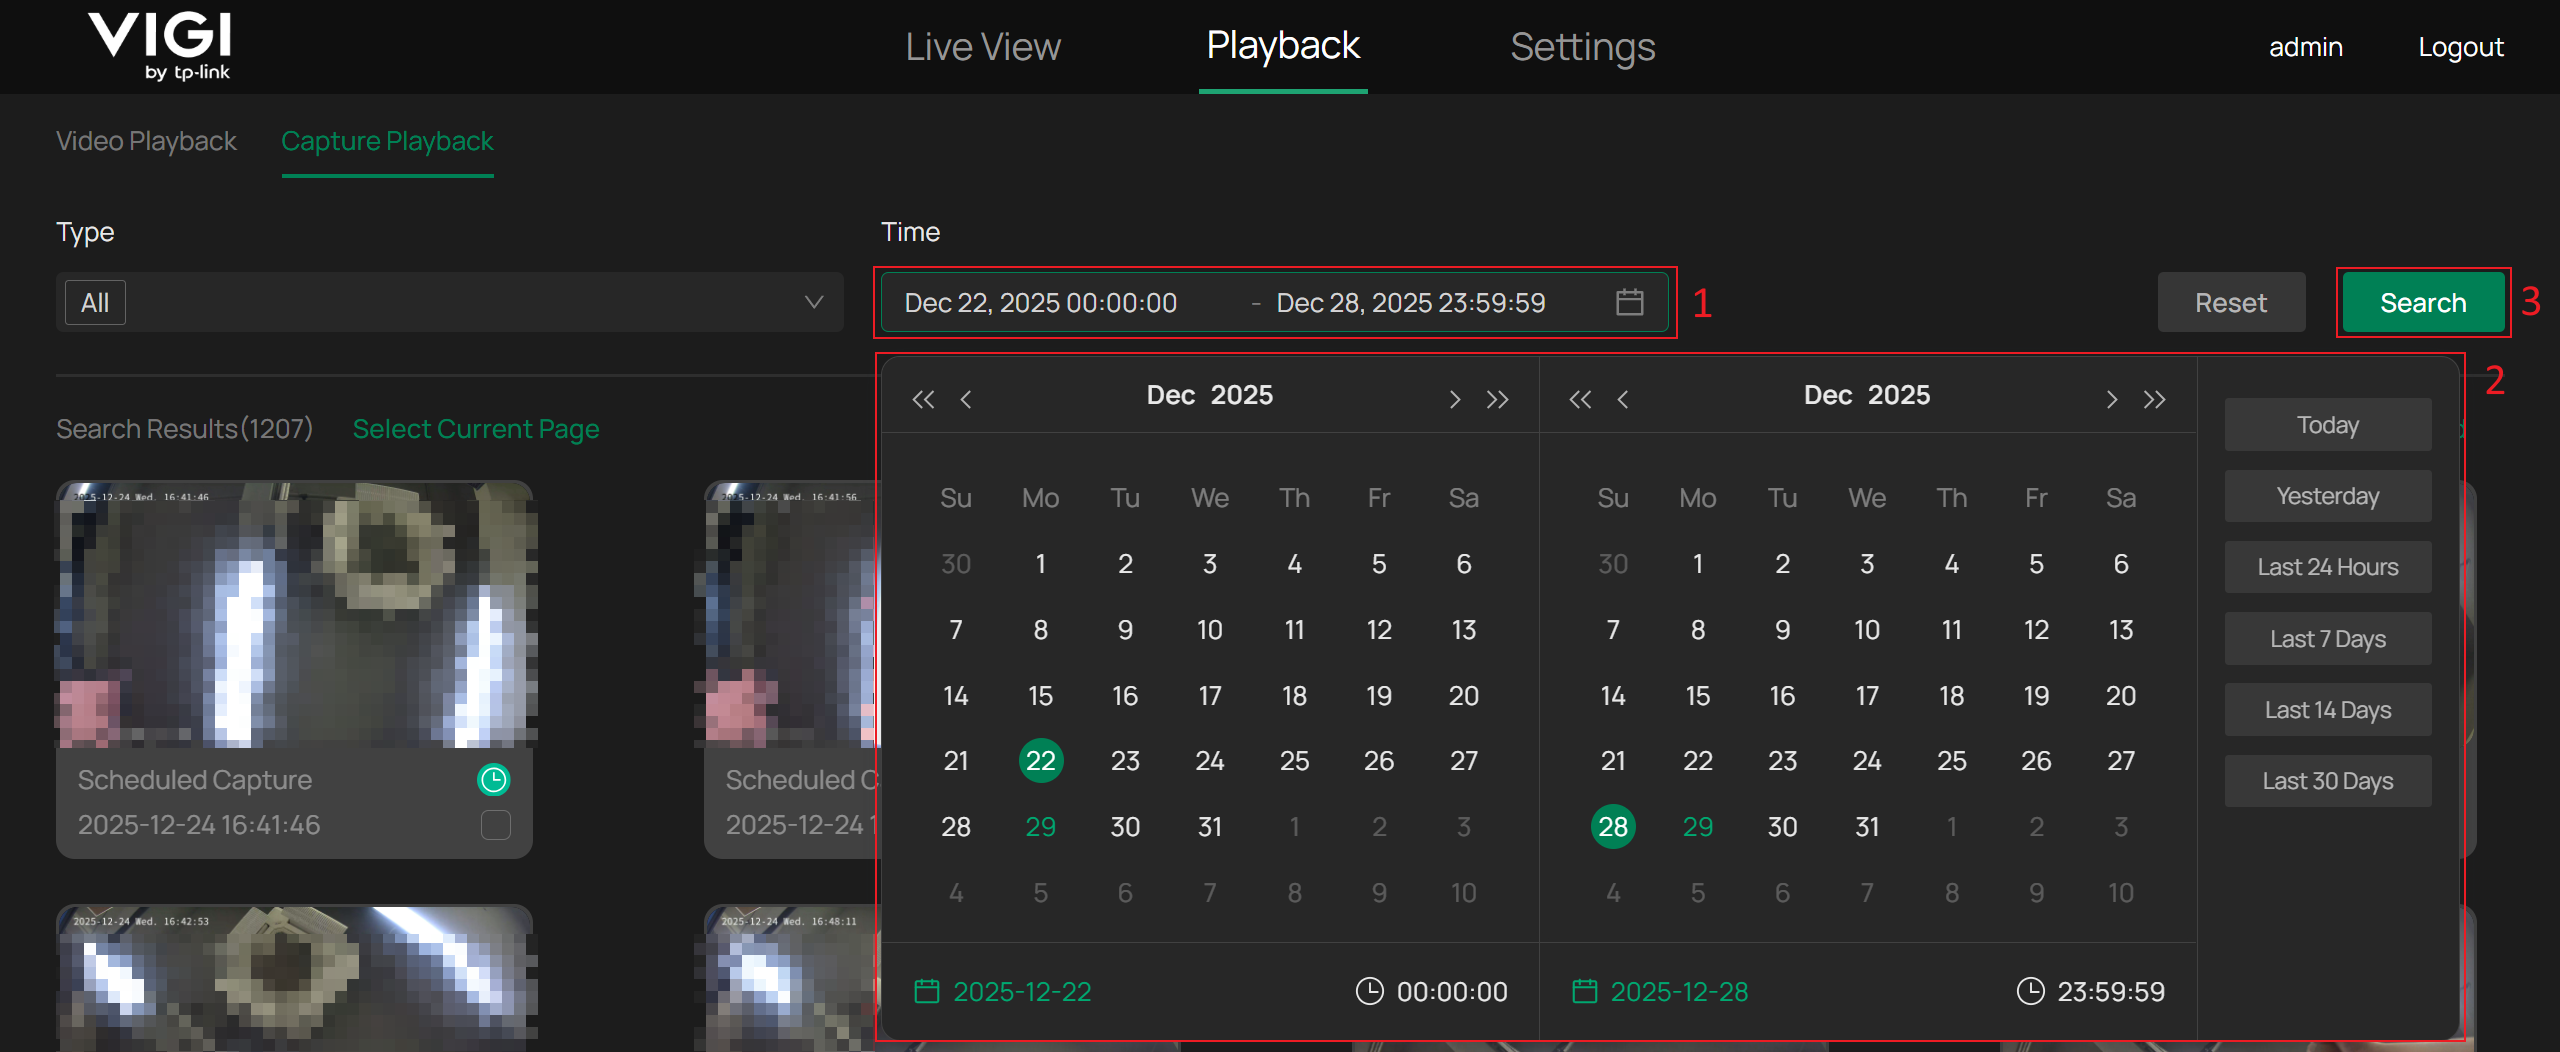
Search Captured Images
You can Search for images using Type or Time as filter conditions.
View Image Details
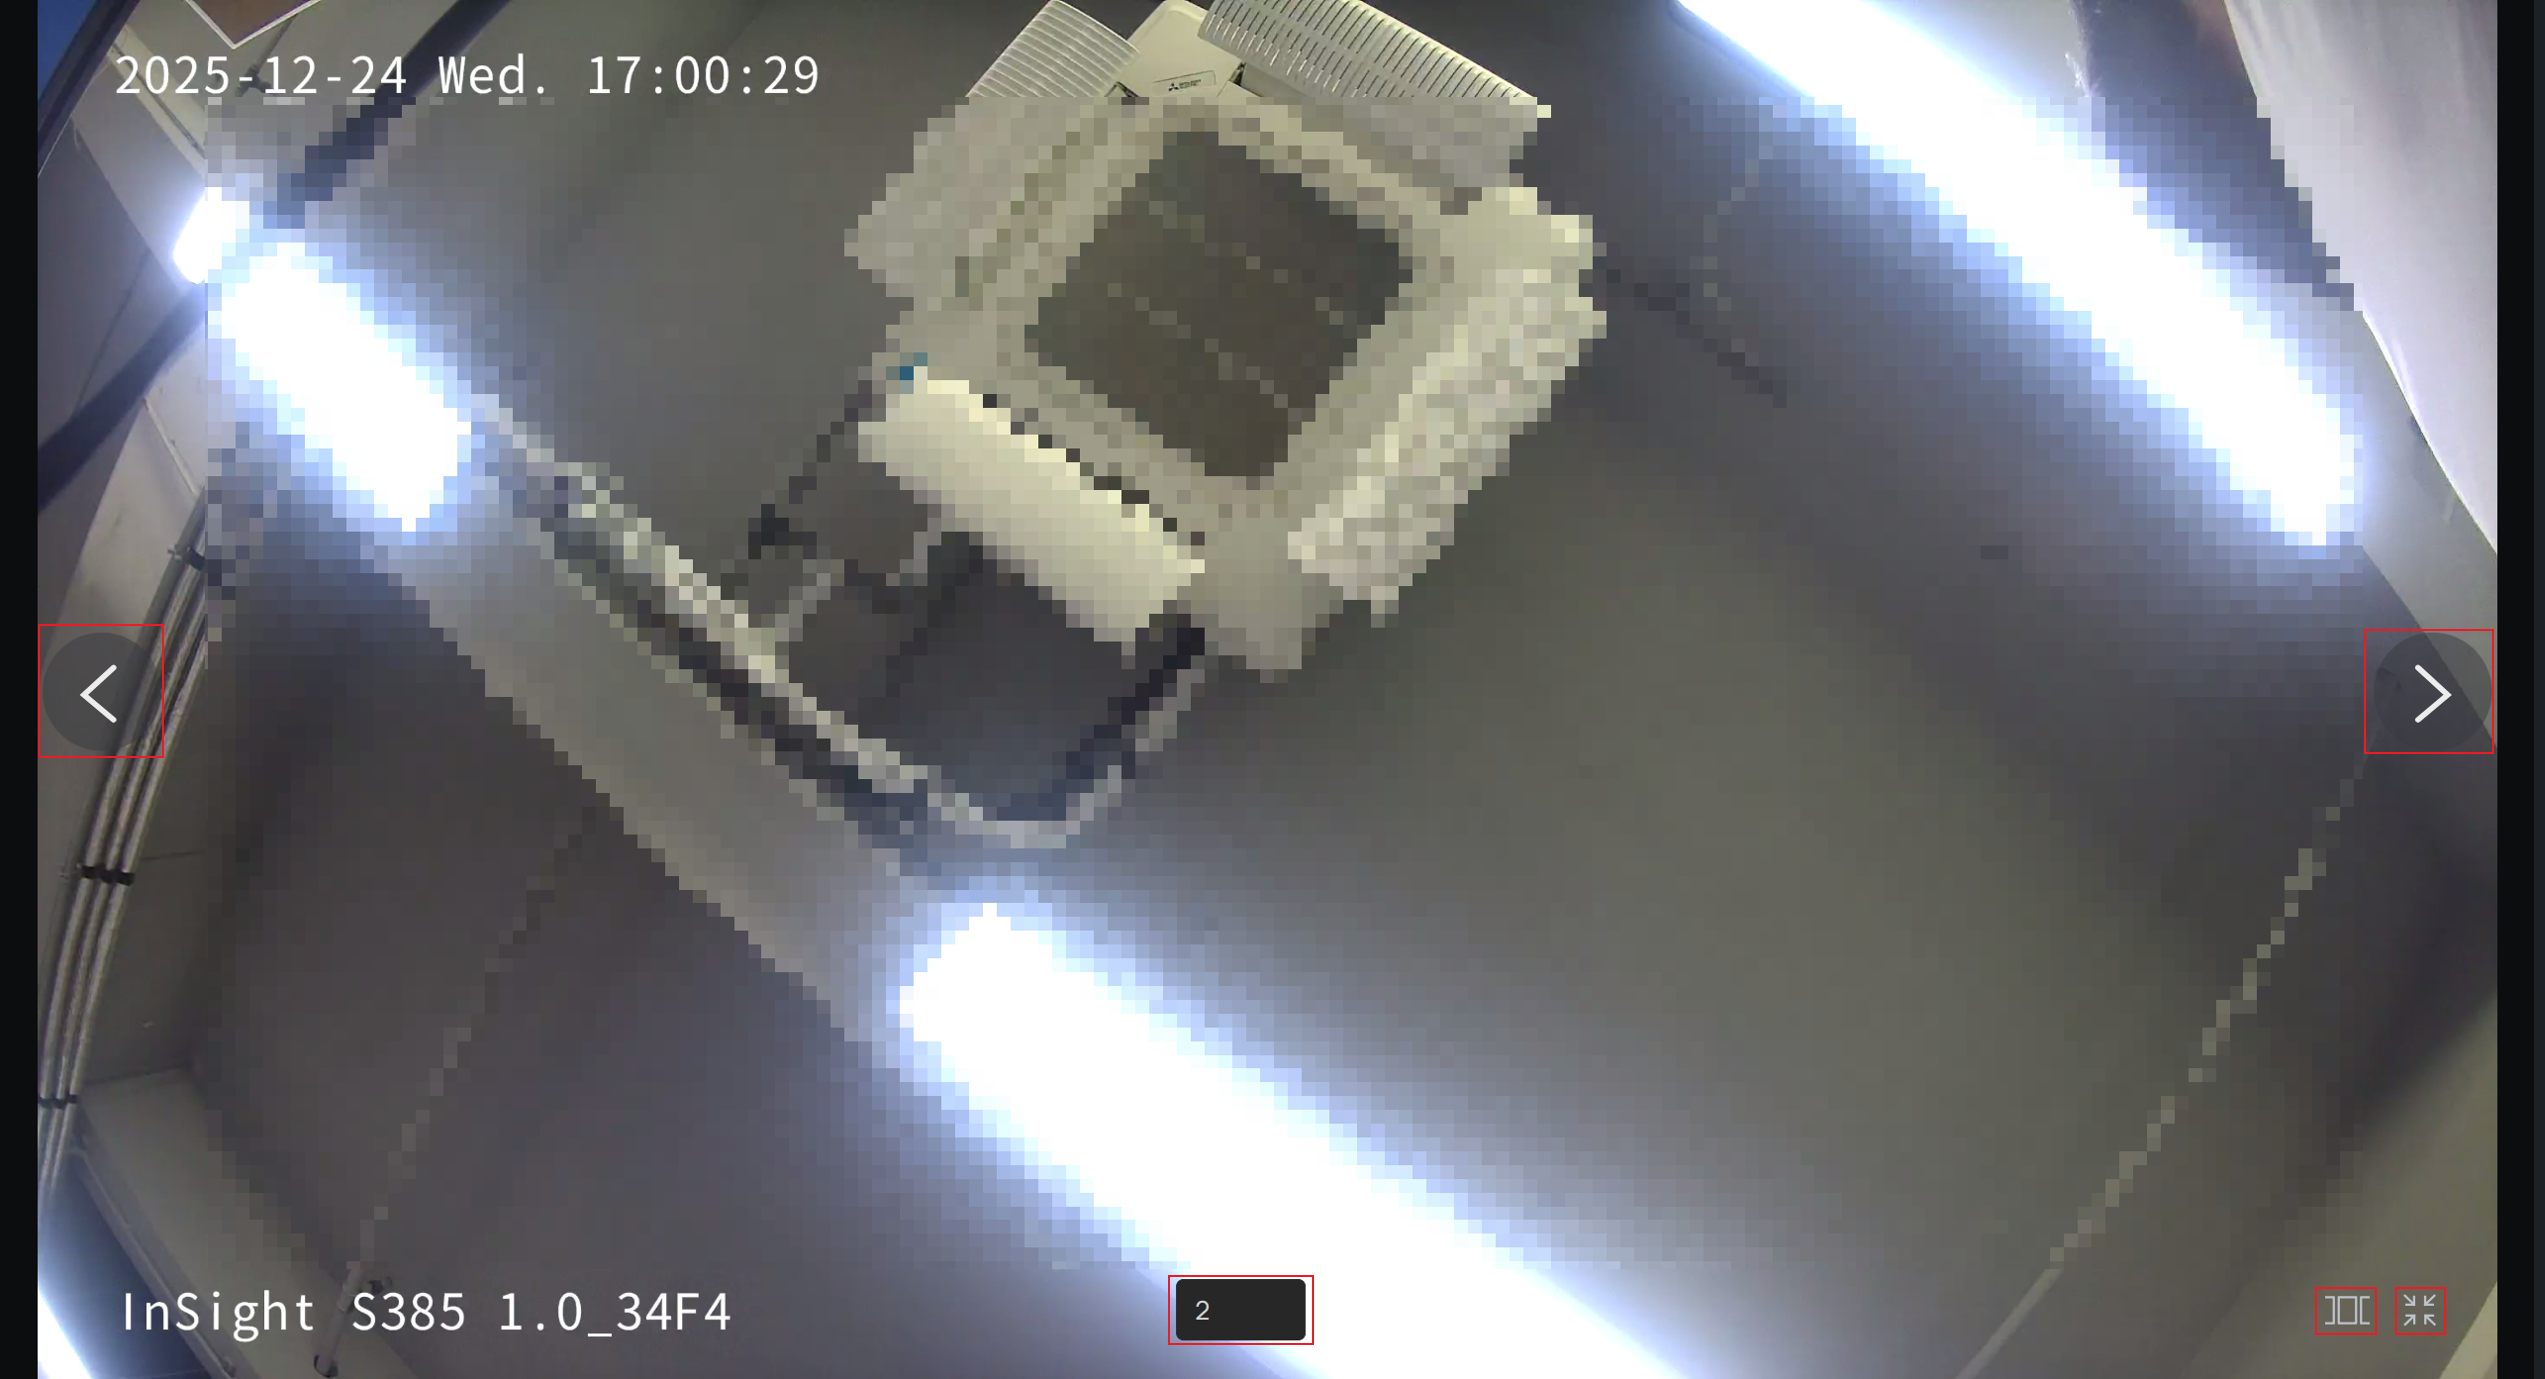
You can click any image to enter Screenshot Detail. From there, you can switch between images, enable Auto Carousel for automatic playback, or enter Full Screen mode.
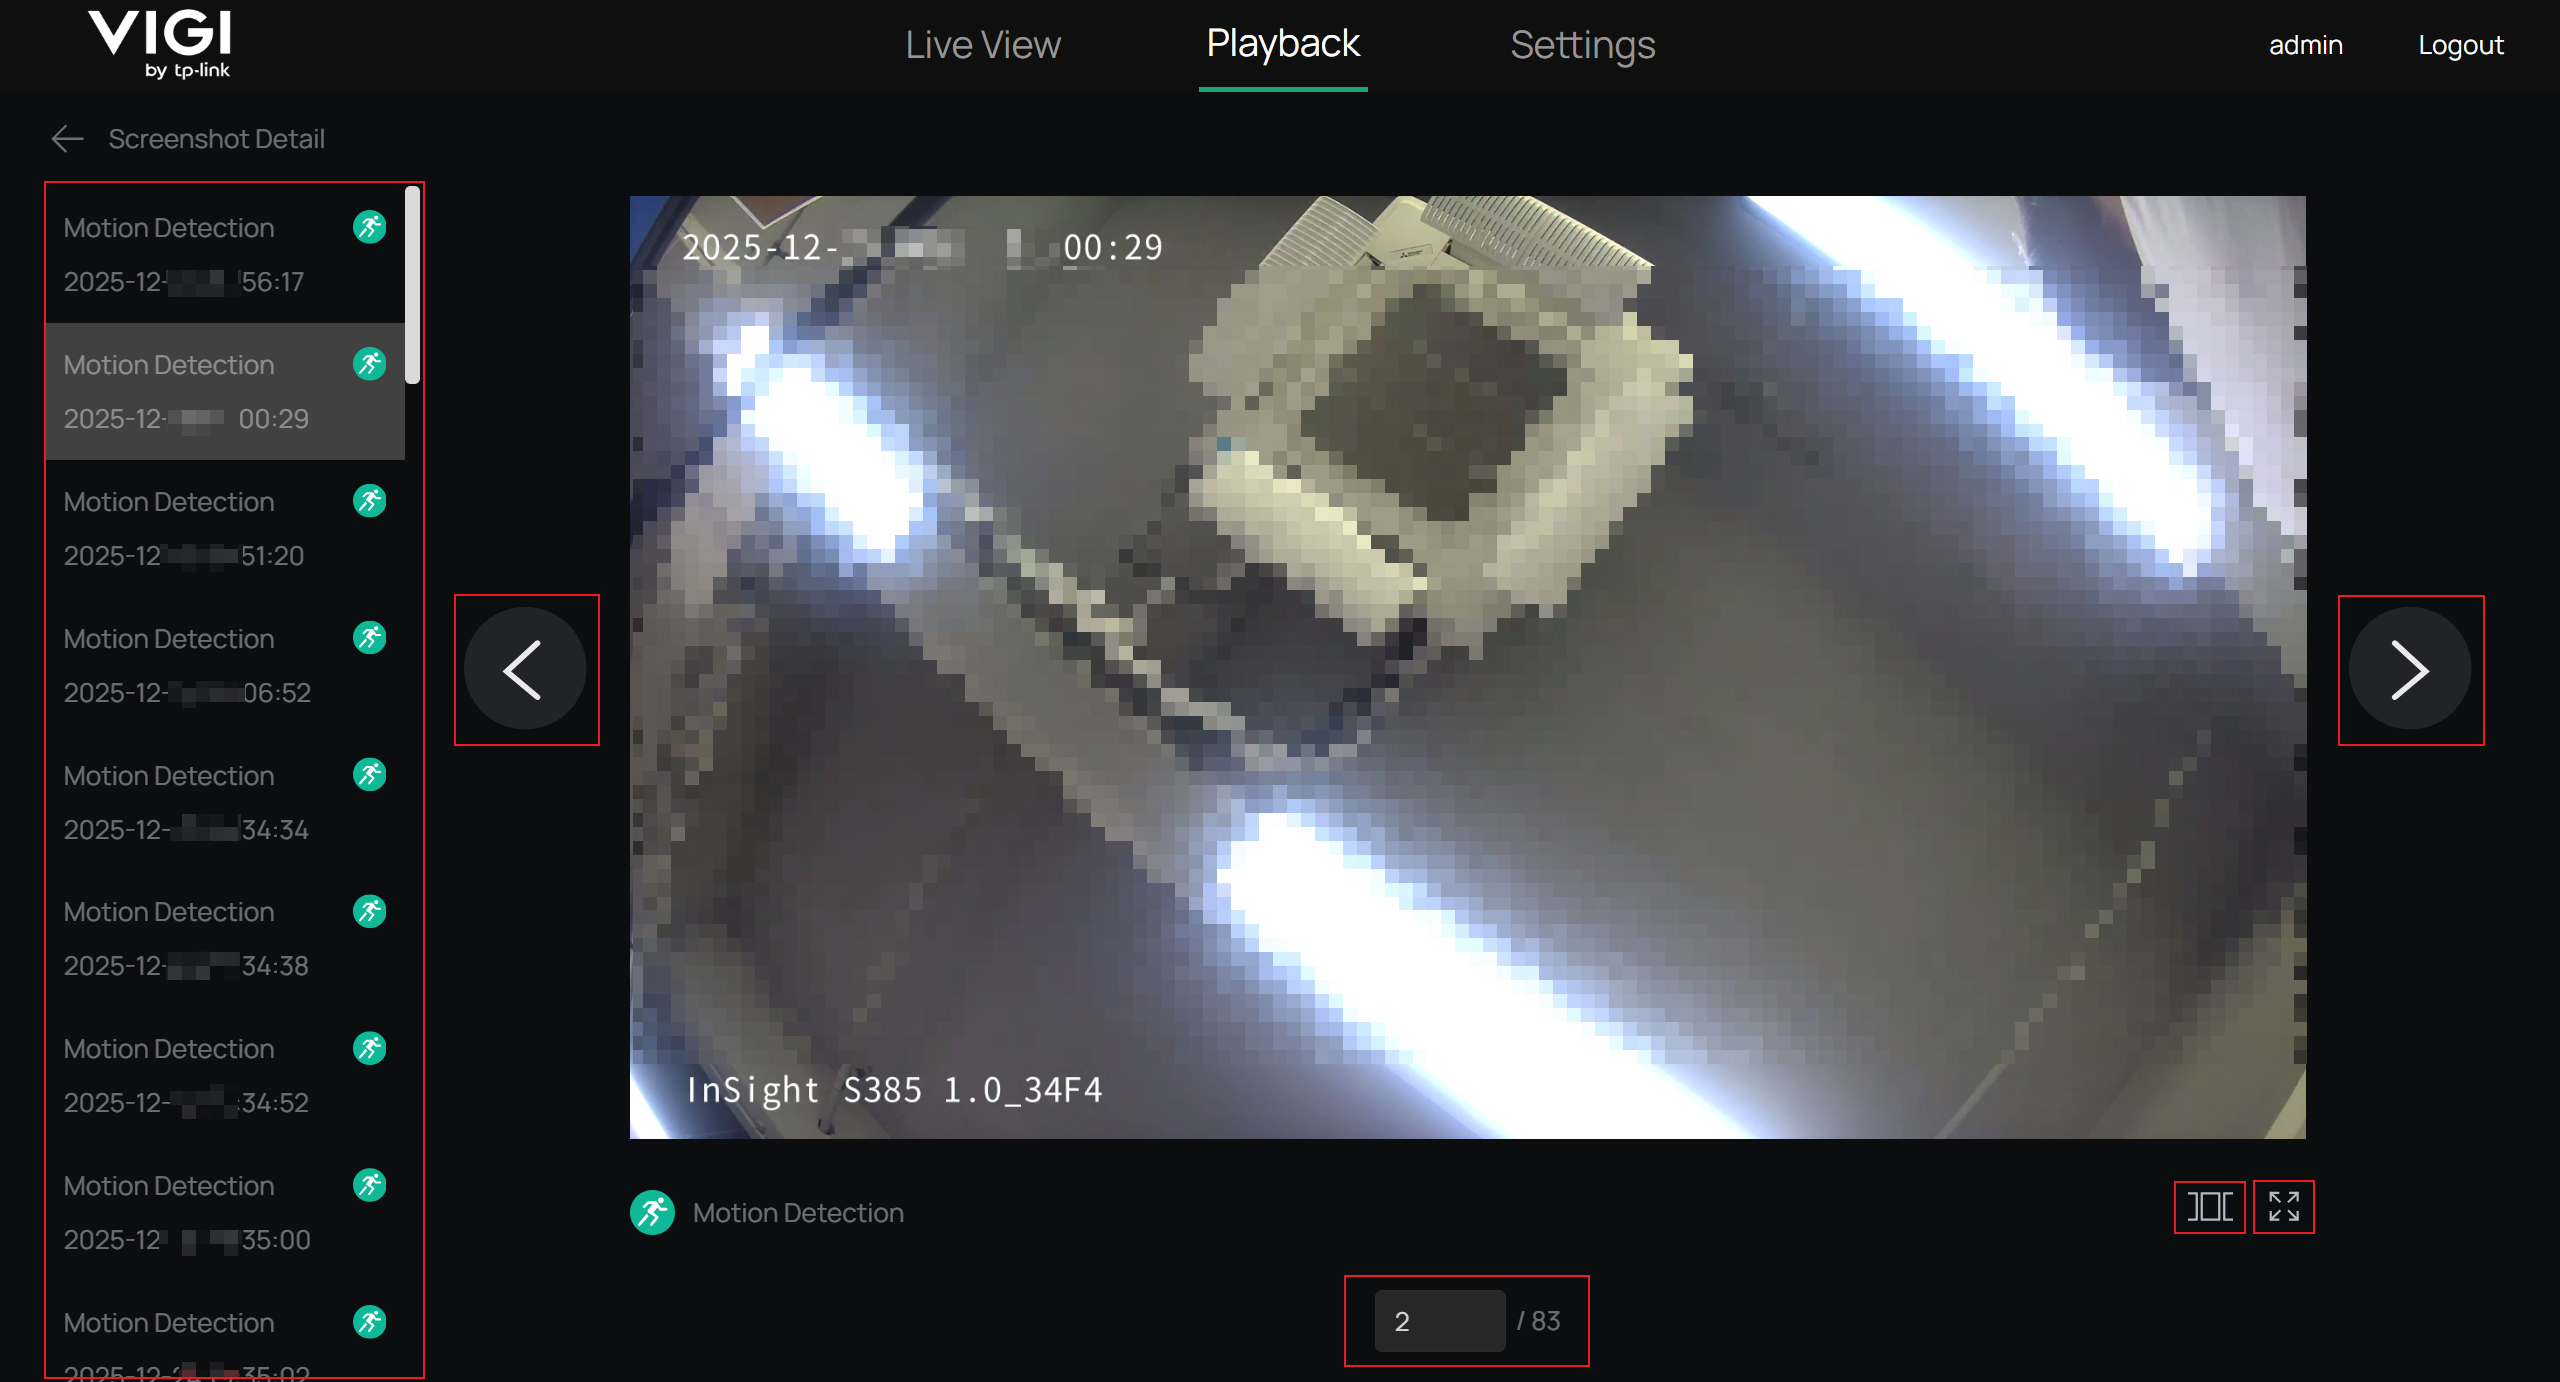
In Full Screen mode, you can switch images, enable Auto Carousel, or Exit Full Screen mode.
Download Captured Images
You can select images to Download, or click Select Current Page to select all images on the current page at once.
Conclusion
You have successfully configured the Capture, allowing the camera to capture images either on a scheduled basis or when events are triggered.
Get to know more details of each function and configuration please go to Download Center to download the manual of your product.
QA
Q1: Why are there no images displayed in Capture Playback even though Scheduled Capture or Event-Triggered Capture has been configured?
A1: Please check whether the SD card is correctly detected under Settings > Storage > Storage Management, and ensure that Capture Capacity is not set to 0.
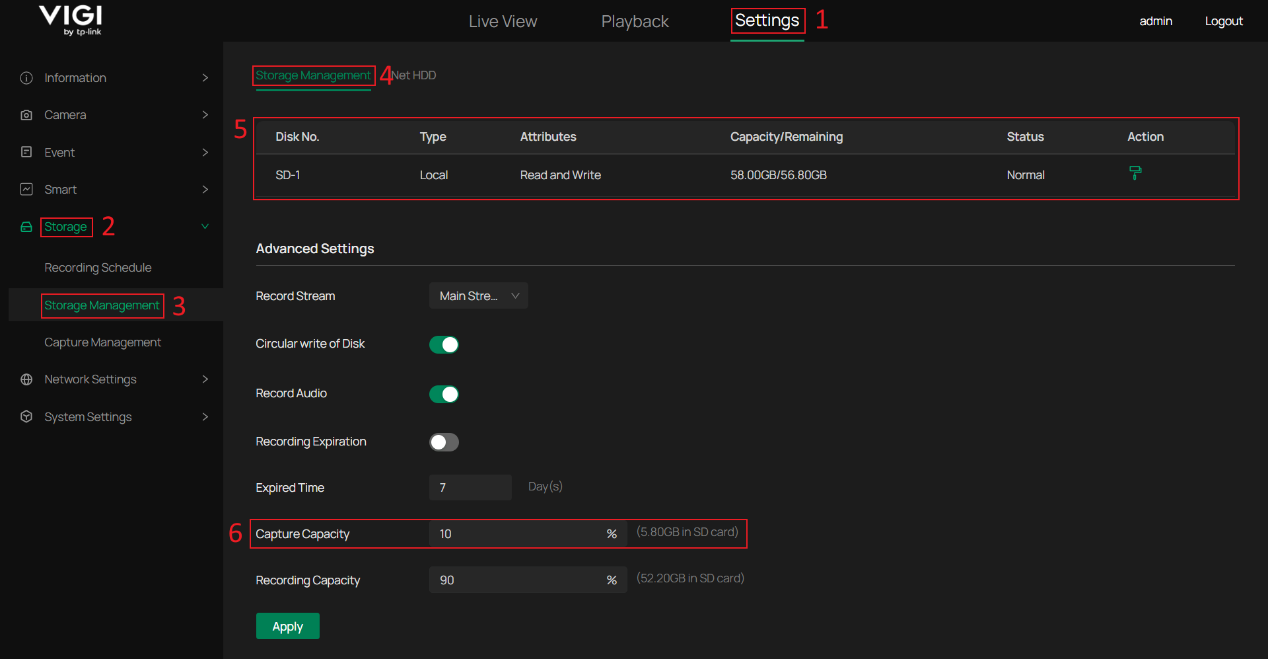
Note: After adjusting Capture Capacity or Recording Capacity, the SD card must be formatted for the changes to take effect.
Is this faq useful?
Your feedback helps improve this site.


TP-Link Community
Still need help? Search for answers, ask questions, and get help from TP-Link experts and other users around the world.