How to configure face analysis on VIGI NVR GUI
Contents
Introduction
Face Analysis uses AI algorithms to detect and capture faces appearing in the camera’s field of view, enabling quick target identification through the NVR’s AI Search function. This feature is suitable for scenarios where identifying individuals is essential, such as access control, attendance tracking, or security monitoring.
Requirements
- VIGI camera that supports Face Analysis
- VIGI NVR that supports the AI Search function
Configuration
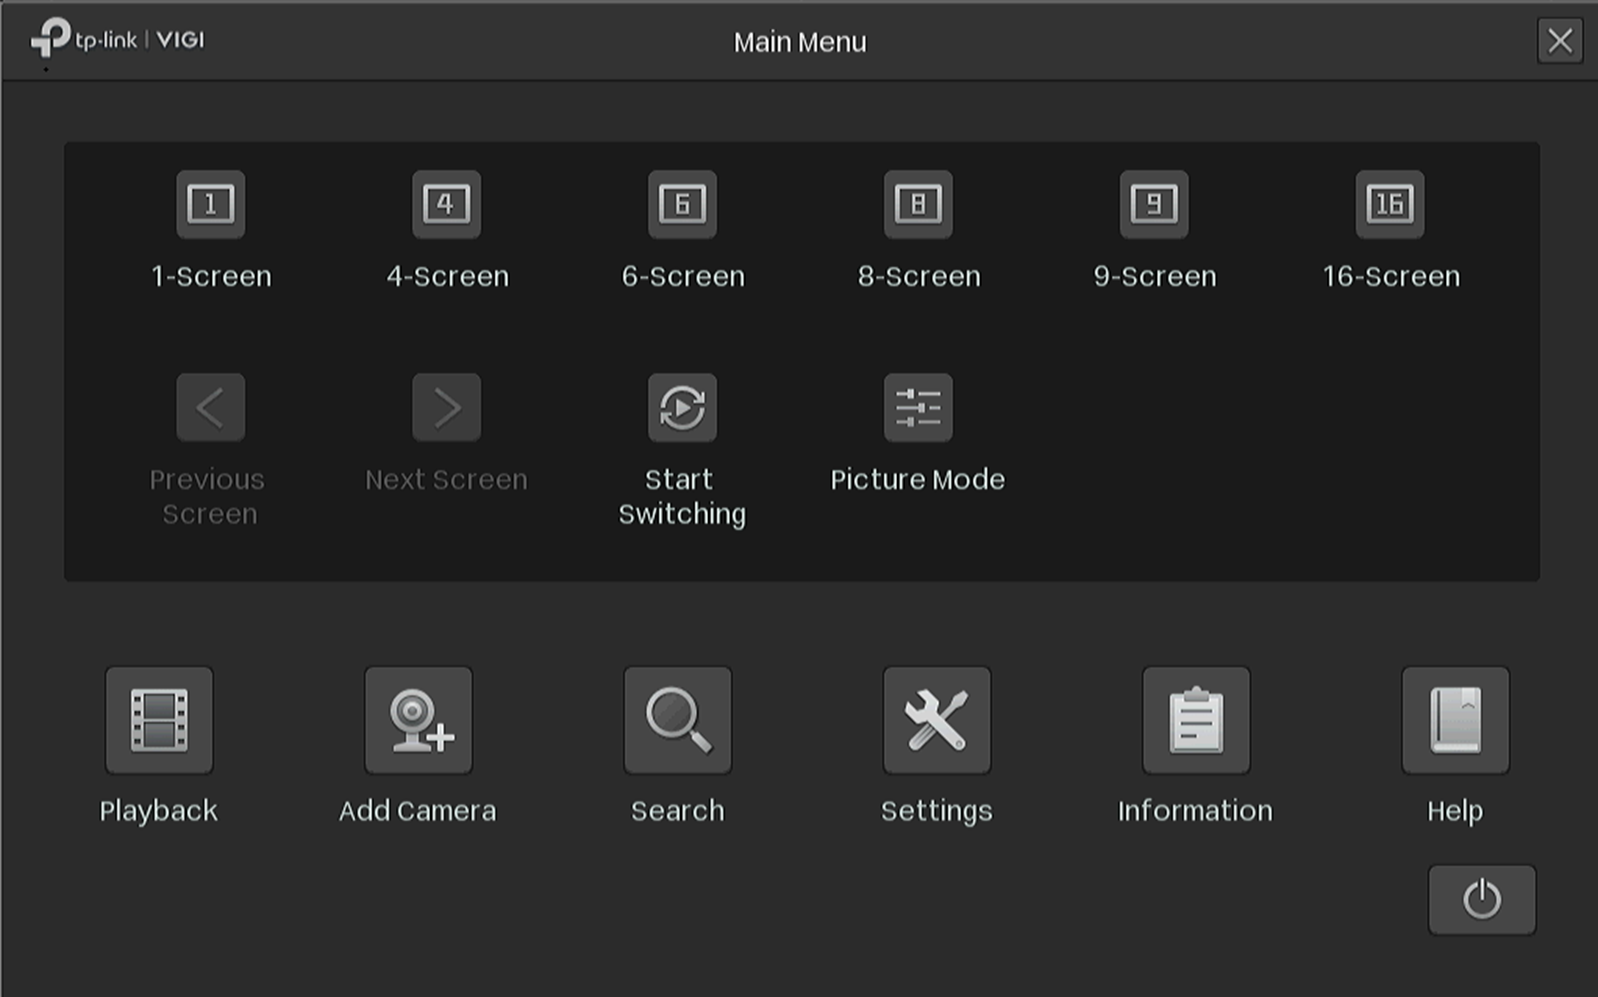
Step 1. Right-click on the screen, click Settings on the Main Menu.
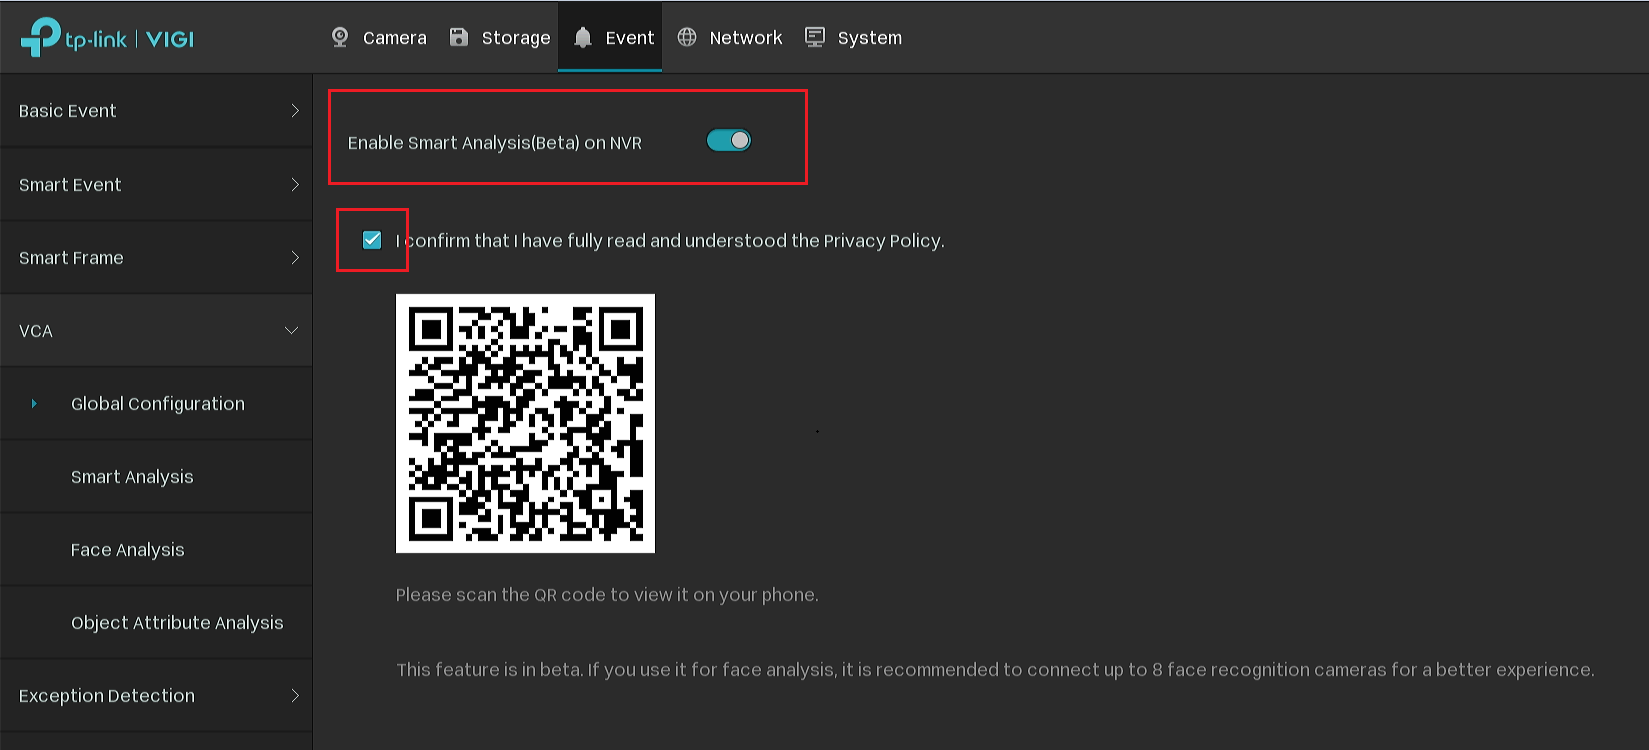
Go to Settings > Event >VCA > Global Configuration. Scan the QR code and view the Privacy Policy. Then check the box to agree to the Privacy agreement and click Enable Smart Analysis On NVR.
Note:
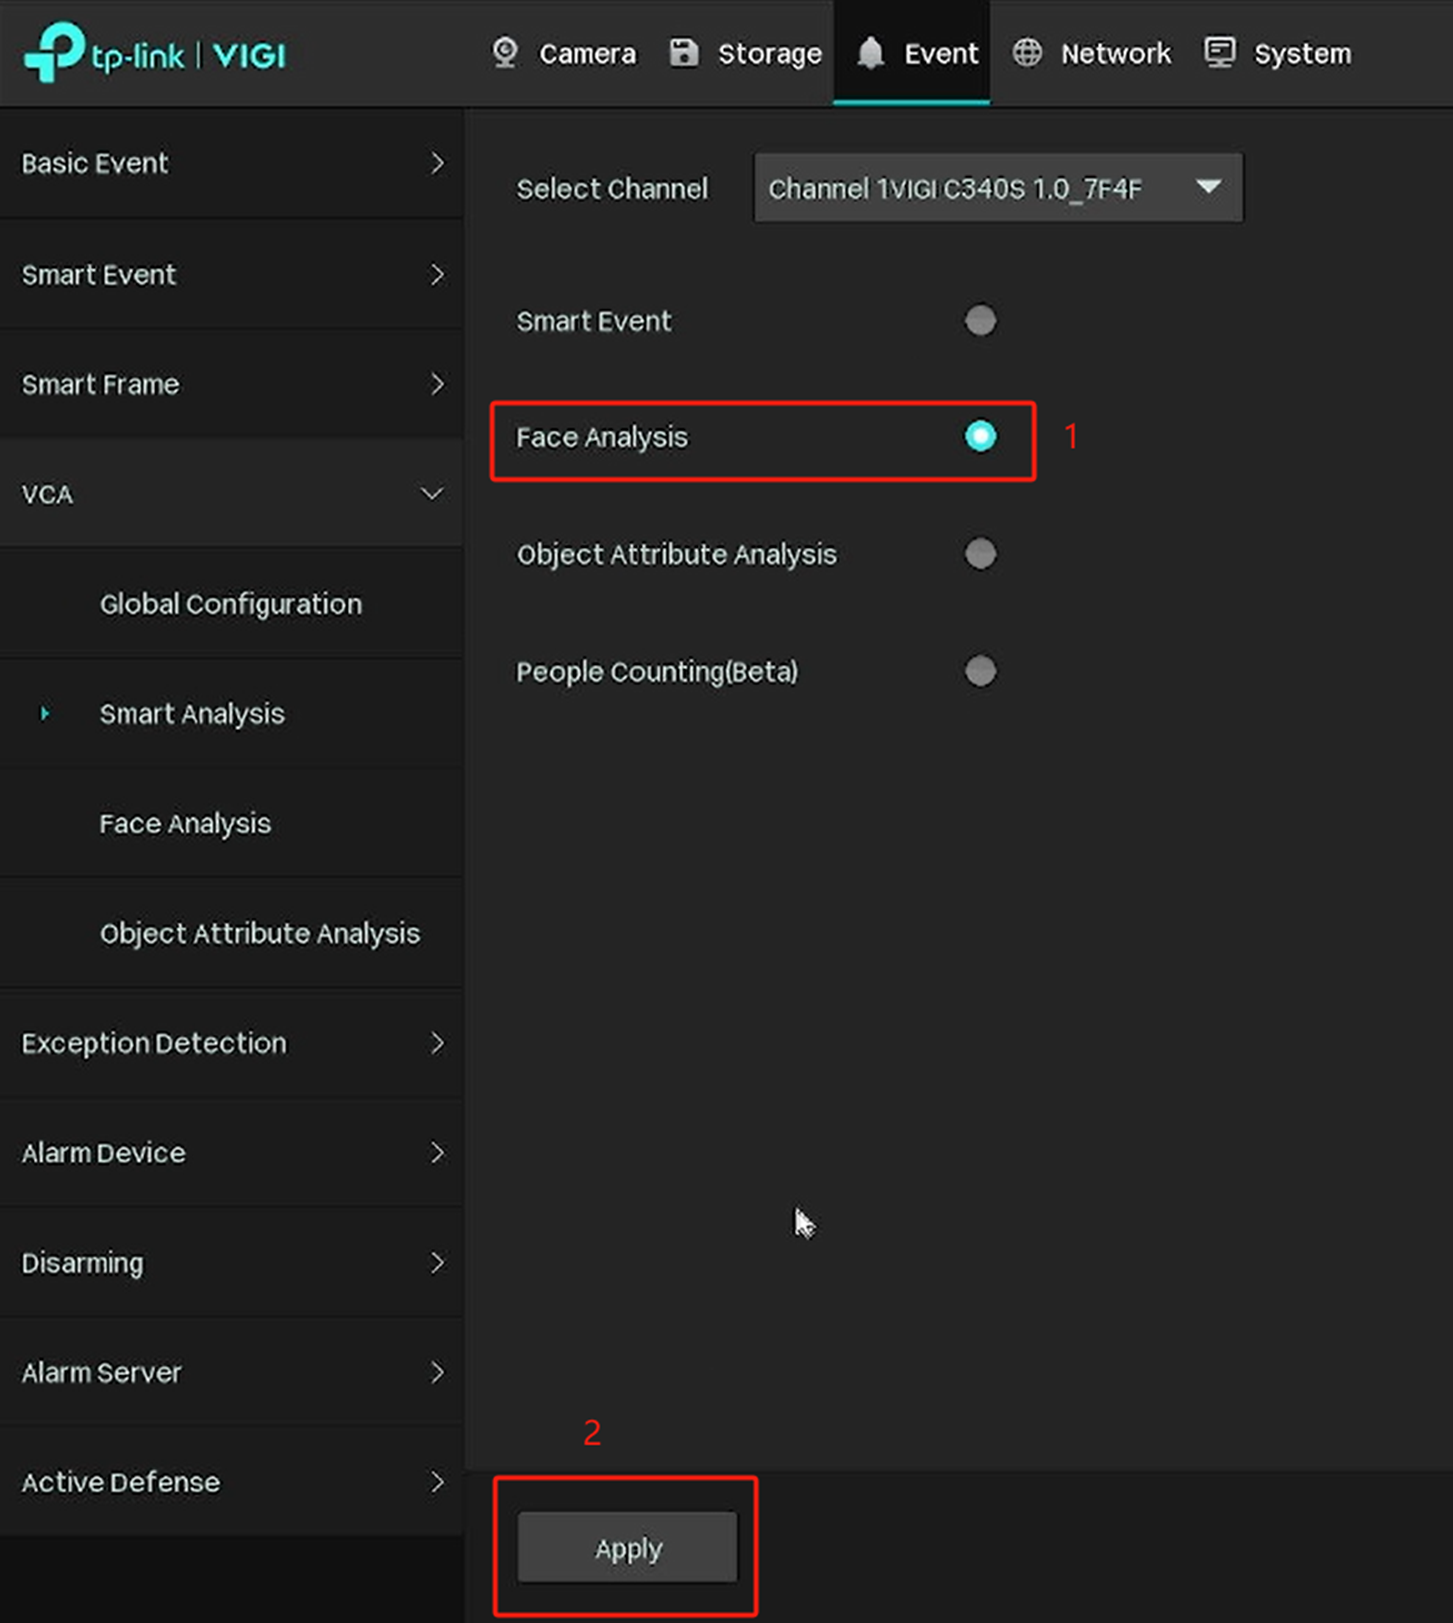
Currently, only one of the following camera functions can be selected, and the selection of multiple functions is not supported.
Smart Event: Basic smart events, such as line crossings, Intrusion Detection, etc., are supported by the camera by default
Face Analysis: Used to analyze the faces that appear on the screen
Object Attribute Analysis: Use to identify human and vehicle attributes.
Step 2. Adding cameras that support AI Search to NVR.
Step 3. Go to Settings> Event>VCA>Smart Analysis. Select the camera and enable the Face Analysis. Click Apply.
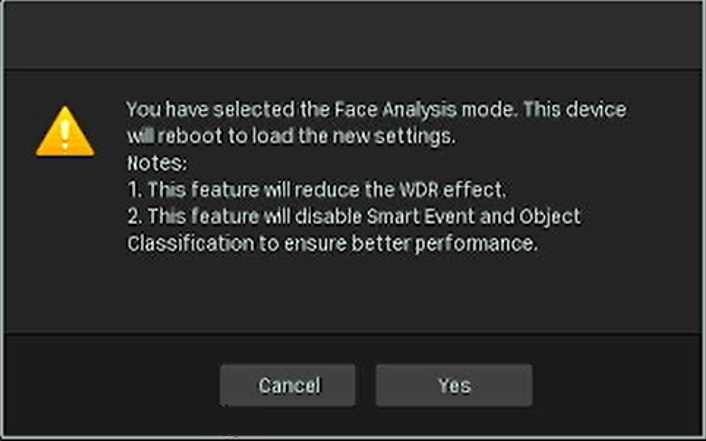
Step 4. There’ll be a small window that pops up. After clicking Yes, the camera will reboot automatically. Please wait for the camera to come back online.
Step 5. After the camera restarts the connection, go to VCA > Face Analysis and enable Face Analysis. You can adjust the face capture area and Alarm Schedule on this page.
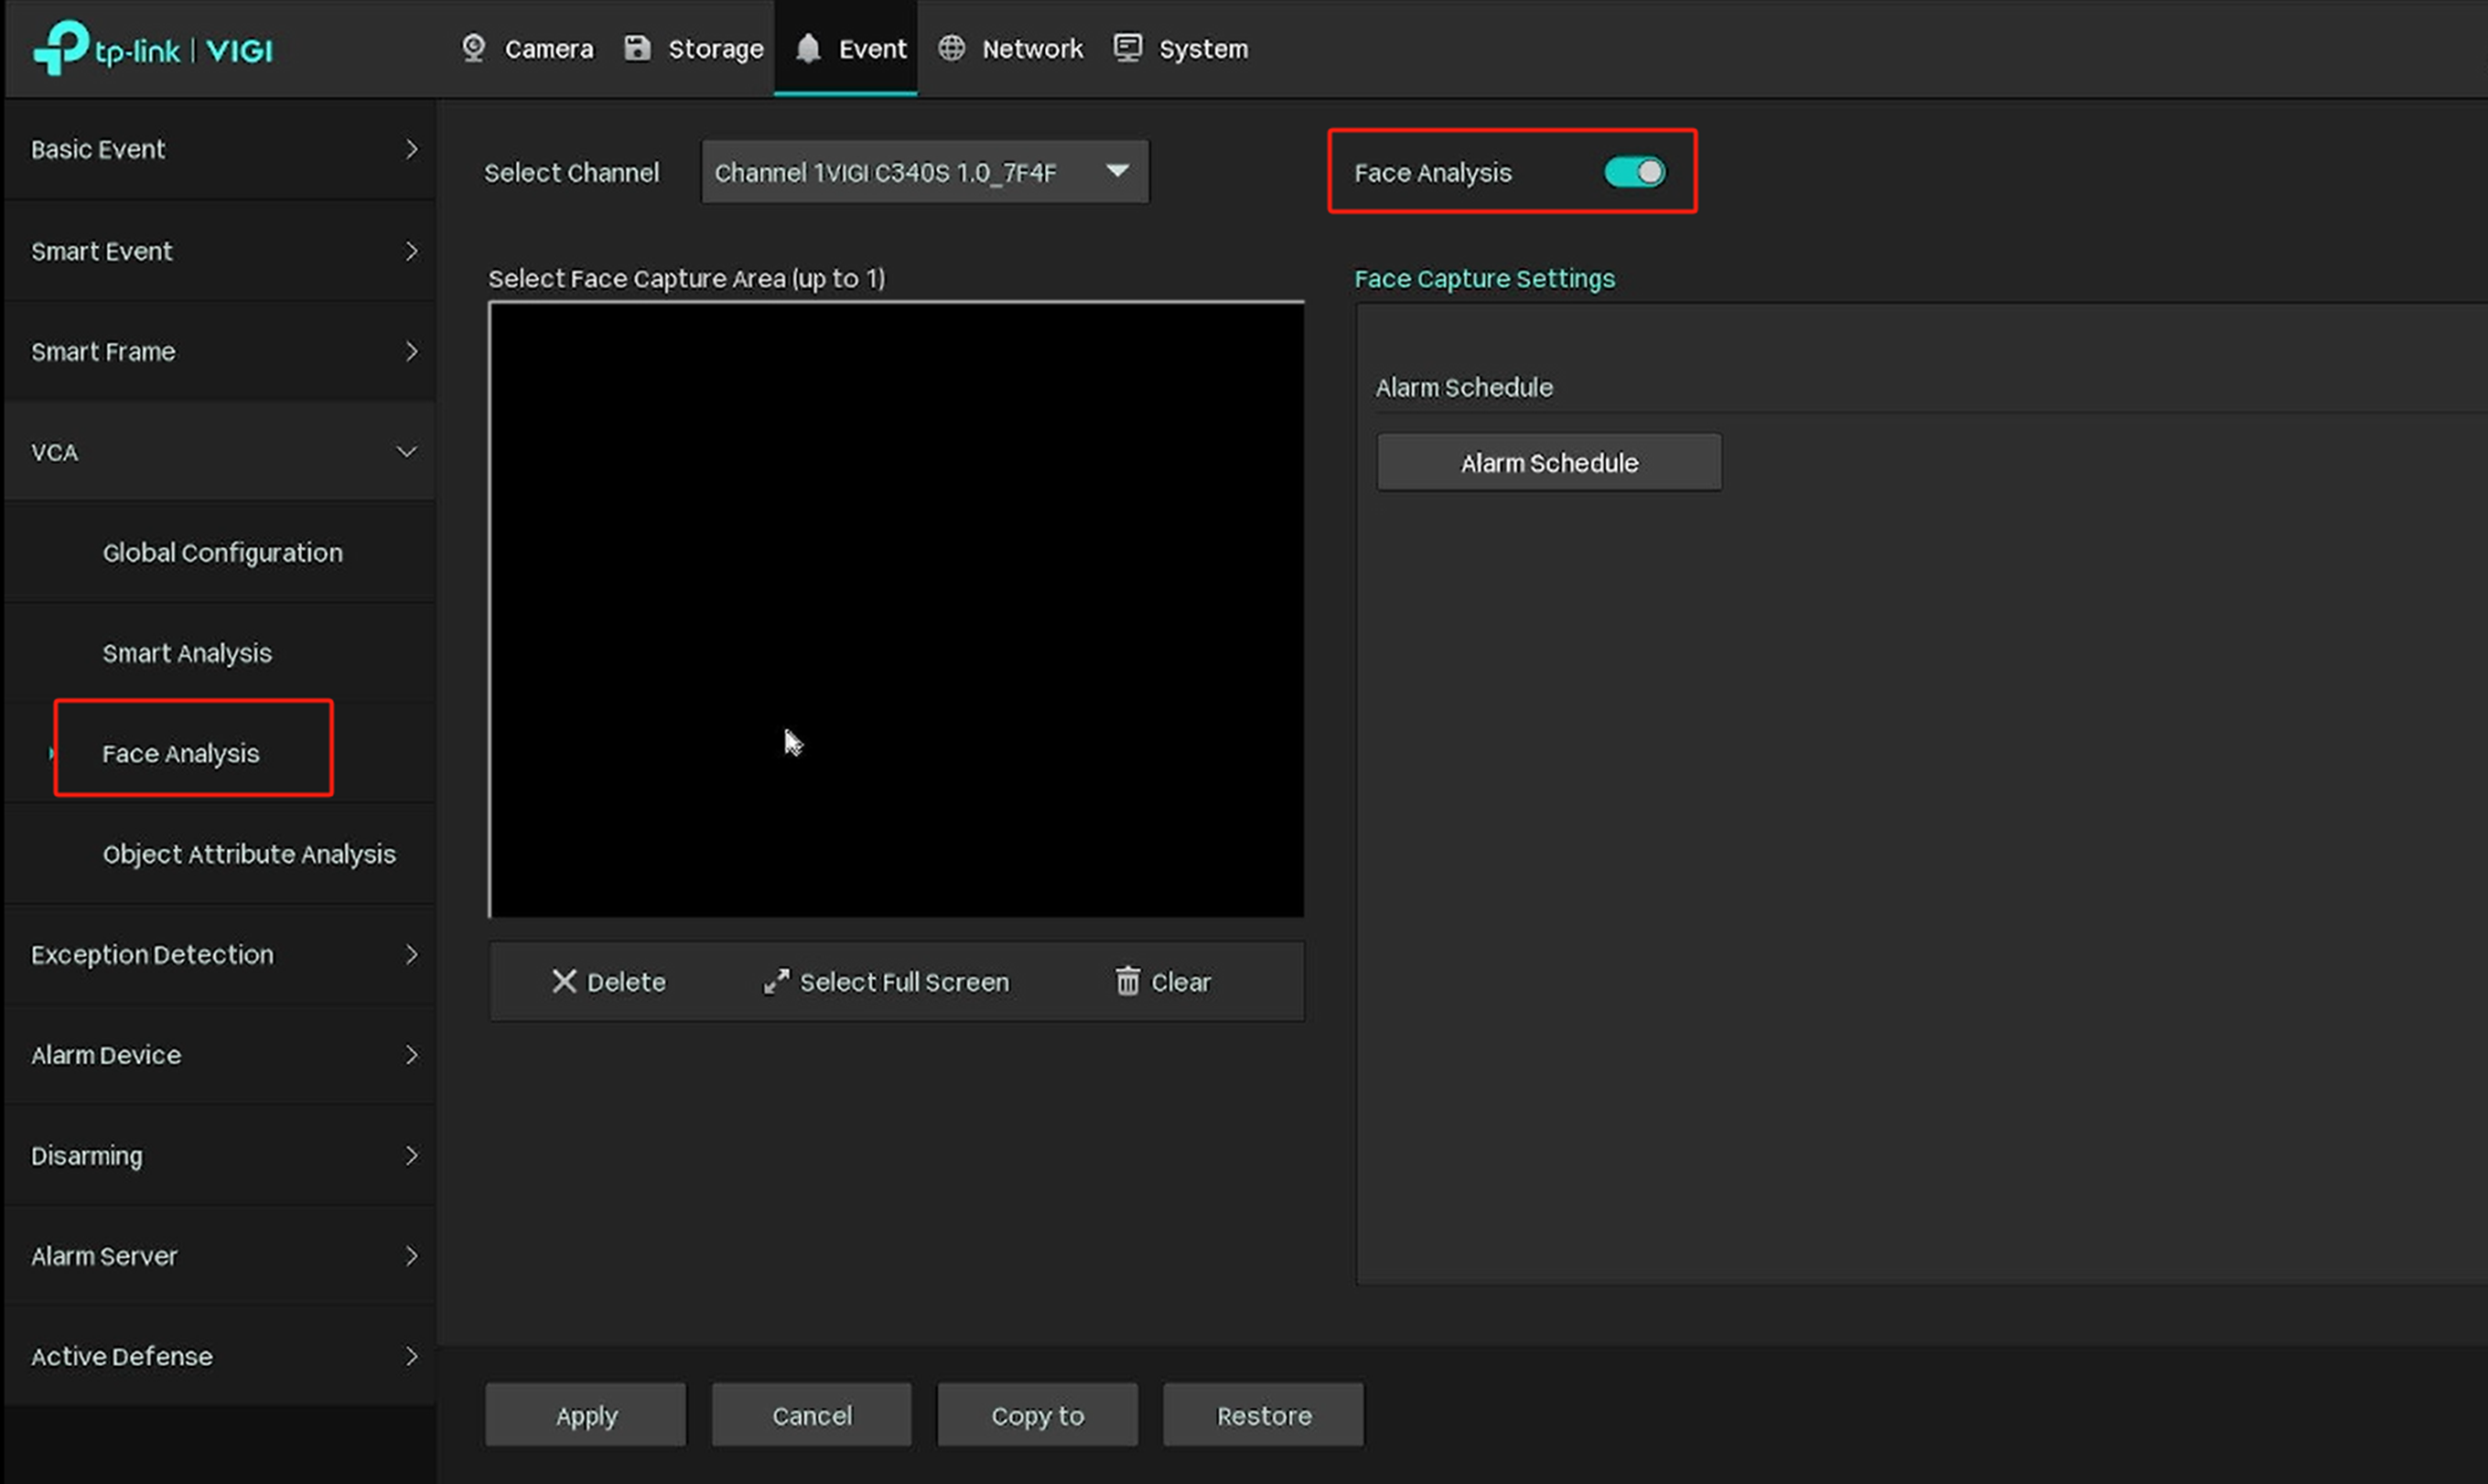
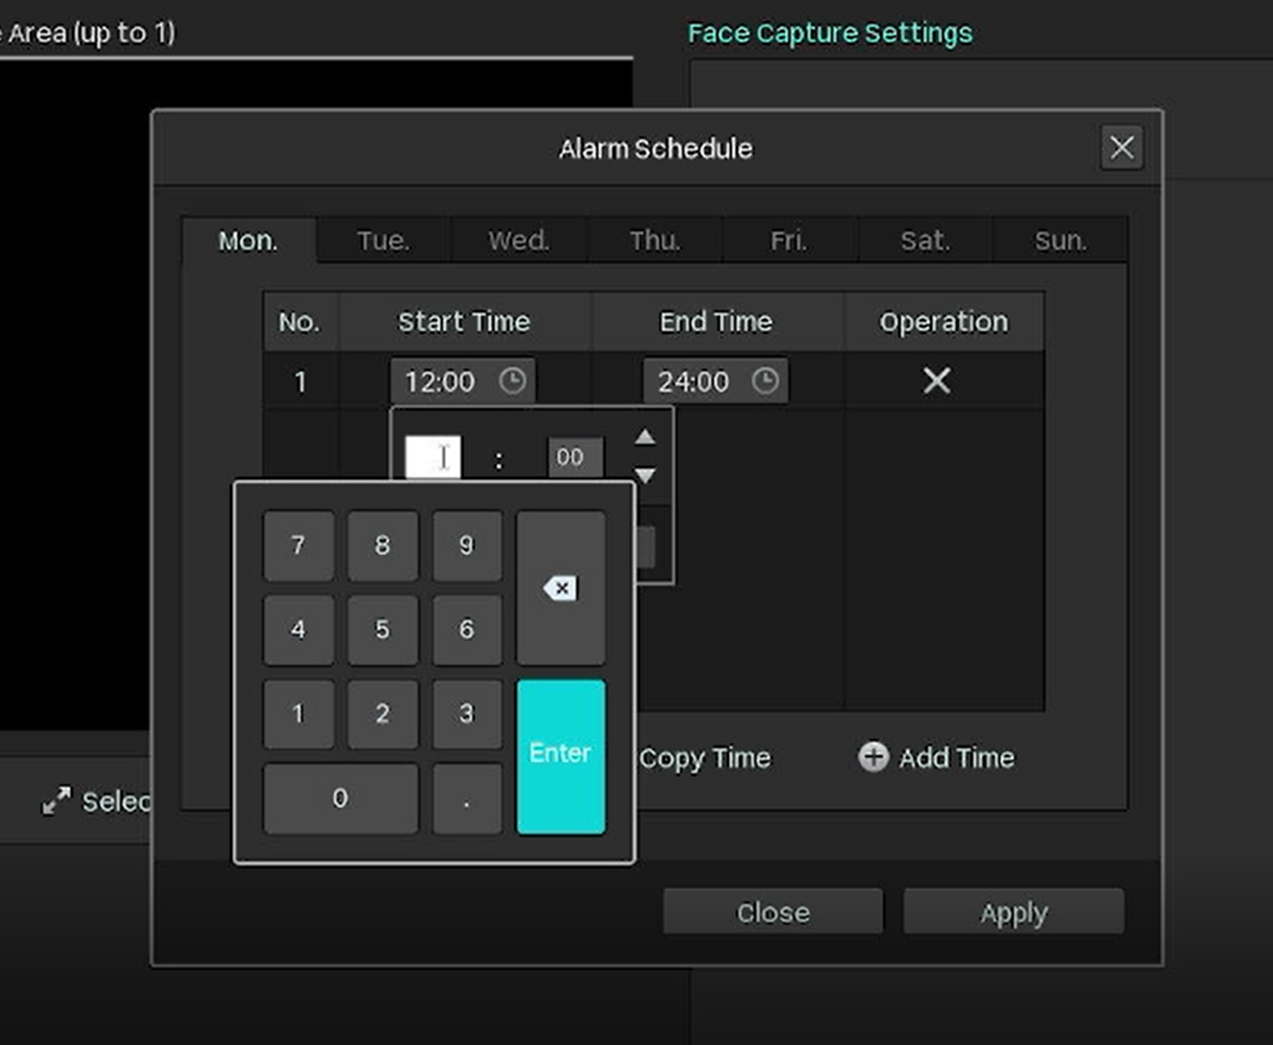
Step 6. After configuring Face Analysis settings, click Apply.
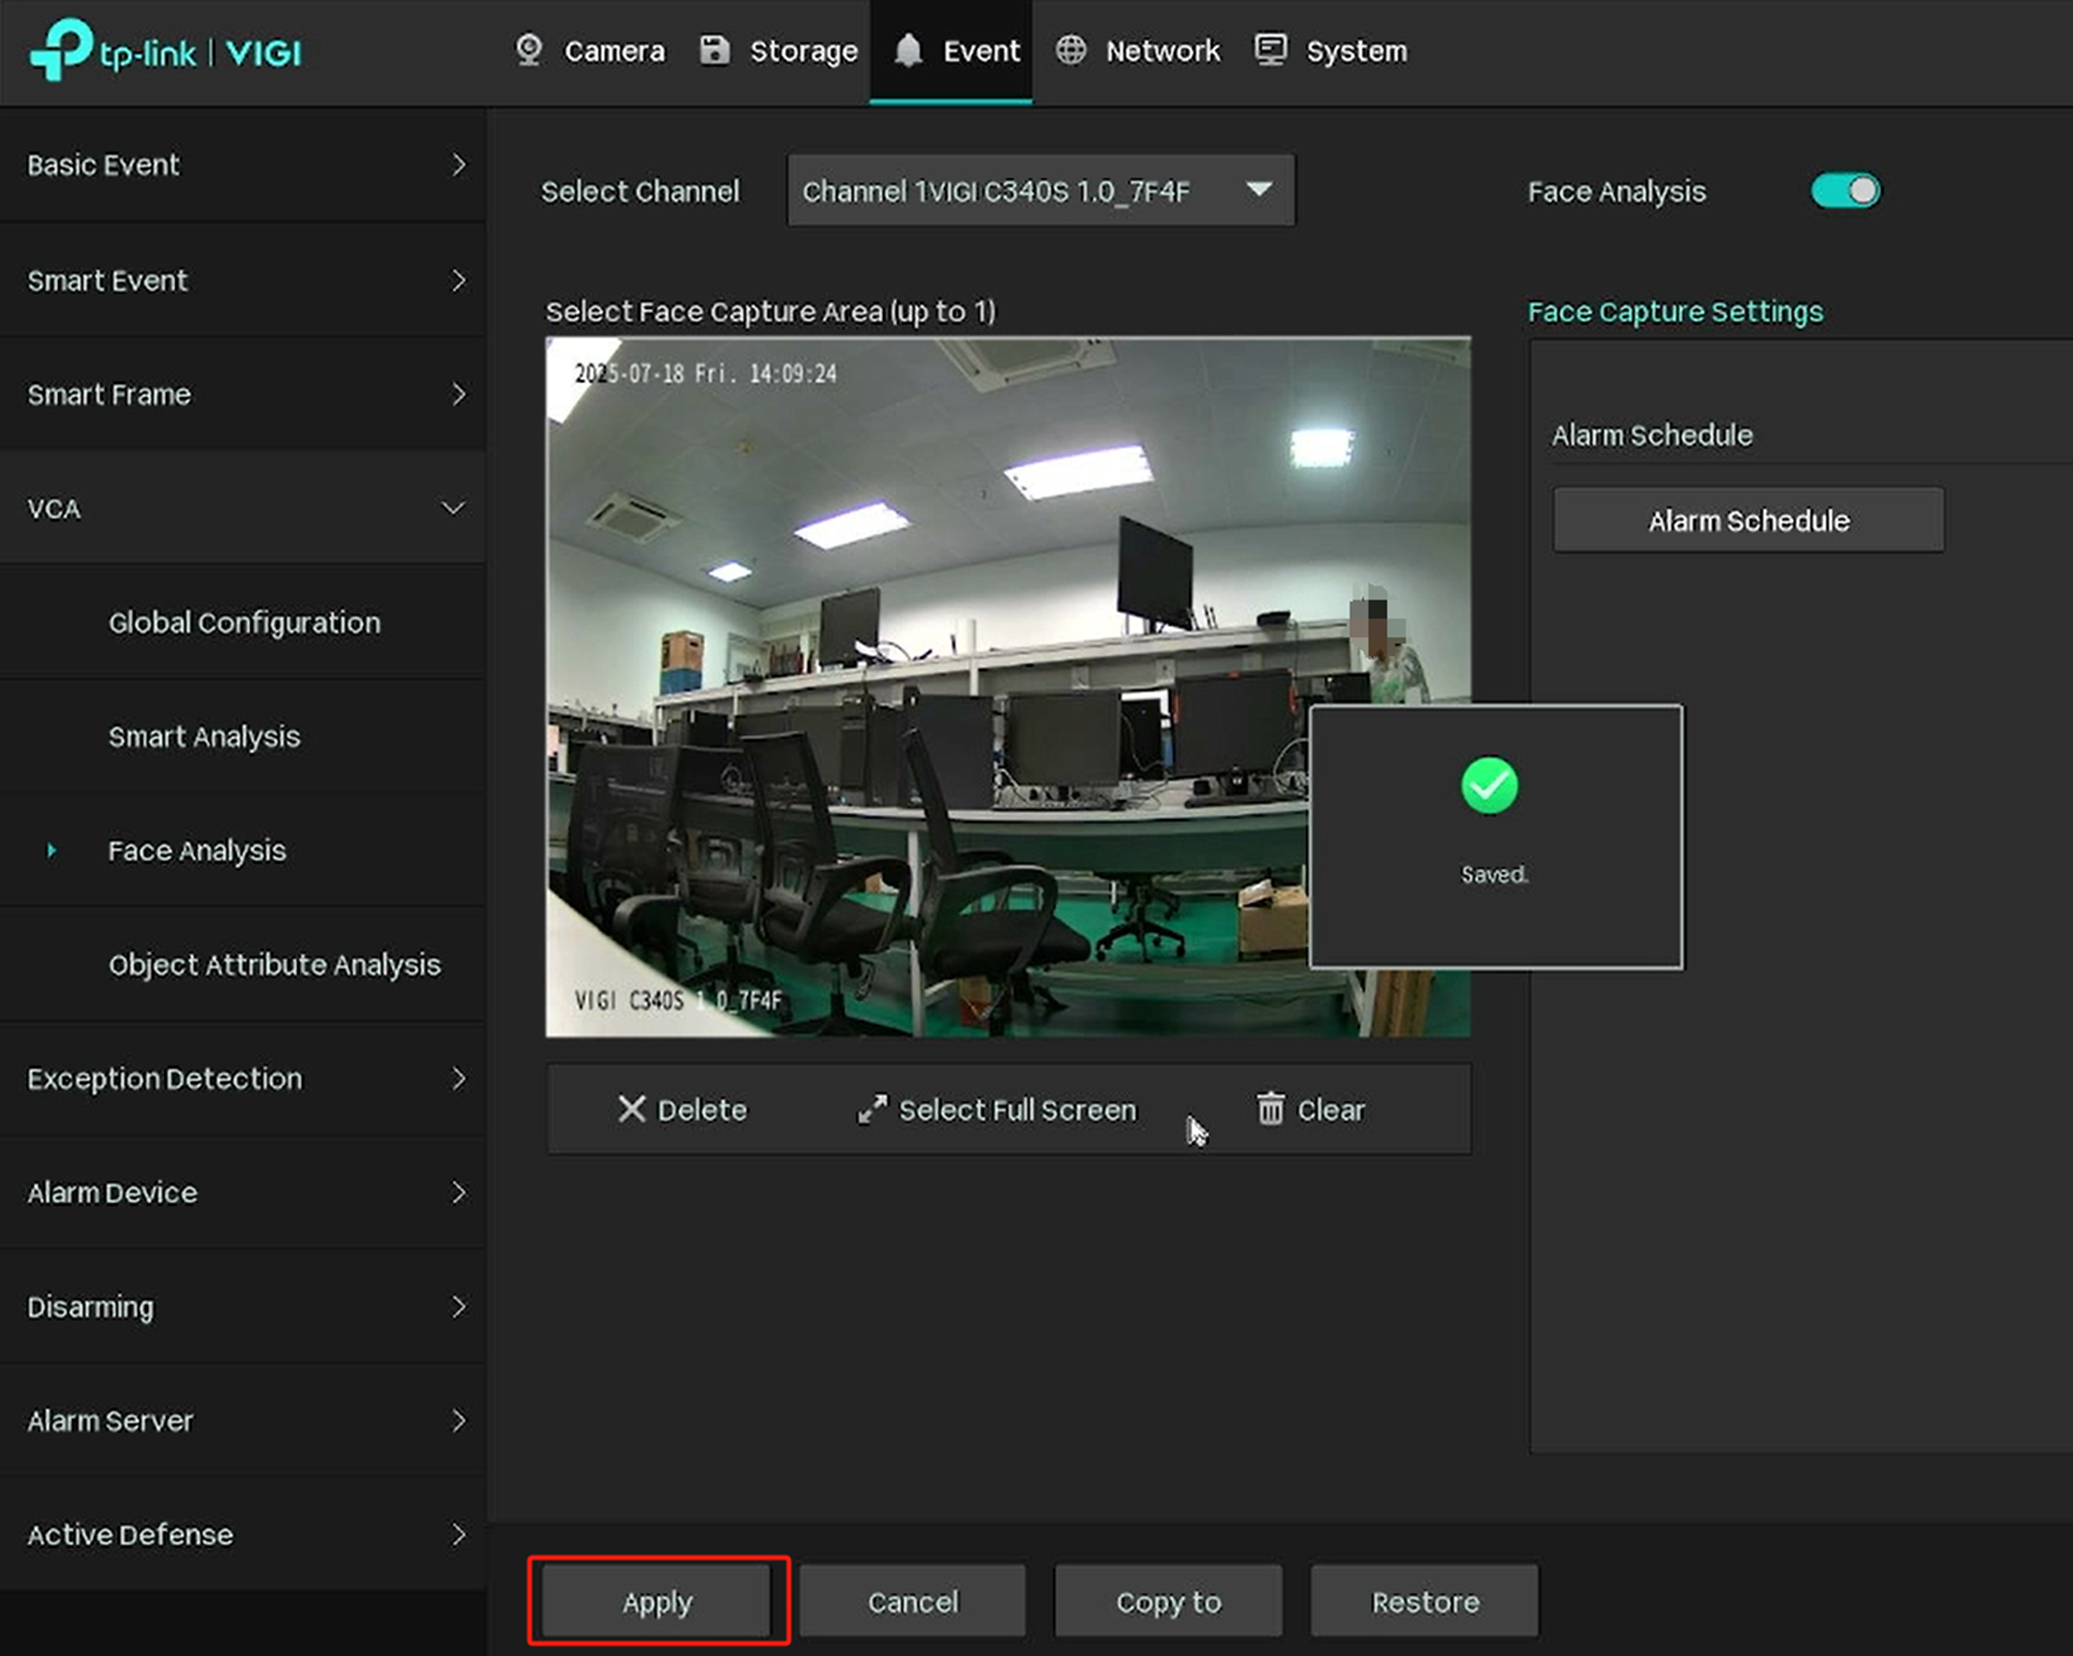
Note: After the configuration, please ensure a search target is visible on the screen, and that the installation height and angle meet the camera AI search shooting requirements. Once a certain amount of smart data is stored, it can be searched using the AI Search function on the GUI. If the detection target person is too far away from the camera, the face needs to be facing the camera.
Step 7. Go back and right-click on the screen, click Settings on the Main Menu, and go to Search.
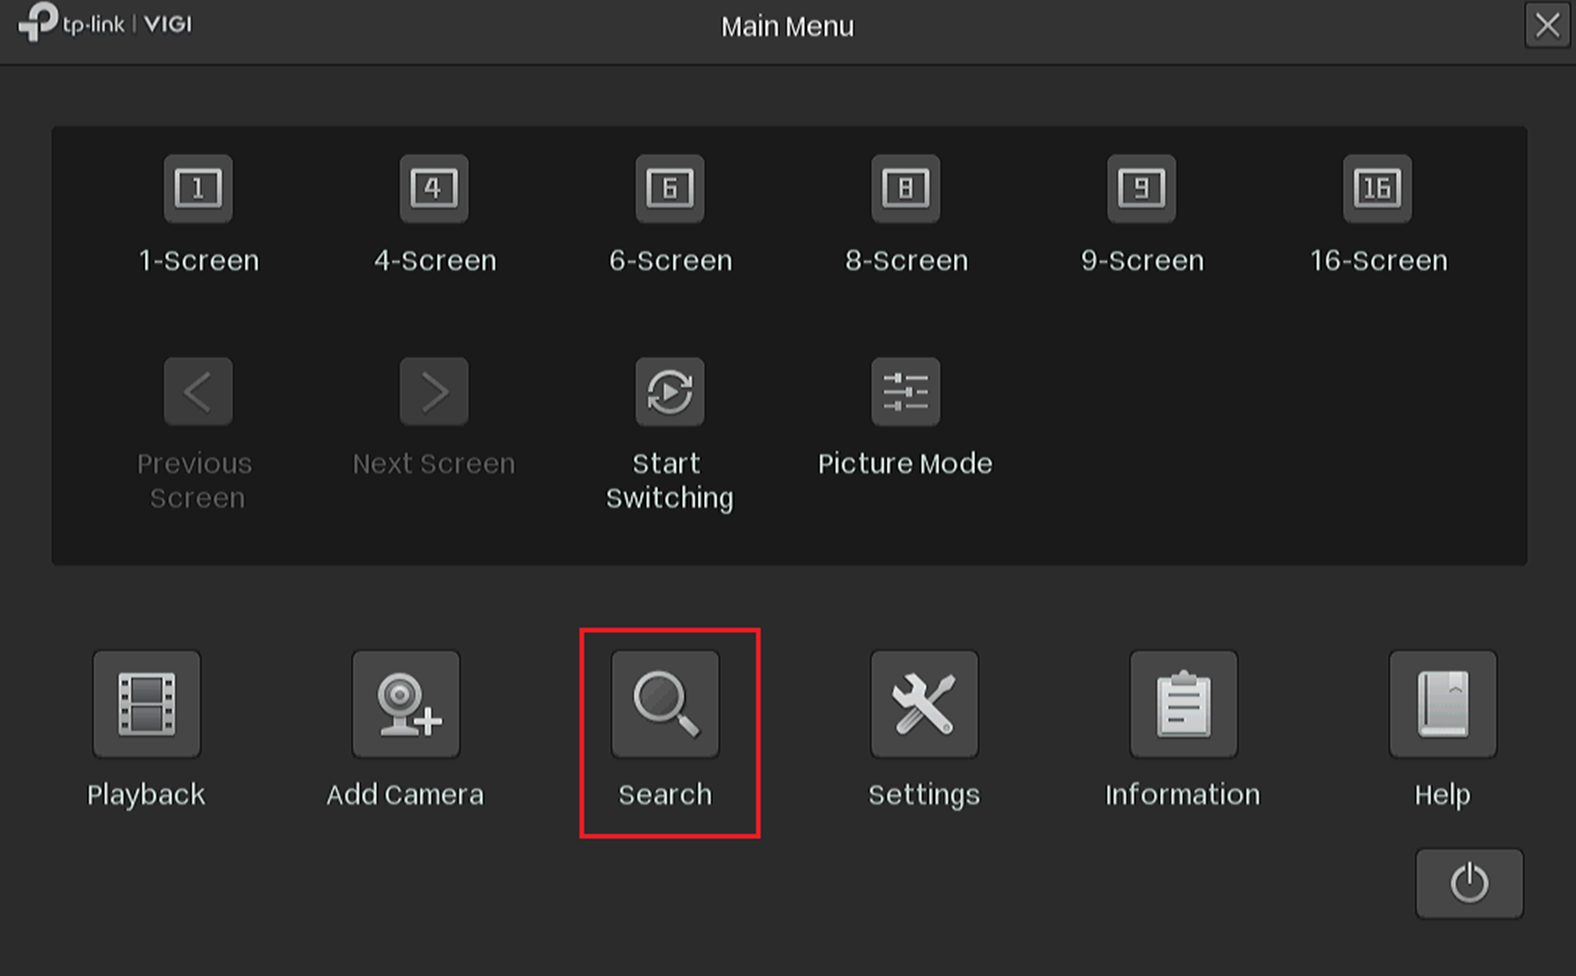
Step 8. Choose Face Search. You can configure the search channel and time range, and click Search to search for eligible captures.

Move the mouse over the bottom left corner of the thumbnail. This will allow you to search for similar pictures. Move the mouse over the bottom right corner of the preview picture. This will allow you to delete the face capture.

Conclusion
You have now configured Face Analysis on your NVR. You can search and review face captures using the AI Search function.
Get to know more details of each function and configuration please go to Download Center to download the manual of your product.
¿Es útil esta pregunta frecuente?
Sus comentarios nos ayudan a mejorar este sitio.


