


How to Disable NAT on Omada Gateway
Contents
Objective
This article provides a practical guide for configuring the Disable NAT feature on Omada Gateway devices, making it easy for users to implement.
Requirements
- Omada Controller (software Controller v5.15.20)
- Omada Gateway ER7206 v2.0
Introduction
By default, when NAT is enabled on the Omada Gateway, traffic from the WAN to the LAN is restricted, which can make it difficult for external devices to access internal resources. The new Disable NAT feature, introduced in SDNC 5.15, allows WAN-to-LAN traffic to be forwarded directly without NAT translation, enabling public network devices to reach internal LAN servers and services.
Configuration
This section explains how to configure Virtual WAN for dedicated line service scenarios.
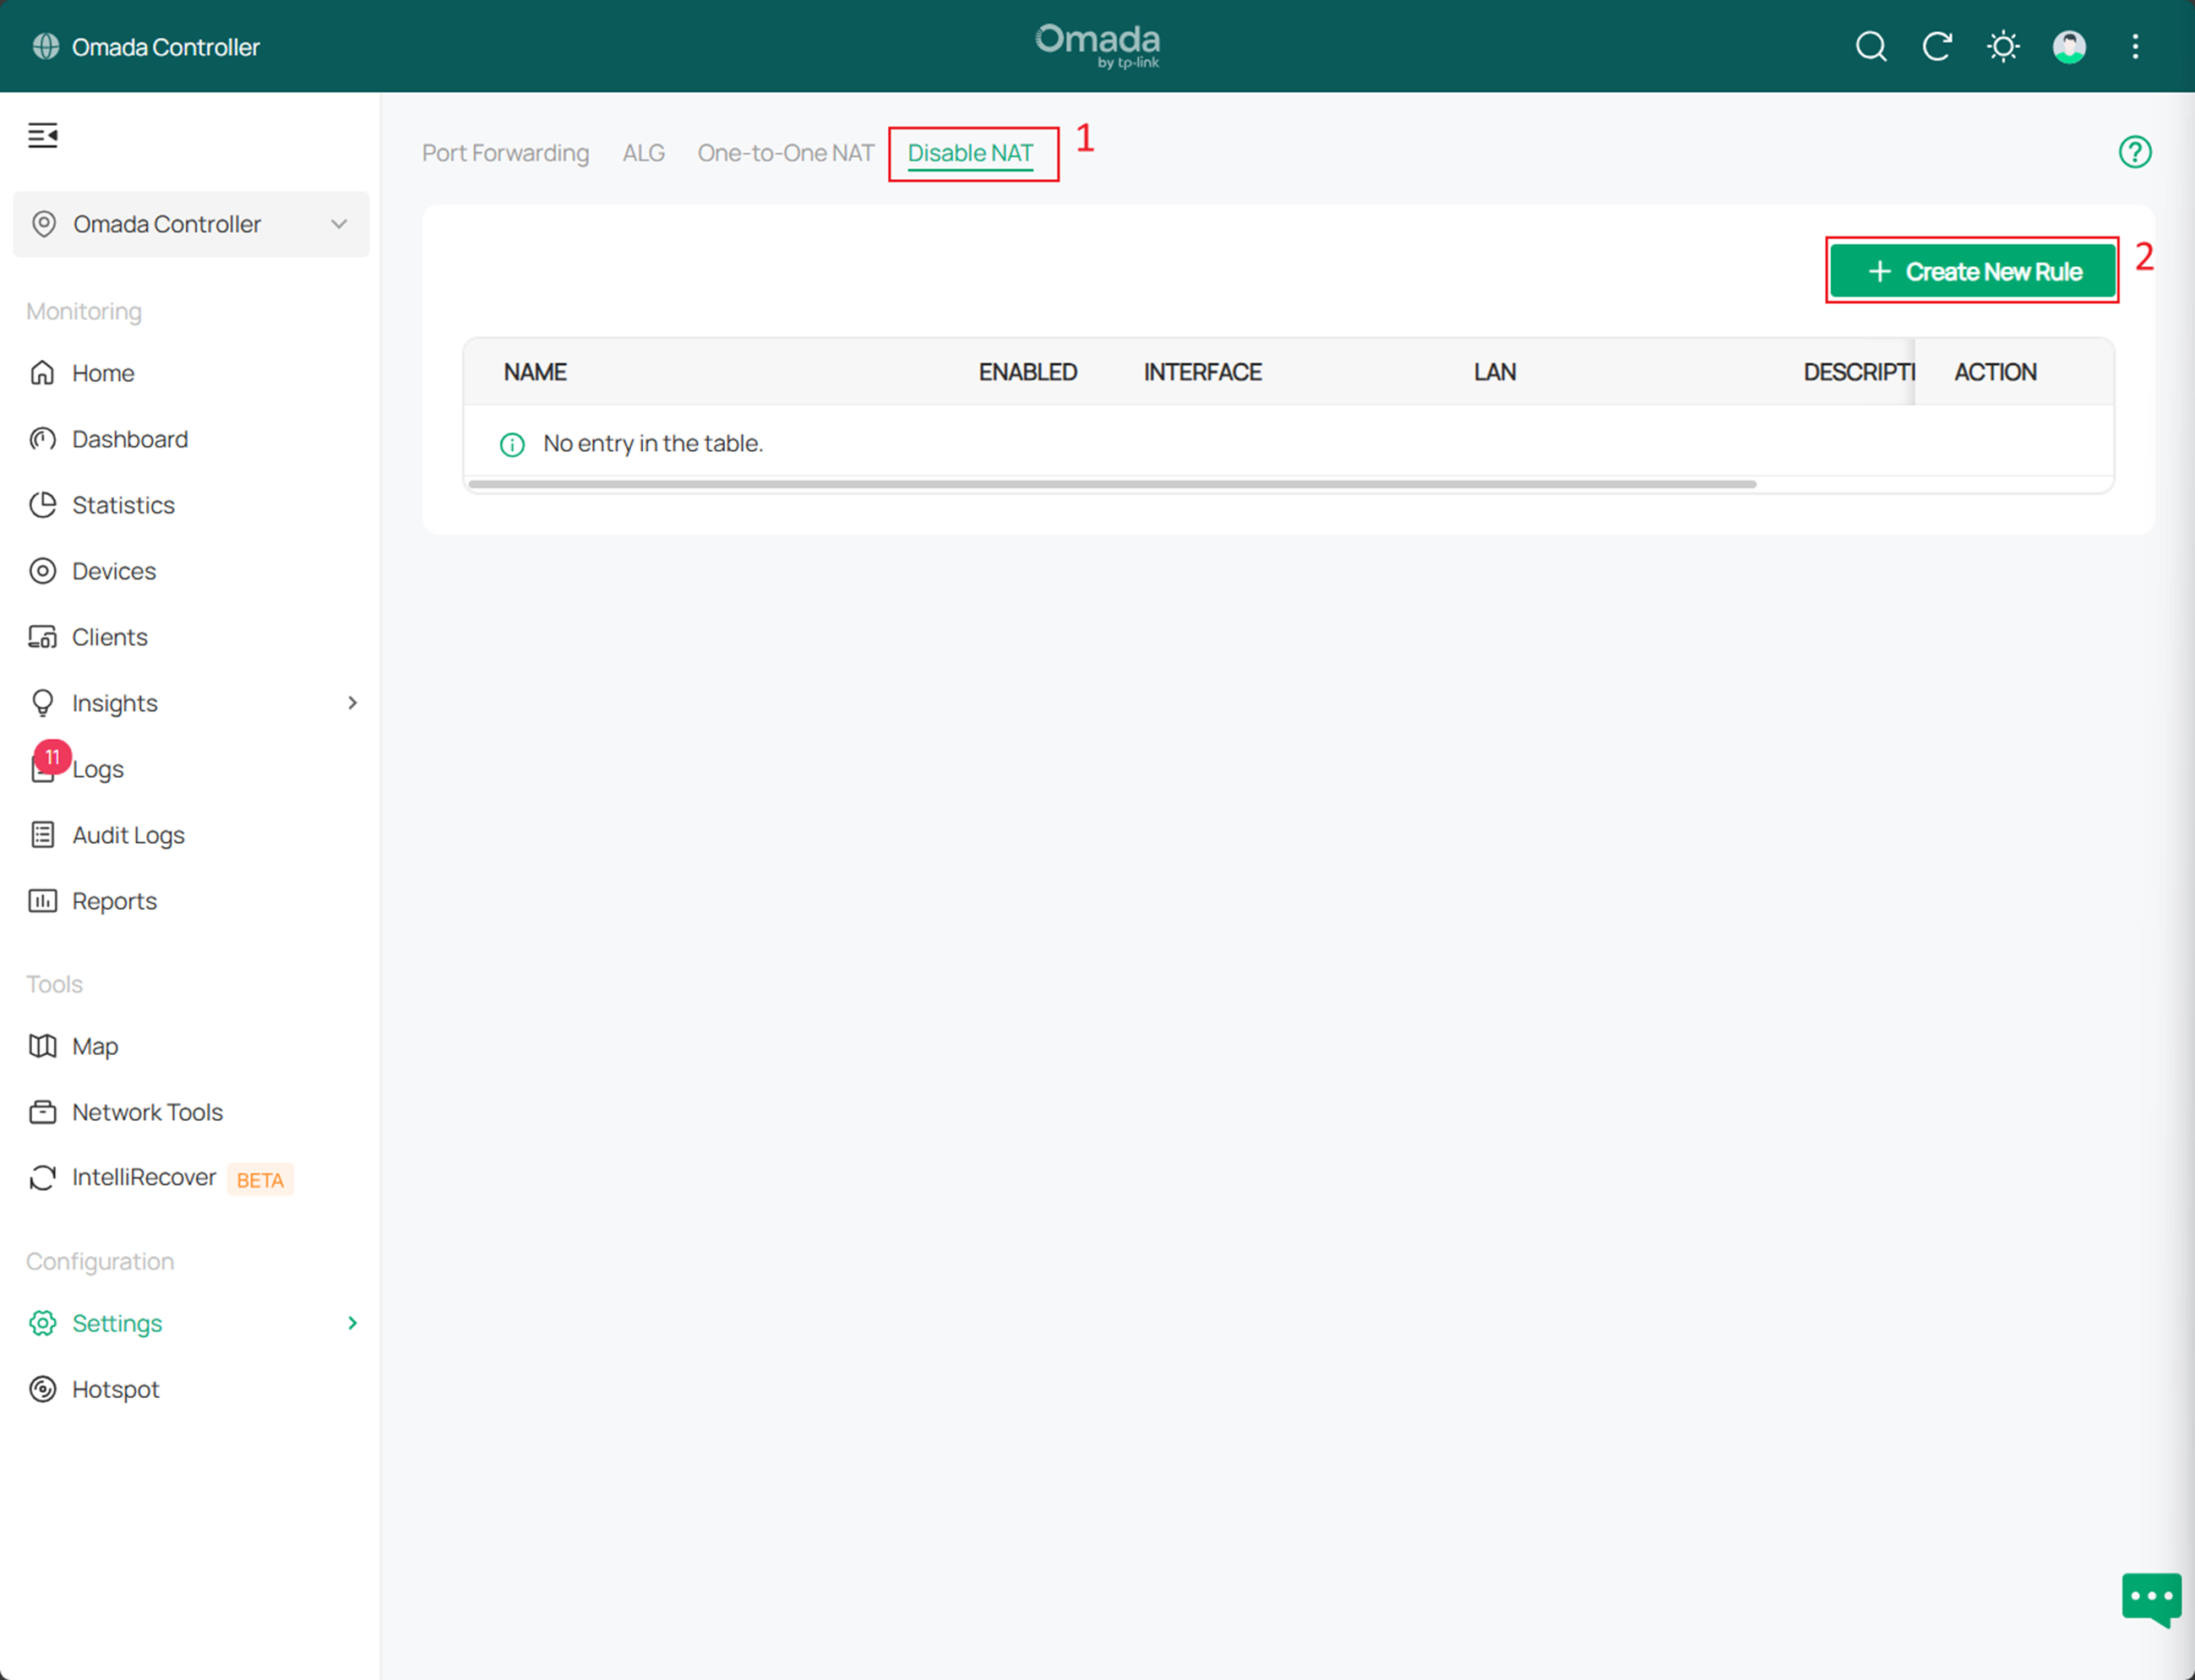
Step 1. Log in to the controller management page, navigate to Settings > NAT > Disable NAT, and click Create New Rule to add a Disable NAT rule.
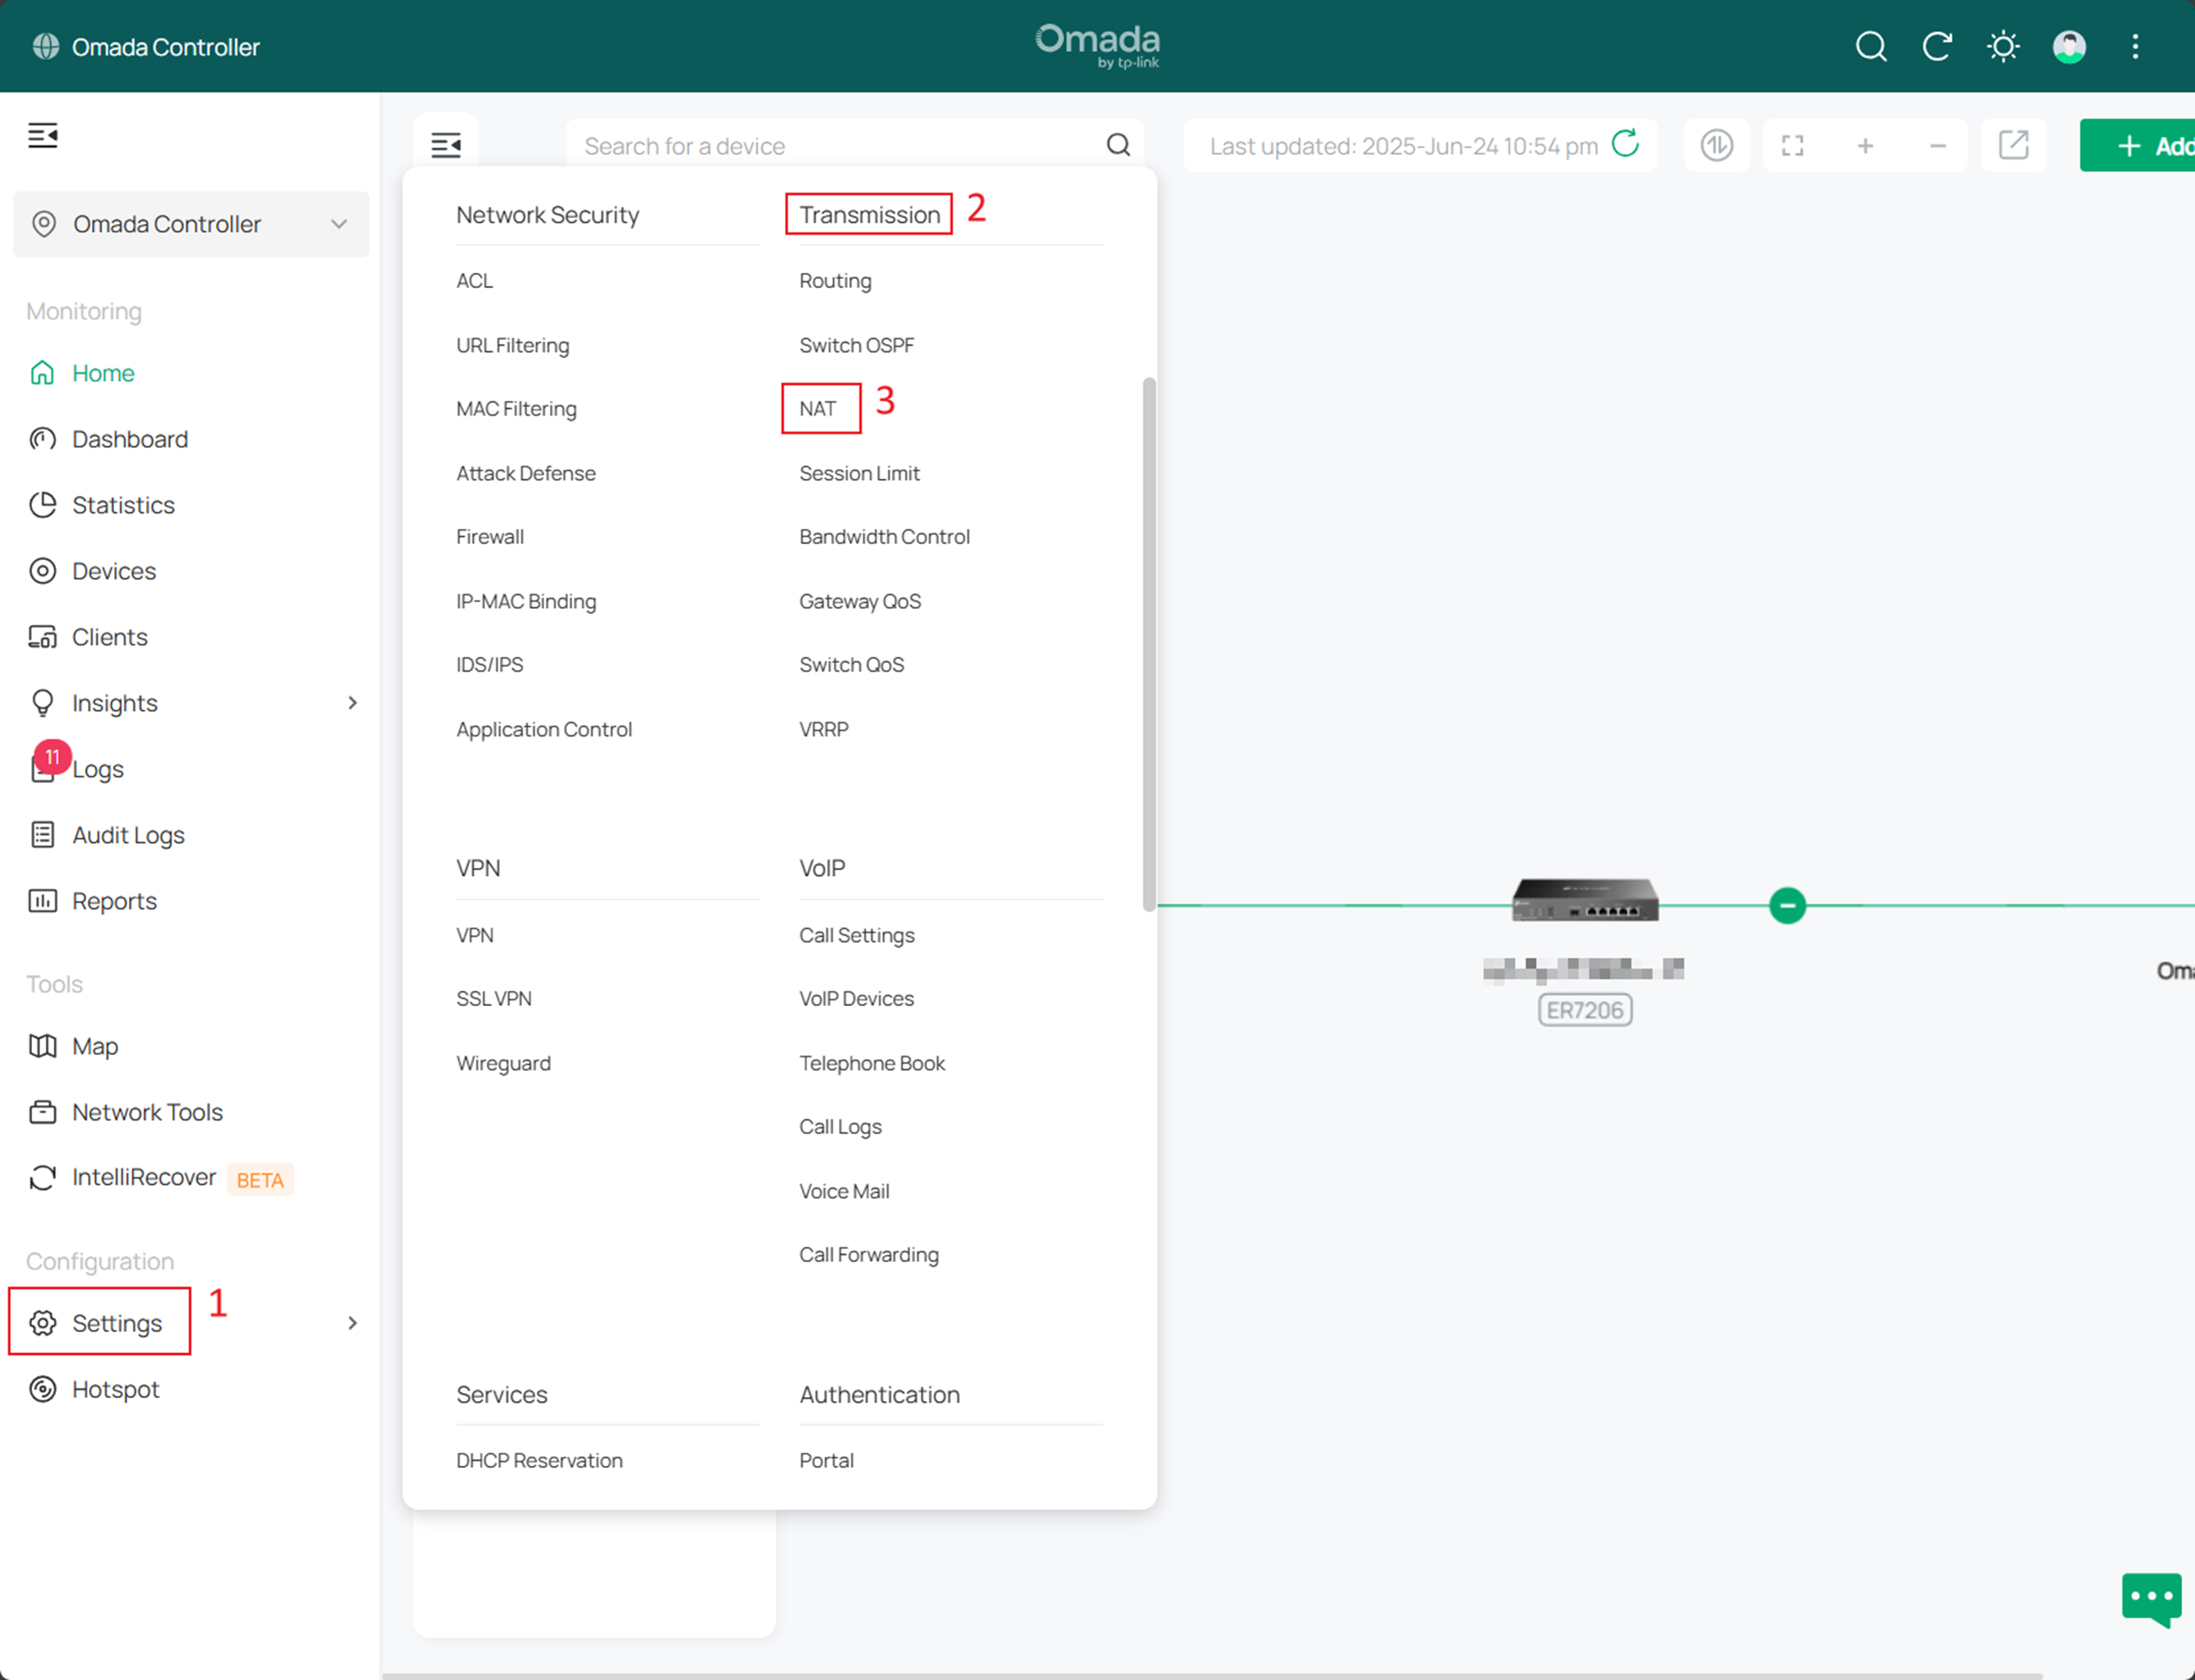
Step 2. When configuring the Disable NAT rule, select the physical WAN port under the Interface option (for example, WAN2). For the LAN setting, select one or more LAN networks depending on your requirements.

Note:
- A single WAN port supports the configuration of only one Disable NAT rule.
- When creating a Disable NAT rule, a priority mode policy routing rule will be automatically generated by default to bind the corresponding WAN port and LAN network. The priority mode policy routing rule is depend upon the online detection status of the WAN port, and it will only take effect if the result is online.
Verification
You can use Wireshark to compare the packet differences between NAT and Disable NAT scenarios. This will demonstrate how packets change as they travel from the LAN to the WAN port when Disable NAT is enabled.
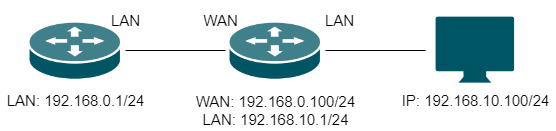
Scenario One: Disable NAT not enabled
Run "ping 192.168.0.1" on the PC and perform packet capture on the LAN port of Gateway-A (connected to Gateway-B). The following results are observed:

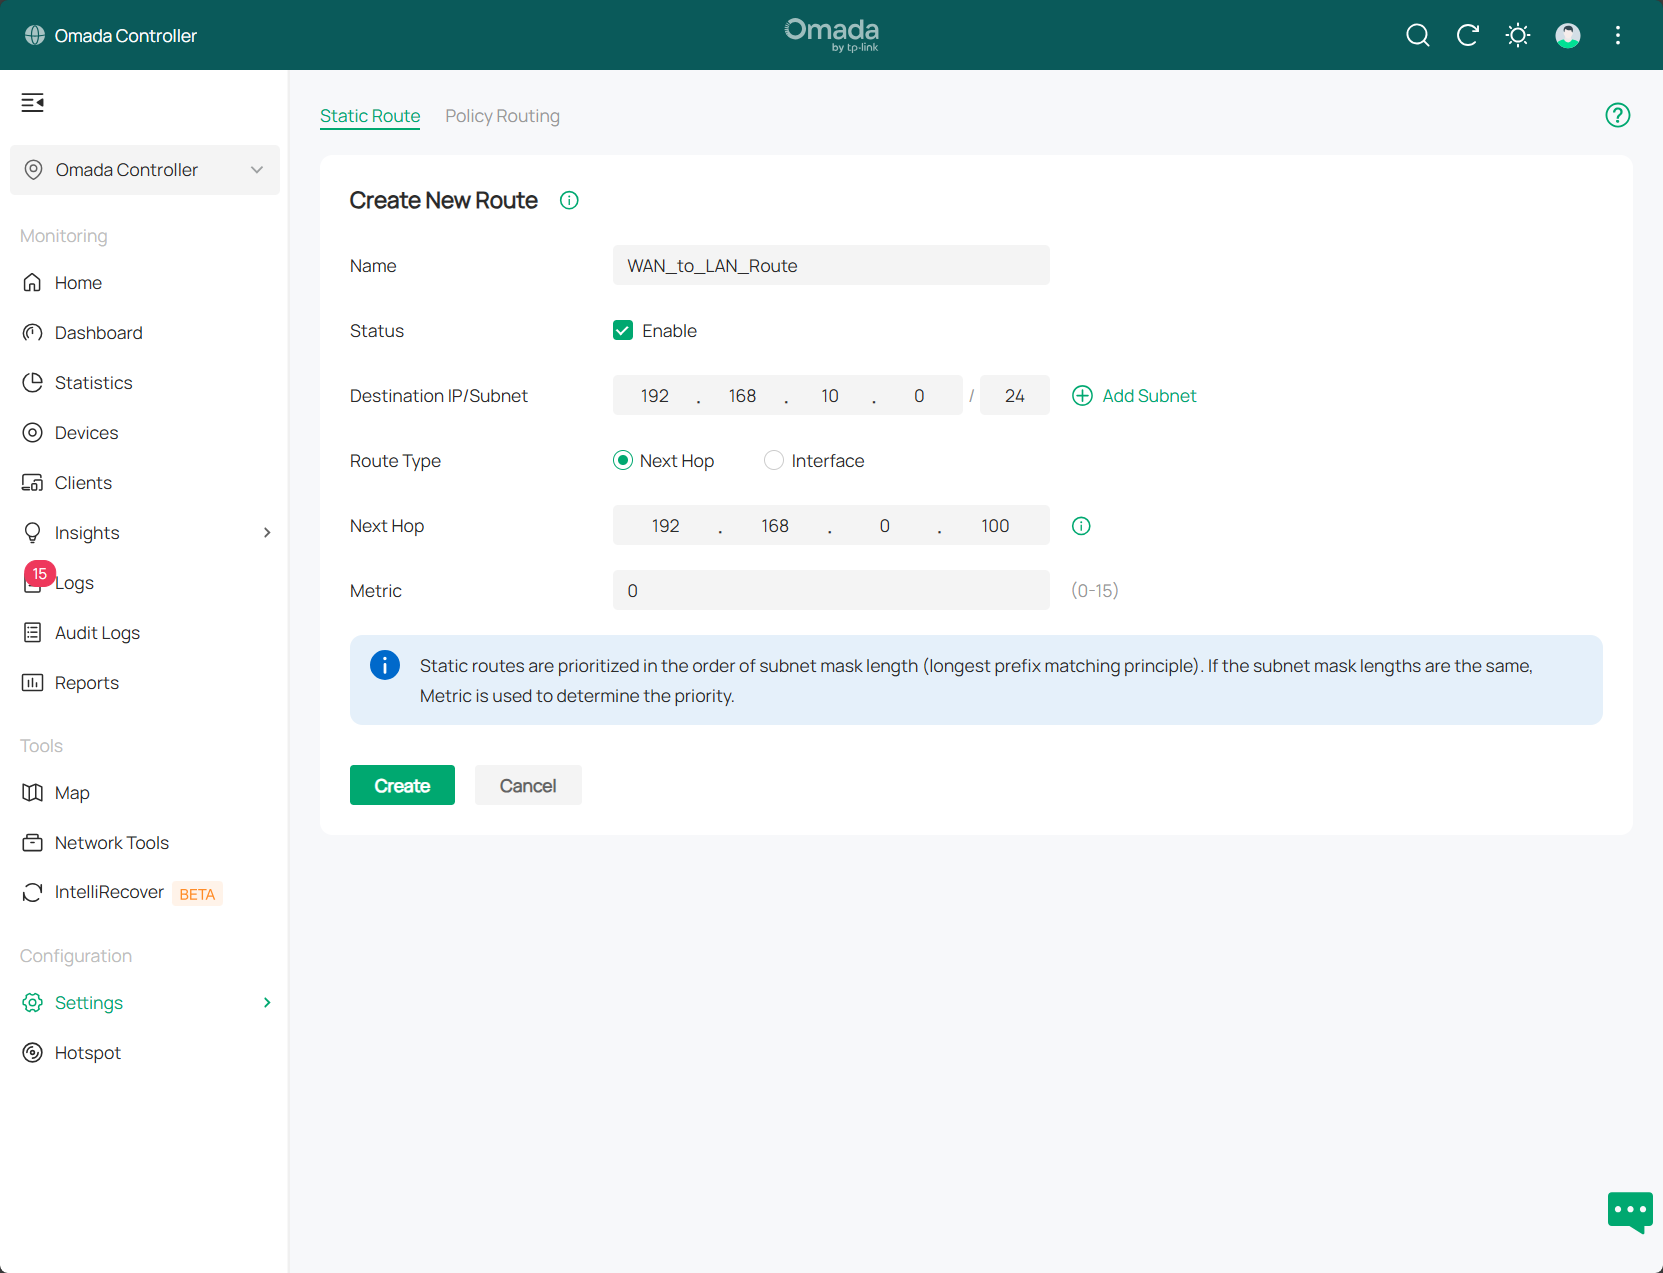
Scenario Two: Disable NAT and add a static route to 192.168.10.X/24 on the middle router, with the next hop set to 192.168.0.100.
Create a static route as follow. All traffic to 192.168.10.X/24 subnet will be routed to 192.168.0.100 as the next hop. Repeat the same test as in Scenario One.

After enabling Disable NAT, the packet capture on LAN port of the left gateway will show the PC’s actual IP address as the source. This confirms that packets are no longer translated by NAT. In this scenario, the middle gateway works as a Layer 3 switch, and upstream devices can see the real client IP for more flexible policy control.
Conclusion
The preceding text has introduced the configuration steps for Disable NAT on the Omada Gateway series models compatible with the SDNC 5.15 software version.
Get to know more details of each function and configuration please go to Download Center to download the manual of your product.
¿Es útil esta pregunta frecuente?
Sus comentarios nos ayudan a mejorar este sitio.
1.0_01_normal_20231207030929b.png)
