How to Migrate from Omada Central Essential to Omada Central Standard
Contents
Objective
Enable a seamless upgrade from Omada Central Essential to Omada Central Standard via migration, preserving the original controller’s configuration and transferring all associated devices to the new controller.
Requirements
- Omada Central Standard
- Licenses Exceeding the Number of Owned Omada Devices in Omada Central Standard
Configuration
Migration enables Omada administrators to transfer configurations and devices from one controller to another. In this case, the upgrade is achieved by migrating from Omada Central Essential to Omada Central Standard.
The process involves three main steps: Export Controller, Migrate Controller, and Migrate Devices.
Step 1. Start Migration
In the original Omada Central Essential, navigate to Global View > Settings > Migration, then click Start.
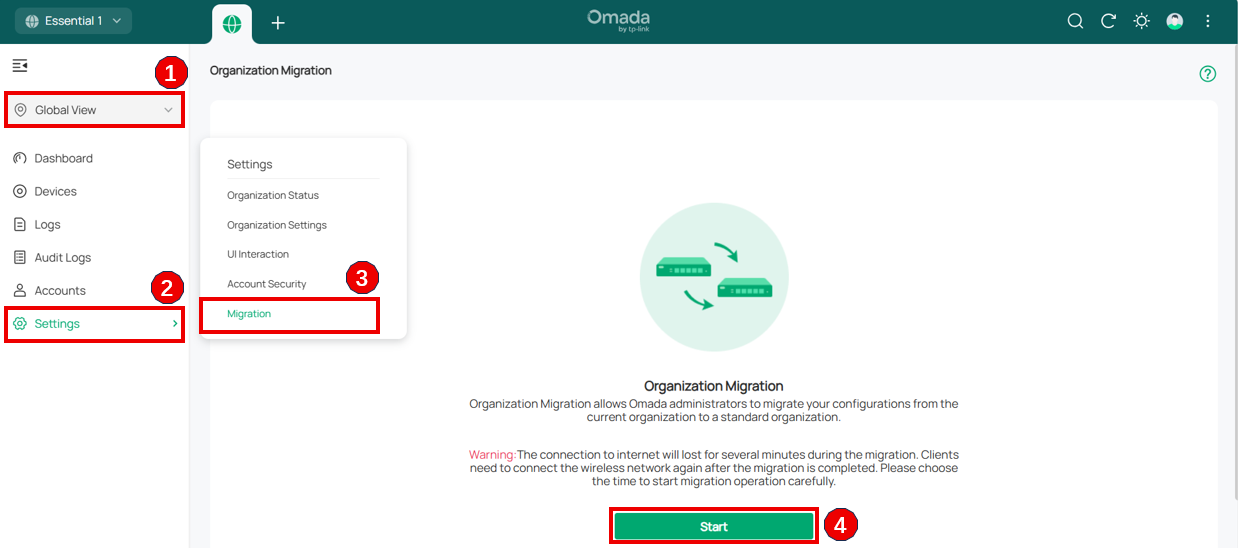
Note: Migration in Omada Central Essential is only available when the Network application is the sole installed application. If the Migration option is not visible, please remove Guard from Omada Central Plane > Settings > Application, as Guard is not yet supported for migration.
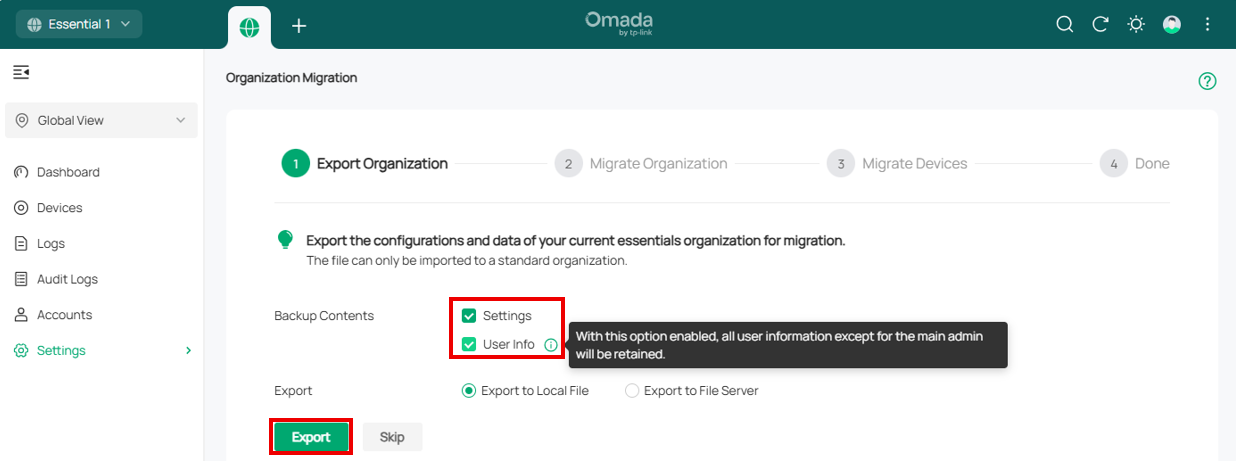
Step 2. Export Organization
Export the configuration of the current controller as a backup file.
- Confirm whether user information needs to be included in the migration.
- Select the destination to save the backup file, then click Export to download the file for the current organization. If you already have a backup file, click Skip to proceed.
Step 3. Migrate Organization
Import the backup file into the target controller.
In the target controller, go to Omada Network > Global View > Settings > Maintenance, select the backup file downloaded in Step 2, and click Restore.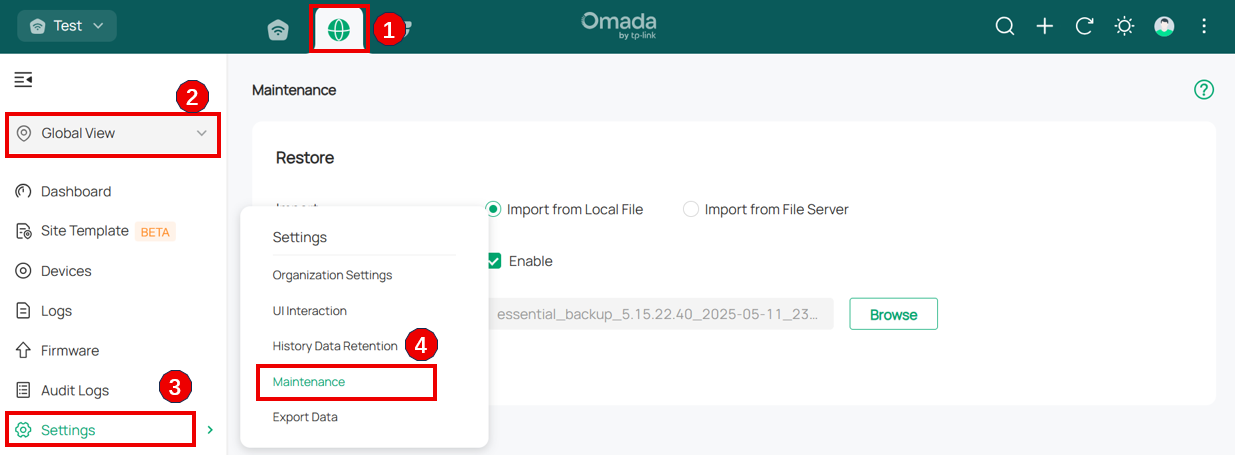
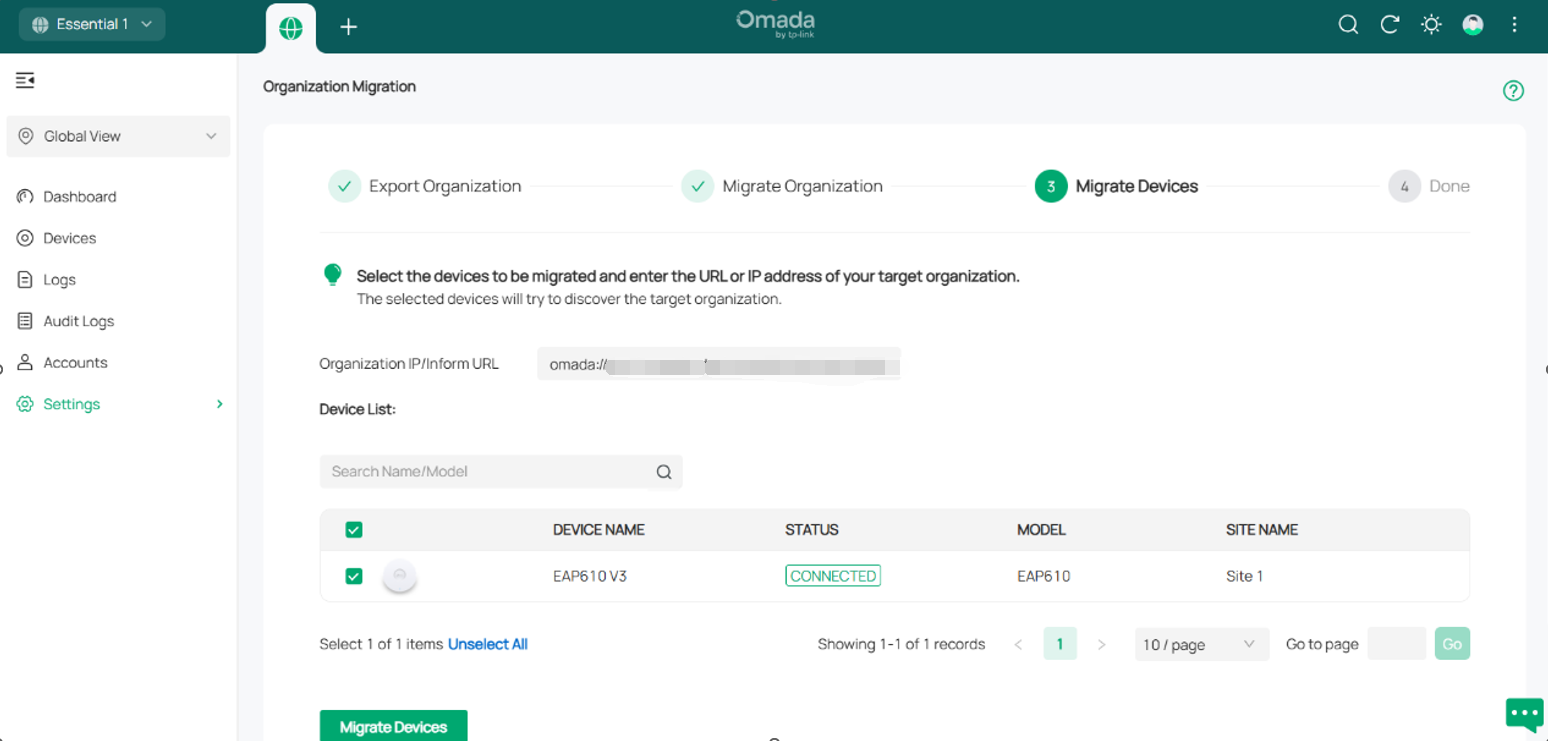
Step 4. Migrate Devices
Migrate the devices from the current controller to the target controller.
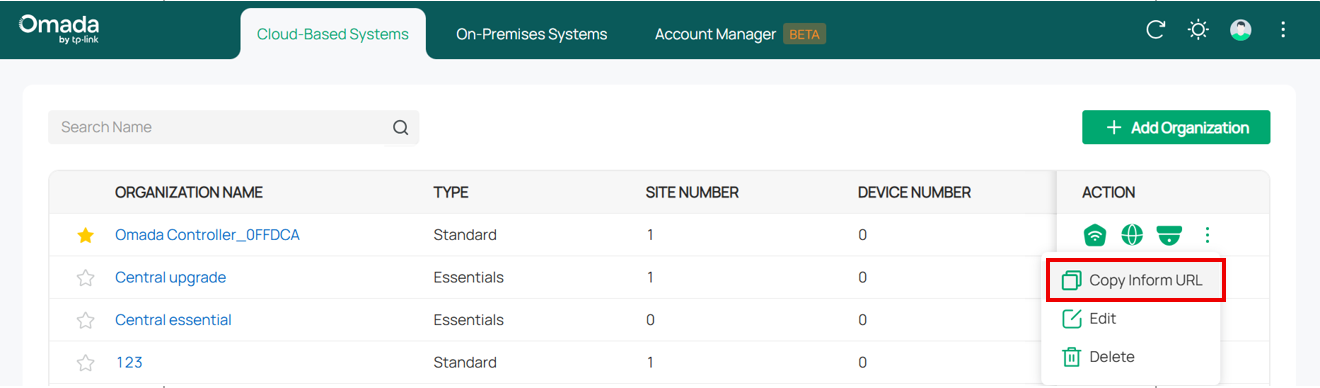
- Enter the target controller’s IP address or Inform URL in the Controller IP/Inform URL input field.
You can find the Inform URL under Organization List > ACTION > More > Copy Inform URL.
Note:
Make sure to enter the correct IP address or Inform URL of the target controller to establish communication with the Omada-managed devices. Otherwise, the target controller will not be able to adopt the devices.
- Select the devices to be migrated by checking the box next to each device. All devices are selected by default. Click Migrate Devices to initiate the migration.
- After migration, verify that all devices appear and are Connected in the target controller. Once all devices show Connected status on the Device page of the target controller, click Forget Devices on the previous controller to complete the migration process.
Conclusion
The upgrade from Omada Central Essential to Omada Central Standard has been successfully completed. All configurations and selected devices have been migrated to the target Omada Central Standard controller.
Get to know more details of each function and configuration please go to Download Center to download the manual of your product.
¿Es útil esta pregunta frecuente?
Sus comentarios nos ayudan a mejorar este sitio.