


Configuration guide of DHCP Options on Omada Switch
Contents
This article introduces common DHCP Options, including their features, functions, and how to customize DHCP Options for switches on the Omada Controller.
- Omada Smart/ L2+/L3 switches
- Omada Controller (Software Controller / Hardware Controller / Cloud-Based Controller, V6.0 and above)
DHCP Options are used to carry additional information and parameters in DHCP messages. Every option shares a common base format, as showed in the following figure. All values in options are represented in network byte order. The use of DHCP Options helps simplify network management with less manual configuration and improves network flexibility and extensibility.

The value of DHCP Options field ranges from 1 to 255. The following table lists some common DHCP Options and their features.
|
Option No. |
Explanation |
|
2 |
Option 2 is used by clients to configure the time offset. The time offset field specifies the offset of the client’s subset in seconds from Coordinated Universal Time (UTC). |
|
42 |
Option 42 is used by clients to configure the NTP server address. |
|
43 |
Option 43 is used by clients and servers to exchange the vendor-specific information. |
|
44 |
Option 44 is used by clients to configure the NetBIOS over TCP/IP name server. |
|
60 |
Option 60 is used by clients to optionally identify the vendor type and configuration of a DHCP client. Mostly it is used in the scenario where APs apply for different IP addresses from different servers according to the needs. |
|
66 |
Option 66 specifies the TFTP server information and supports a single TFTP server IP address. |
|
67 |
Option 67 tells the client a path to a file from a TFTP server (Option 66) that will be retrieved and used to boot. That file needs to be a basic boot loader that conducts any other required work. |
|
138 |
Option 138 is used to discover devices by the Omada Controller. |
|
252 |
Option 252 provides a DHCP client with a URL to use to configure its proxy settings. It's defined in draft-ietf-wrec-wpad-01. If it was a statement like 'wpad-proxy-url' then only systems that understood it could use it (they'd have to recognize that string and know how to handle it). |
For the definition and usage of other DHCP Options, refer to RFC 2132: DHCP Options and BOOTP Vendor Extensions (rfc-editor.org).
In such scenarios as school campus network or enterprise network, a core switch may act as a DHCP server that will automatically assign IP addresses and other network information to the devices connected to the switch.
The following topology will be used as an example to show how to use and configure DHCP Options on the Omada Controller for the switch. In the network topology, Port 1/0/28 is an uplink port connected to the internet; Port 1/0/24 is connected to the Omada Controller whose IP address can be set in the Management VLAN. Here, the IP address of the Controller is assigned to the network segment of 192.168.0.0/24. For more information on Management VLAN settings, refer to How to configure Management VLAN in Omada SDN Controller (4.4.4 or above) | TP-Link. Port 1/0/1 is connected to a PC client with the IP address of 192.168.100.0/24. This IP address is assigned by the DHCP Server configured on the switch.

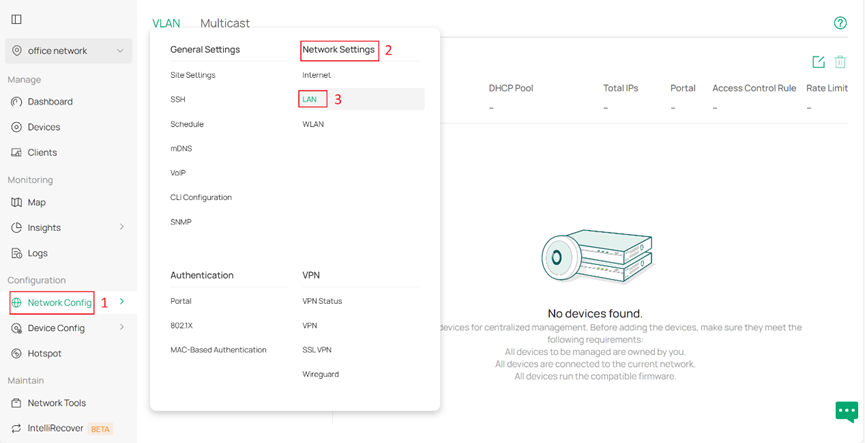
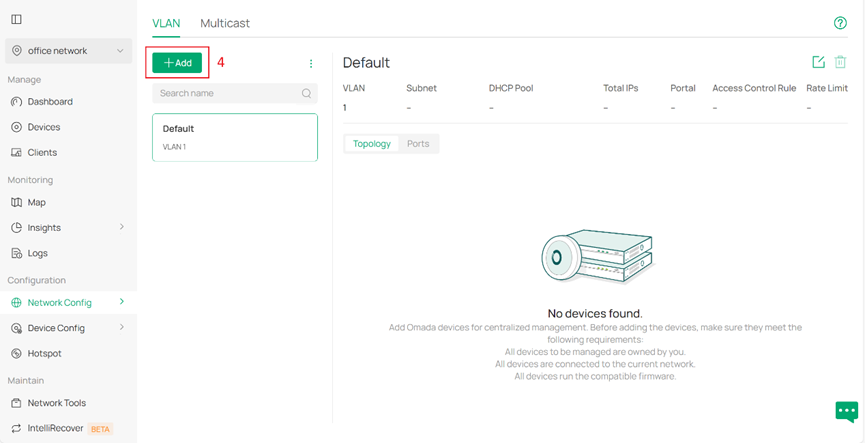
Step 1. Create new VLAN on the Controller. Go to Network Config > Network Settings > LAN and click Add under the column VLAN.
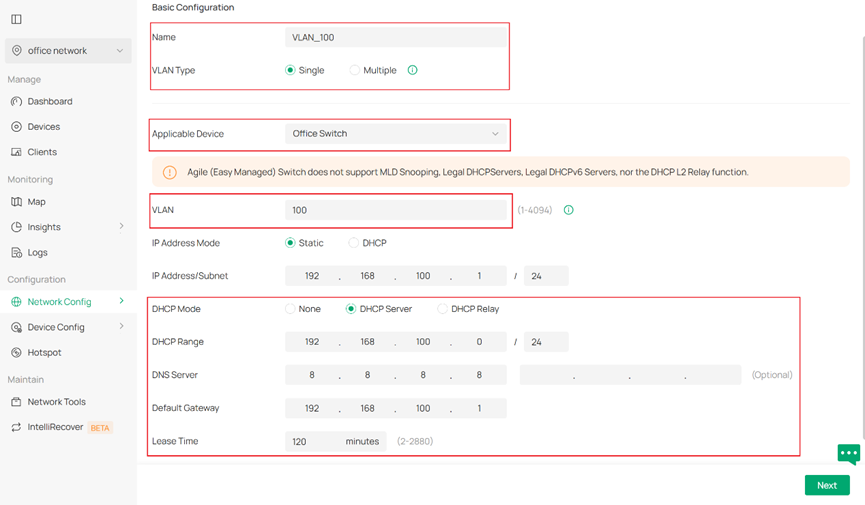
Select the Omada Switch where you wish to enable DHCP server as Application Device
Specify the Name, VLAN Type for the newly created VLAN. Select Static for IP Address Mode and specify the IP Address and Subnet Mask. Select DHCP Server for DHCP Mode and enter the required parameters such as DHCP Range and DNS Server.
Note: The VLAN interface requires an IP address to use the DHCP Server. Setting the IP Address Mode of VLAN_100 as Static can allow VLAN_100 to use the DHCP Server to assign IP addresses.
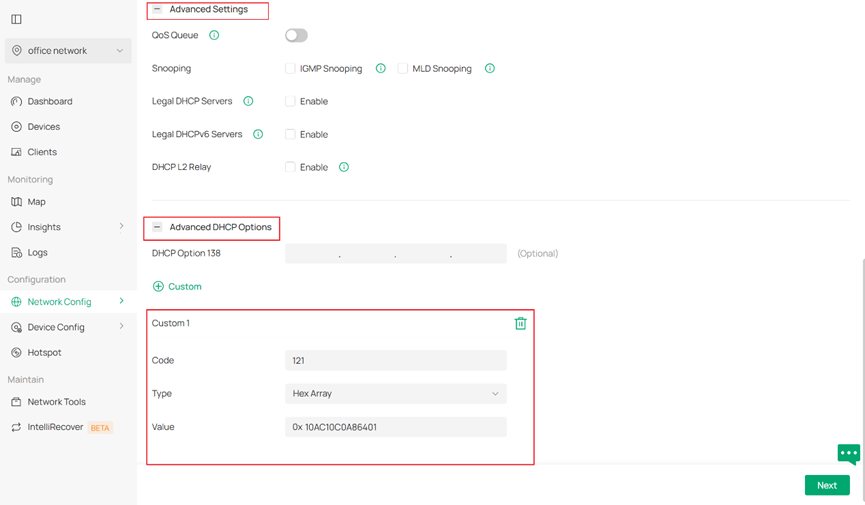
You may also configure advanced network settings including Snooping, Legal DHCP Servers and DHCP L2 Relay in Advanced Settings, and configure DHCP option 138 and custom DHCP options according to your own needs in Advanced DHCP Options.
Here We take DHCP Option 121 for example. Option 121 is a Classless Static Route option that defines a series of static routes which can be assigned to the client and added to the client’s routing table. The Destination Address is 172.16.0.0/16 (represented in hexadecimal as 10AC10), and the Next Hop is 192.168.100.1 (represented in hexadecimal as C0A86401).
After finishing configuring all you need, click Next to continue.
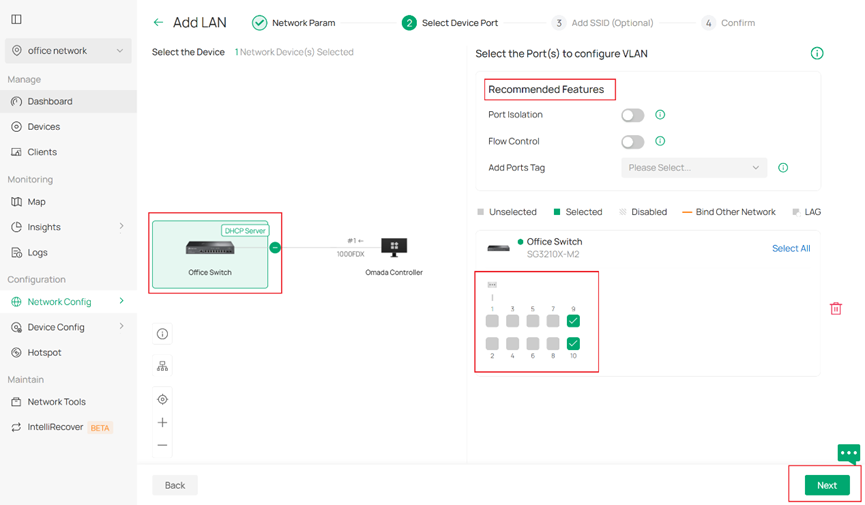
Step 2. Select Device Port. In the following page, you could select ports to be the access ports of your network (ports that connected to hosts or clients, i.e. PC). You may also enable our recommended features such as port isolation and flow control on these access ports. Then click Next to continue.
Step 3. (Optional) Configure a corresponding SSID for your newly created VLAN. You may refer to our FAQ about How to Configure SSID & Client Rate Limit on Omada Controller | TP-Link for further information if you need to configure SSID. We will skip it in this article.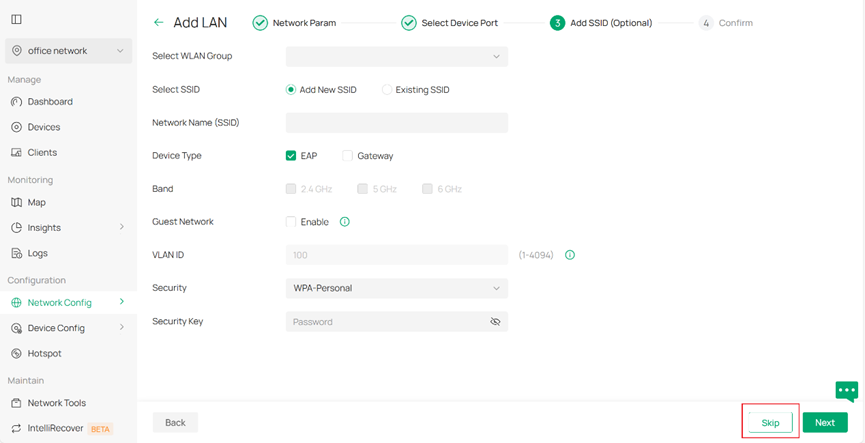
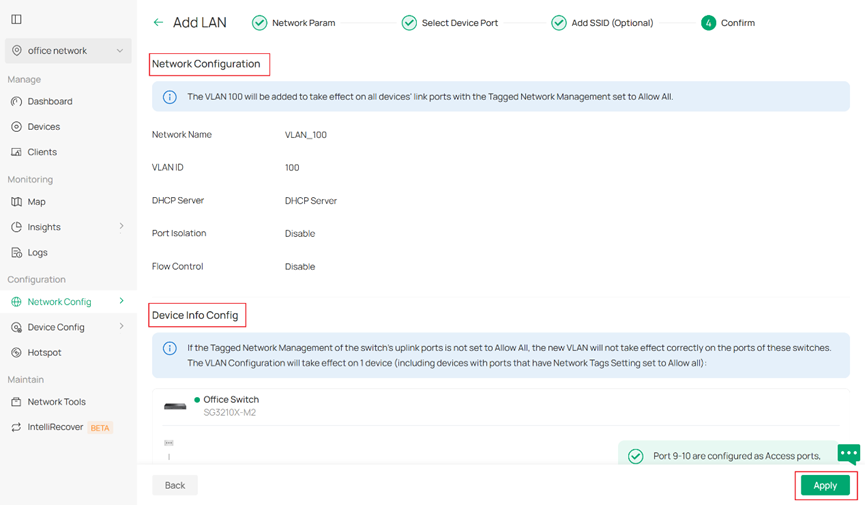
Step 4. Confirm the what you have just configured. Then click Apply to finish.
Run the command prompt (cmd) on a PC and enter the commands ipconfig and route print respectively. It shows that the client have obtained the IP address and other information and a static route has been configured.


You have successfully configured DHCP Option on the Omada Controller.
Get to know more details of each function and configuration please go to Download Center to download the manual of your product.
¿Es útil esta pregunta frecuente?
Sus comentarios nos ayudan a mejorar este sitio.


