TL-WA901N V6 User Guide
Chapter 3 Set Up Internet Connection Via Quick Setup Wizard
This chapter introduces how to connect your access point to the internet via the web-based Quick Setup Wizard.
It contains the following sections:
With a Web-based utility, it is easy to configure and manage the access point. The Web-based utility can be used on any Windows, Macintosh or UNIX OS with a Web browser, such as Microsoft Internet Explorer, Mozilla Firefox or Apple Safari.
Follow the steps below to log in to your access point.
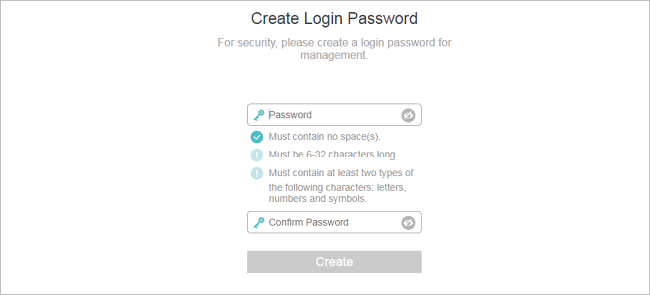
1.Visit http://tplinkap.net, and create a password to log in.
![]() Note:
Note:
If the login window does not appear, please refer to the FAQ Section.
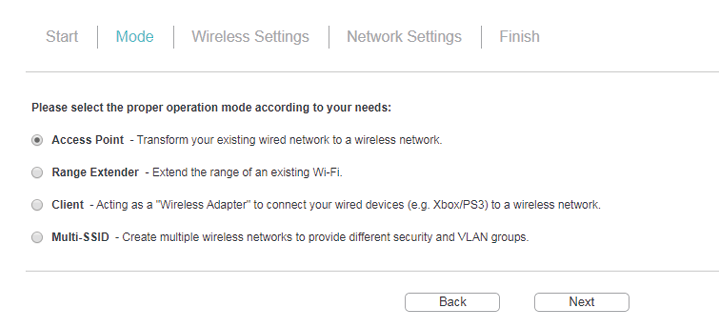
The Quick Setup Wizard will guide you through the process to set up your access point.
1.Go to Quick Setup and click Next to start.
2.Choose the operation mode you need and click Next. Then follow the corresponding steps to configure your access point.
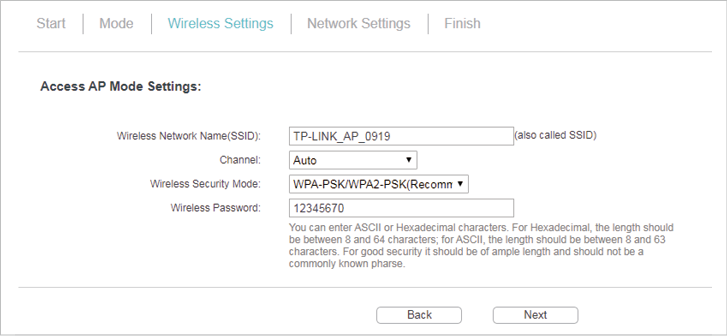
1.Either customize your Wireless Network Name and Wireless Password or keep the default ones, and then click Next.
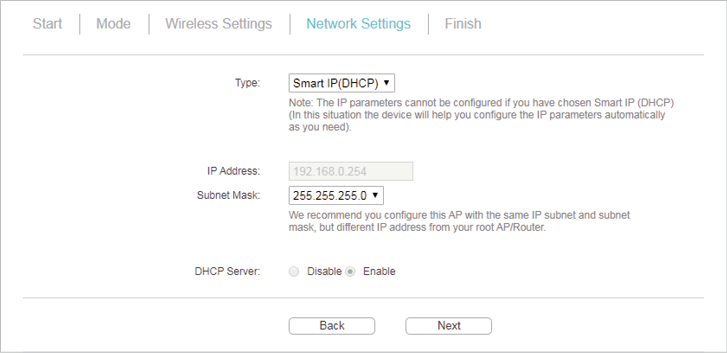
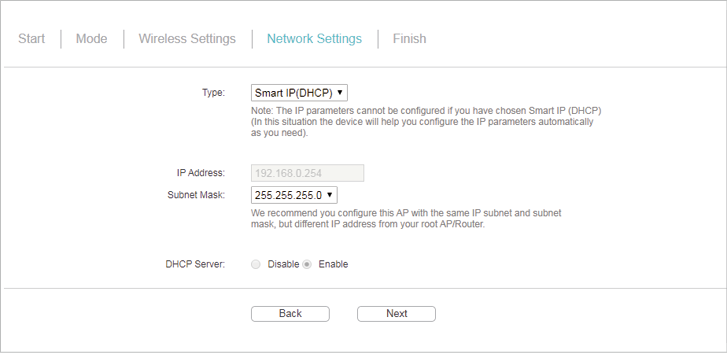
2.Select the LAN IP type of the access point or leave the default setting Smart IP for most cases, and then click Next.
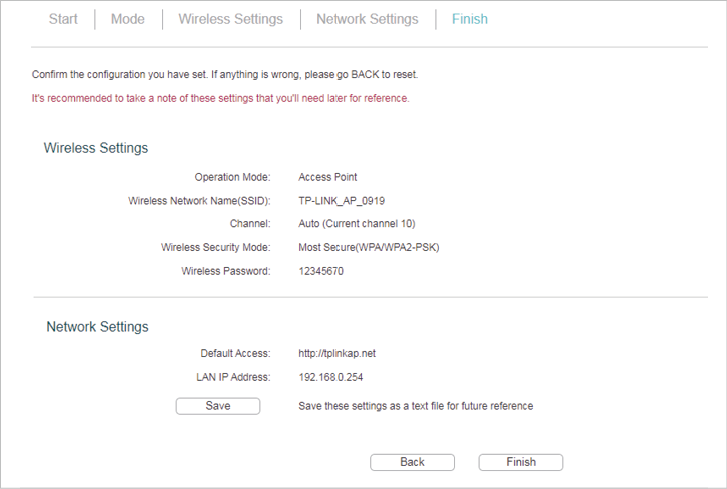
3.Click Finish to complete the configuration. Reconnect your wireless devices to the new Wi-Fi network.
2.2. Range Extender Mode
1.If you select Range Extender mode, the AP will automatically detect wireless networks within its range. Find your host network in the AP list and click Connect.
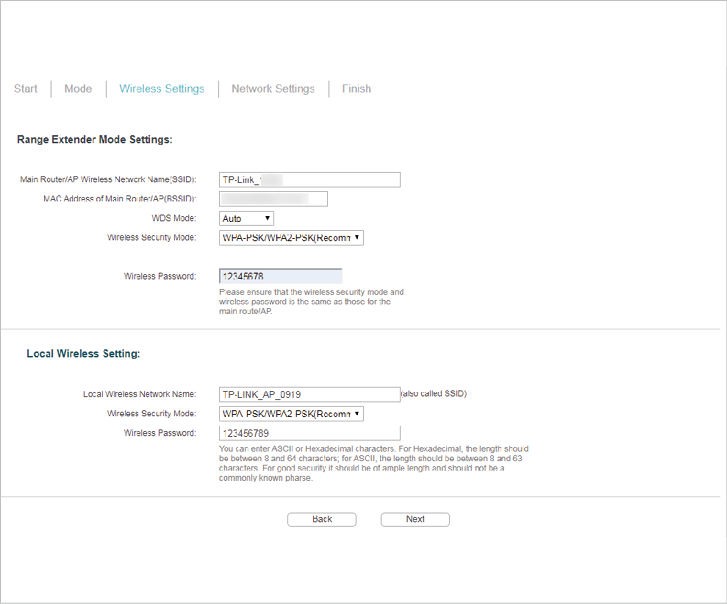
2.Enter the host network’s password in the Wireless Password field. In the Local Wireless Setting section, either customize your Local Wireless Network Name and Wireless Password or keep the default ones, and then click Next.
3.Select the LAN IP type of the access point or leave the default setting Smart IP for most cases, and then click Next.
4.Click Finish to complete the configuration.

5.Relocate the access point to a good place. Connect your wireless devices to the Wi-Fi network using the access point’s SSID and password.
2.3. Client Mode
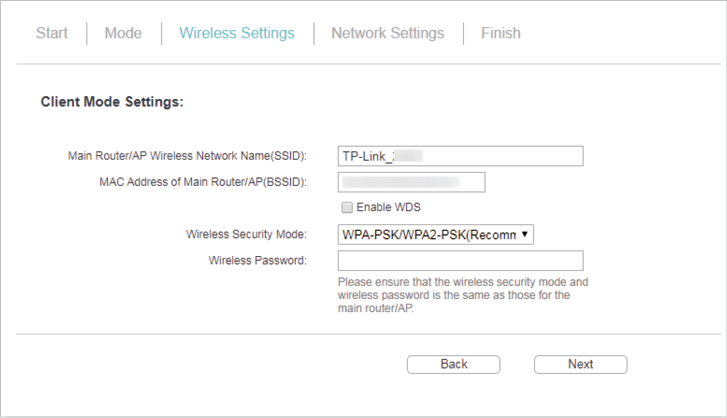
1.If you select Client mode, the AP will automatically detect wireless networks within its range. Find your host network in the AP list and click Connect.
2.Enter the host network’s password in the Wireless Password field, and then click Next.
3.Select the LAN IP type of the access point or leave the default setting Smart IP for most cases, and then click Next.
4.Click Finish to complete the configuration. Now your wired connected devices can enjoy the Internet surfing.

2.4. Multi-SSID Mode
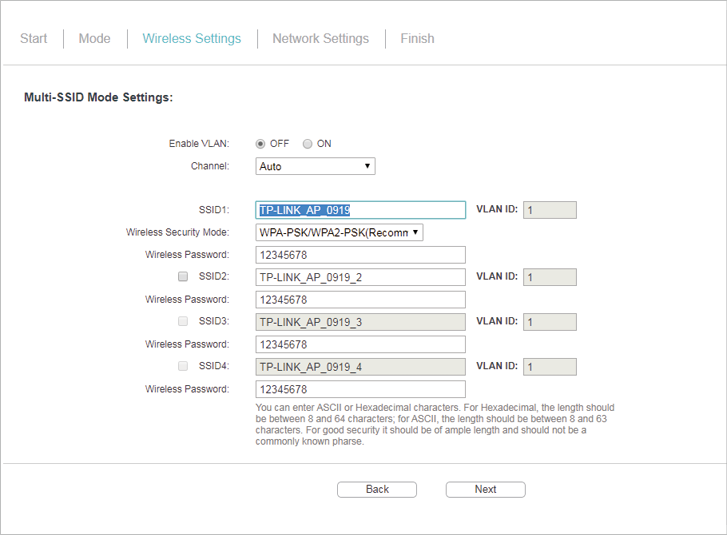
1.Enable the VLAN function and check SSIDs you want to enable. Customize the SSIDs and the passwords according to your needs and click Next.
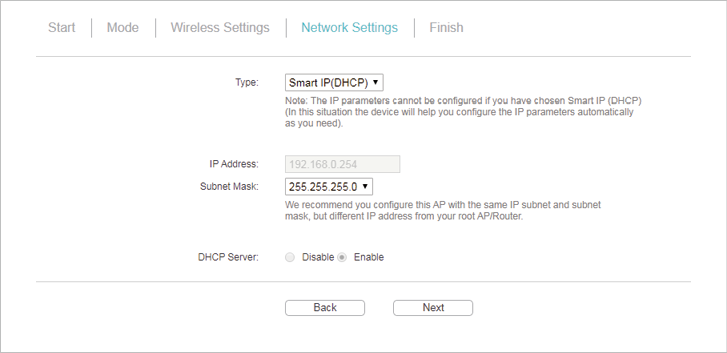
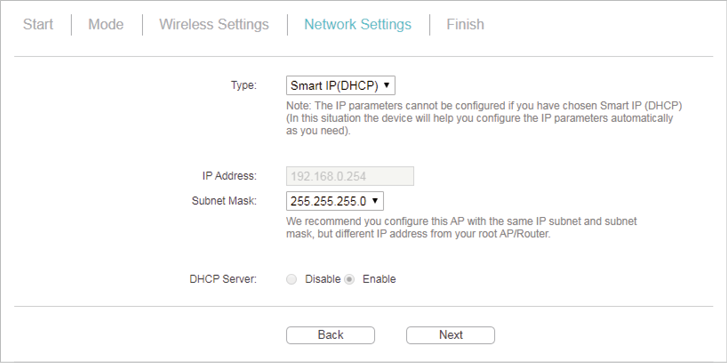
2.Select the LAN IP type of the access point or leave the default setting Smart IP for most cases, and then click Next.
3.Click Finish to complete the configuration.
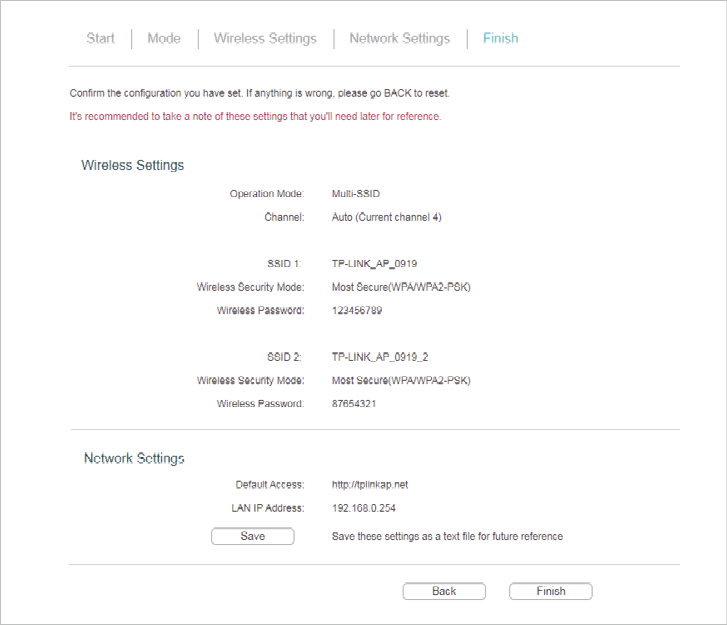
4.Connect your wireless devices to the different Wi-Fi networks to be isolated by VLANs.