RE200 V5 & RE220 V3 User Guide
Chapter 6 More Features of Your Extender
This chapter explains how to use the extender as a wireless adapter and as an access point .
It contains the following sections:
1. Use Your Extender as a Wireless Adapter
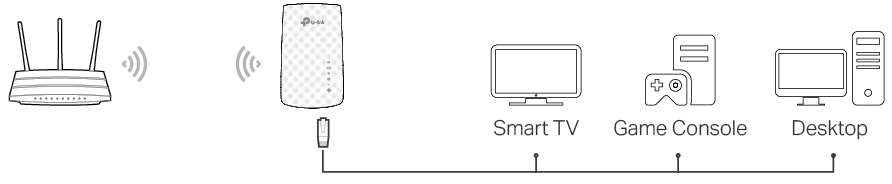
The extender can be used as a wireless adapter to connect any wired-only device, such as a Blu-ray player, game console, DVR, or smart TV, to your wireless network.
After configuration, you can connect an Ethernet-enabled device to the extender via an Ethernet cable.
2. Transform Your Existing Wired Network to a Wireless One
The extender can work as an access point, transforming your existing wired network to a wireless one.
2.1. To Set Up the Extender as an Access Point
1.Visit http://tplinkrepeater.net, and log in with your TP-Link ID or the password you set for the extender.
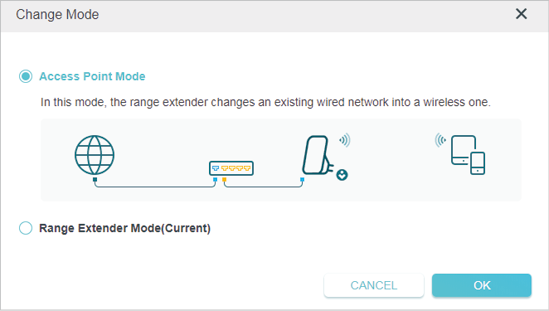
2.Click Change Mode in the top right corner of the page. Select Access Point Mode and click OK. The extender will reboot and switch to Access Point mode.
3.After rebooting, connect to the extender’s network TP-Link_Extender or TP-Link_Extender_5GHz.
4.Visit http://tplinkrepeater.net, and log in with your TP-Link ID or the password you set for the extender.
5.Go to Settings > Quick Setup to configure your extender.
1 ) Customize your wireless SSID and password and click NEXT.
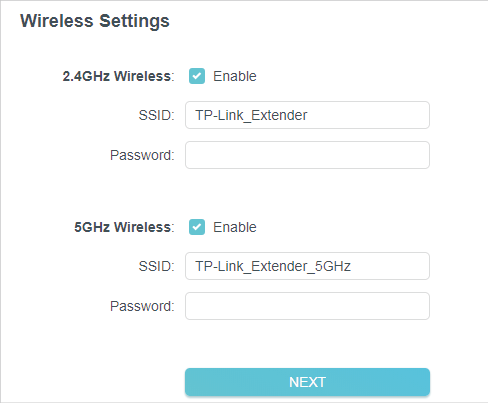
2 )Confirm the information and click FINISH.

6.Connect the extender to your modem or wired router via an Ethernet cable. Now you can enjoy Wi-Fi.
2.2. To Connect Your Wireless Devices to the Extender via WPS
Wi-Fi Protected Setup (WPS) provides an easier way to set up a secure Wi-Fi connection.
Wireless devices that support WPS, including Android phones, tablets, and most USB network cards, can be connected to your extender through this method (not supported by iOS devices).
1.Visit http://tplinkrepeater.net, and log in with your TP-Link ID or the password you set for the extender.
2.Go to Wireless > WPS.
3.Enable WPS.

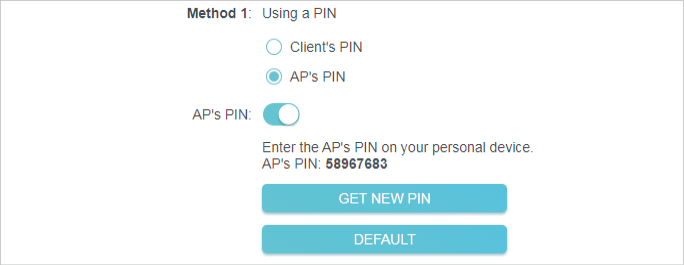
4.Connect via WPS:
•Client’s PIN: Enable Client’s PIN and enter your device’s PIN in the blank, and then click CONNECT.

•AP’s PIN: Enable AP’s PIN and enter the PIN on your device. You can click GENERATE to get a new PIN or click DEFAULT to restore the PIN to its factory one.
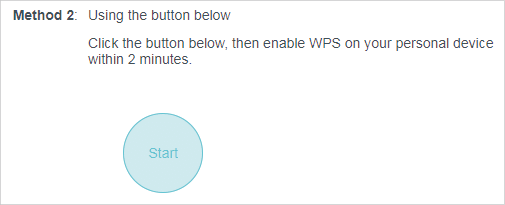
•Push Button (Recommended): Click Start and push the WPS button on the client device within 2 minutes.
•Push AP’s WPS button: Press the AP’s WPS button, then enable WPS on your device within 2 minutes.
