Archer T600U Plus V1 User Guide
This chapter introduces how to install your adapter’s driver and utility, use your adapter to join a wireless network, manage your adapter and uninstall your adapter in Mac OS X.
This chapter includes the following sections:
We take the steps in Mac OS X 10.10 as an example - the steps may vary slightly from other versions of Mac OS.
1. Download the driver and utility at https://www.tp-link.com/download-center.
 Note:
Note:
The CD is included in the package. If your computer has a CD drive, you can also run the included CD to install the driver and utility.
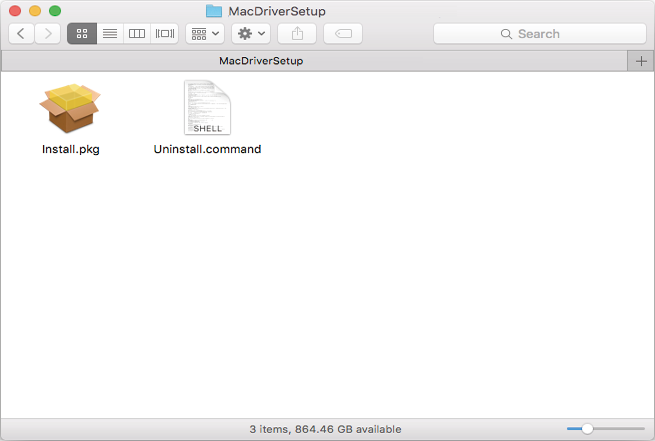
2. Double click to unzip the downloaded folder and run the Install.pkg.
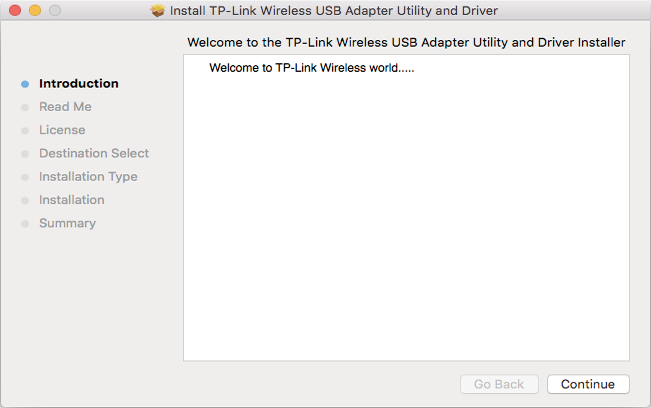
3. The Install TP-Link Wireless USB Adapter Utility and Driver Wizard window will appear. Click Continue and follow the instructions to complete the installation.
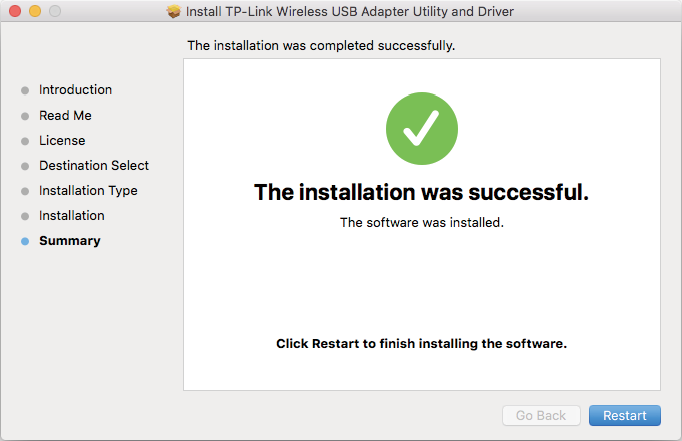
4. When the following screen appears, the driver and utility have been installed successfully. Click Restart to finish the installation.
5. After restarting the computer, the TP-Link Utility icon  will appear on the menu bar in the upper-right corner of the screen. To use the utility to join a Wi-Fi network with your adapter, refer to Join a Wireless Network.
Note:
If the TP-Link Utility icon does not appear on the menu bar, make sure the USB wireless network adapter is connected properly and its LED is on.
There are two options of using the adapter to join a Wi-Fi network.
Option 1: TP-Link Utility
TP-Link Utility lets you easily connect the adapter to a Wi-Fi network and manage the adapter.
Option 2: WPS (Wi-Fi Protected Setup)
WPS (Wi-Fi Protected Setup) is a network security standard for easily adding computers and other devices to a home network. Use this method if your wireless router or access point supports WPS.
Option 1
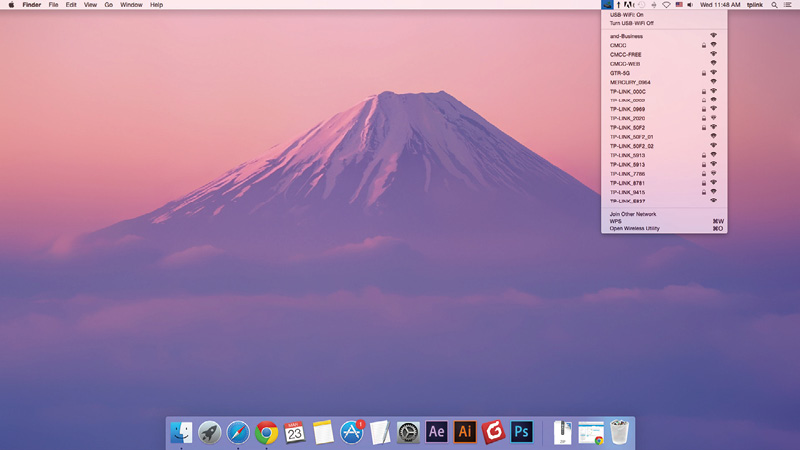
Click the TP-Link Utility icon on the menu bar, and choose a Wi-Fi network from the list. Enter the password when prompted.
When you are connected to the internet, the network icon will change to  .
.
Option 2
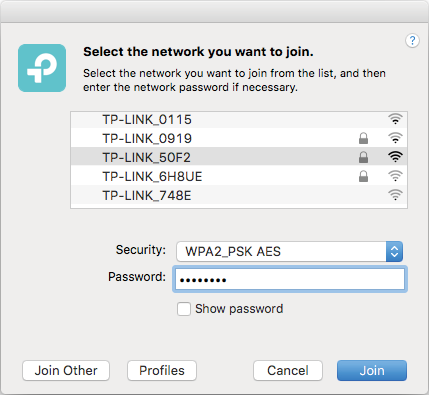
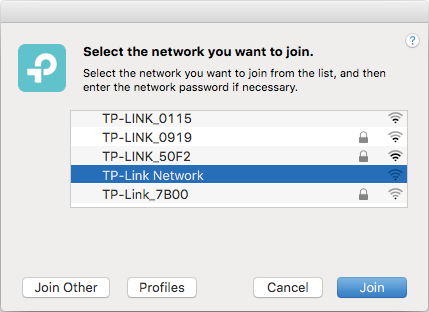
1. Click the TP-Link Utility icon on the menu bar, and then click Open Wireless Utility at the bottom of the network list.
2. Select the network you want to join from the list and enter the password when prompted. Click Join.
Note:
If your Wi-Fi network is not displayed in the list, you can try to join it by WPS or by clicking Join Other on the above screen, and then follow the on-screen instructions to join the network.
2.2. WPS (Wi-Fi Protected Setup)
WPS can be activated via PBC (Push Button Configuration) and PIN code on the TP-Link Utility. Please refer to PBC or PIN below.
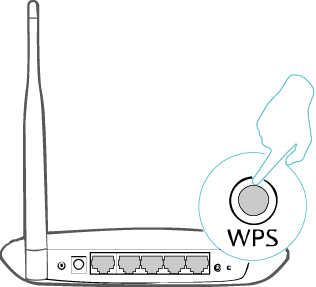
1. Press the WPS/QSS button on your router or AP.
2. Within 2 minutes, click the TP-Link Utility icon on the menu bar, and then click WPS at the bottom of the network list.
3. Click PBC.

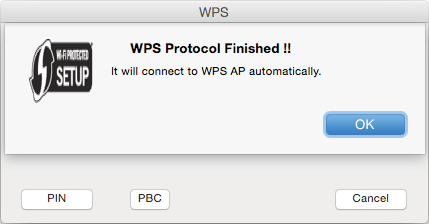
4. The following screen indicates a successful connection by WPS. Click OK.
1. Click the TP-Link Utility icon on the menu bar, and then click WPS at the bottom of the network list.
2. Click PIN.
3. Within 2 minutes, log in to the web management page of your router or AP. Go to its WPS page, enter the PIN of the adapter in the corresponding field and click Connect.
4. The following screen indicates a successful connection by WPS. Click OK.
TP-Link Utility provides you with an easy way to manage various connection settings of your Wi-Fi network.
1. Click the TP-Link Utility icon on the menu bar, and then click Open Wireless Utility at the bottom of the network list.
2. TP-Link Utility will pop up. Click the Profiles button to open the Profiles screen.
3. The Profiles screen lets you manage different Wi-Fi connection settings as profiles so that you can connect to your network easily.
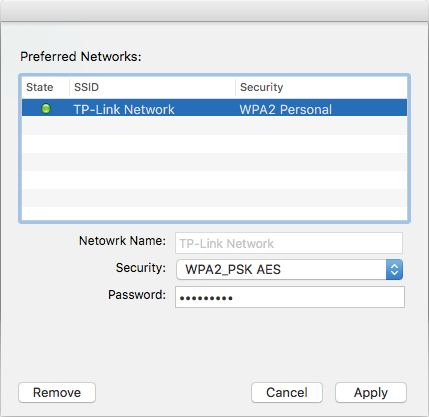
Preferred Networks displays the networks that you once connected to. The networks’ status and information are displayed in the table.
•To join a Wi-Fi network
If you want to join a Wi-Fi network that is listed on the profile screen, select the profile and click Apply in the bottom right corner.
•To manage an existing profile
If you want to change the wireless settings of an existing profile, select it and then you can edit its Security and Password. If you want to delete a profile, select it and click Remove.
4. Uninstall Driver and Utility
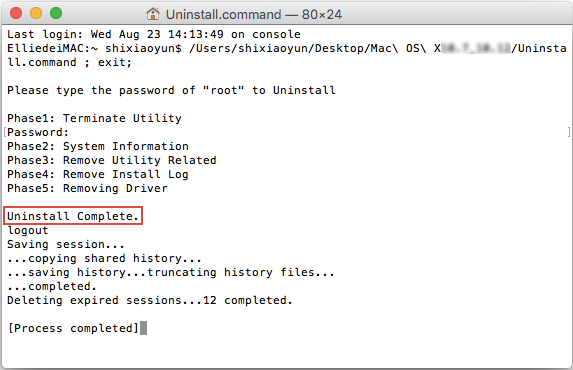
1. Double click Uninstall.command in the downloaded folder.

2. Enter the password of you computer and when the “Uninstall Complete” message appears, the uninstallation is complete.