How to Update Your TP-Link Extender Firmware: Three Methods
Keeping your extender's firmware up to date improves performance, adds new features, and addresses security vulnerabilities. This page explains how to update your TP-Link extender using any of three available methods: online update via the Tether app, local update via the web management page, and online update via the web management page. Choose the method that works best for your setup and follow the steps below.
Key Takeaways
- TP-Link range extenders can be updated in three ways: via the Tether app, via local update on the web management page, or via online update on the web management page.
- The Tether app method (Method 1) is the simplest. Connect your phone to the range extender, go to More > System > Firmware Update, and tap Update.
- For the local update method (Method 2), download the latest firmware file from tp-link.com first, extract the BIN file from the ZIP, then log in to the web interface at tplinkrepeater.net and upload the file under Settings > System Tools > Firmware Upgrade.
- For the online update via web management page (Method 3), log in at tplinkrepeater.net, go to Settings > System Tools > Firmware Upgrade, and click Check for Upgrade.
- During any firmware update, do not power off or reset the extender until the process is complete.
Requirements
- A smartphone with the Tether app installed (for online upgrade)
- Computer (for local upgrade)
- TP-Link Range Extender
- If the firmware release notes indicate that updating will reset your settings, back up your configuration before proceeding
How to Update Your TP-Link Extender Firmware
Method 1. Online Update via Tether App (For Tether-compatible models)
Step 1. Connect your phone to the Range Extender, and open the Tether app.
Step 2. Go to More > System > Firmware Update.
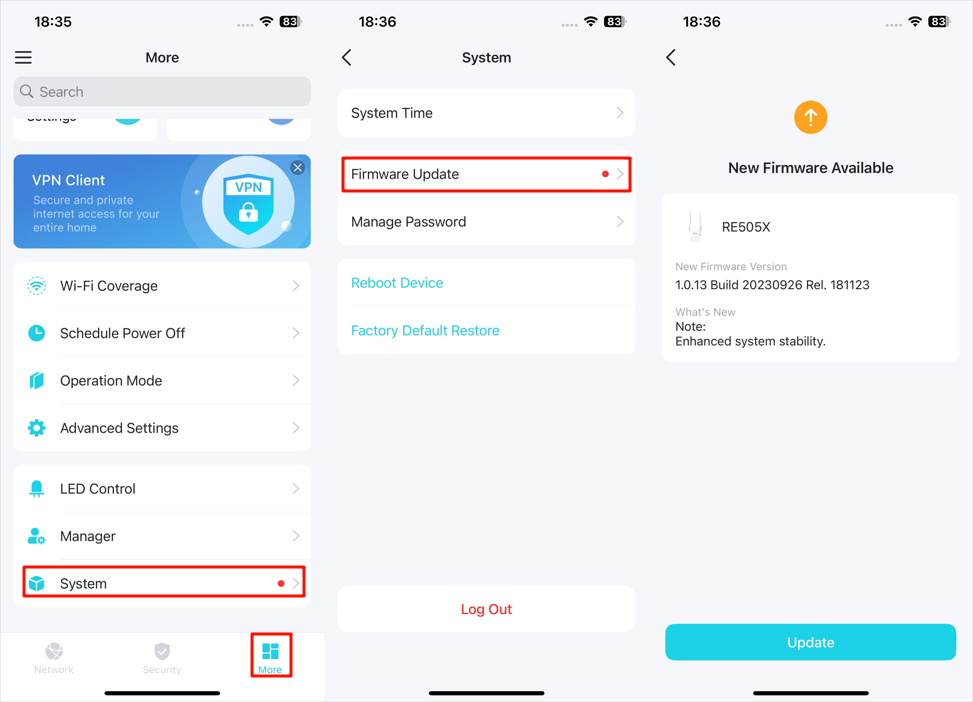
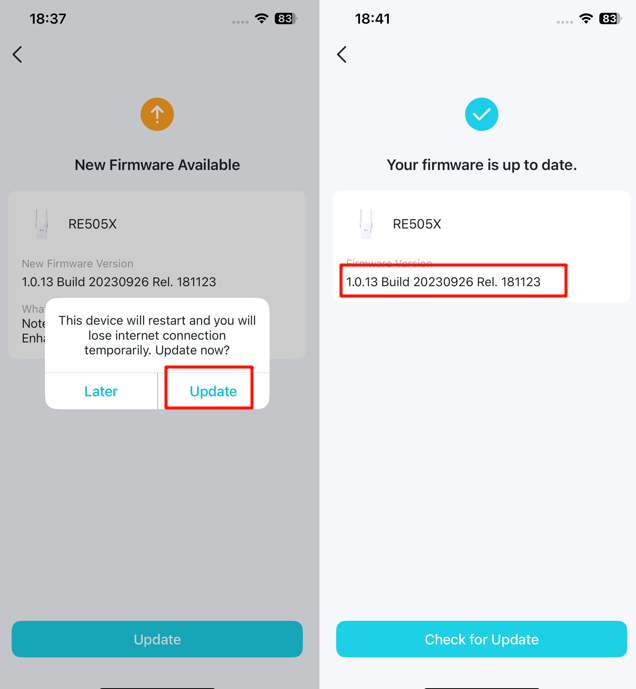
Step 3. Click Update and wait for the update process to finish.
Note: During the backup process, do not power off or reset the extender.
Method 2. Local Update via Web Management Page
Step 1. Download the latest firmware file for the extender from the TP-Link official website at www.tp-link.com.
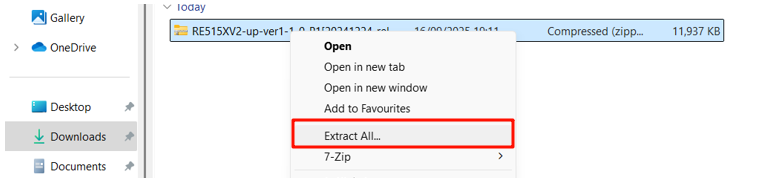
Step 2. Find and open the ZIP file you want to extract from. Right-click on the file and select Extract All from the context menu to extract the BIN file. (Google Chrome & Windows system as an example)

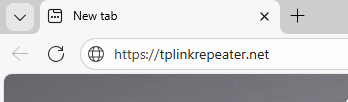
Step 3. Connect to the extender via either Wi-Fi or an Ethernet port, visit https://tplinkrepeater.net, and log in with your password.
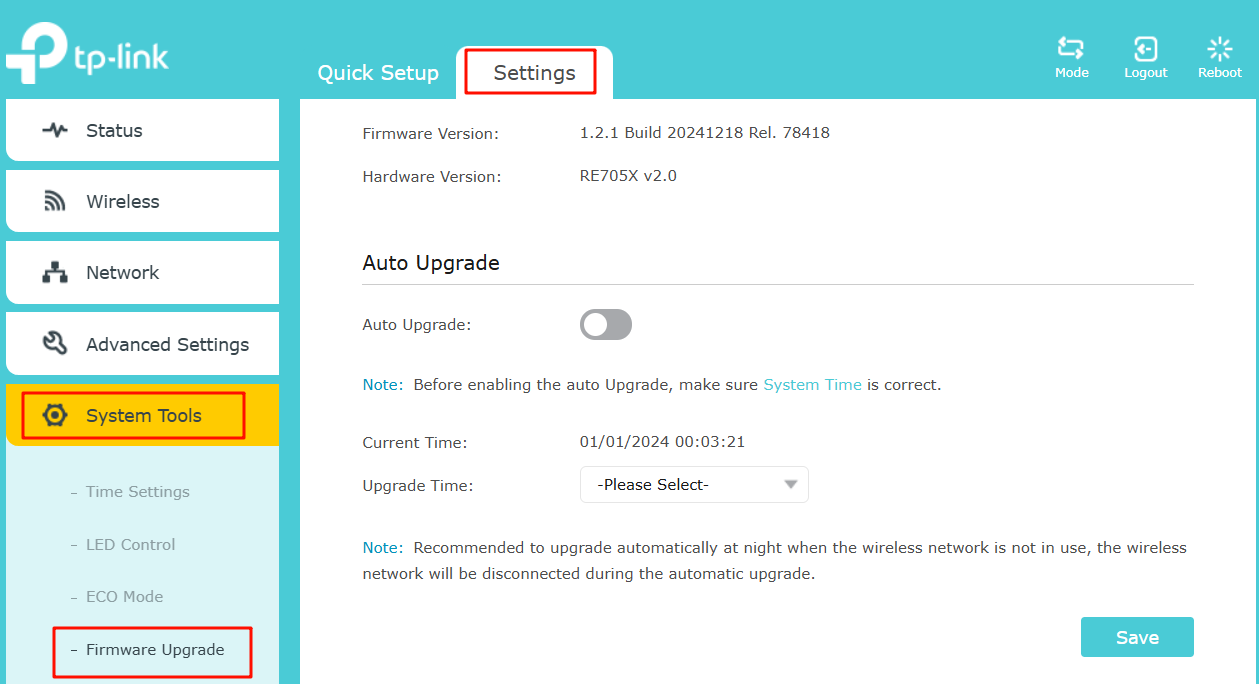
Step 4. Go to Settings > System Tools > Firmware Upgrade.

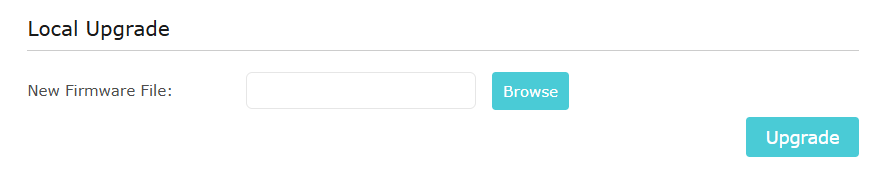
Step 5. Find the Local Upgrade, and click Browse to select the BIN file, and then click Upgrade.
Method 3. Online Update via Web Management Page (For TP-Link Cloud Compatible models)
Step 1. Connect to the extender via either Wi-Fi or an Ethernet port, visit https://tplinkrepeater.net, and log in with your password.

Step 2. Go to Settings > System Tools > Firmware Upgrade.
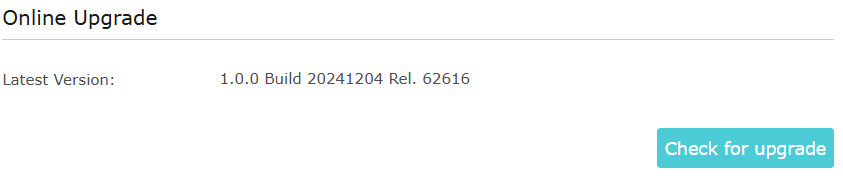
Step 3. Find the Online Upgrade, and click Check for Upgrade to update the firmware automatically.
Note: During the restoring process, do not power off or reset the extender.
Step 4. Wait a few moments for the upgrading and rebooting.
Get to know more details of each function and configuration. Please go to the Download Center to download the manual of your product.
Looking For More
Is this faq useful?
Your feedback helps improve this site.


TP-Link Community
Still need help? Search for answers, ask questions, and get help from TP-Link experts and other users around the world.