


How to set up Org, Site, and User Account on the Omada Central
Contents
Configuration for adding an Organization
Configuration for adding a Site
Configuration for adding a User Account
Objective
The objective of this article is to provide a comprehensive guide on setting up Organization (Org), Site, and User accounts in Omada Central.
Requirements
- Omada Central
Introduction
Organization, Site, and User Account are essential for managing VIGI devices and dividing user permissions, ensuring a streamlined and secure monitoring environment. By following these instructions, users can efficiently organize their surveillance system, assign specific roles to users, and manage access rights for different sites.
Configuration
In the following section, the configuration steps of Org, Site, and User will be introduced respectively.
Configuration for adding an Organization
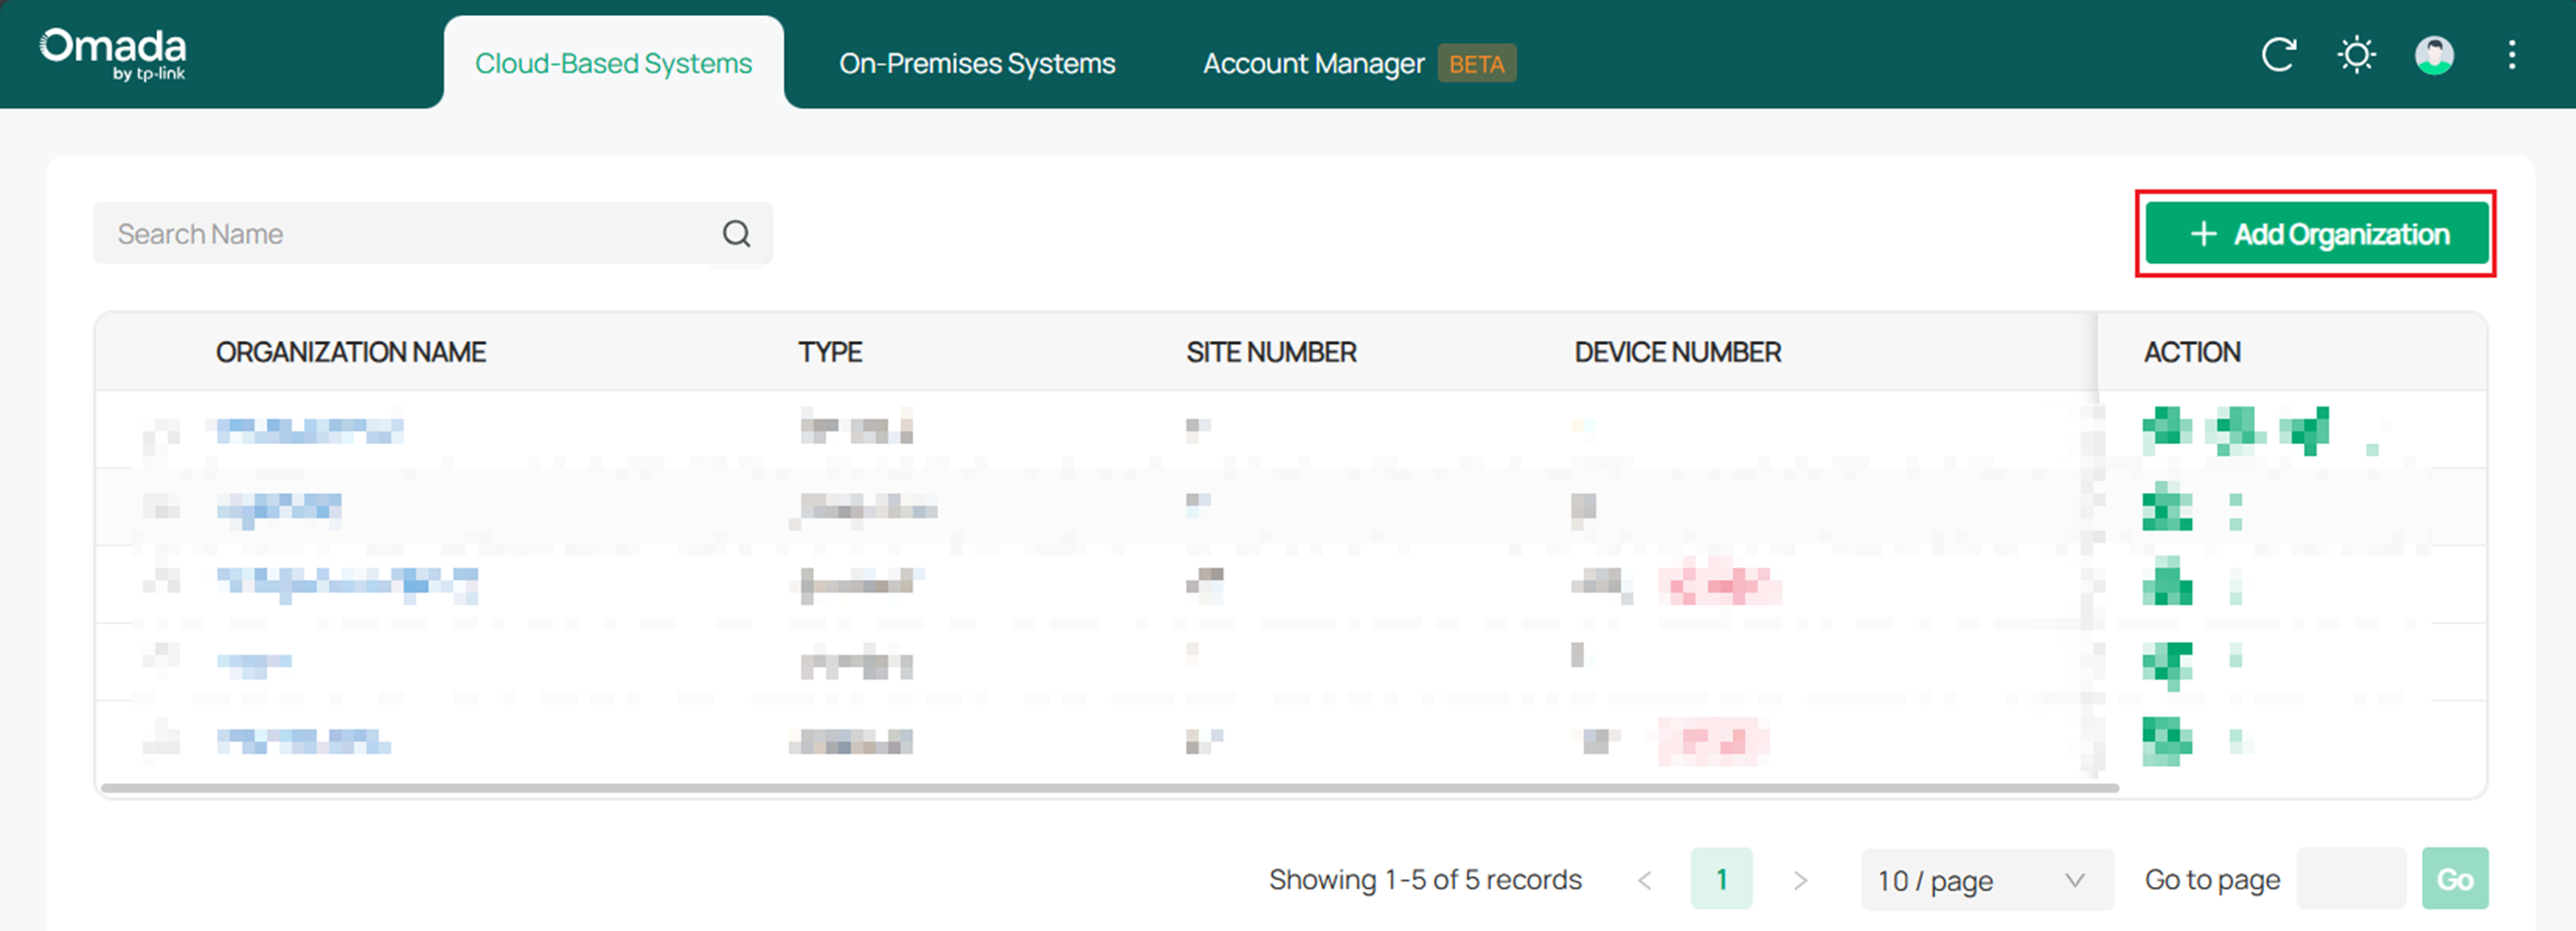
Step 1. Log in to the Omada Cloud Platform and click + Add Organization.
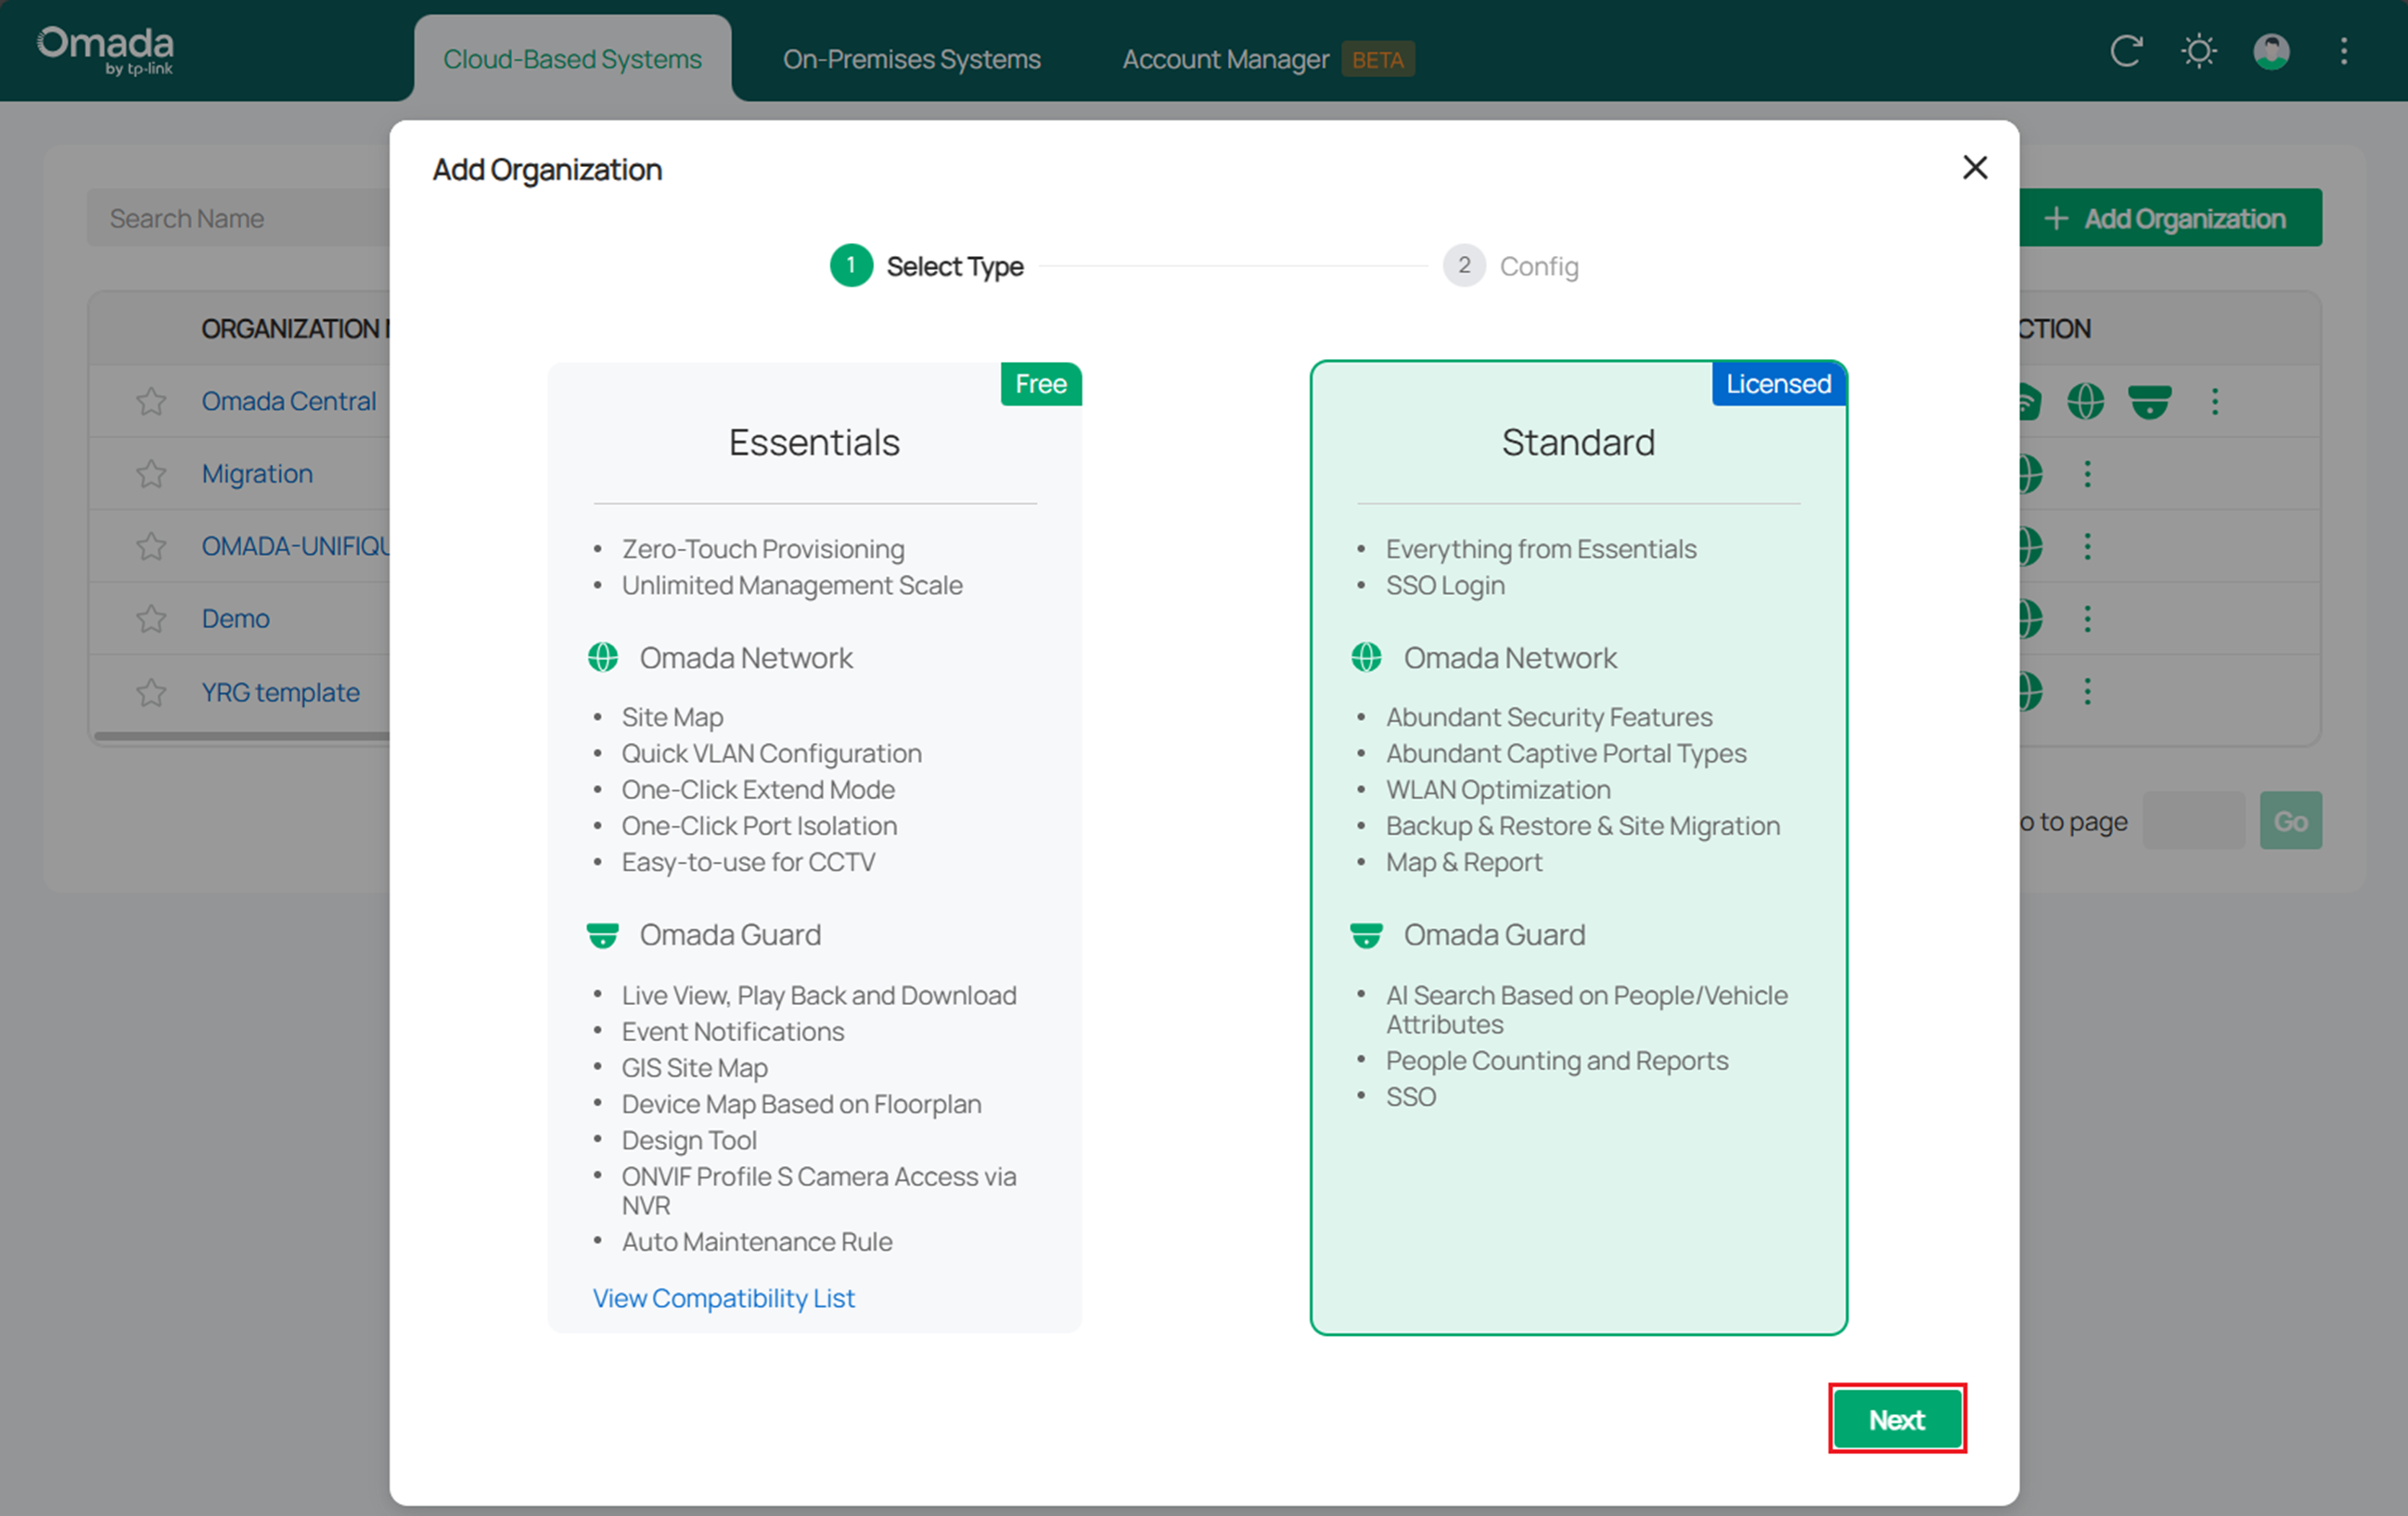
Step 2. Select the Essentials or Standard version according to your requirements, and then click Next.
Step 3. Specify the Organization Name, Country/Region, Time Zone, and Select Applications. The article only selects Omada Guard for demonstration.
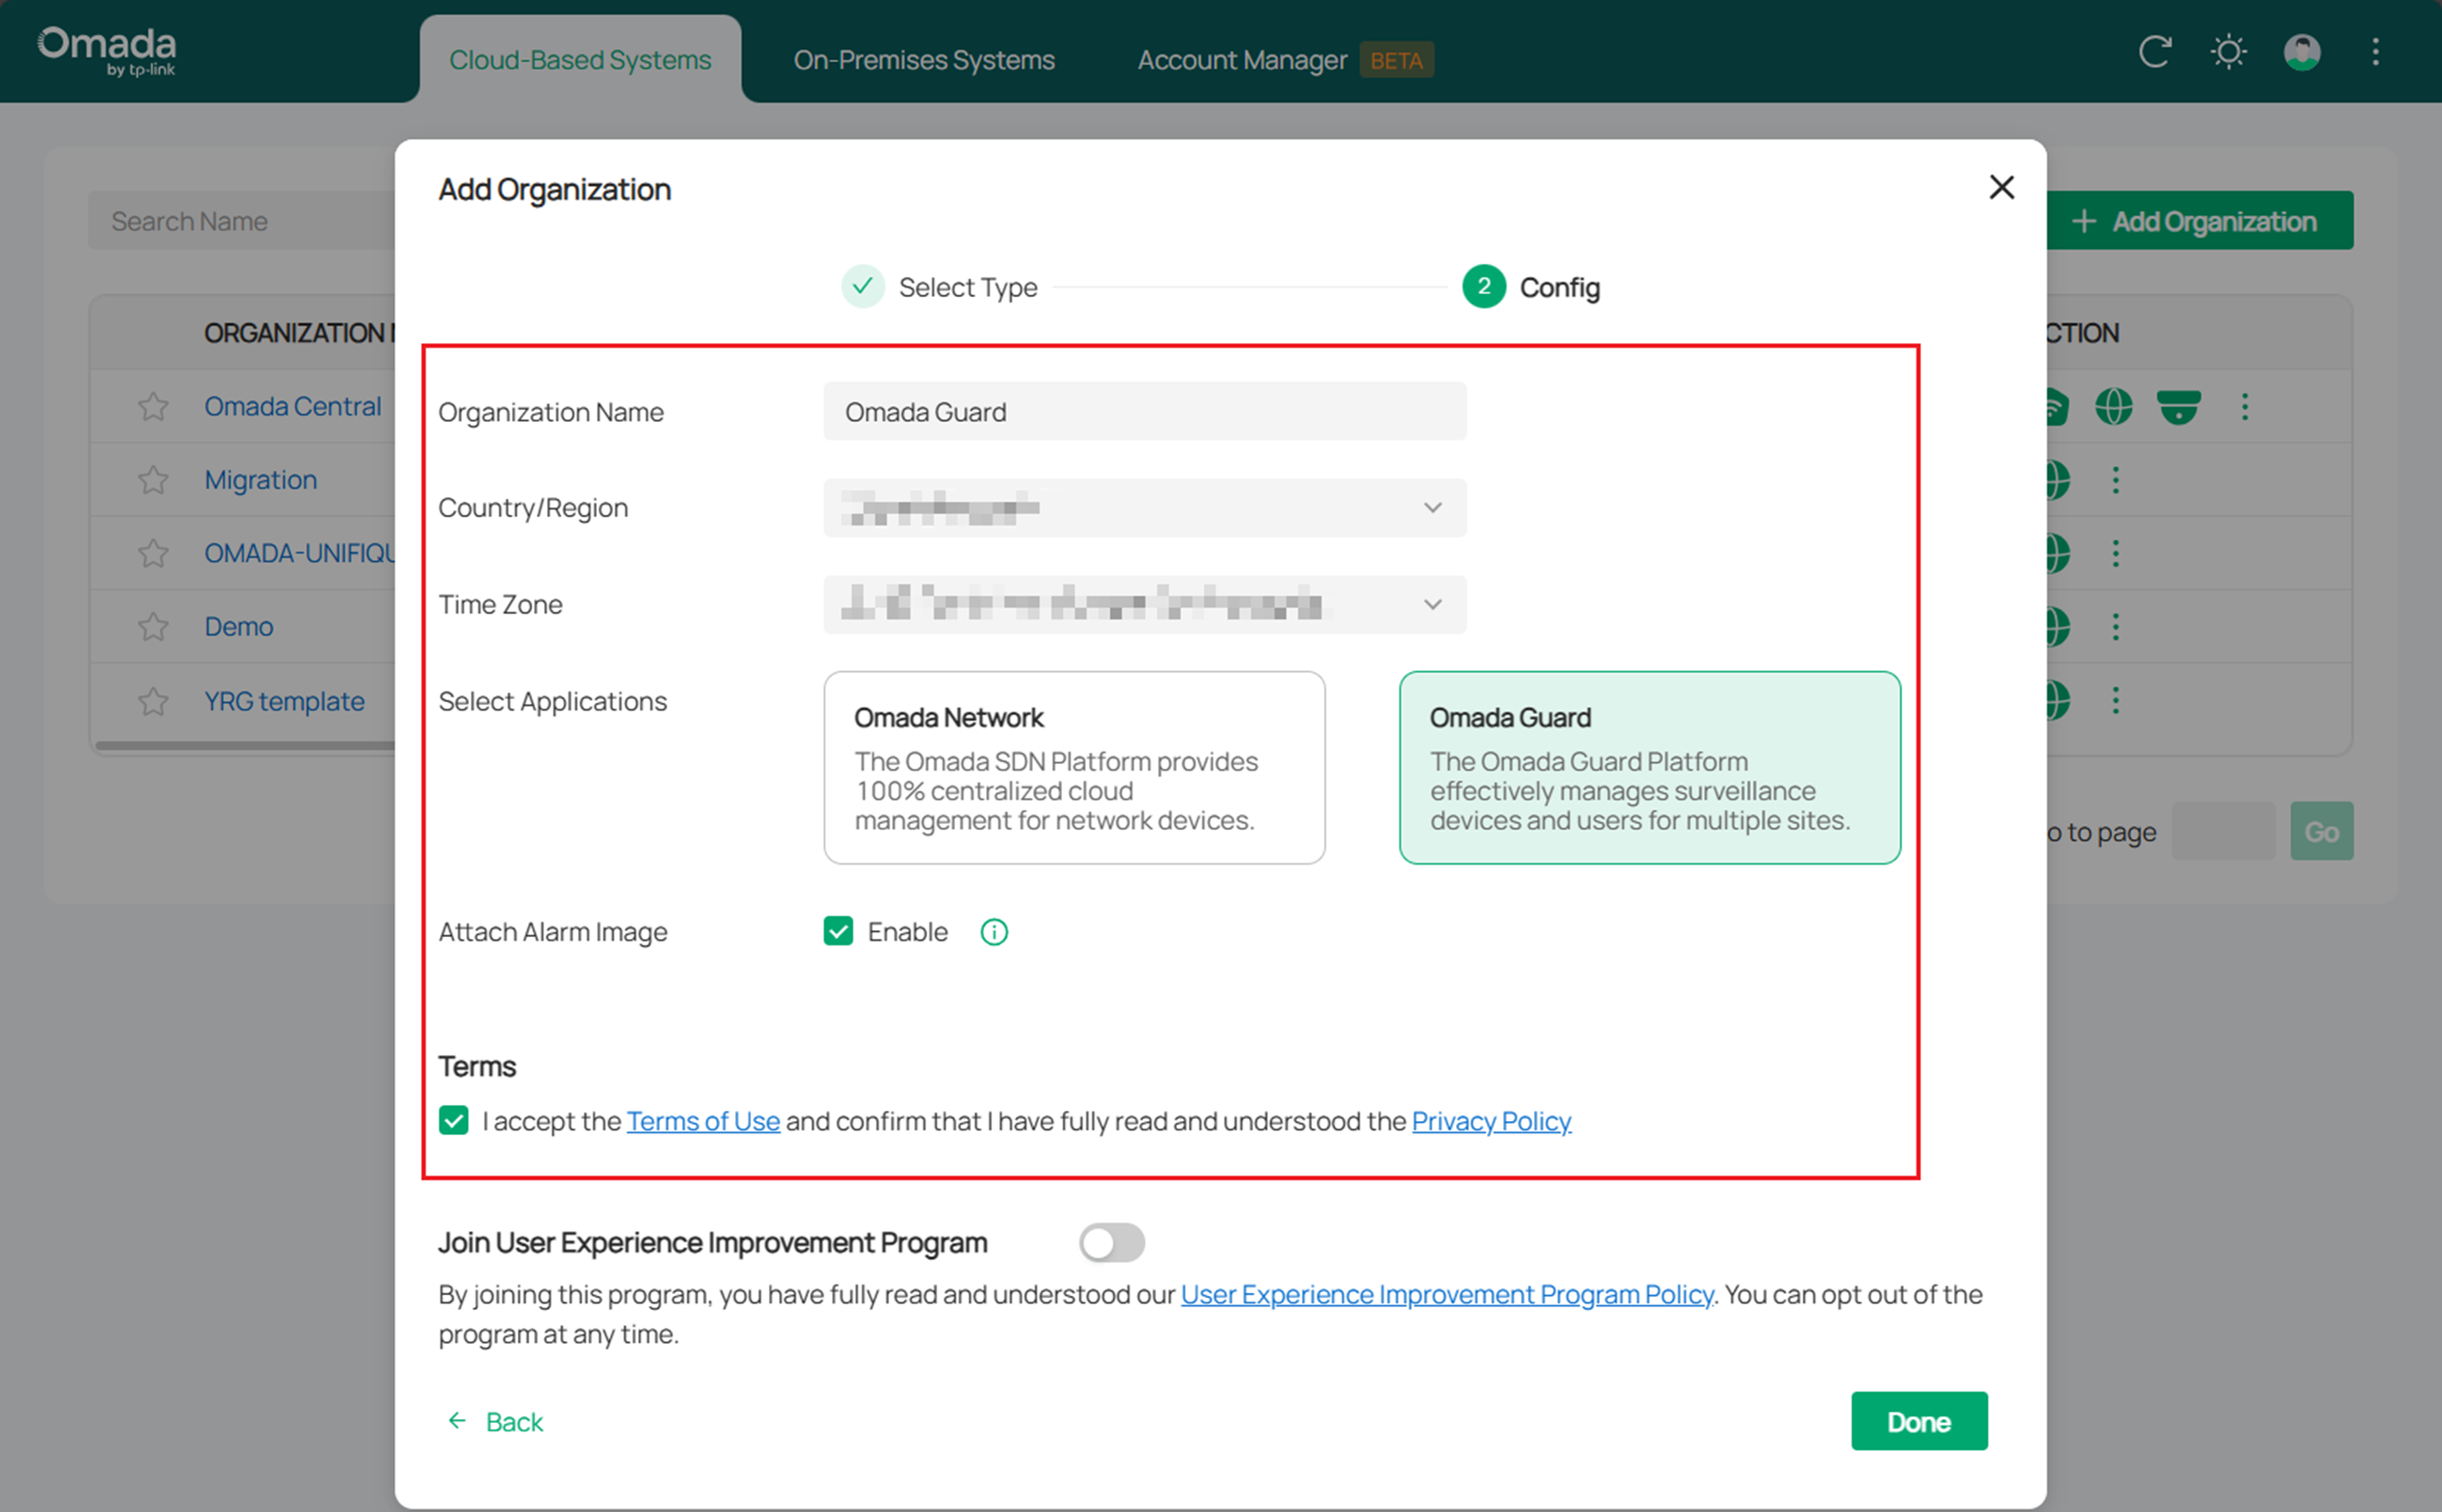
Note:
If the " Attach Alarm Image is enabled, the device will attach an alarm thumbnail when uploading alarm information to Omada Guard. Enable it according to your requirements.
Step 4. Click Done after all configuration is complete, and the page directs you to the Dashboard of the newly created organization.
Configuration for adding a Site
Step 1. Log in to the Omada Cloud Platform and launch the Organization with Omada Guard created.
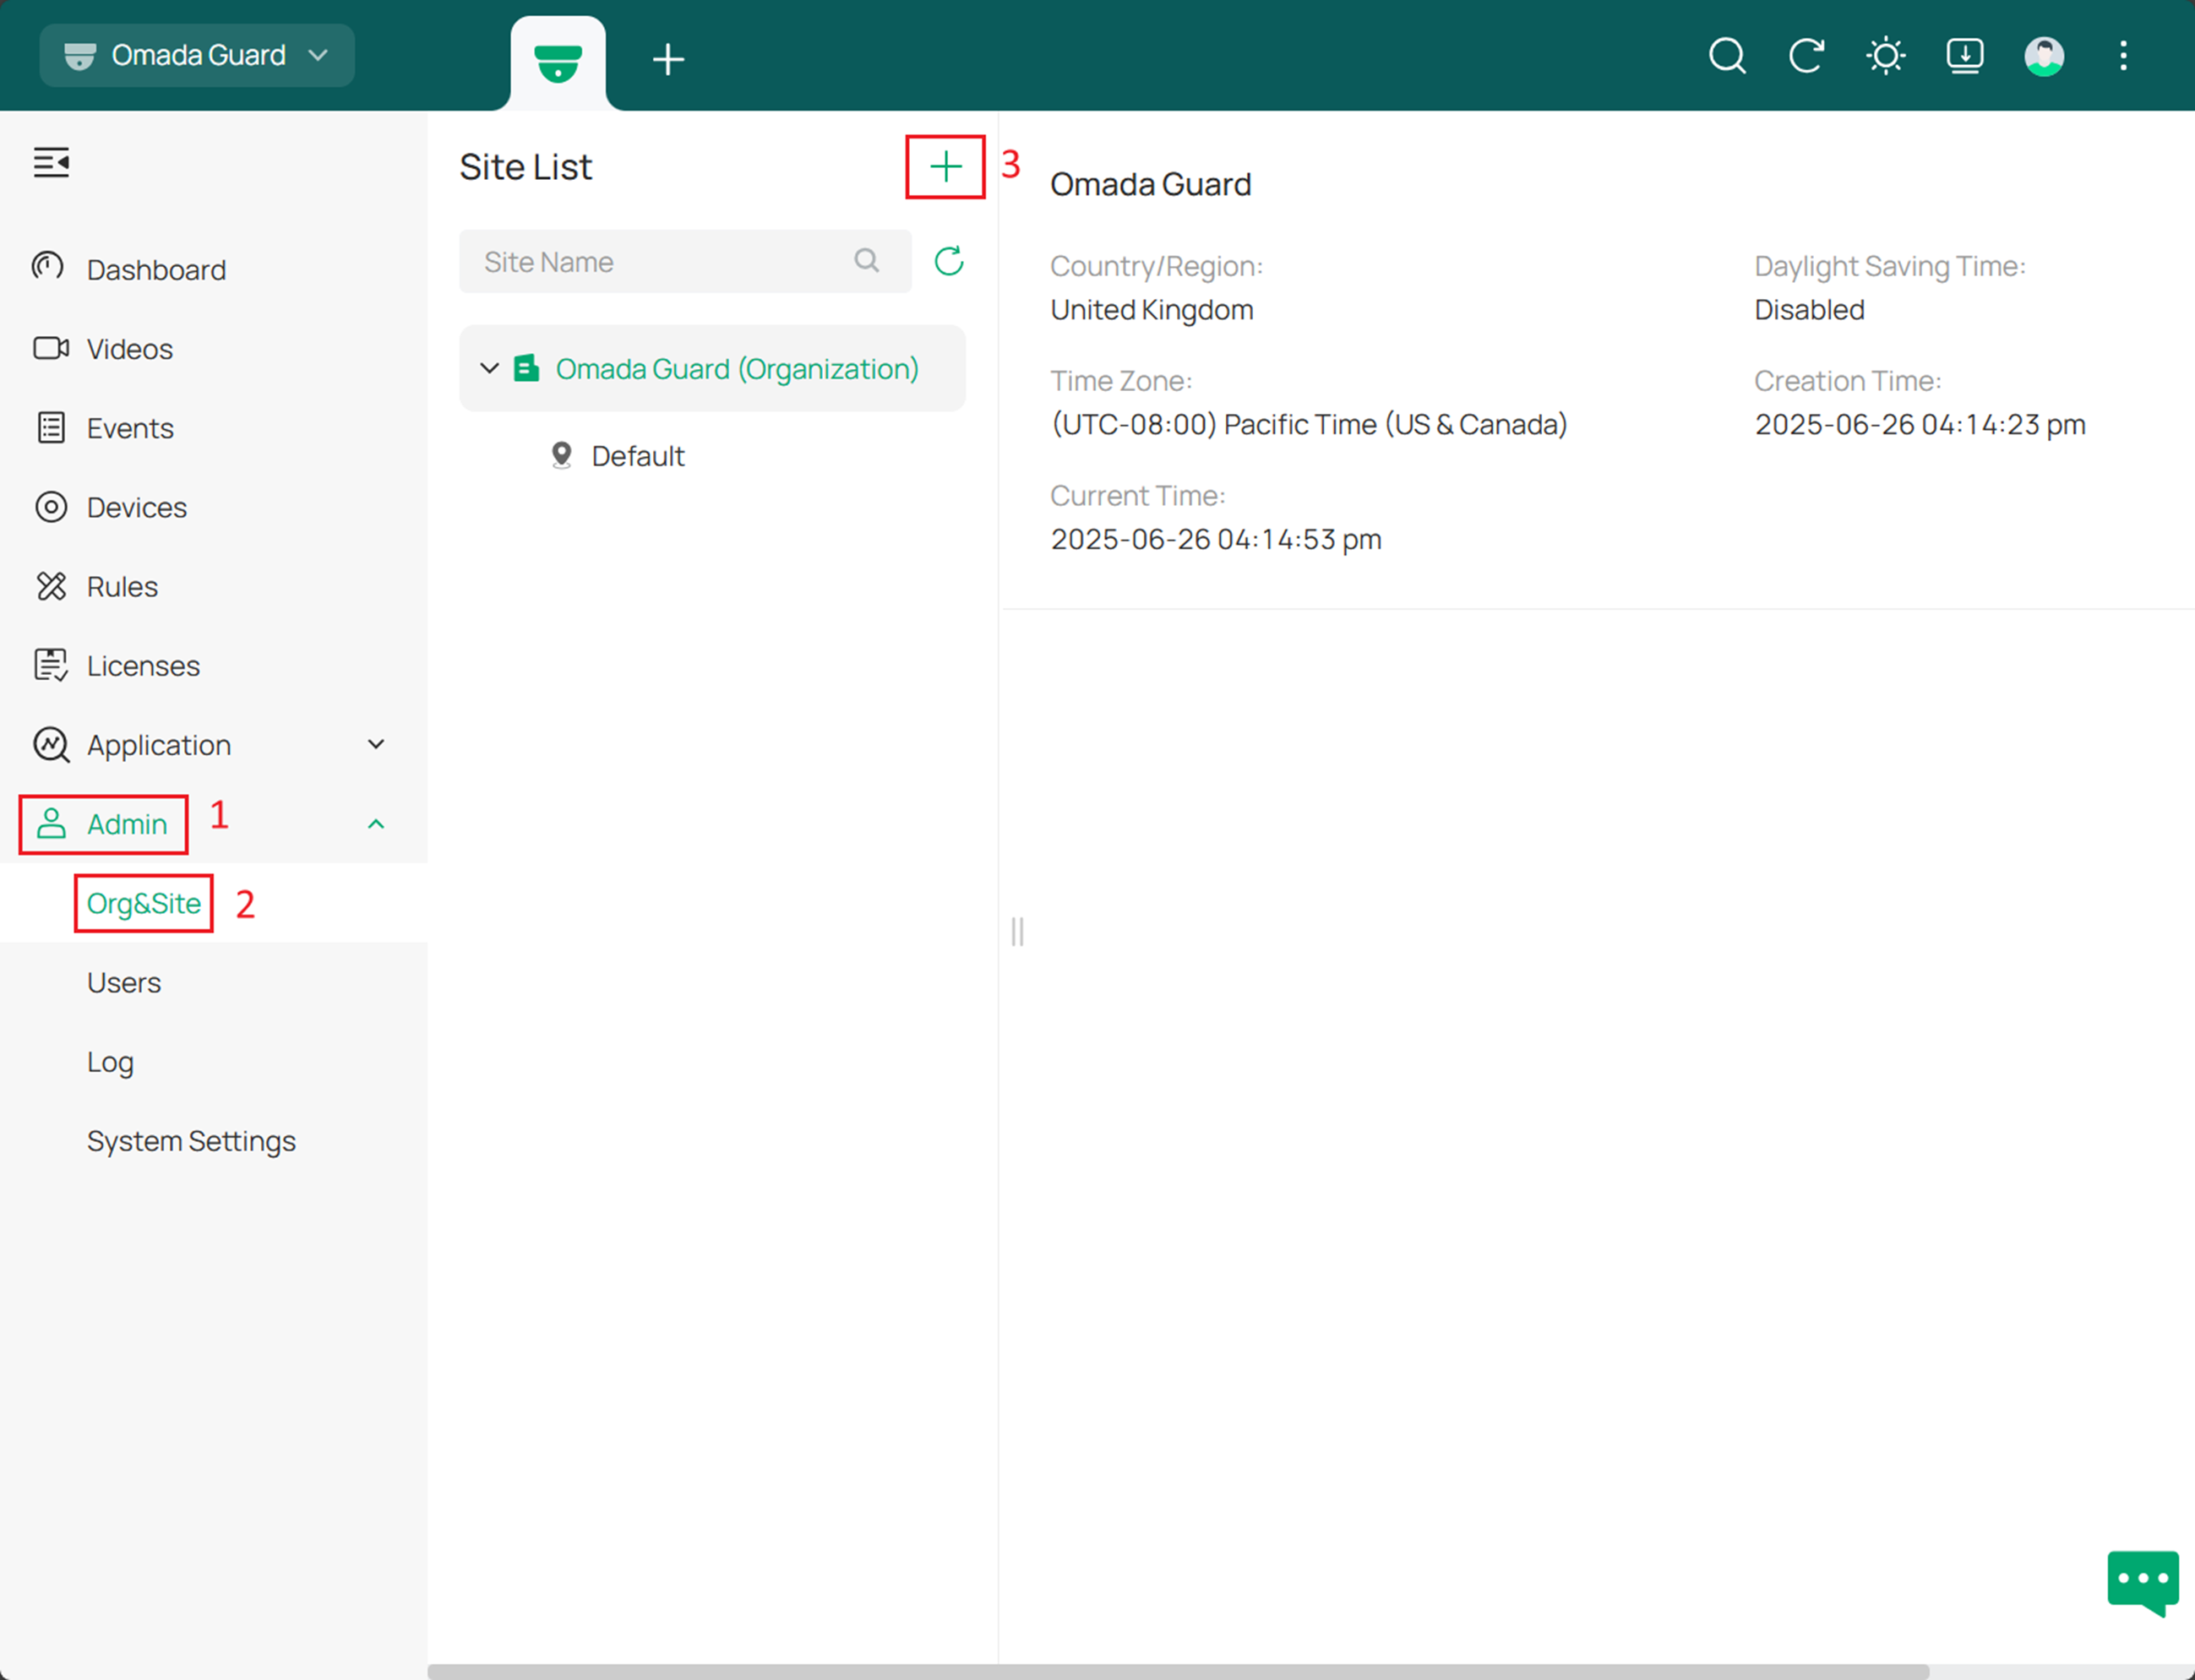
Step 2. Navigate to the Admin > Org & Site and click the “+” button to enter the information editing interface.
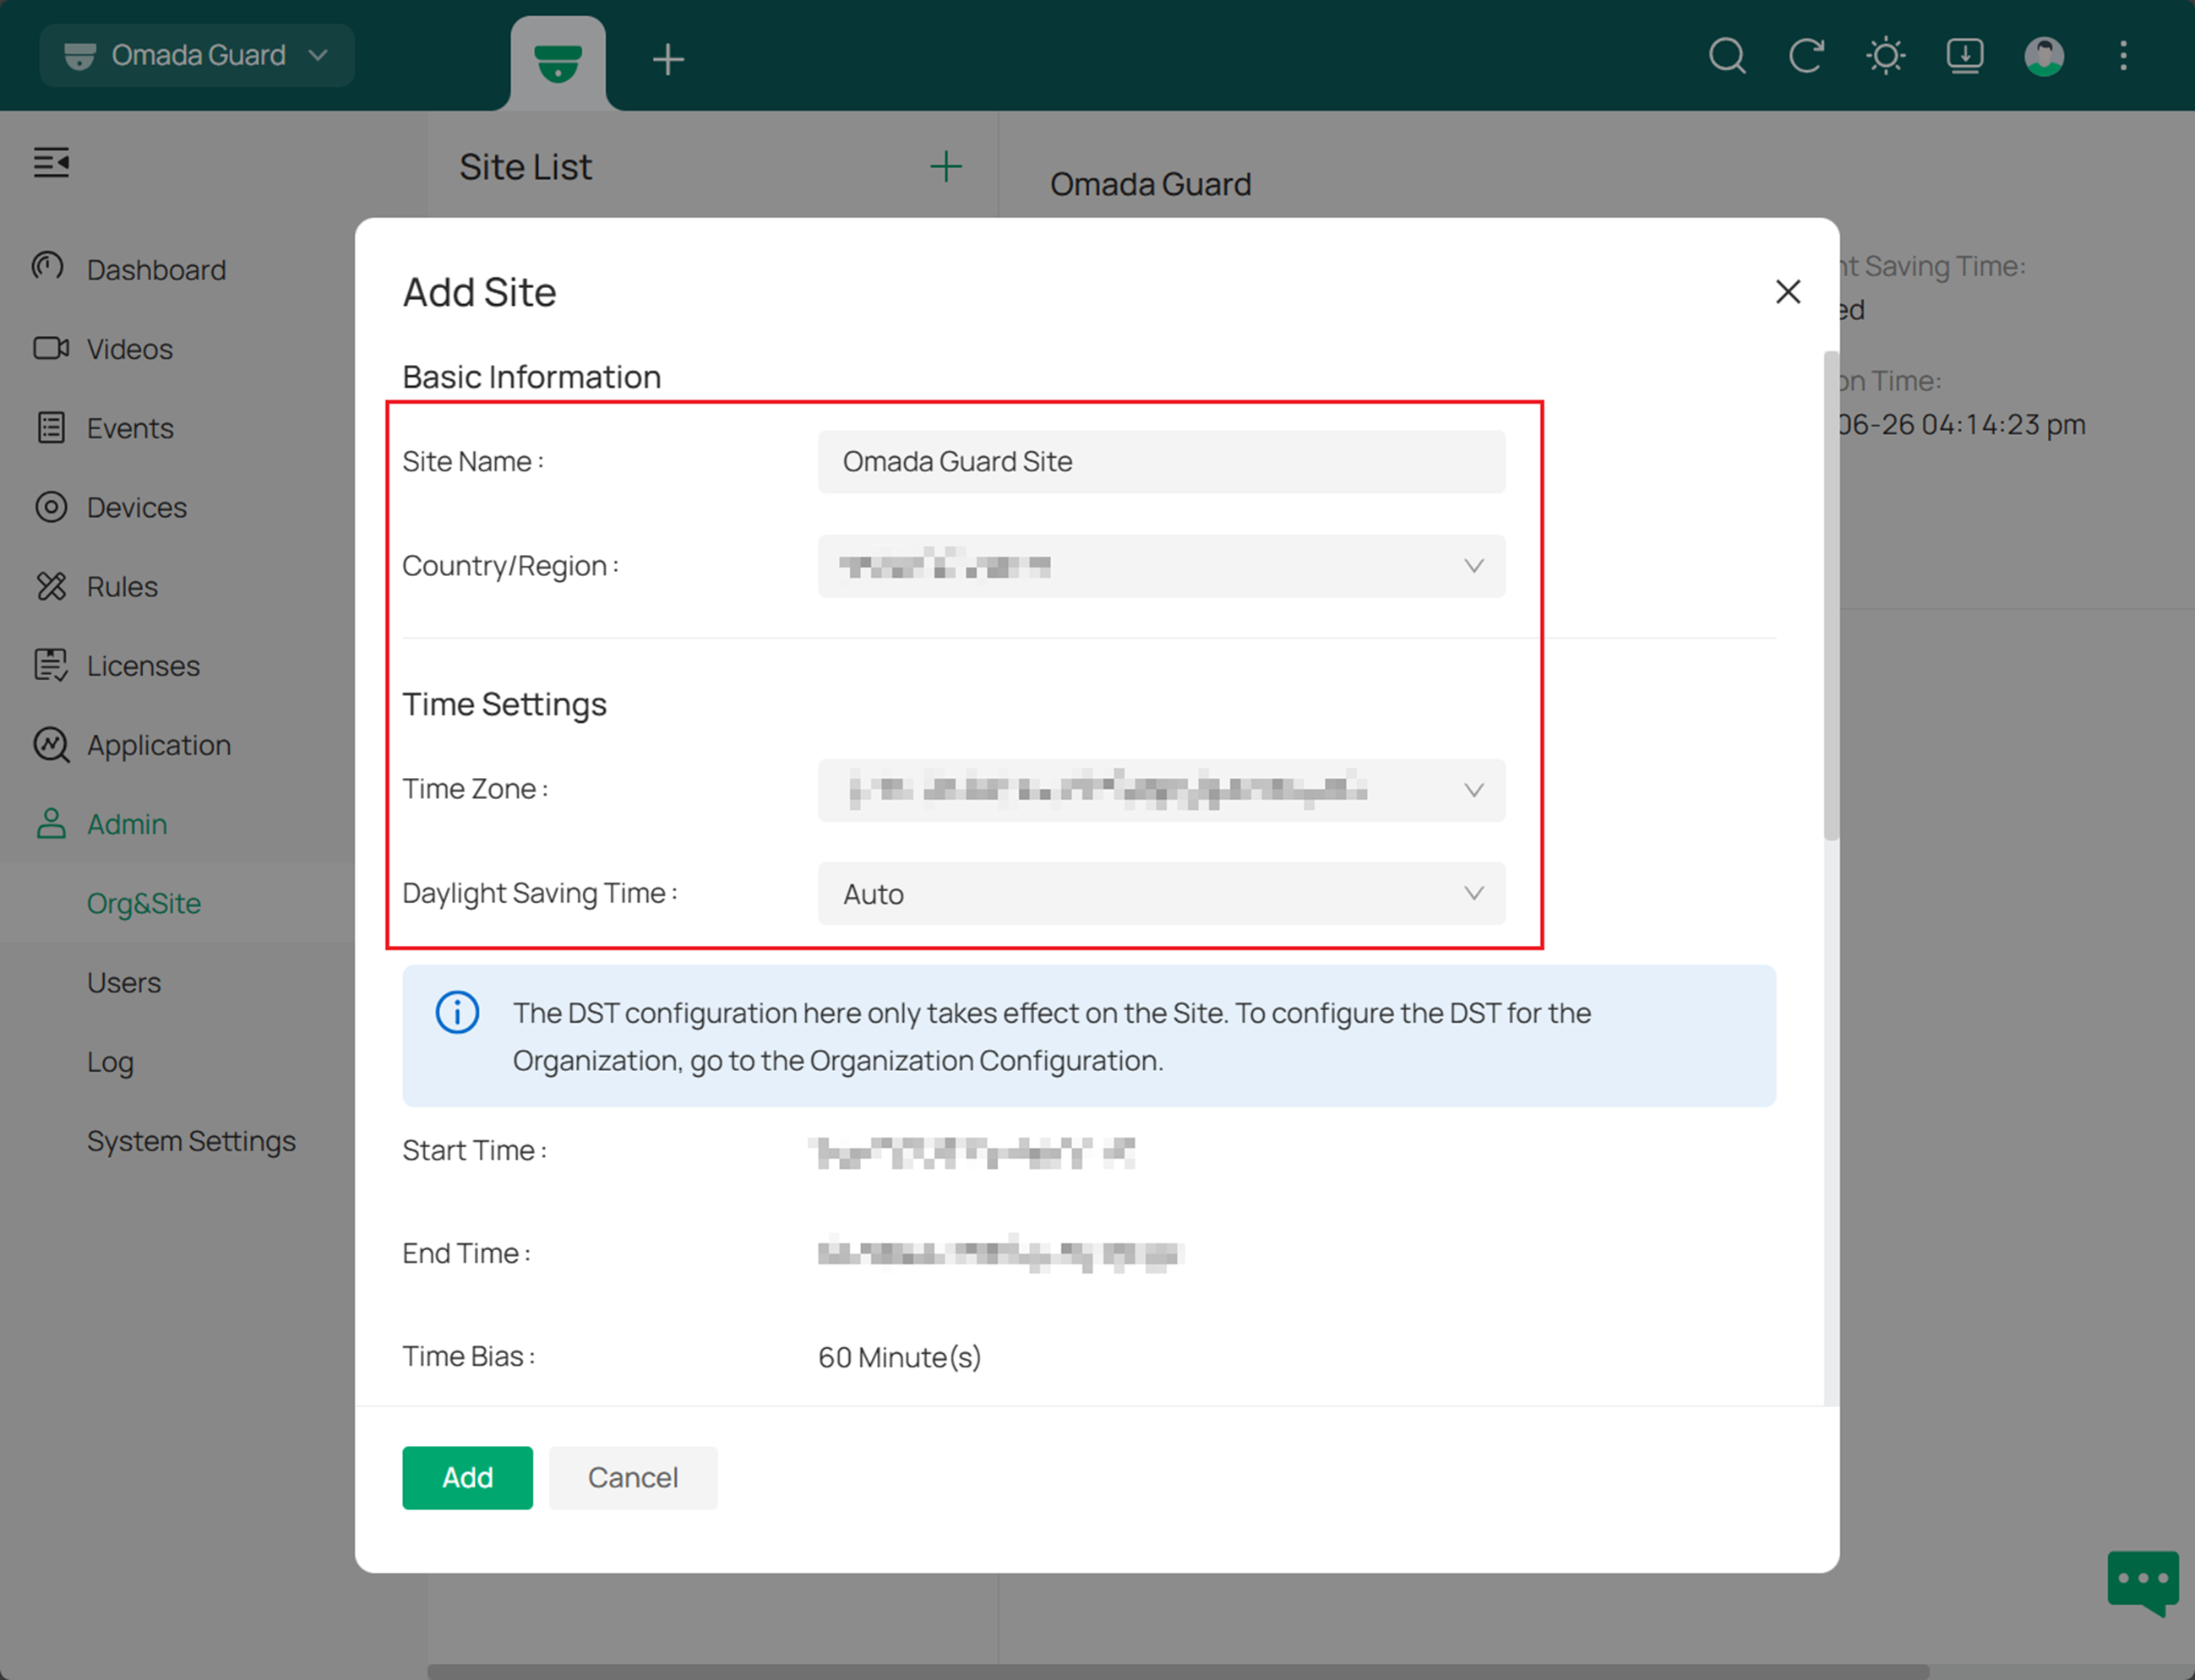
Step 3. Configure the Name, Country/Region, Time Zone, and daylight saving time of the organization.
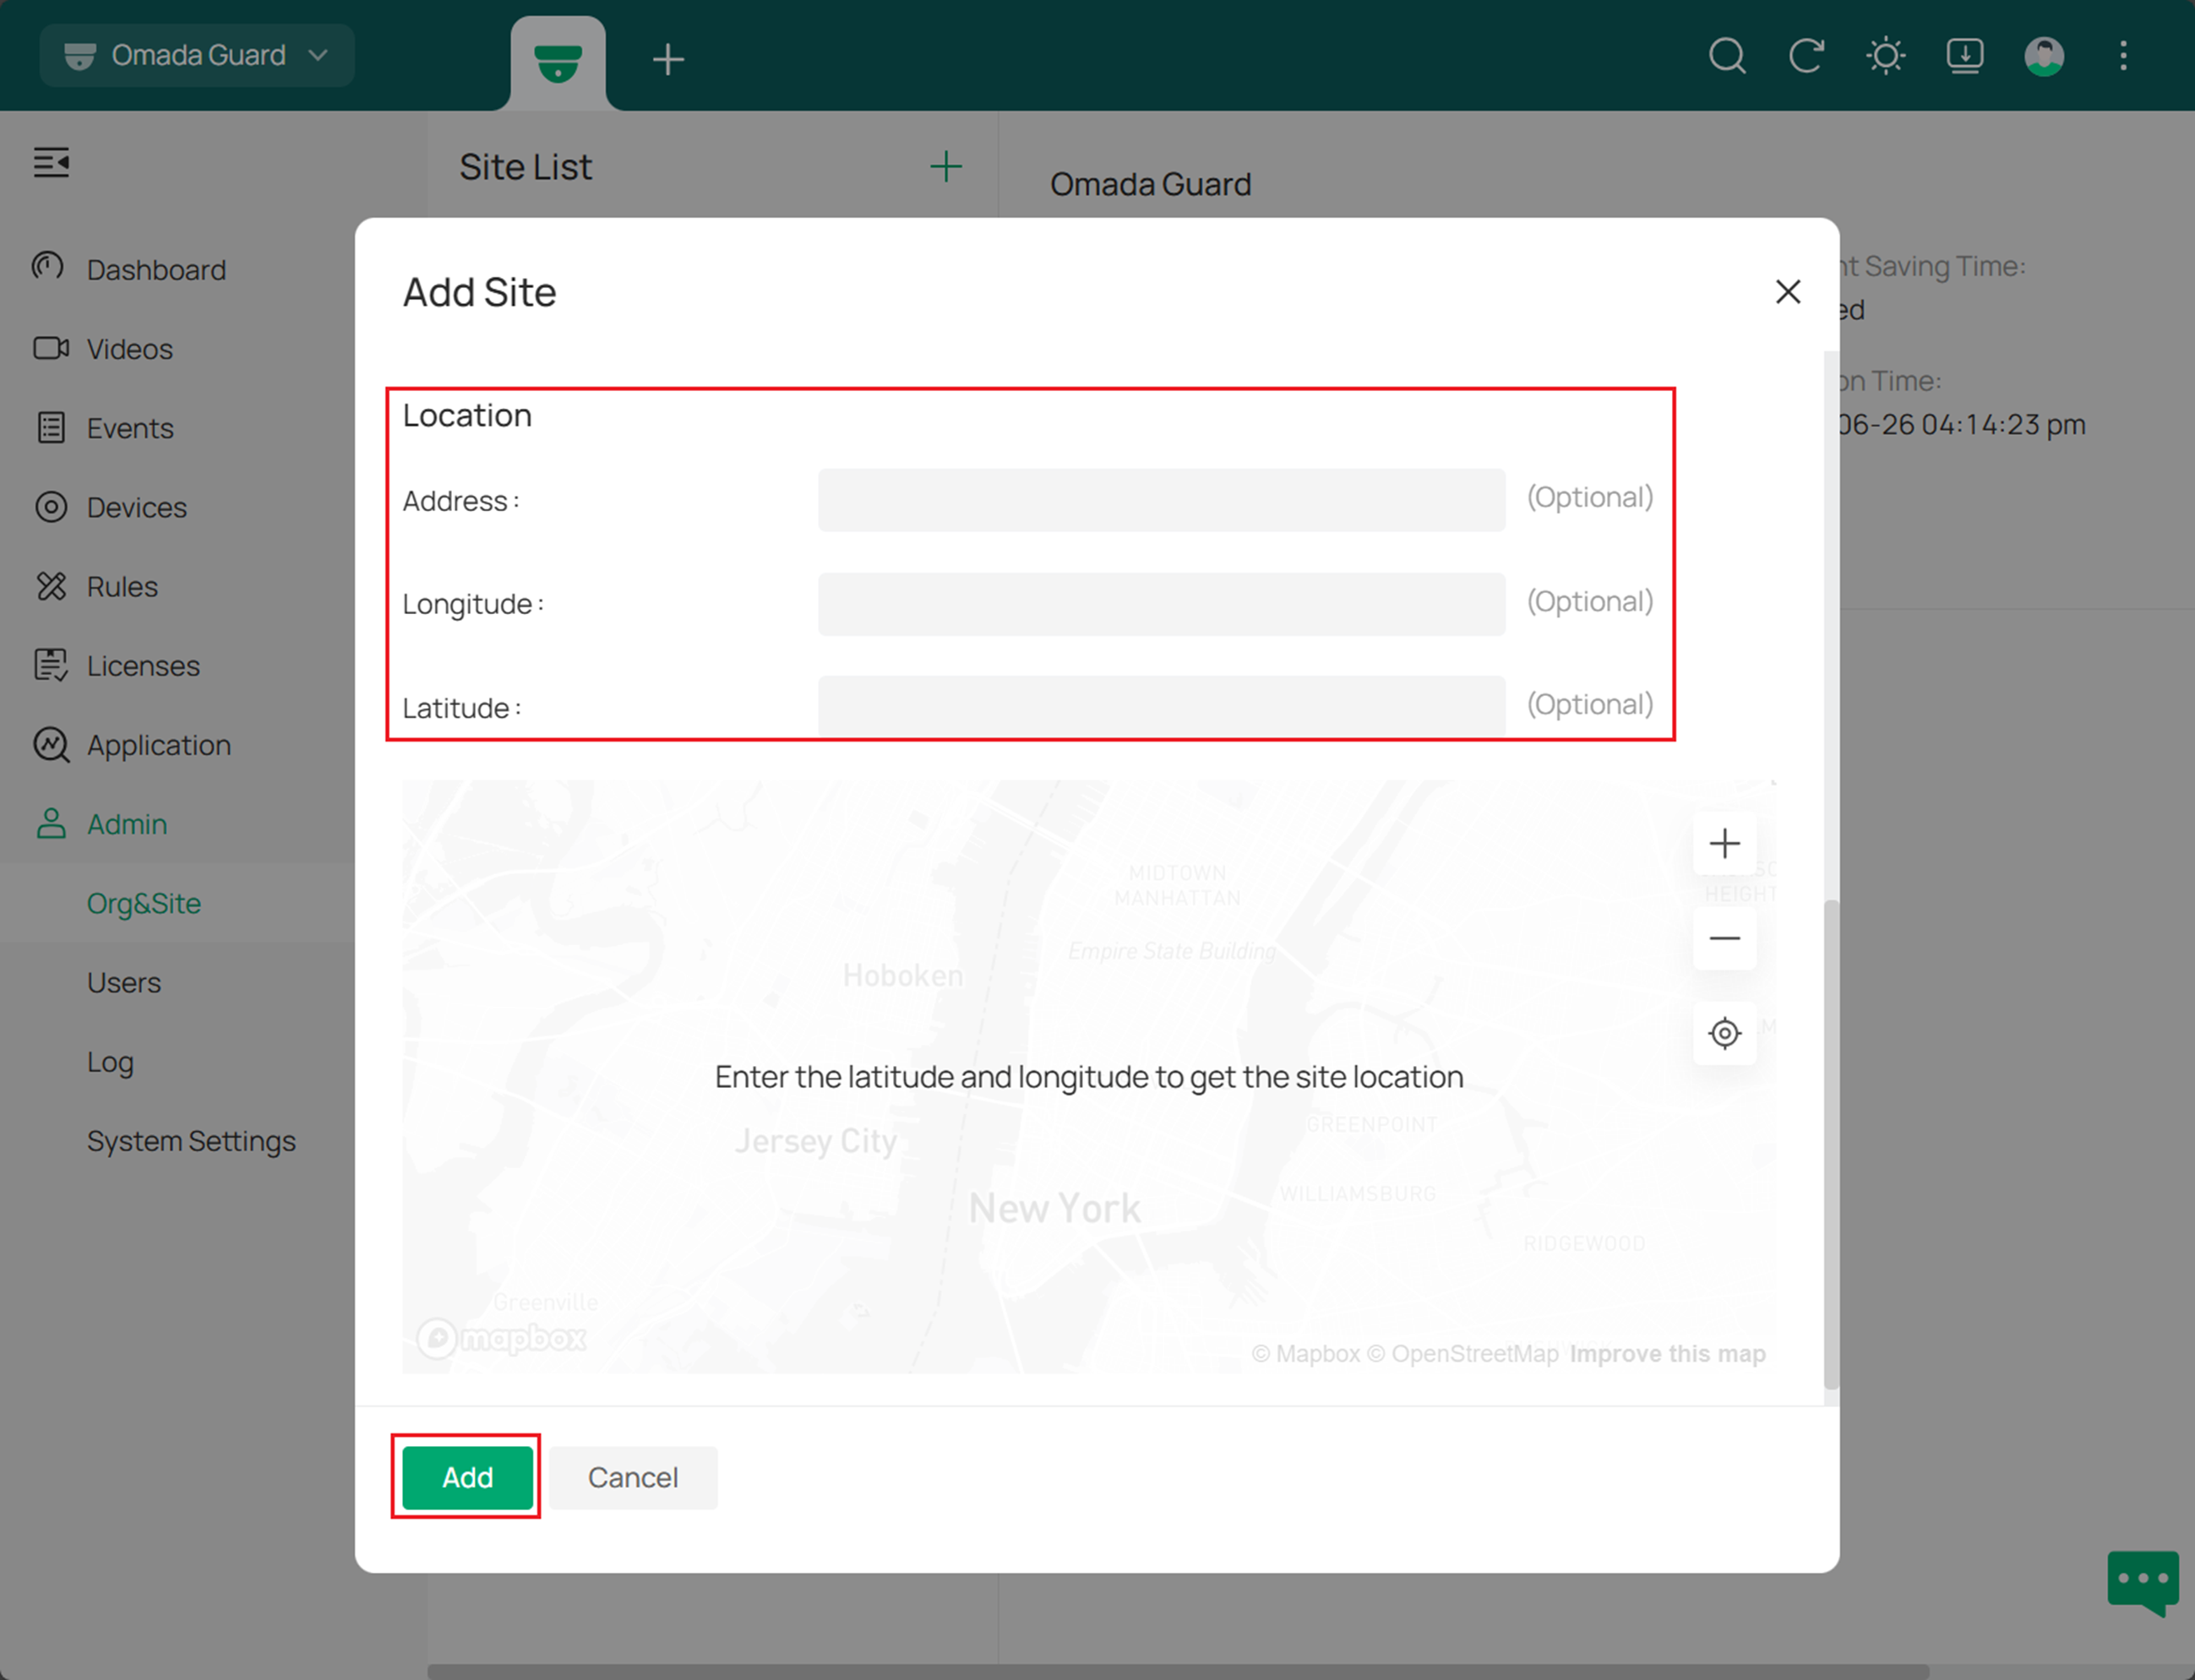
Step 4. You may specify its location with longitude and latitude if necessary. Click Add when everything is set correctly.
Configuration for adding a User Account
Different accounts can be set for various sites, with users being granted specific permissions for each use. Permissions for each user and site are listed in the table below.
Step 1. Decide the type of account you would like to add. Refer to the table below for a list of their respective permissions.
|
Role Name |
Description |
|
Owner |
The one who creates the organization and owns the highest permission by default. |
|
Super Admin |
This role has all permissions and can access all resources. |
|
Admin |
This role has all permissions but can only view specific users and sites. |
|
Operator |
This role can perform all device operations but lacks permissions for user and system management. |
|
Viewer |
This role can only view video resources and has no operation or system management permissions. |
|
Live Only User |
This role can only view live video. |
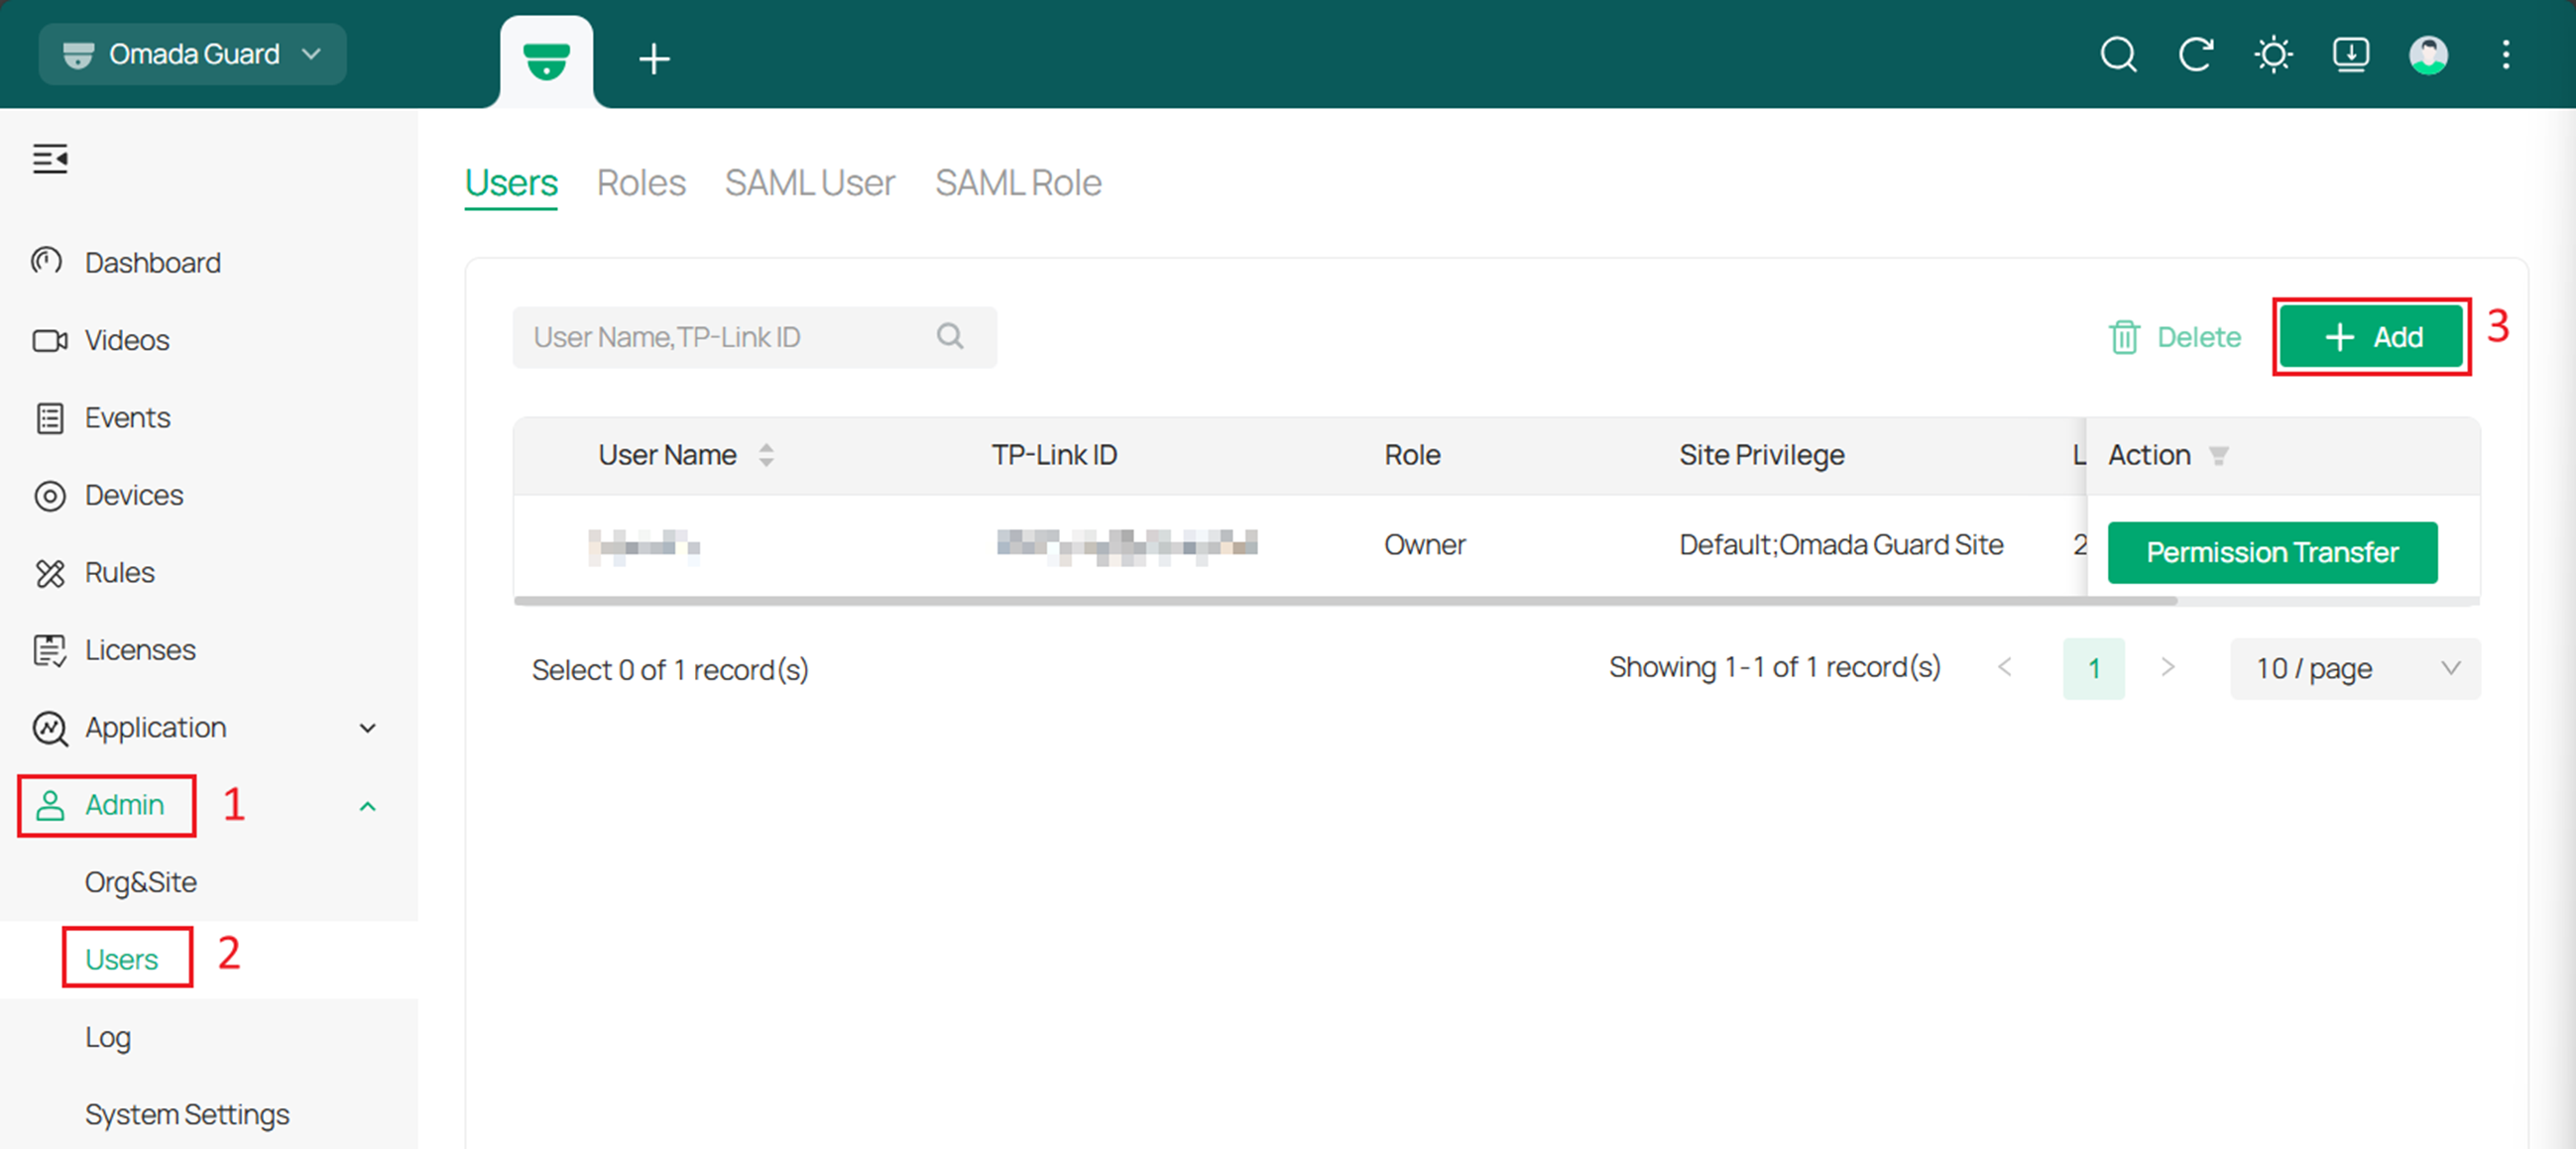
Step 2. Navigate to Admin > Users and click on the + Add button.
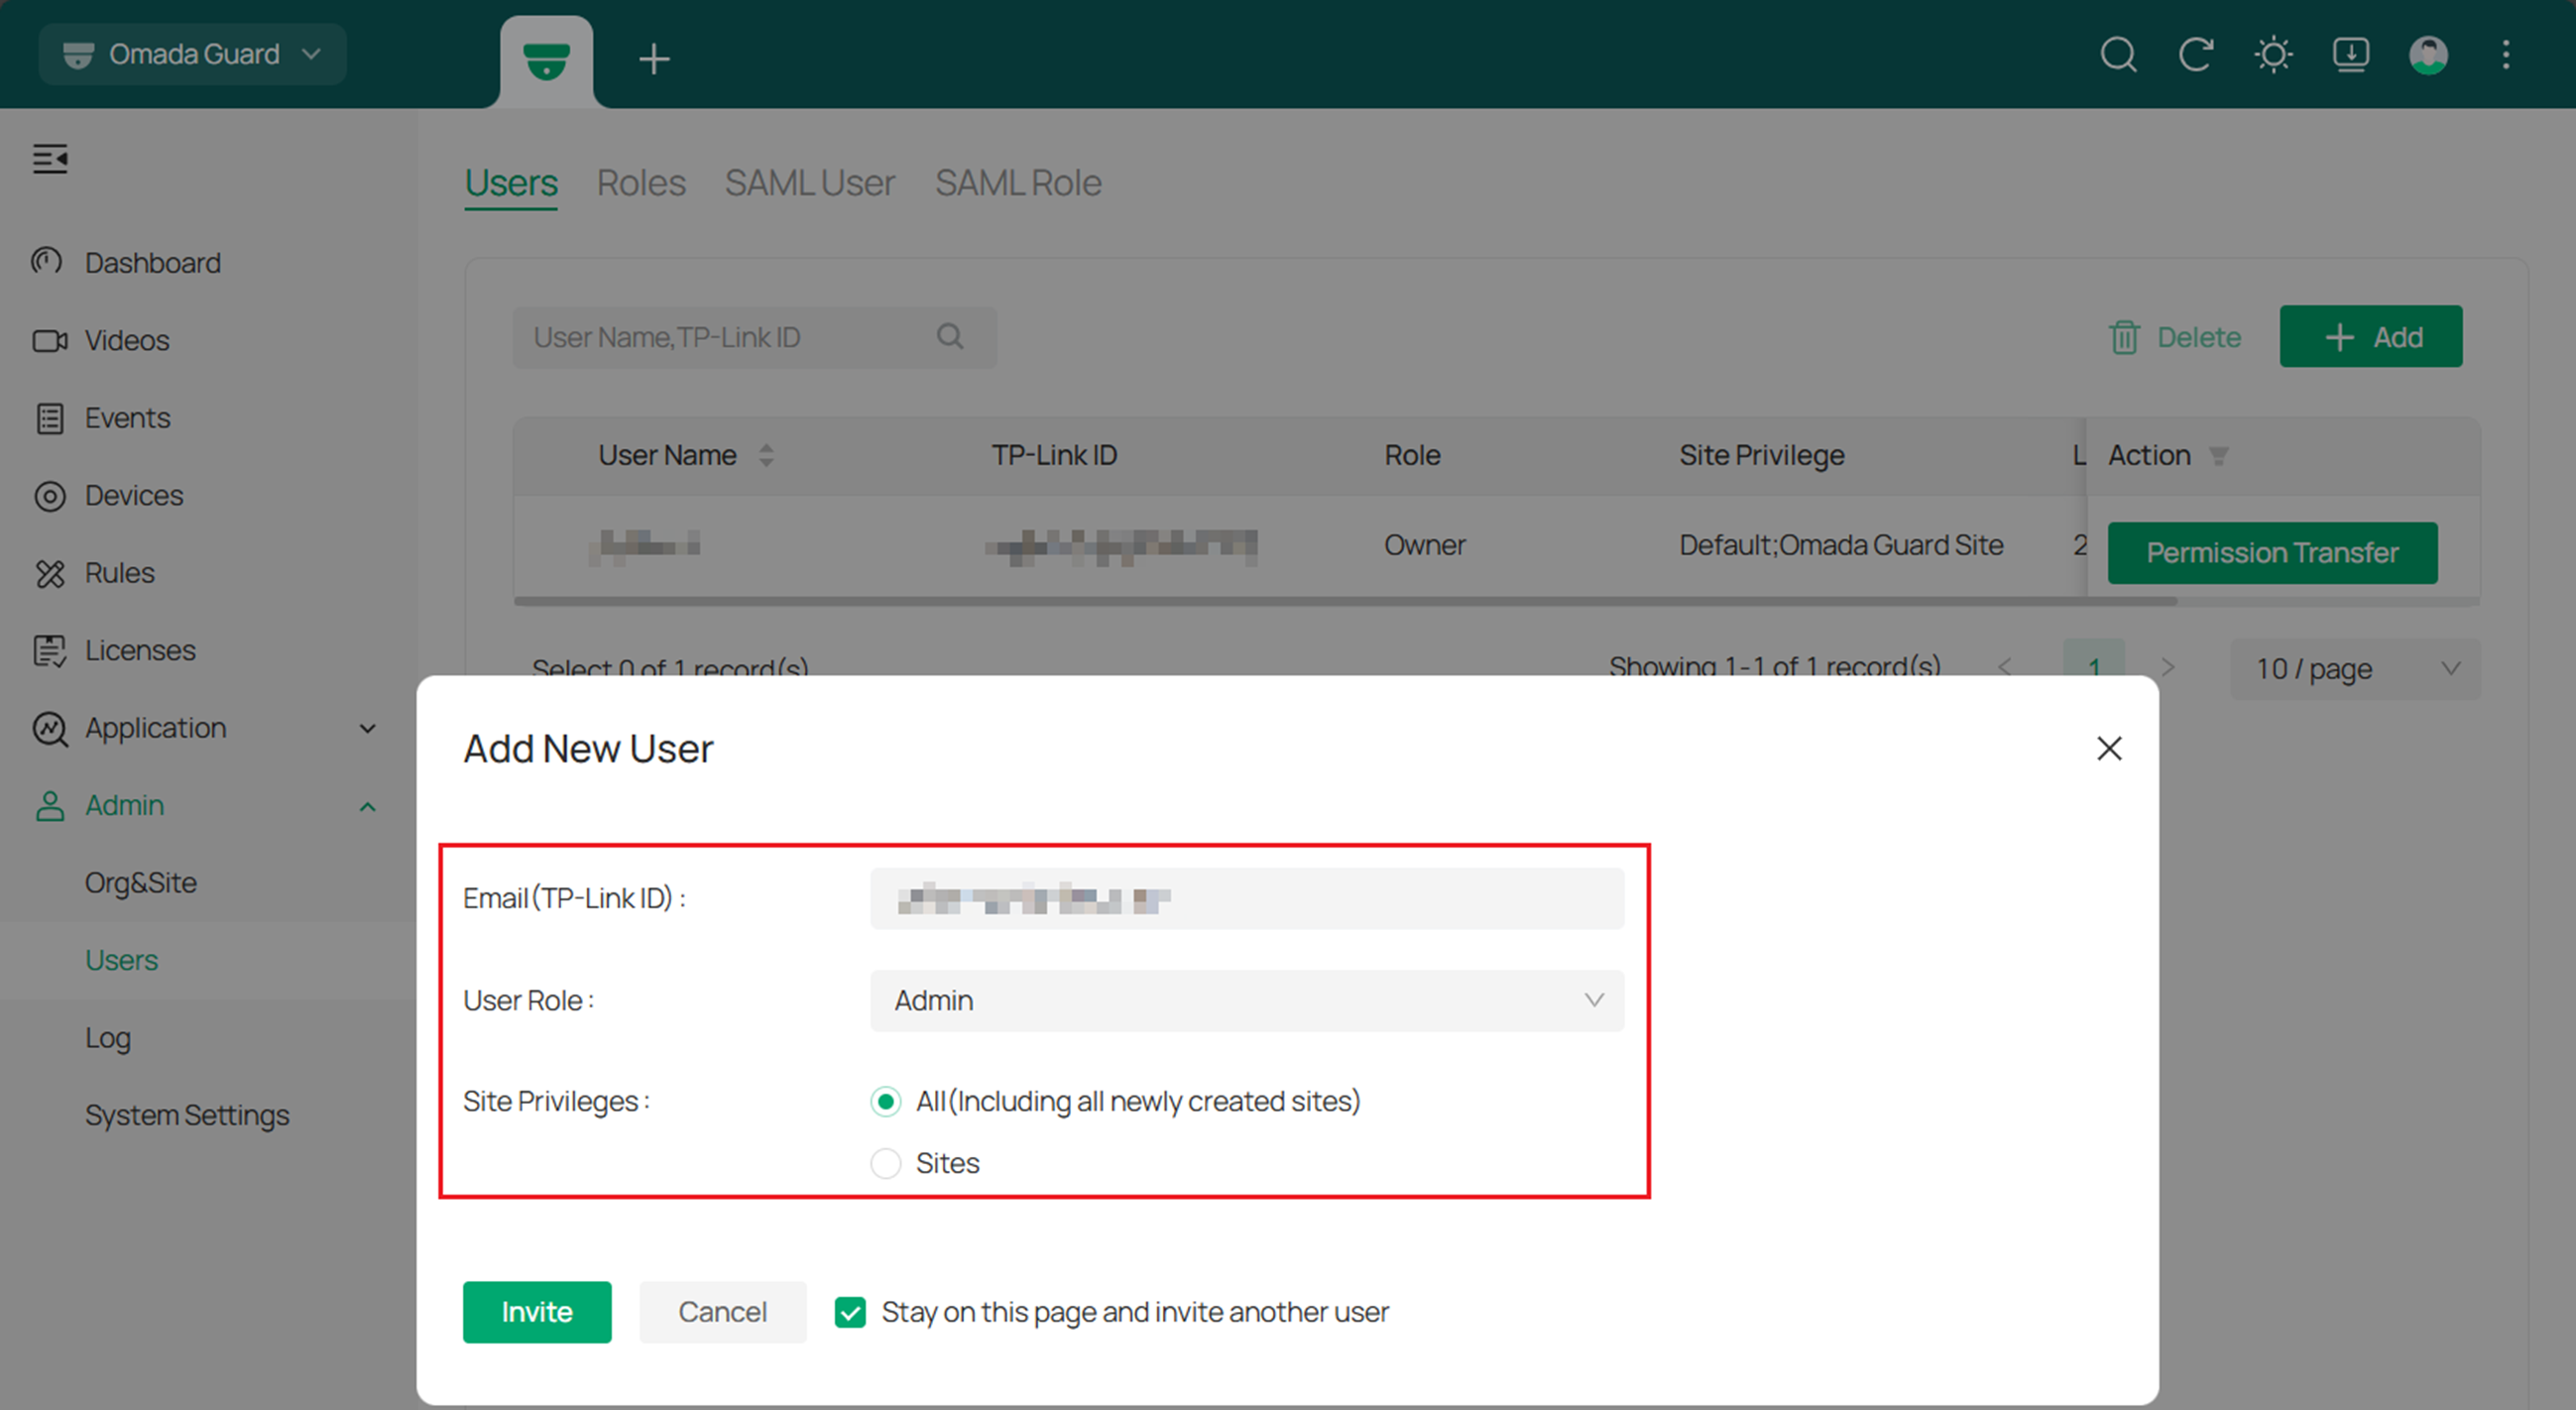
Step 3. Fill in the TP-Link ID of the new account, specify its role, and its Site Privileges, and click on Invite.
Step 4. Check the email inbox of TP-Link ID’s address and accept the invitation by clicking the internal link. The new user can manage or view the organization by logging in to the Omada Cloud Platform.
Conclusion
In conclusion, setting up the Organization, Site, and User accounts on Omada Central is essential for efficiently managing your surveillance system and assigning appropriate permissions. By following the steps outlined in this guide, users can establish a structured and secure monitoring environment with clear role definitions and effective access control.
Get to know more details of each function and configuration please go to Download Center to download the manual of your product.
Is this faq useful?
Your feedback helps improve this site.
TP-Link Community
Still need help? Search for answers, ask questions, and get help from TP-Link experts and other users around the world.