How do I configure wireless G Access Point to wireless AP-Client mode?
User Application Requirement
Updated 05-24-2016 08:43:03 AM218499
This Article Applies to:
TL-WA5110G , TL-WA601G , TL-WA501G , TL-WA500G
Recent updates may have expanded access to feature(s) discussed in this FAQ. Visit your product's support page, select the correct hardware version for your device, and check either the Datasheet or the firmware section for the latest improvements added to your product. Please note that product availability varies by region, and certain models may not be available in your region.
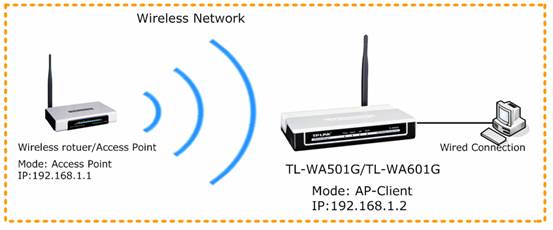
Definition: The Access Point is connected to another device via Ethernet cord and acts as an adapter to send/receive the wireless signal from your wireless network.
Step 1
Connect your computer to TL-WA501G/TL-WA601G, and then log into the Webbased Utility by entering the IP address 192.168.1.1 into Web Browser.
If you cannot log into the Web-based Utility, please click here and follow the instruction for a try.
Step 2
Change the LAN IP address of the access point (TL-WA501G/TL-WA601G) to avoid IP conflict if necessary. Please refer to FAQ_173 for some detailed information.
After changing the IP address of your access point, you need to re-log into it by using the new IP address.
Step 3
Configure the wireless mode to Client and connect to the wireless network.
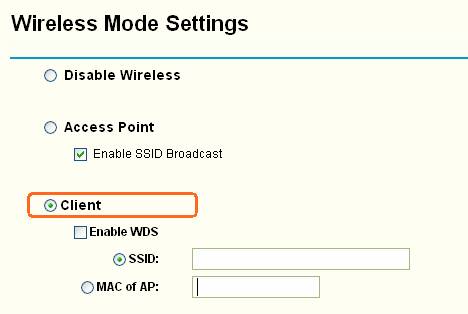
1. Click Wireless -> Wireless Mode on the left, select Client.
Note: If the wireless router or Access Point which you want to connect does not support WDS, please do not enable WDS option.
2. If you know the SSID of the wireless network or the MAC address of the AP, you can enter them into the SSID or MAC of AP box manually, and then Click on Save to save the settings.
3. Or you can click on Survey button to view the available wireless networks, and then click on Connect button to connect to it.
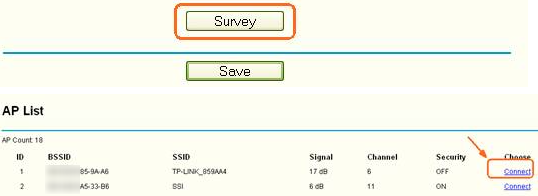
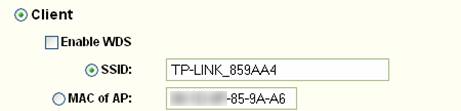
After clicking on Connect button, the SSID of the wireless network and the MAC address of the AP will be shown in the Client mode box automatically. Then click on Save button.
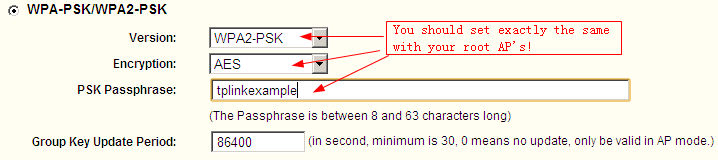
4. Click Wireless ->Security Settings on the left side menu, choose the right security type. Then type in the same security with your root AP. At last, click the Save button.
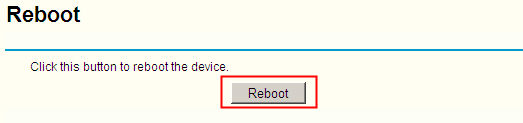
5. After above the configuration, Click on System Tools->Reboot and click the Reboot button. The settings will take effect once the device has been rebooted.
NOTE:
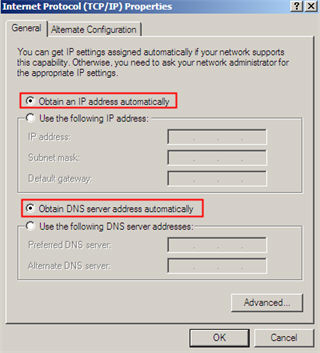
If you have a broadband router which provides you Internet connection, please re-configure the IP settings of your computer to Obtain an IP address automatically/Obtain a DNS server address automatically to suit for the router in order to connect to Internet after the settings in TL-WA501G/TL-WA601G.
Get to know more details of each function and configuration please go to Download Centerto download the manual of your product.
Is this faq useful?
Your feedback helps improve this site.
What’s your concern with this article?
Dissatisfied with product
Too Complicated
Confusing Title
Does not apply to me
Too Vague
Other
Thank you
We appreciate your feedback. Click here to contact TP-Link technical support.
TP-Link Community
Still need help? Search for answers, ask questions, and get help from TP-Link experts and other users around the world.
We have updated our Policies. Read Privacy Policy and Terms of Use here. This website uses cookies to improve website navigation, analyze online activities and have the best possible user experience on our website. You can object to the use of cookies at any time. You can find more information in our privacy policy .
Basic Cookies
These cookies are necessary for the website to function and cannot be deactivated in your systems.
Analysis cookies enable us to analyze your activities on our website in order to improve and adapt the functionality of our website.
The marketing cookies can be set through our website by our advertising partners in order to create a profile of your interests and to show you relevant advertisements on other websites.