How to Set up VIGI Wireless Camera in VIGI App
Contents
Introduction
VIGI wireless cameras can be set up through the VIGI App even before they are connected to a network. The VIGI App allows you to set up the camera and connect it to a Wi-Fi network during the initialization process. This article introduces how to set up a VIGI wireless camera using the VIGI App.
Requirements
- VIGI wireless camera
- VIGI App
Configuration
Step 1. Open the VIGI App and log in with your TP-Link ID. If you do not have an account, sign up first.
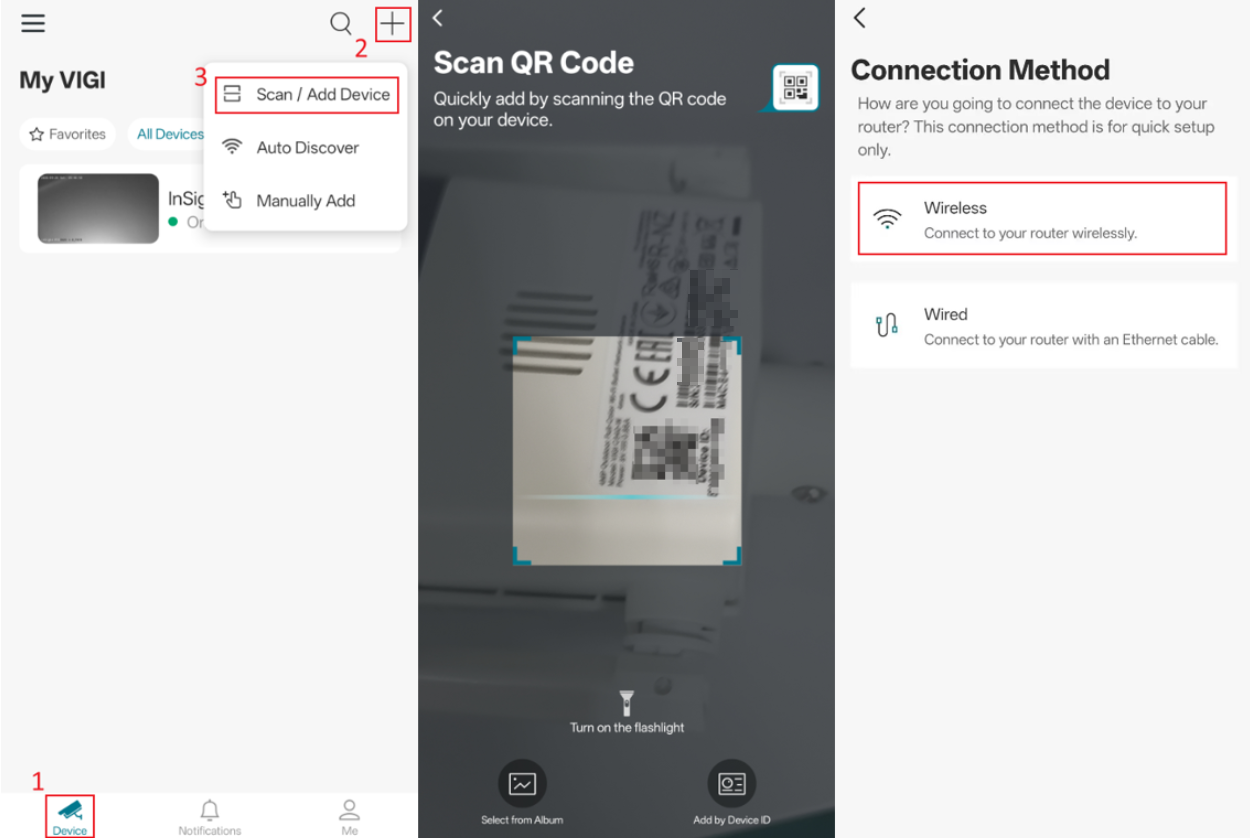
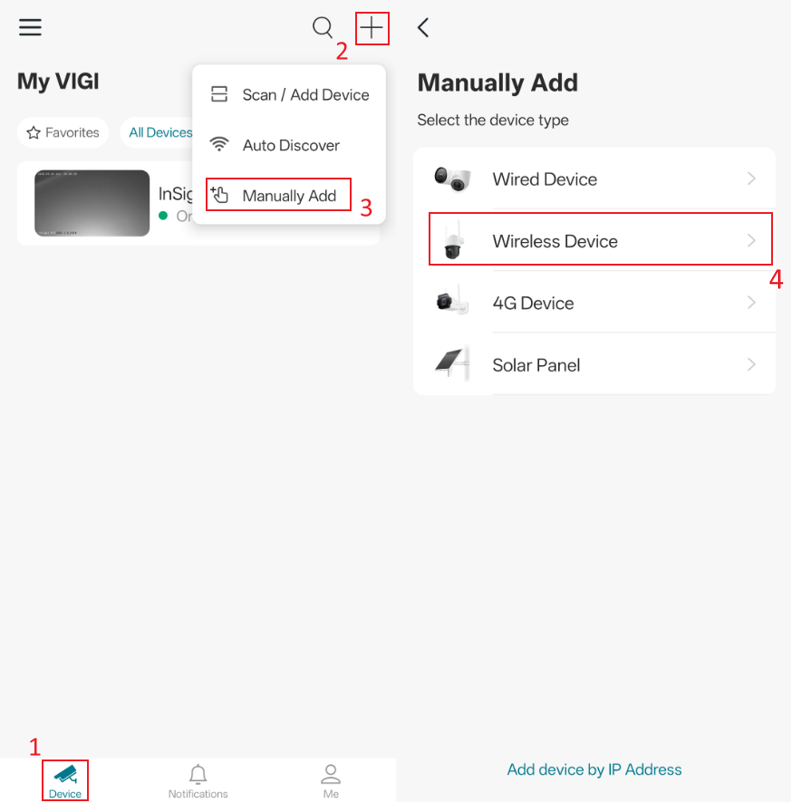
Step 2. Power up your camera. Tap the "+" button in the top-right corner of the Device page. You can select to scan the QR code or manually add the wireless camera.
Scan / Add Device:
Manually Add:
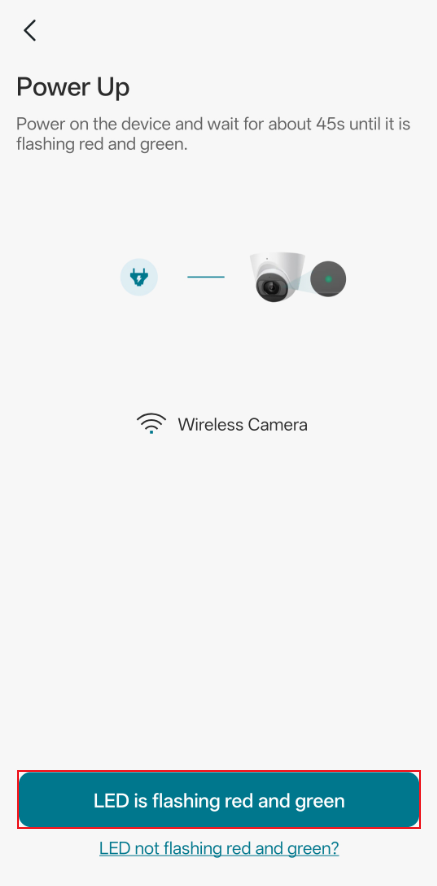
Step 3. Ensure that the camera's LED light is flashing red and green, then tap the "LED is flashing red and green" button to proceed.
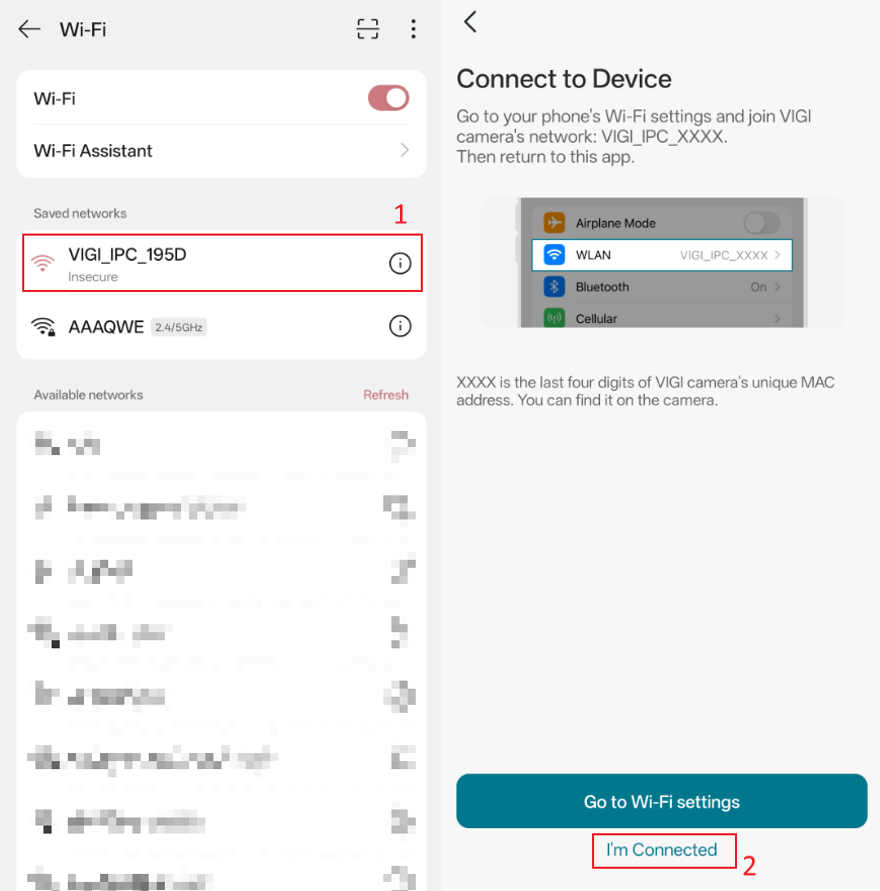
Step 4. Follow the instructions to enable location access. If Wi-Fi is turned off, you will be prompted to enable it. Go to your phone's Wi-Fi settings, turn on Wi-Fi, and connect to the camera's default SSID. The default SSID of a VIGI wireless camera is usually VIGI_IPC_XXXX, where XXXX represents the last four digits of the camera's MAC address.
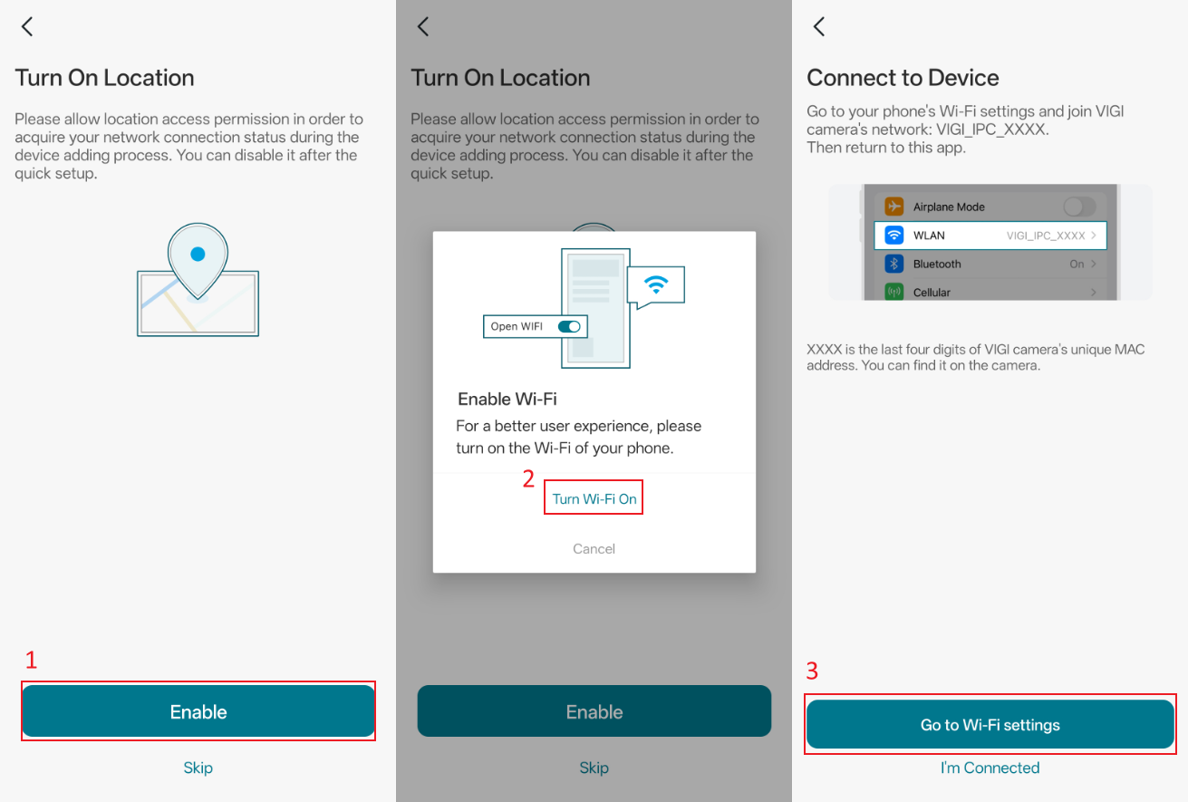 After connecting to the default Wi‑Fi network, return to the VIGI App and tap "I'm Connected".
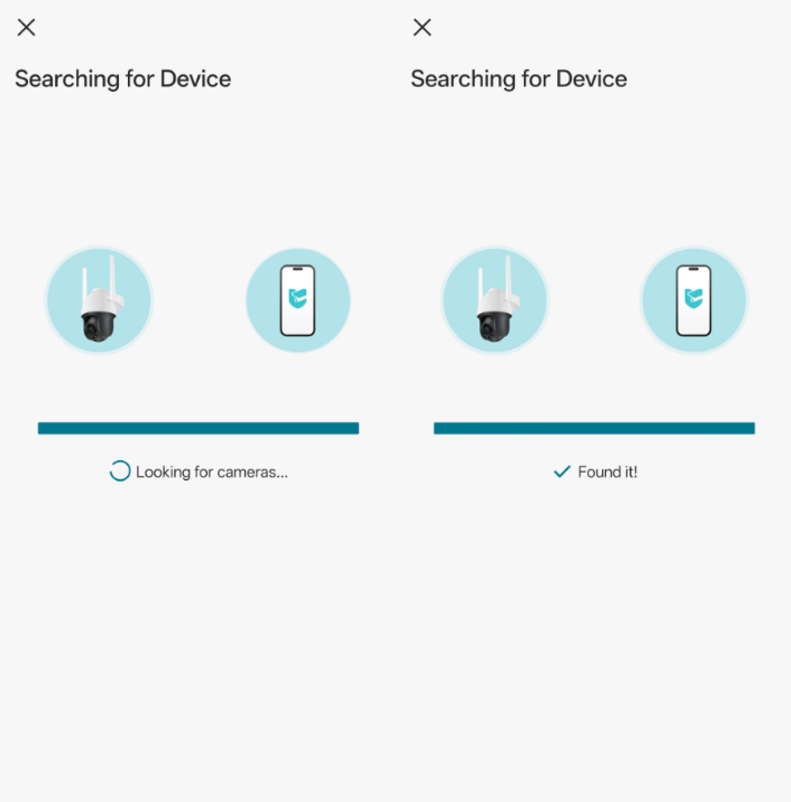
Step 5. Wait for the App to search for the camera.
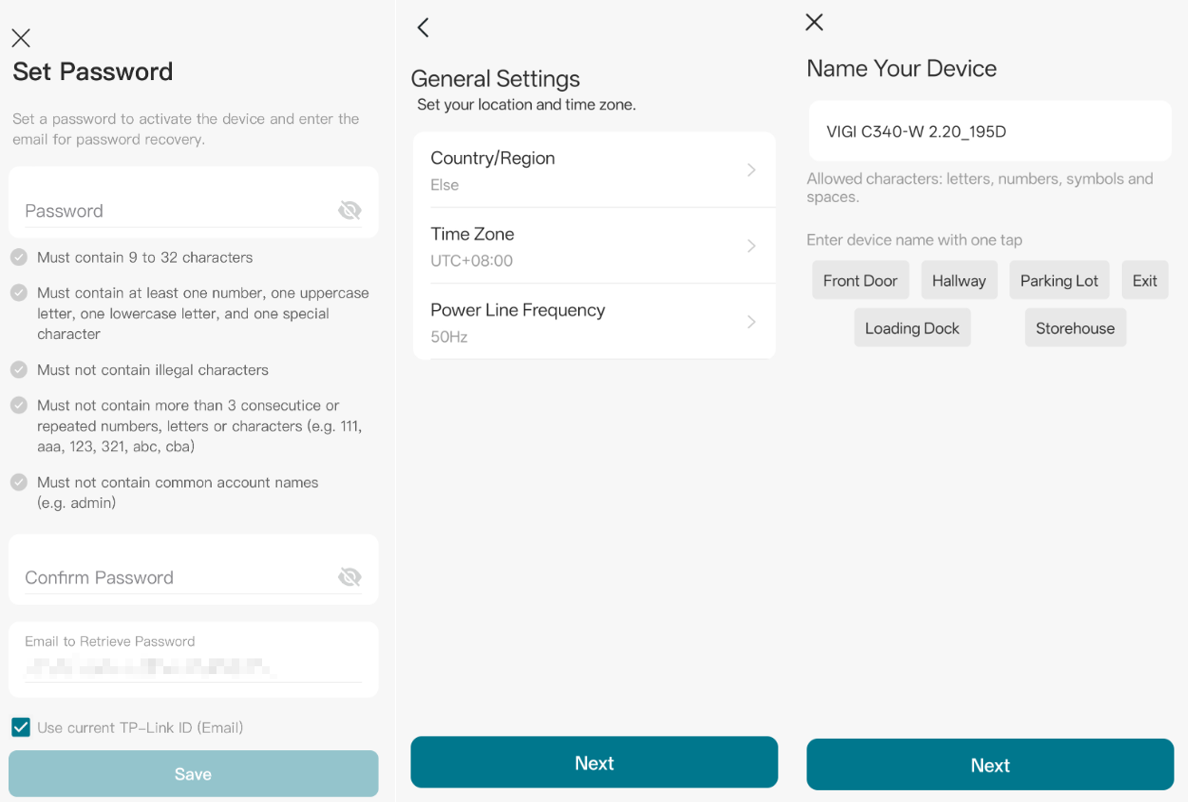
Step 6. Set a password for the camera following the password requirements in the VIGI App. Configure the General Settings and name the camera, then tap Next to continue.
Step 7. Wait for the camera to scan for nearby Wi-Fi networks and select your Wi-Fi network from the Wi-Fi list.
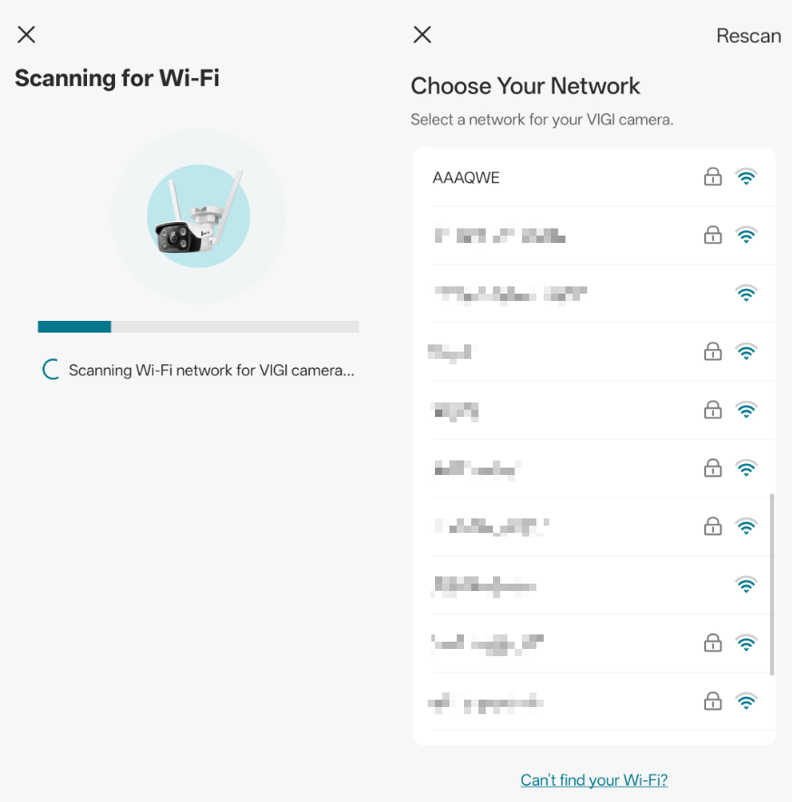
Note: Currently, VIGI wireless cameras only support 2.4 GHz Wi-Fi connections. Please ensure your network supports 2.4 GHz Wi-Fi. We recommend connecting the camera to a 2.4 GHz-only Wi-Fi network to minimize wireless interference.
Enter your Wi‑Fi password and verify that it is entered correctly. An incorrect password will prevent the VIGI camera from connecting to the network.
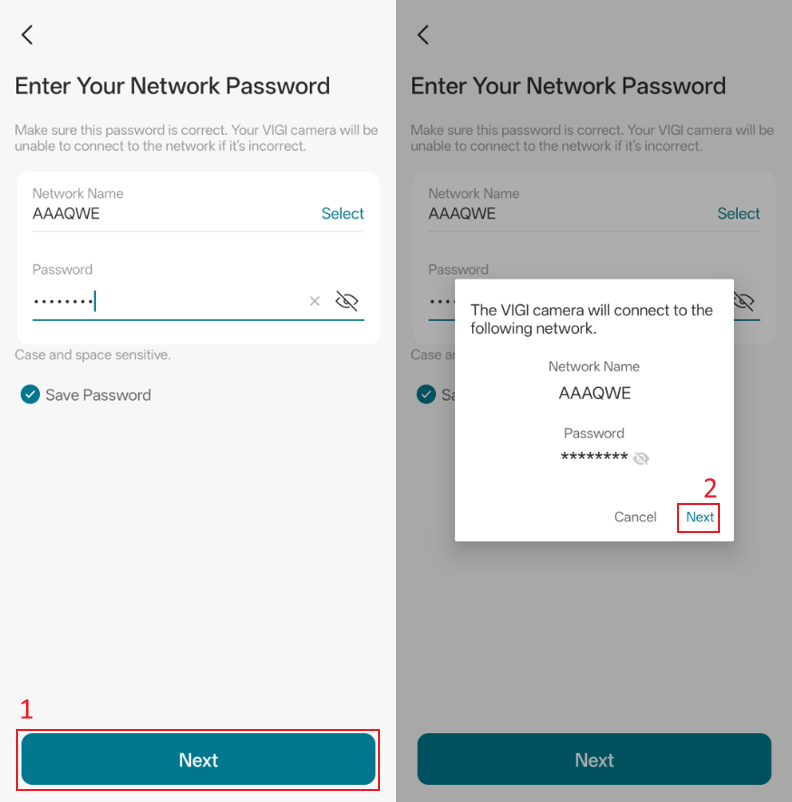
Note: If you select Save Password, the VIGI App will save the password and automatically fill it in when you next configure another wireless camera on the same network.
Step 8. After clicking Next, the camera will report "Connecting to Wi-Fi", and the LED light will blink green slowly. Wait until the camera reports "Wi-Fi connected" and the LED light turns solid green.
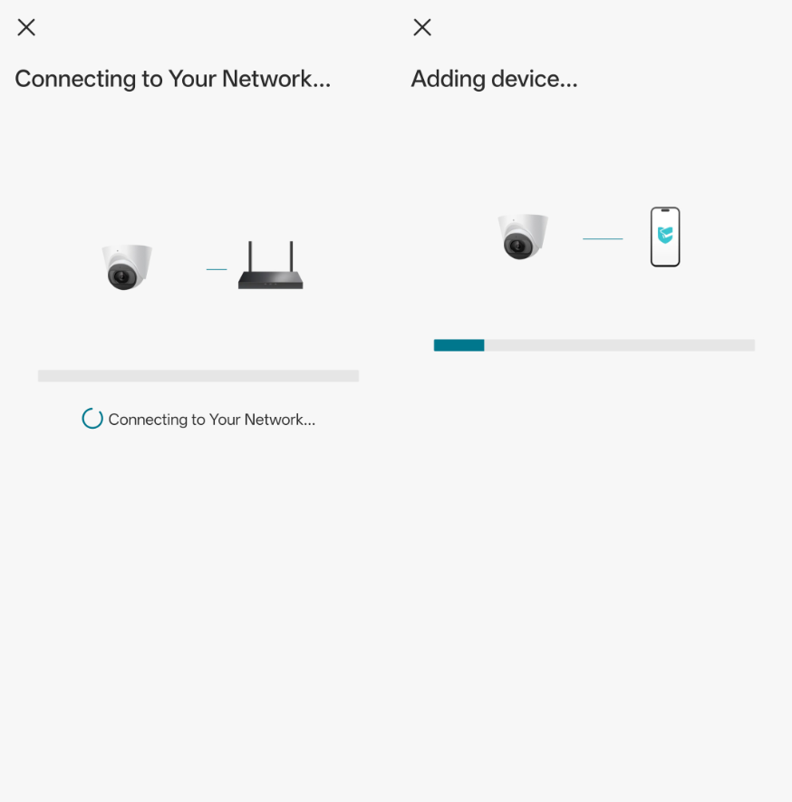
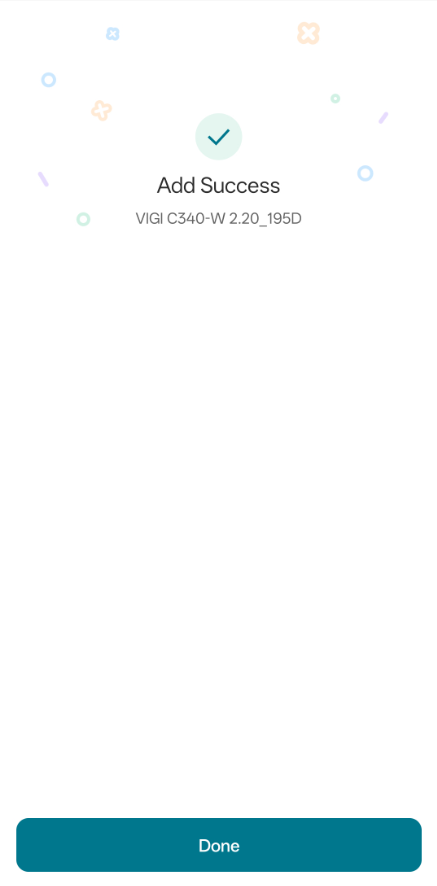
Step 9. You will hear a confirmation sound from the camera when the setup is complete.
Verification
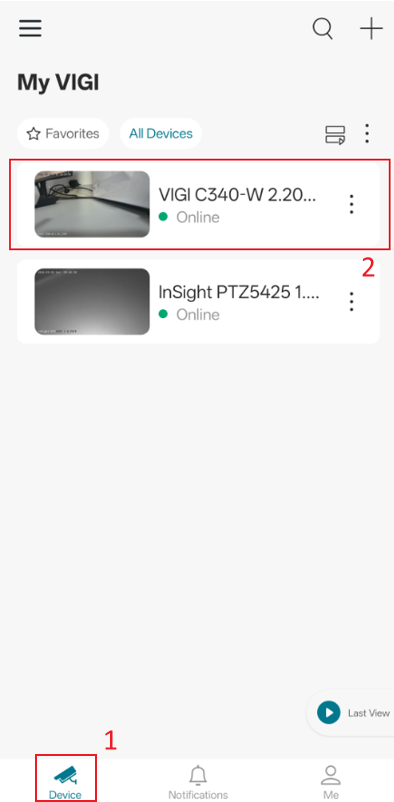
Return to the device list in the VIGI App. If the camera appears in the list, the setup is complete.
Conclusion
You have successfully set up your VIGI wireless camera using the VIGI App.
To learn more about each function and configuration, please visit Support Home to download or check the manual for your product.
Looking For More
Is this faq useful?
Your feedback helps improve this site.



TP-Link Community
Still need help? Search for answers, ask questions, and get help from TP-Link experts and other users around the world.