How to Configure the AP Mode on the TL-WR802N/TL-WR810N
The configuration guide of TL-WR802N and TL-WR810N are similar, here takes TL-WR802N as demonstration.
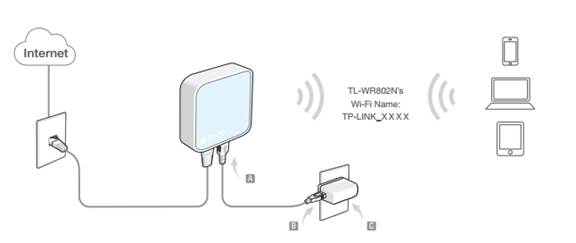
Definition: To set up a Wi-Fi network from an existing wired (Ethernet) network so that multiple devices can share the Internet.
Please reset the router first by pressing the reset button/hole on the router.
Step 1
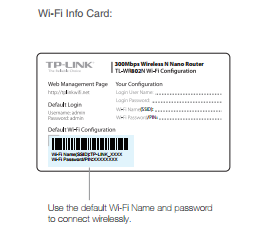
Connect your computer to the TPLINK wireless network. The default Wi-Fi Name and Password are printed on the Wi-Fi Info Card to connect to the router.
Step 2
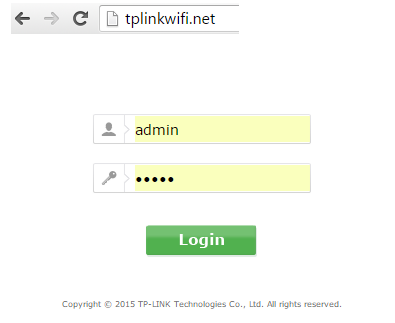
Launch a web browser and type http://tplinkwifi.net into the address bar. Enter admin (in lowercase) for both user name and password.
Step 3
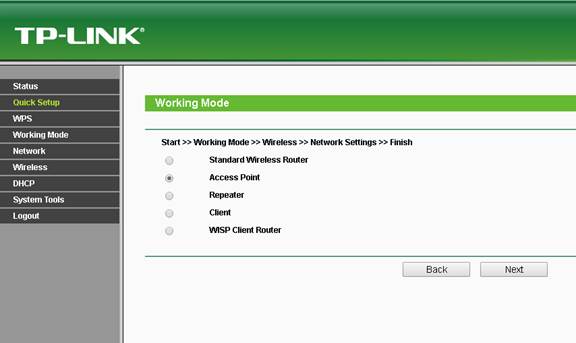
Click Quick Setup on the left panel, and click Next to start configuring the router. Select Access Point mode and click Next.
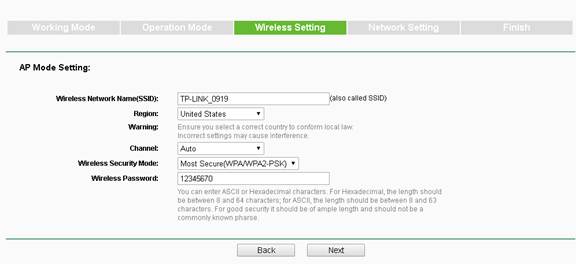
Step 4
On the Wireless Setting screen, either keep the default Wireless Network Name and AP Wireless Password or customize them, then click Next.
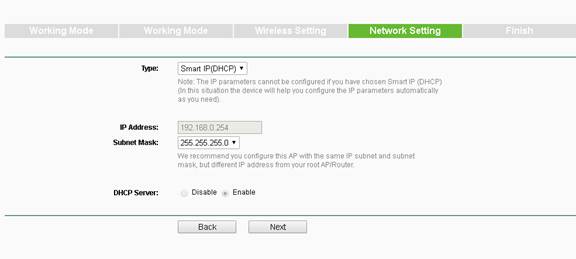
Step 5
Select the LAN IP type of the router or you can leave Smart IP as the default setting for most cases, and click Next.
Step 6
Click Finish to complete the configuration.
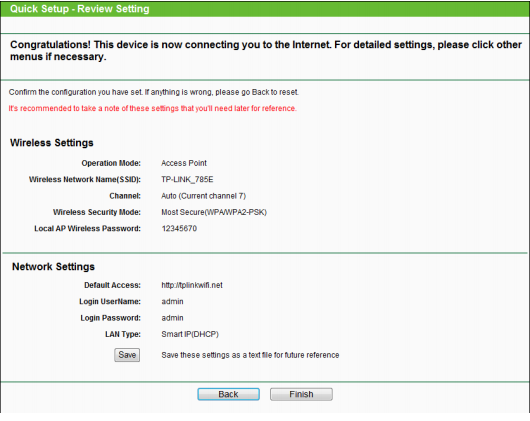
Congratulations! Now all your Wi-Fi enabled devices can connect to the customized wireless network.
Get to know more details of each function and configuration please go to Download Center to download the manual of your product.
Был ли этот FAQ полезен?
Ваш отзыв поможет нам улучшить работу сайта.
Сообщество TP-Link
Нужна помощь? Задавайте вопросы, находите ответы и обращайтесь за помощью к специалистам TP-Link и другим пользователям со всего мира.