


How to Migrate Devices Managed by VIGI Security Manager to VIGI PC Client
Contents
Synchronizing devices bound to TP-Link ID
Migrating VIGI Security Manager's local devices
Introduction
To deliver a better surveillance experience, we have launched the VIGI PC Client to replace the VIGI Security Manager. This application lets you conveniently manage your devices, view live feeds, and access advanced features directly from your PC. This article describes step-by-step how to migrate devices managed by VIGI Security Manager to VIGI PC Client.
Requirements
- VIGI Security Manager
- VIGI PC Client
- VIGI Devices
Configuration
VIGI Security Manager can manage VIGI devices locally and in the cloud. The operation steps are as follows.
Synchronizing devices bound to TP-Link ID.
If you log in to VIGI Security Manager via TP-Link ID, you can synchronize devices to VIGI PC Client. Please refer to the following steps:
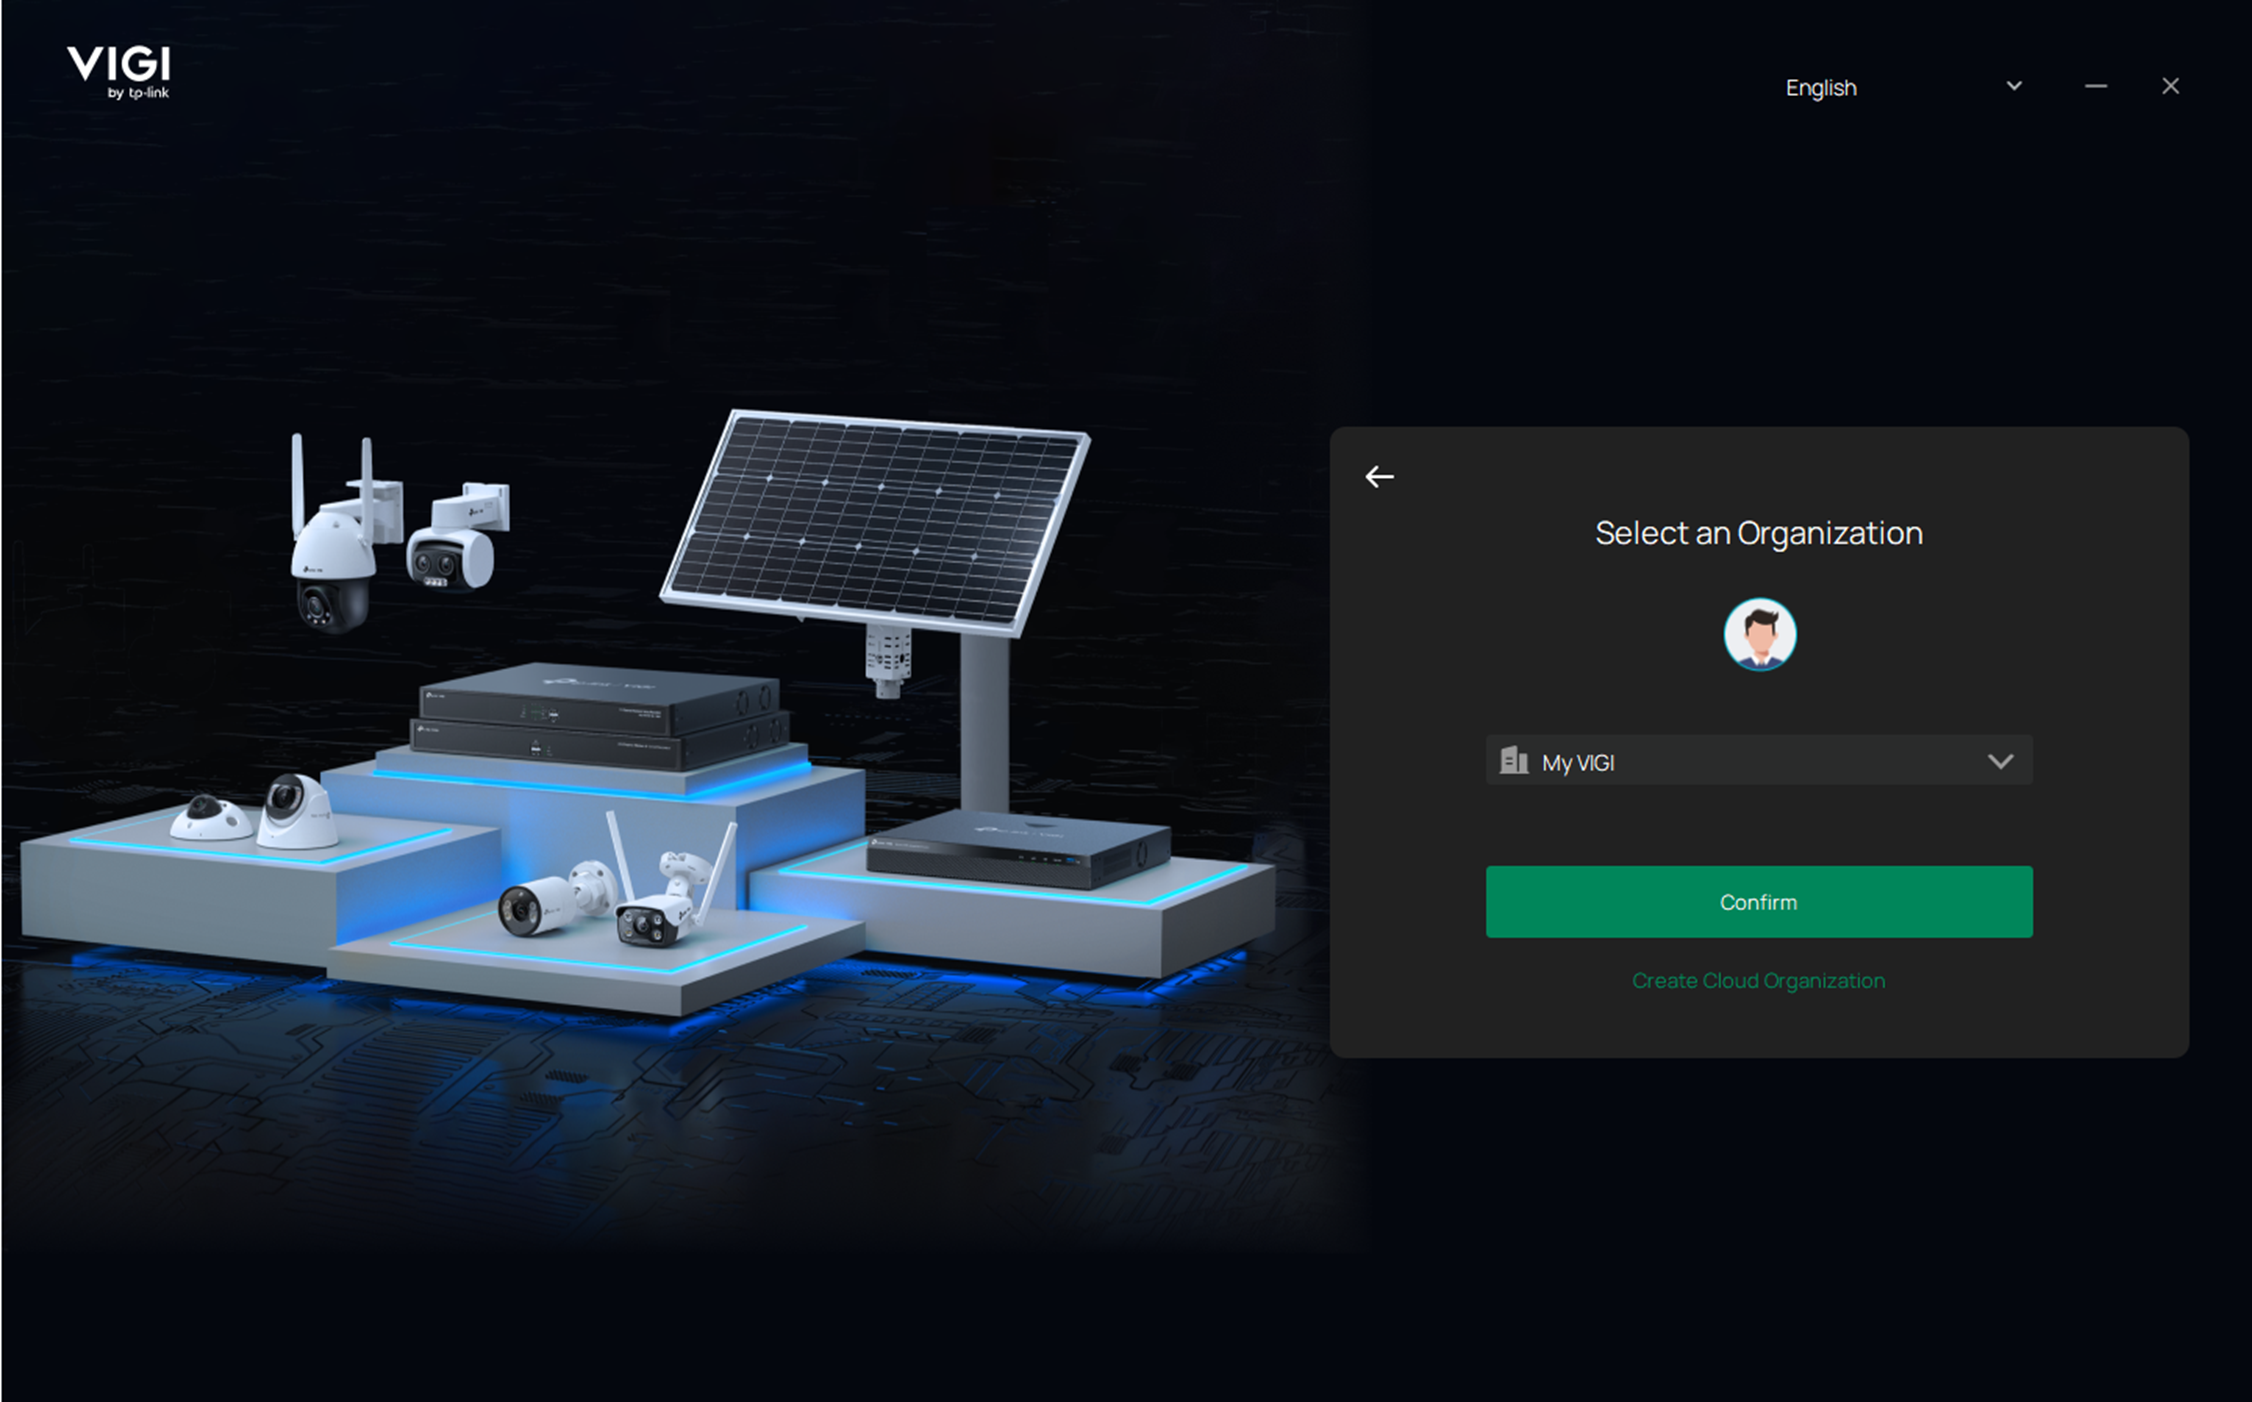
Step 1. Log in to the VIGI PC Client with your TP-Link ID.

Step 2. Select 'My VIGI’ Organization and click the Confirm button.
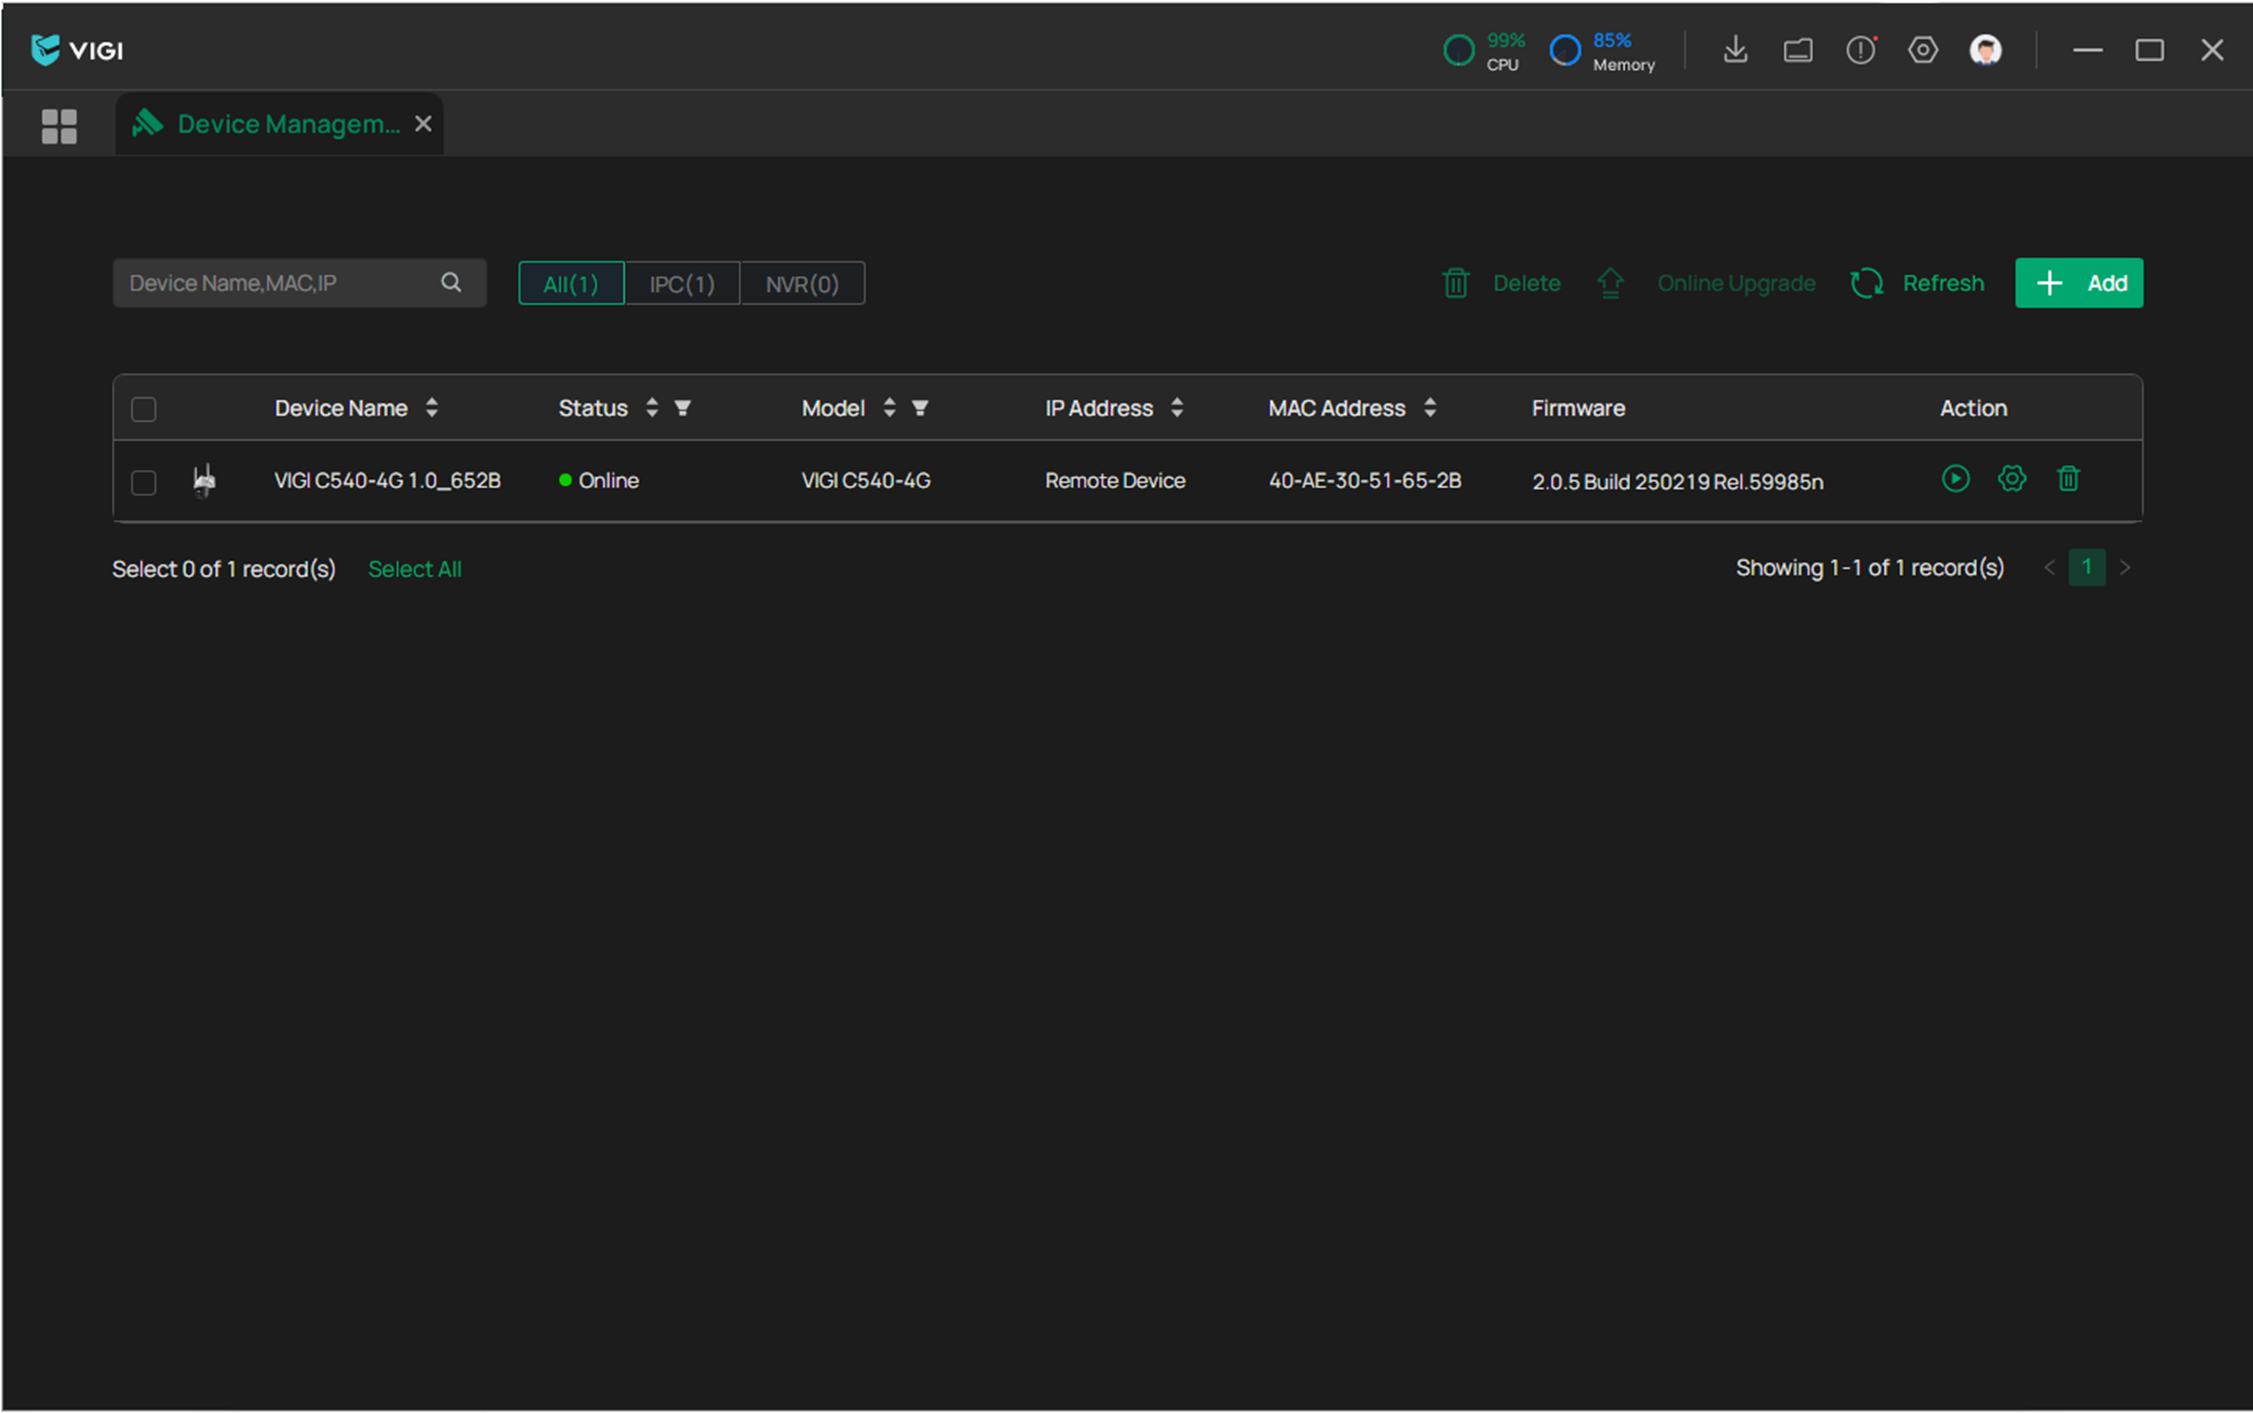
Step 3. Go to the Device Management page, and it will automatically synchronize the devices from VSM to VPC. Please make sure the devices are consistent. After that, you can manage the device via VIGI PC Client.
Migrating VIGI Security Manager's local devices
Suppose you log in to VIGI Security Manager via the Local account and want to migrate devices to VIGI PC Client. Please refer to the following steps:
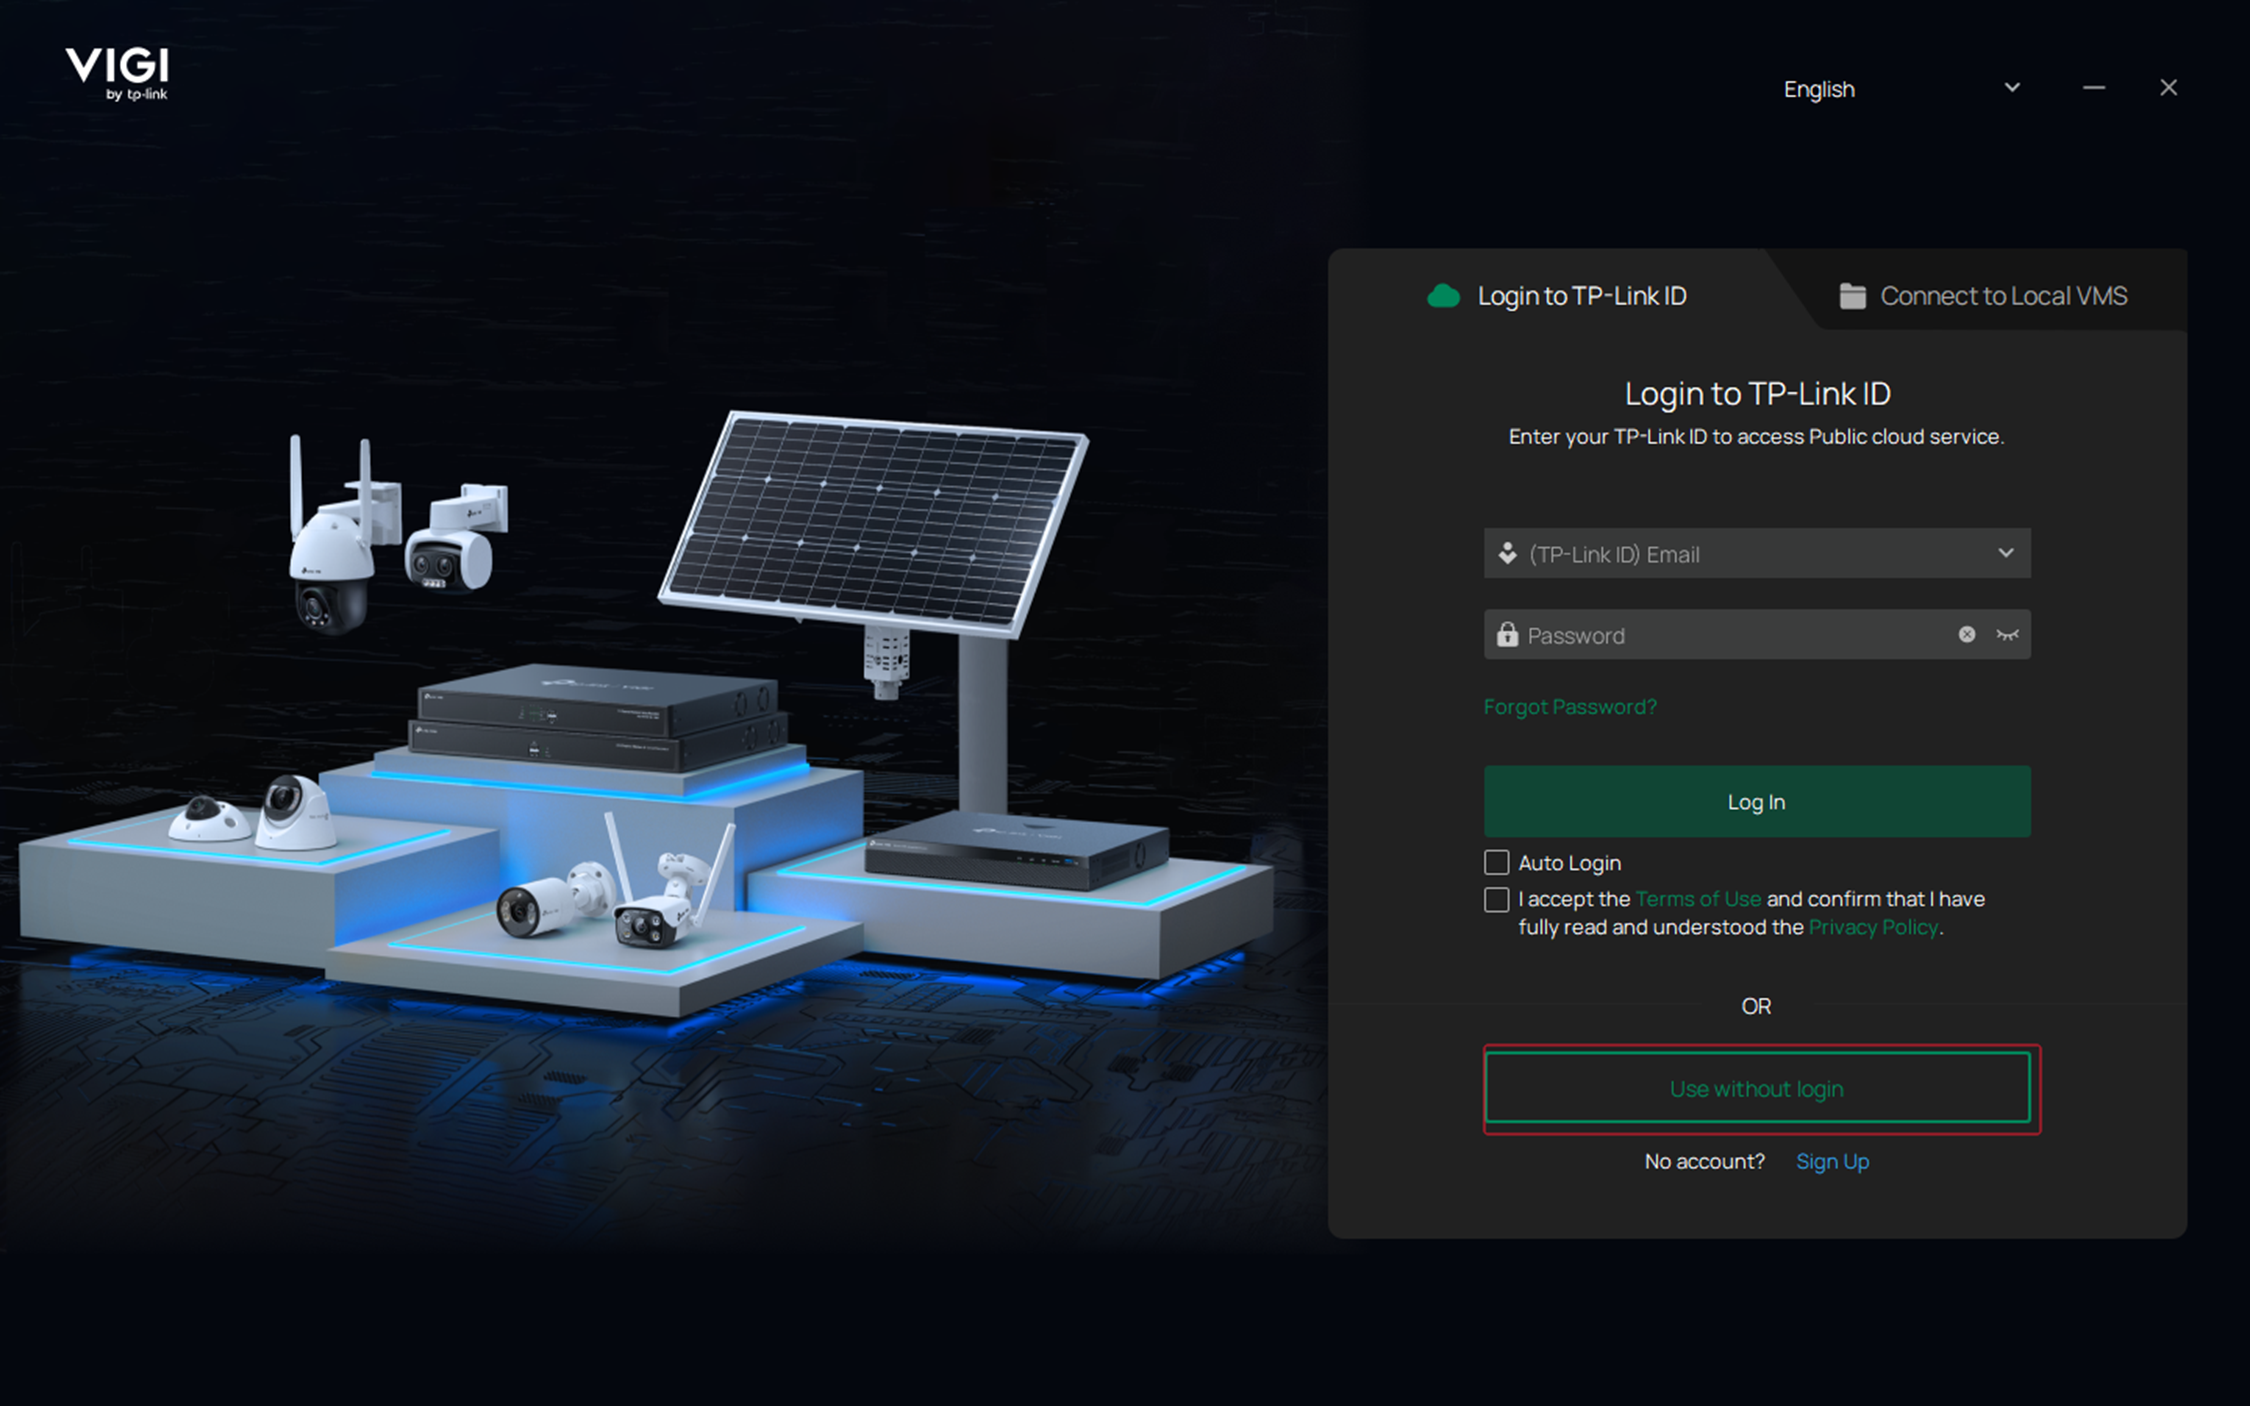
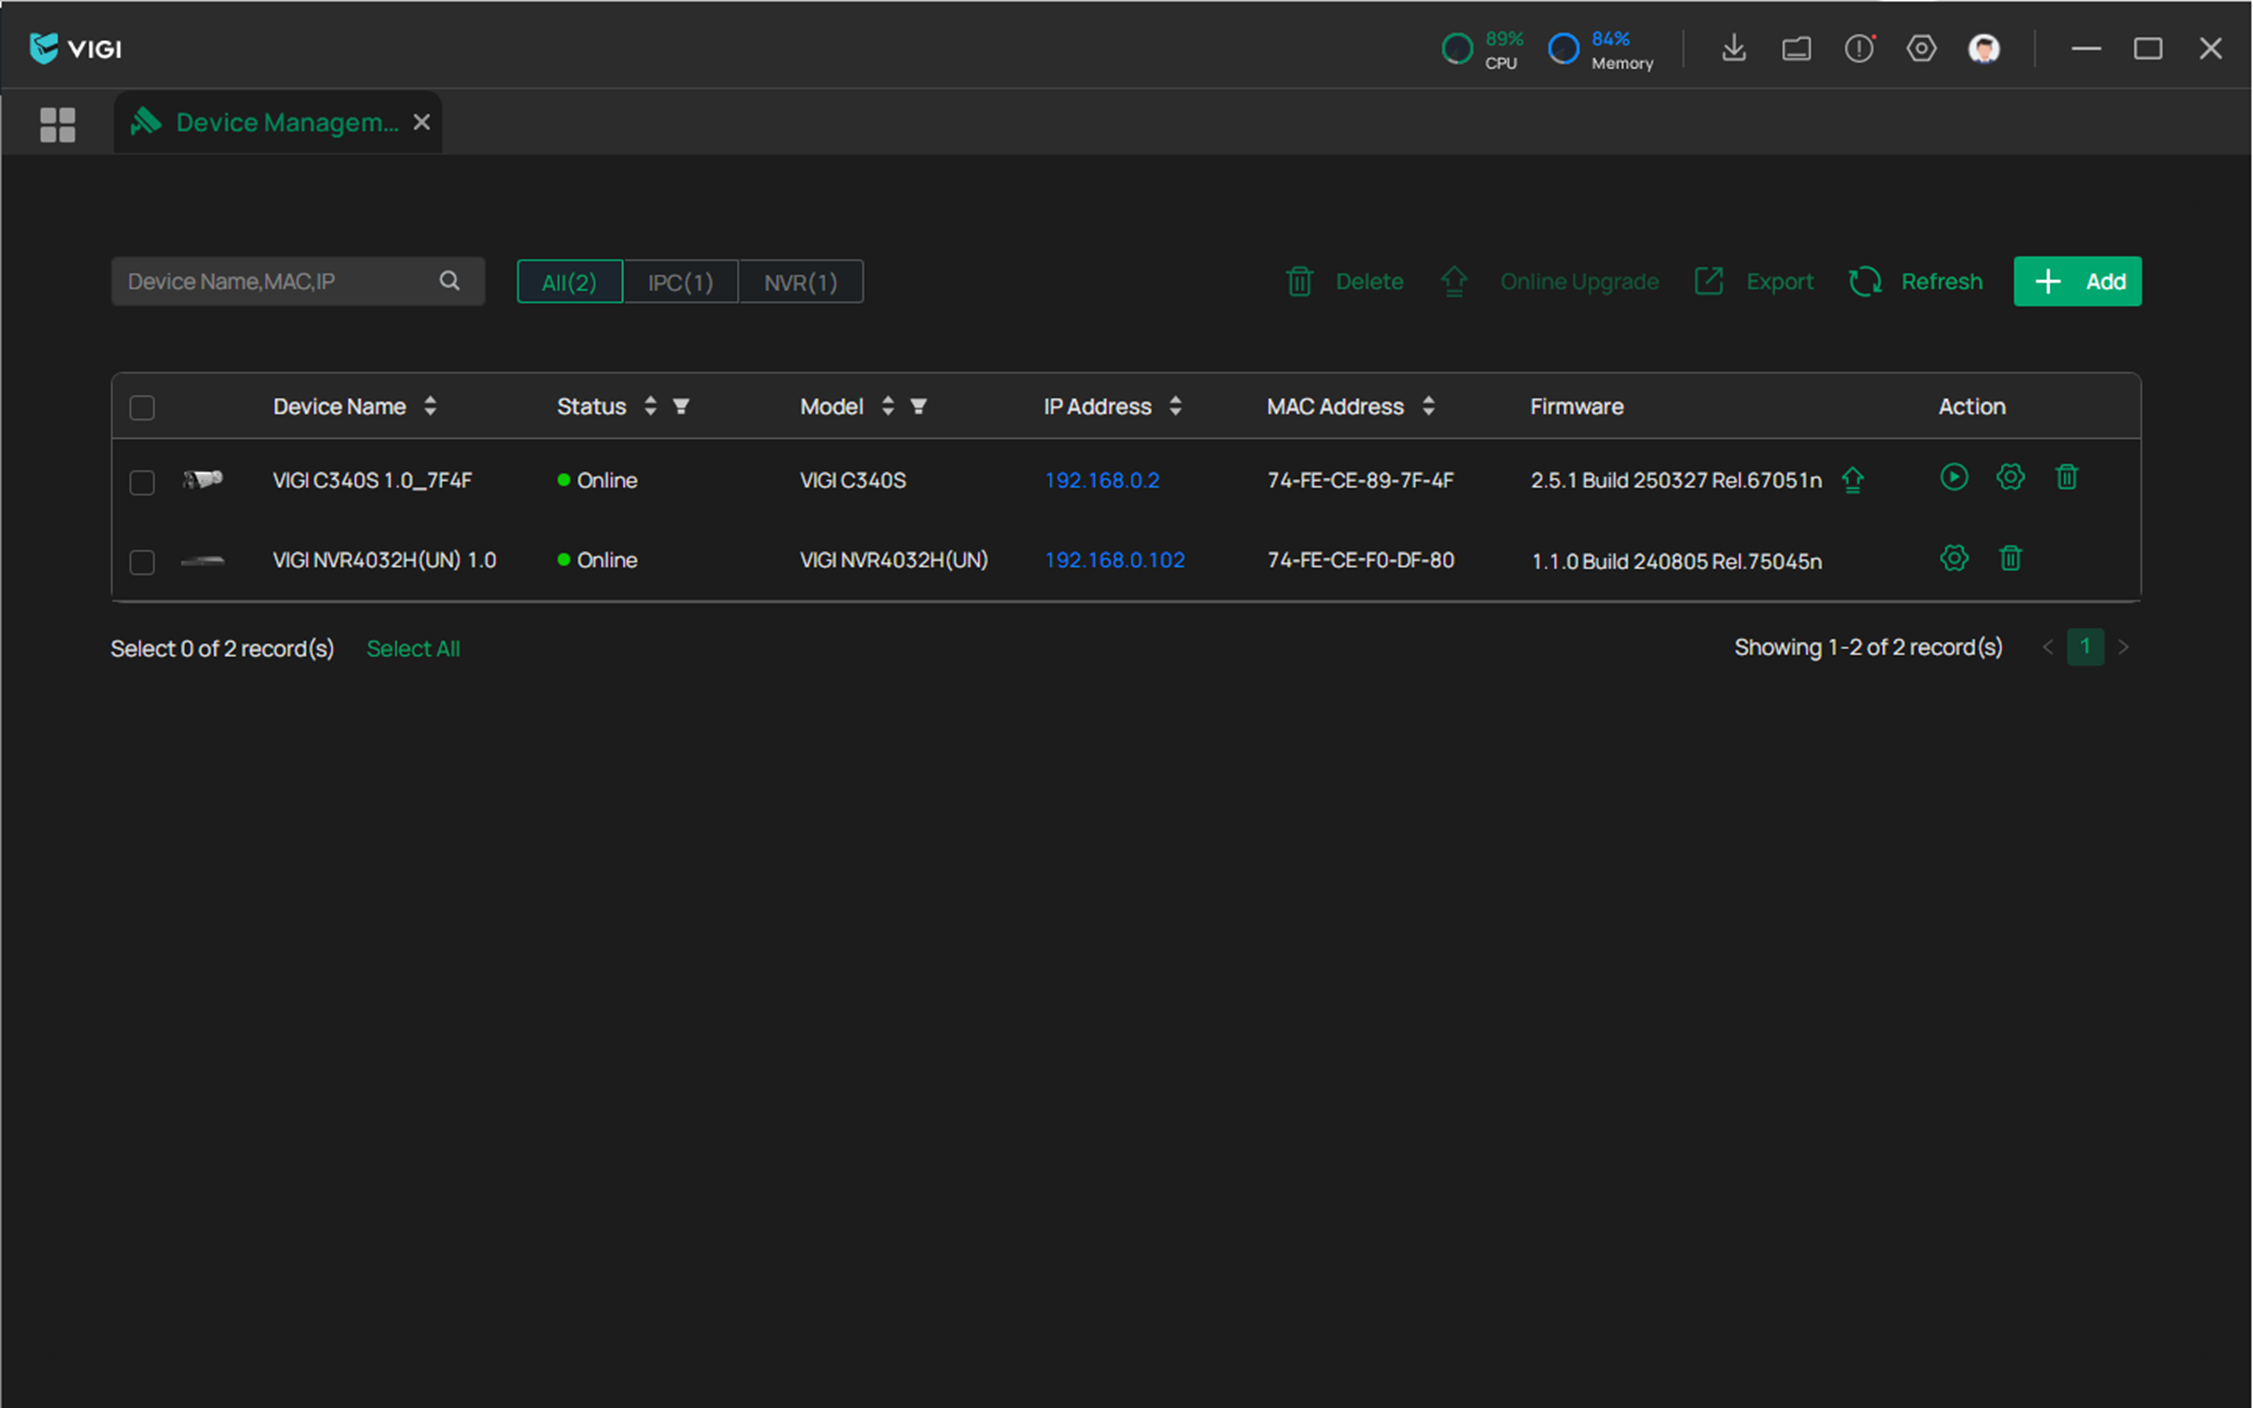
Step 1. Click the Use without login button. Then go to the Device Management page.
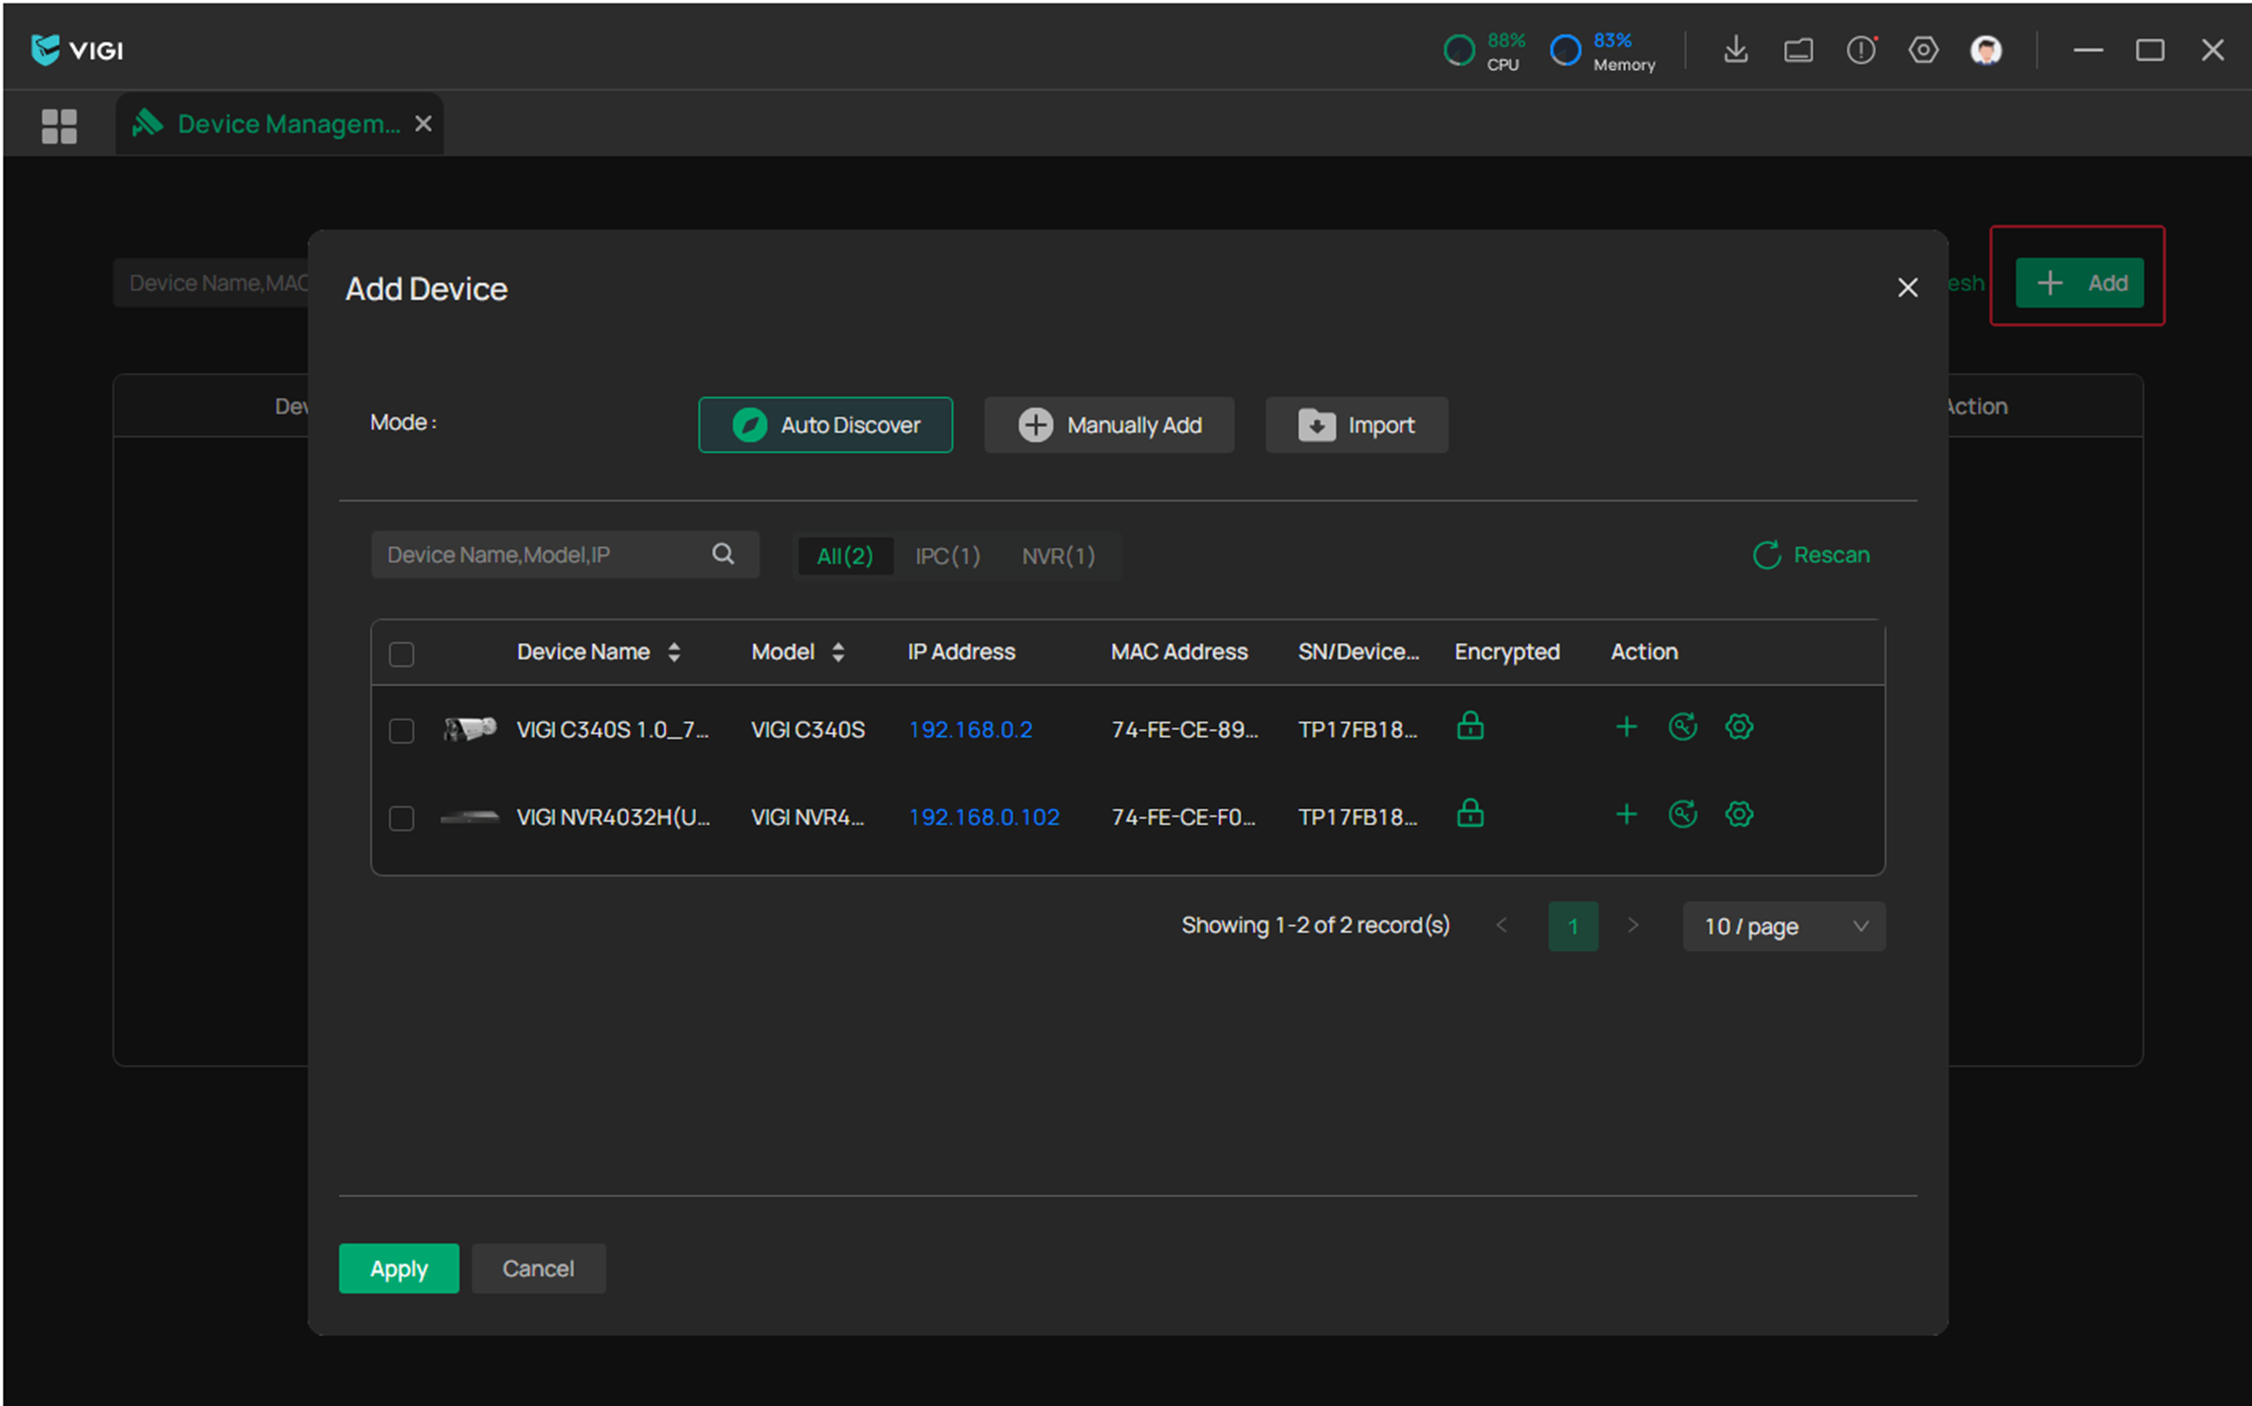
Step 2. If your devices are on the same network, click +Add, and the VIGI PC client will automatically scan the VIGI device. Next, click the + button in the Action column and enter the VIGI device password to add it successfully. Even if the device has been added locally at the VIGI Security Manager, it still needs to be re-added at the VIGI PC Client before it can be managed.
Additionally, you can manually add devices, which requires specifying them by IP and Port Number.
Step 3. Now you can manage the VIGI device on the VIGI PC Client.
Conclusion
Now that the devices have been migrated to the VIGI PC Client, you can manage the VIGI device via the VIGI PC Client.
Get to know more details of each function and configuration please go to Download Center to download the manual of your product.
A fost util acest FAQ?
Părerea ta ne ajută să îmbunătățim acest site.


