How to set up and modify Wi-Fi settings on a VIGI NVR
Contents
Introduction
The wireless VIGI NVR supports direct Wi-Fi connections for wireless cameras and client devices, addressing the challenge of inconvenient network cabling. By configuring the Wi-Fi settings—such as network name, password, wireless channel, mode, and bandwidth—you can set up or modify the NVR’s Wi-Fi configuration as needed. This article introduces these Wi-Fi parameters and provides step-by-step guidance on how to configure them.
Requirements
- Wireless VIGI NVR
- PC
Configuration
You can configure the VIGI NVR’s Wi-Fi settings through its web management interface. The steps below describe the configuration process using the web interface.
Step 1. Power on the NVR and connect a PC to one of its LAN ports. Log in to the NVR’s web interface via its IP address. If no DHCP server is available, the fallback IP is 192.168.253.240..
Step 2. Go to Settings > Network > Wireless settings. If Wireless Network is off, switch it on.
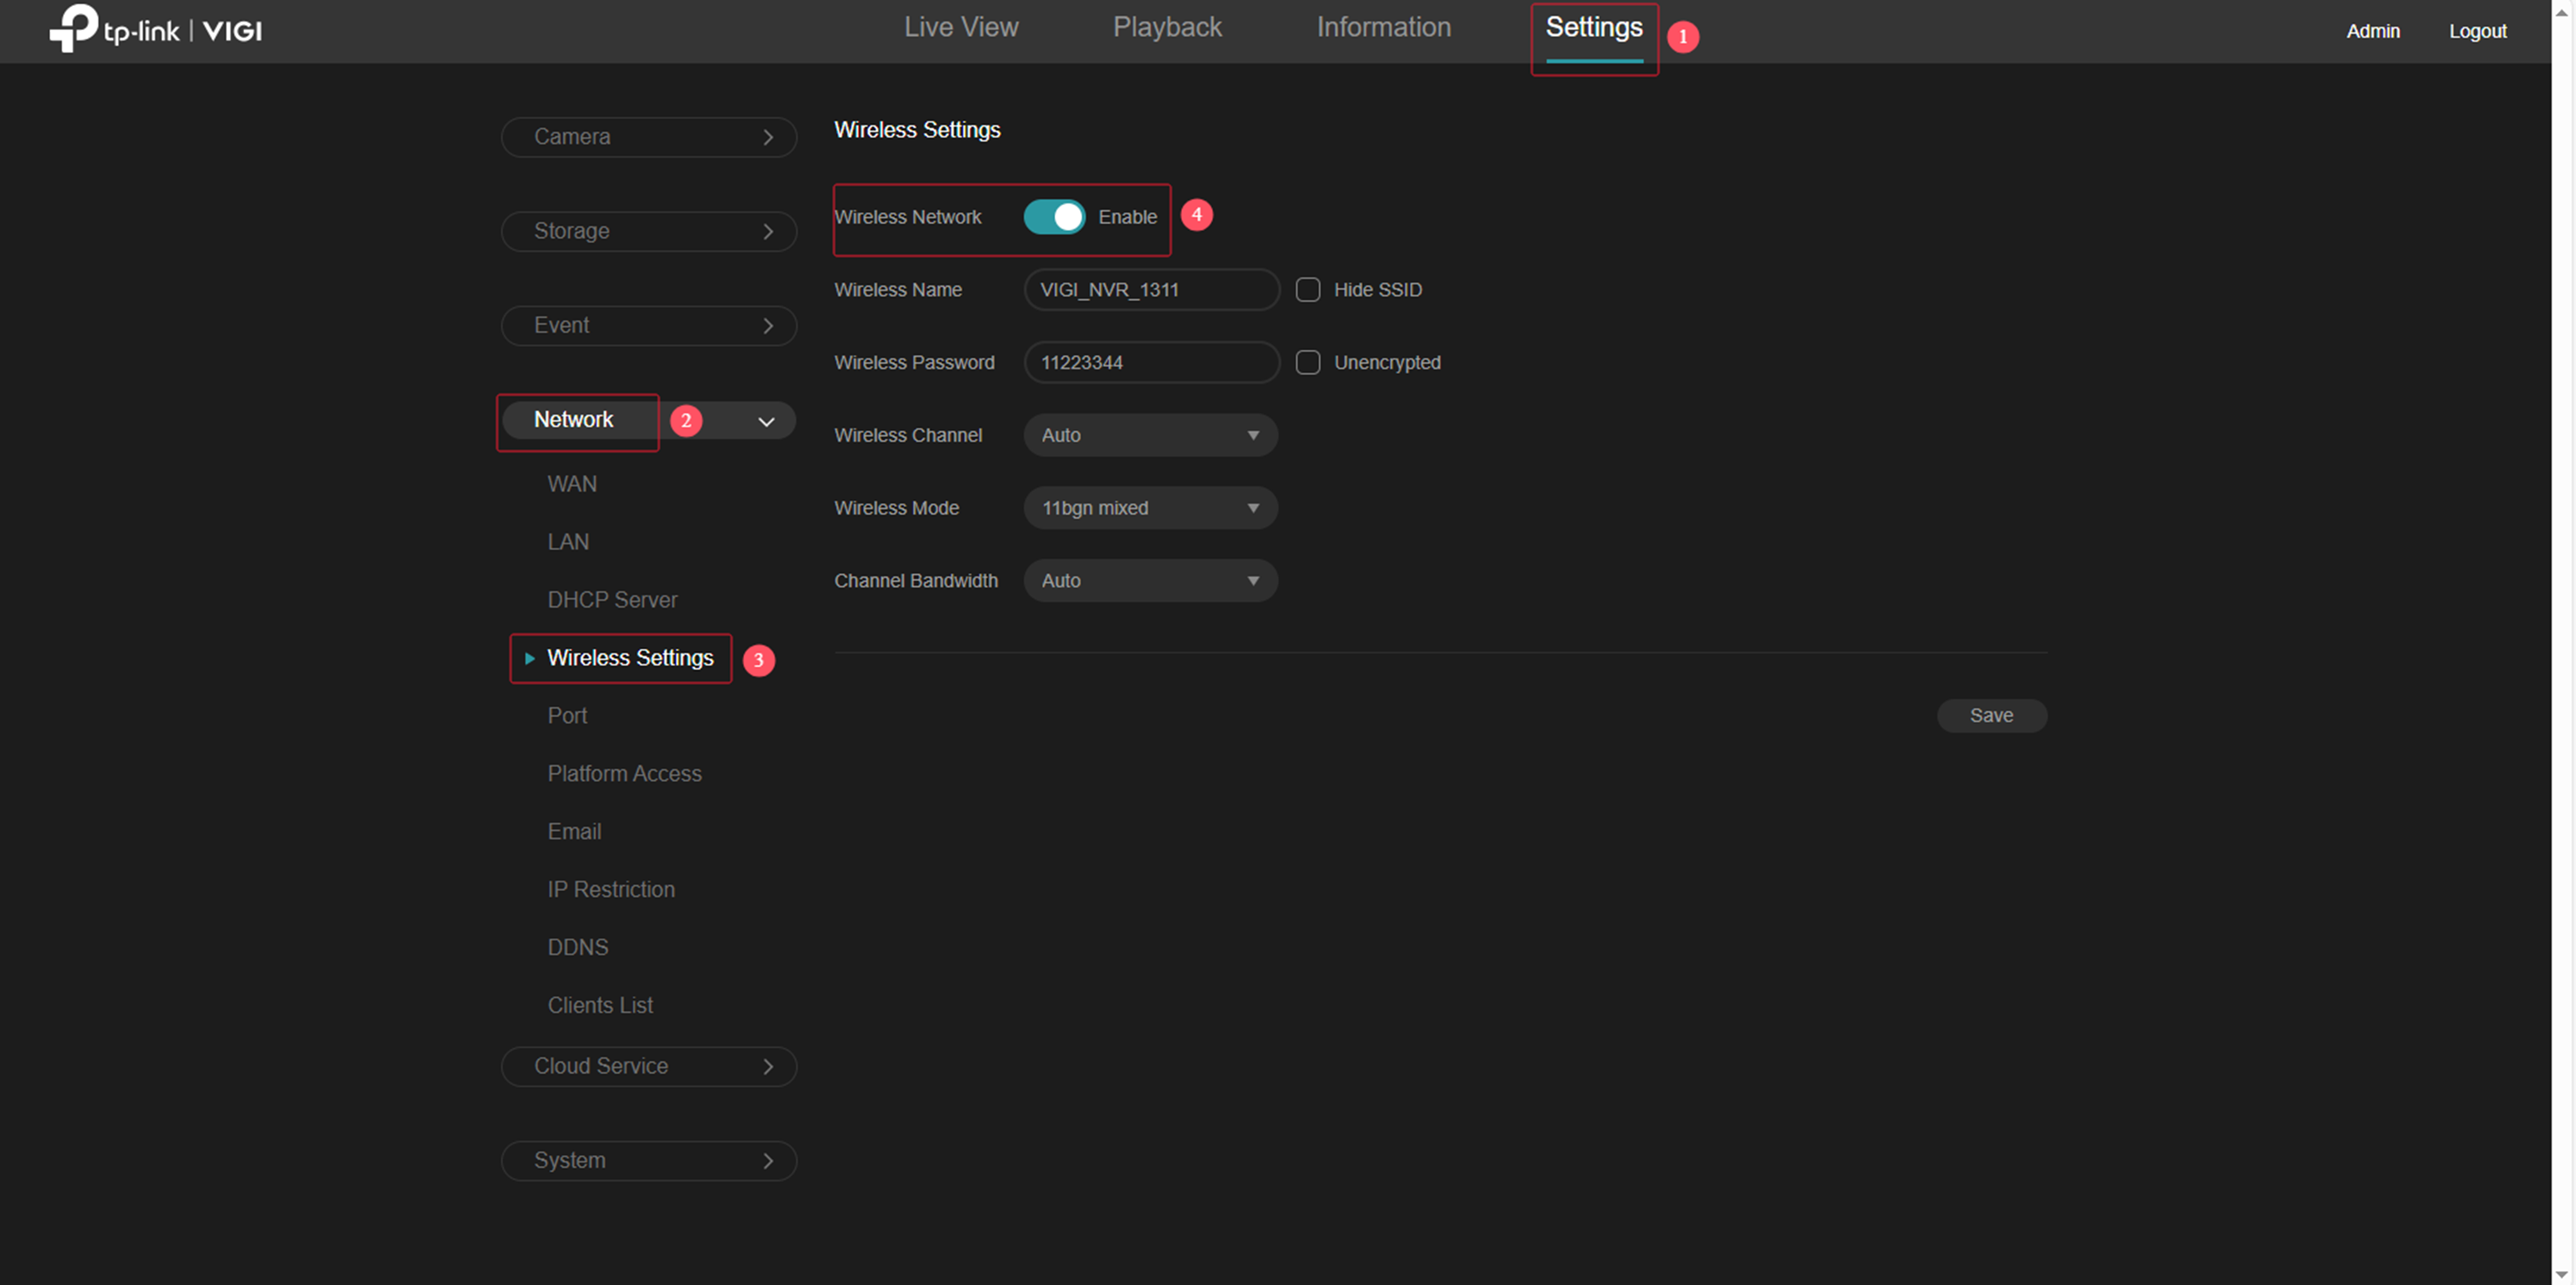
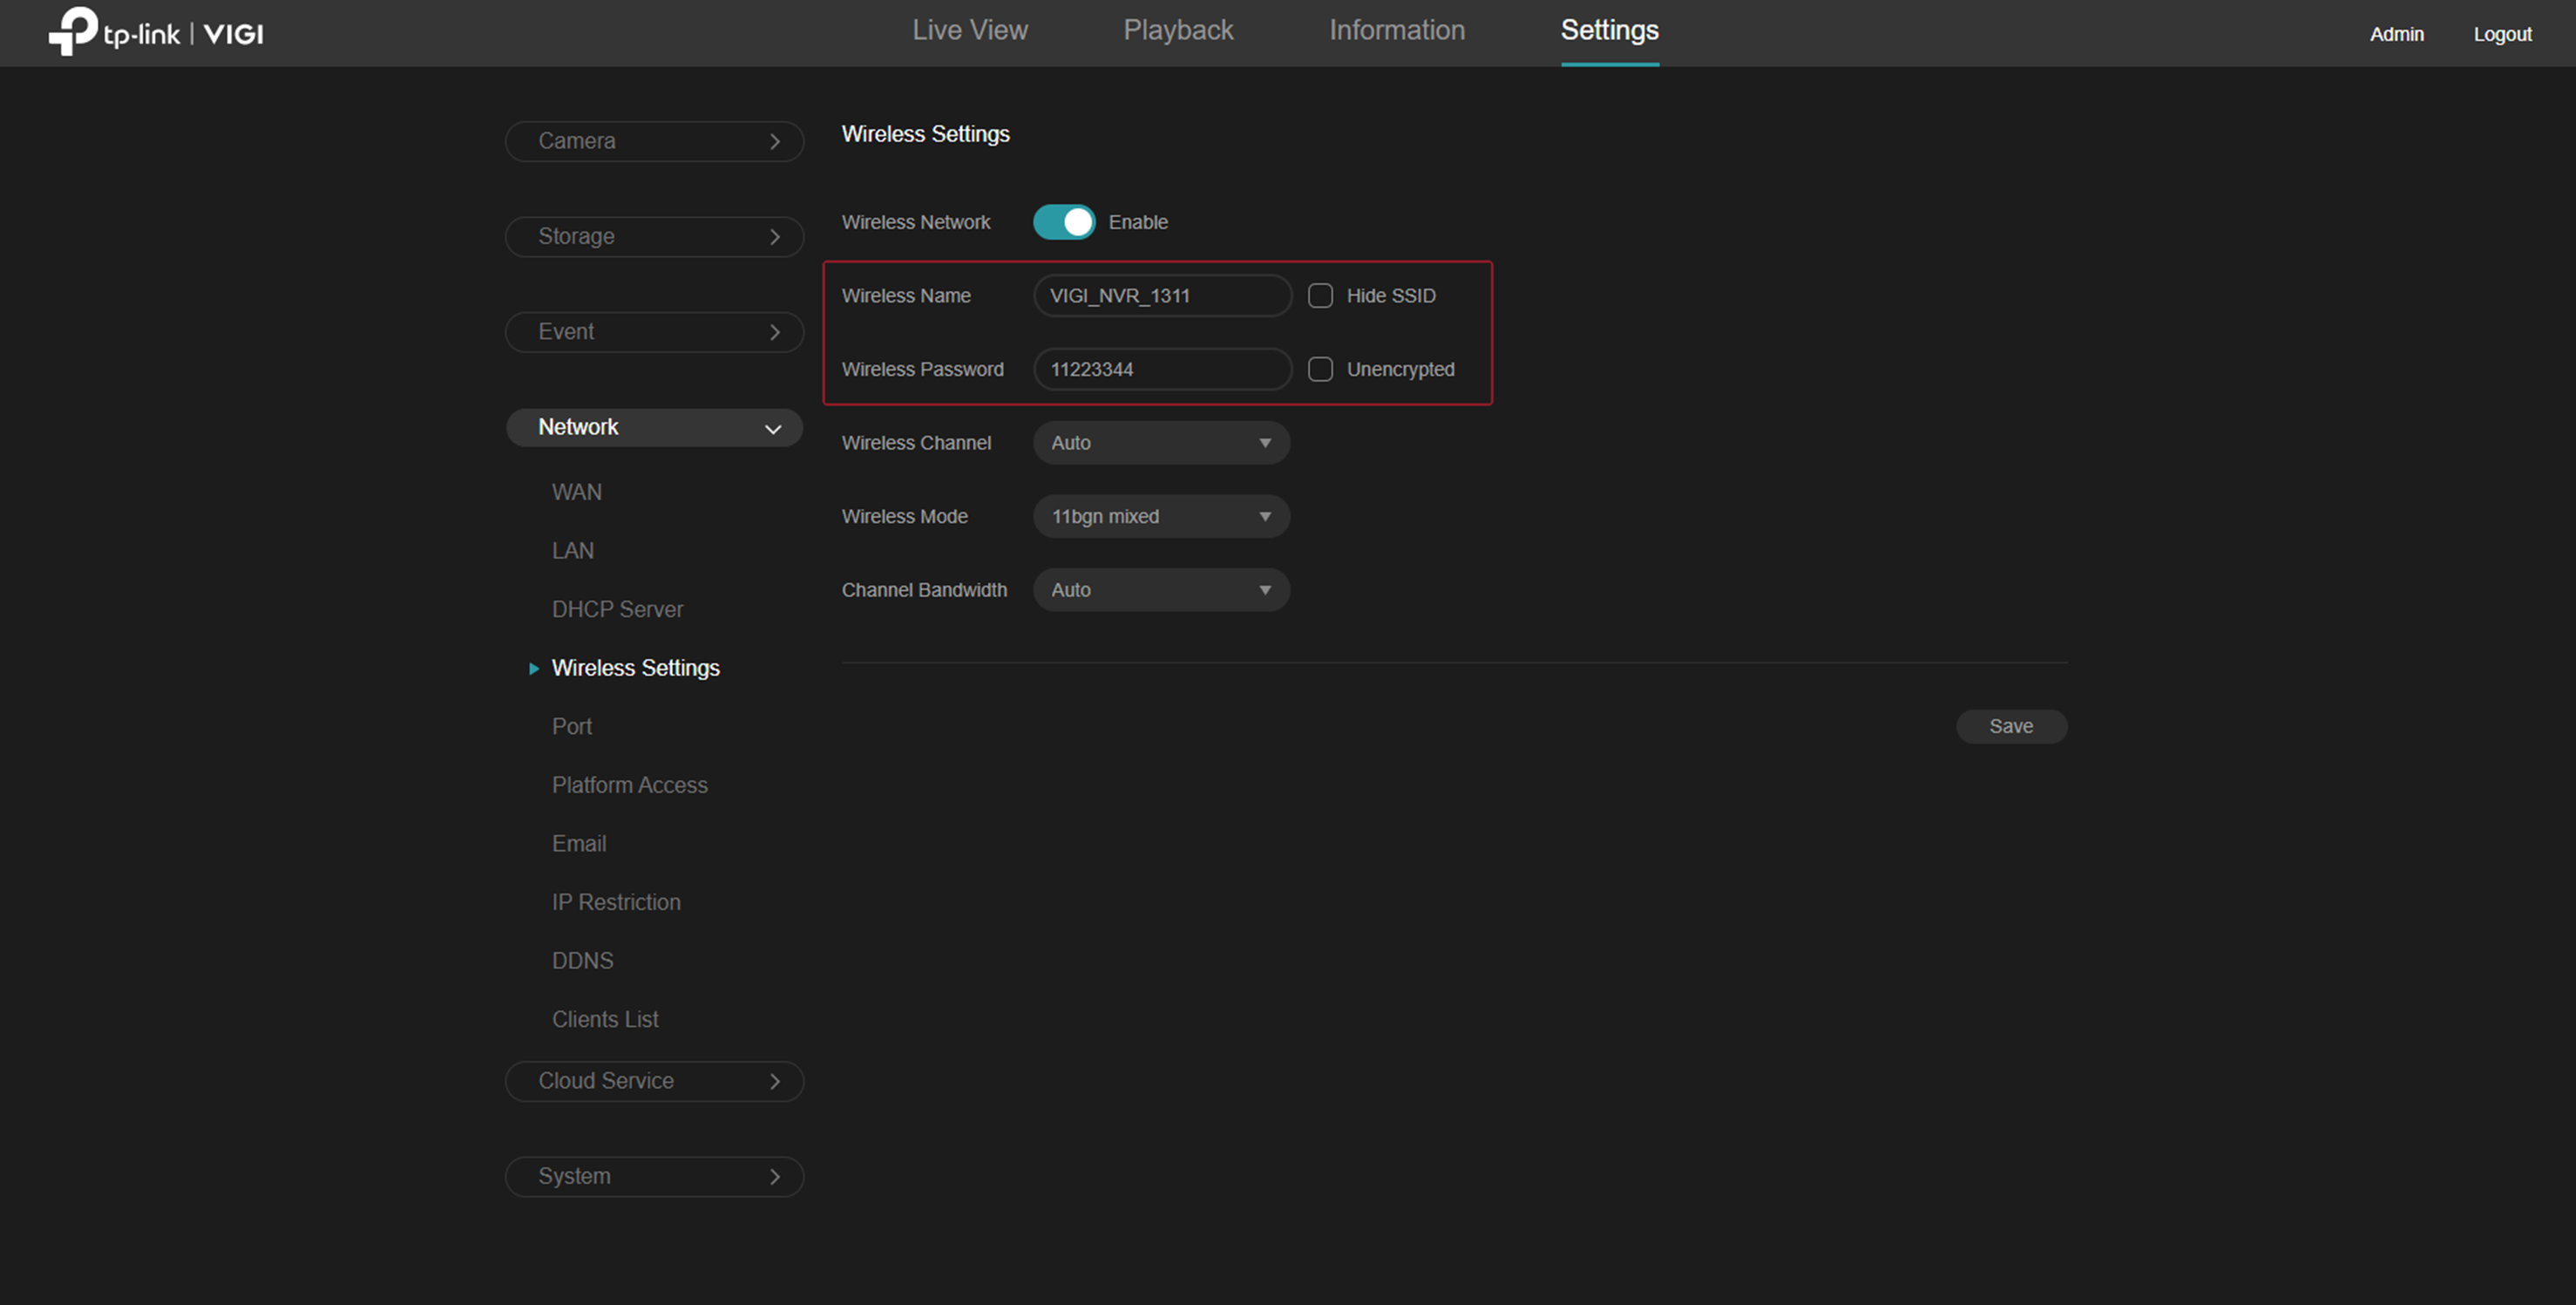
Step 3. In the Wireless Name and Wireless Password fields, set your desired Wi-Fi name and password.
- Enable Hide SSID to hide the network from the Wi-Fi list.
- Enable Unencrypted to remove the password requirement.
Note: After changing the wireless name or password, the camera needs to reconnect to the NVR.
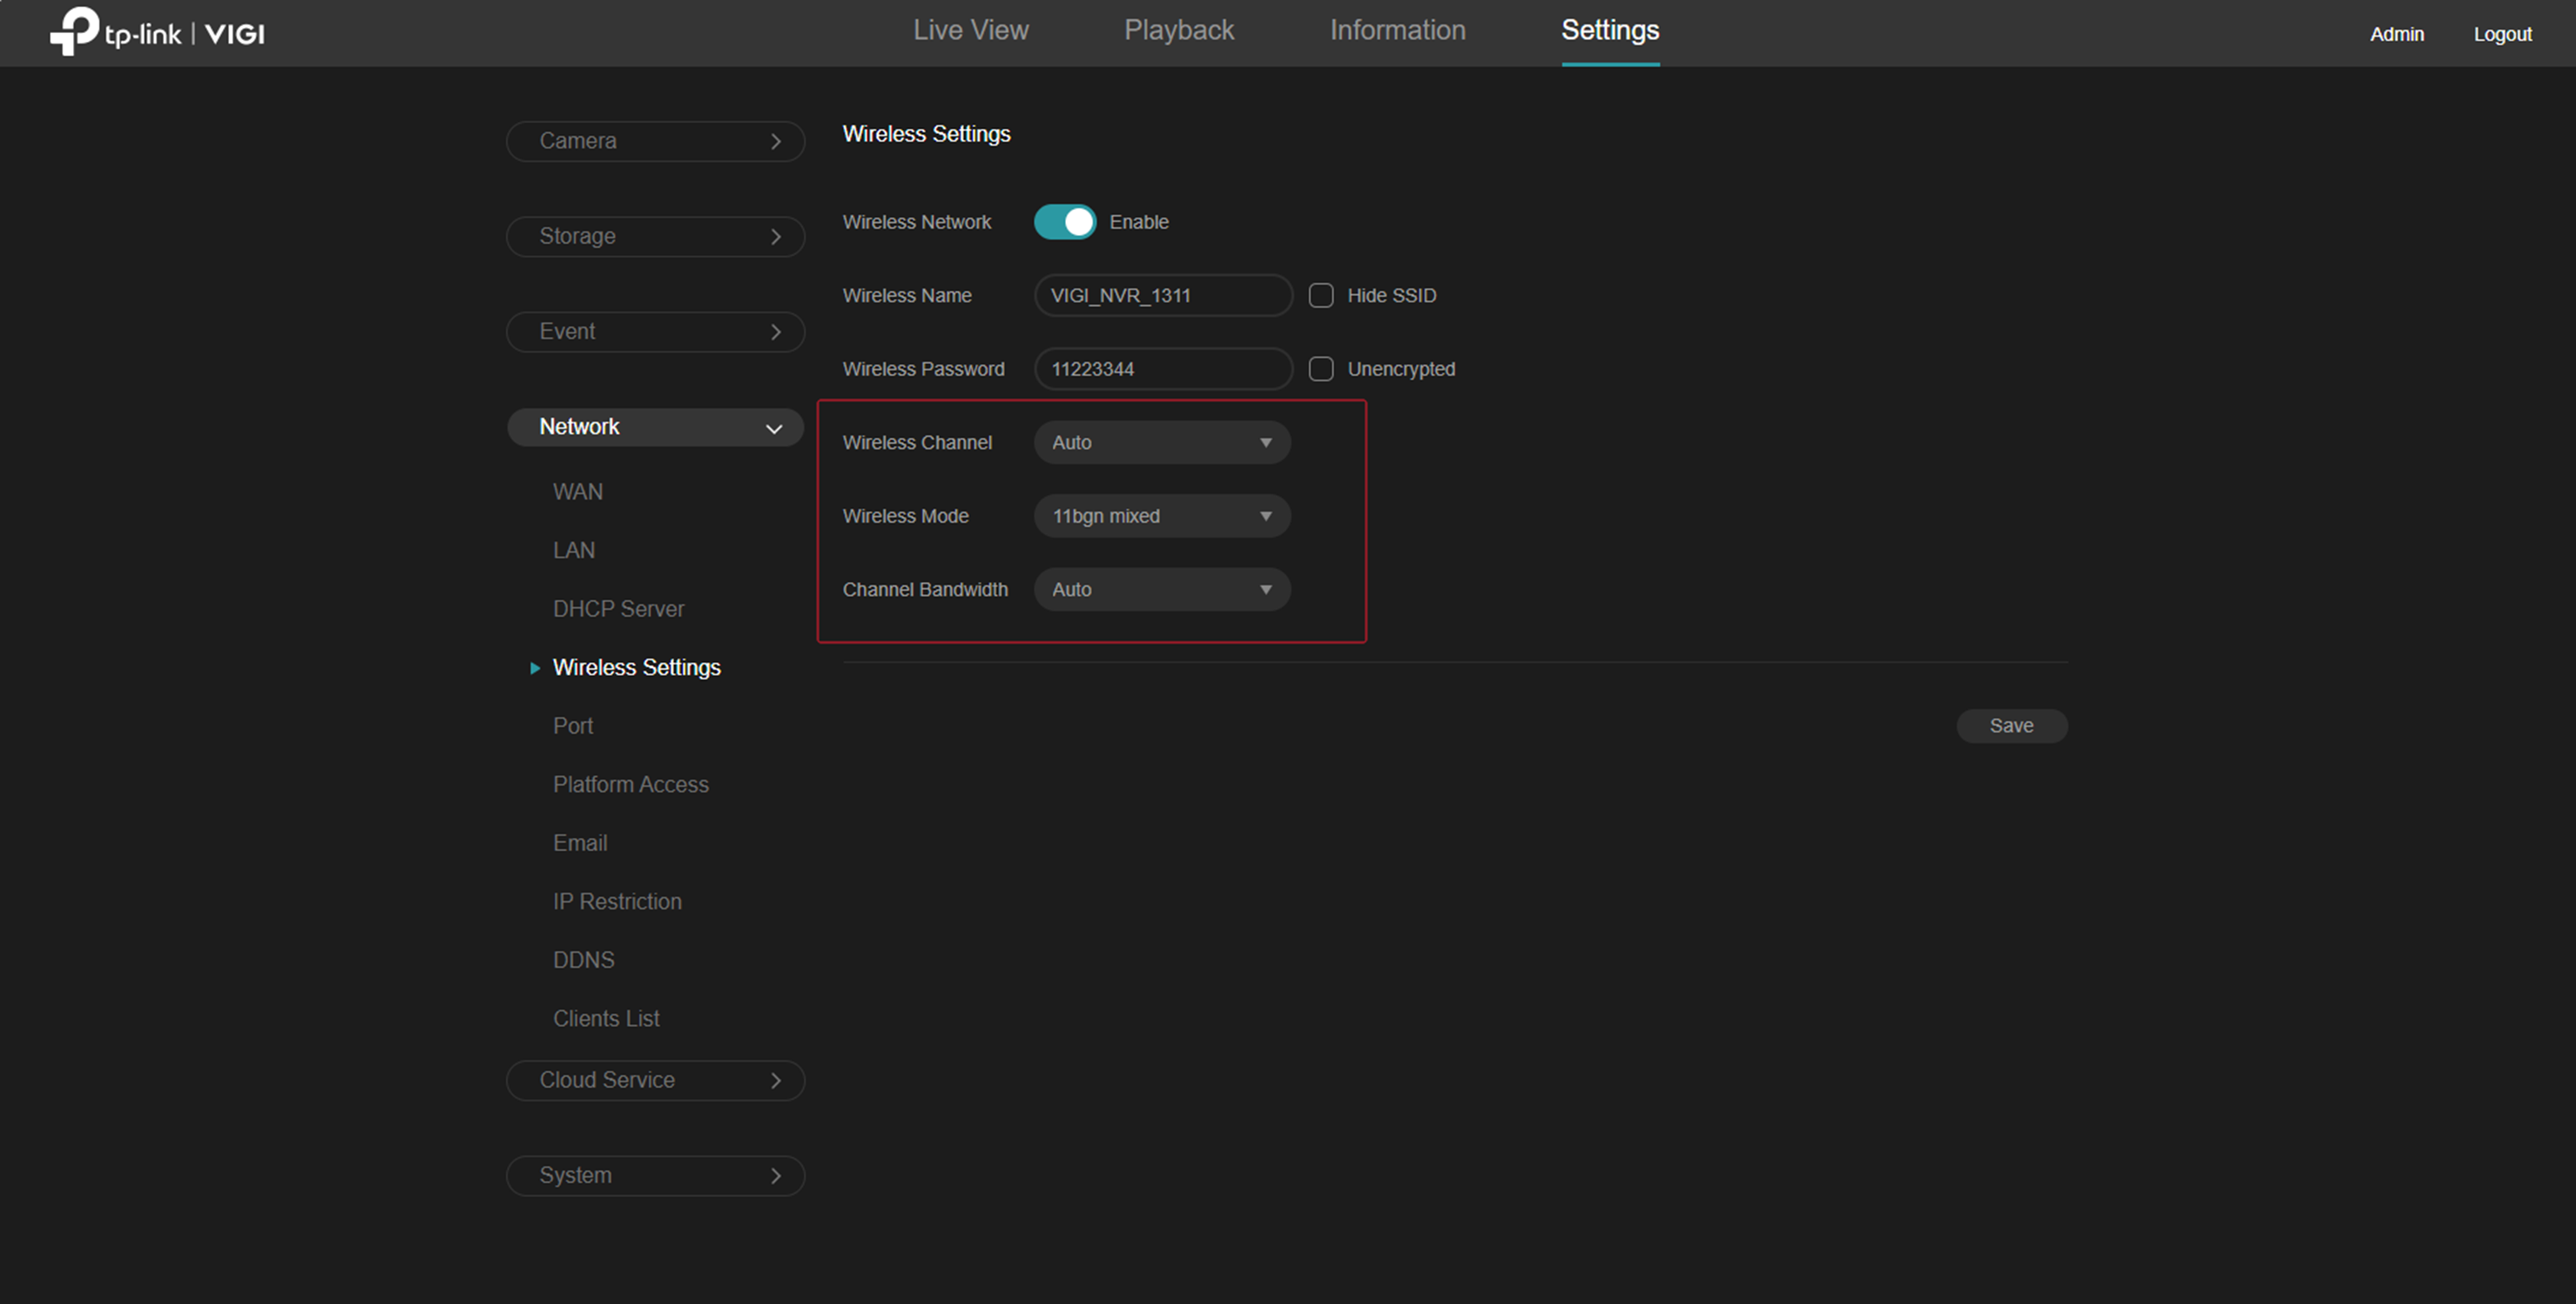
Step 4. Adjust optional settings—Wireless Channel, Wireless Mode, and Channel Bandwidth—or keep the default value.
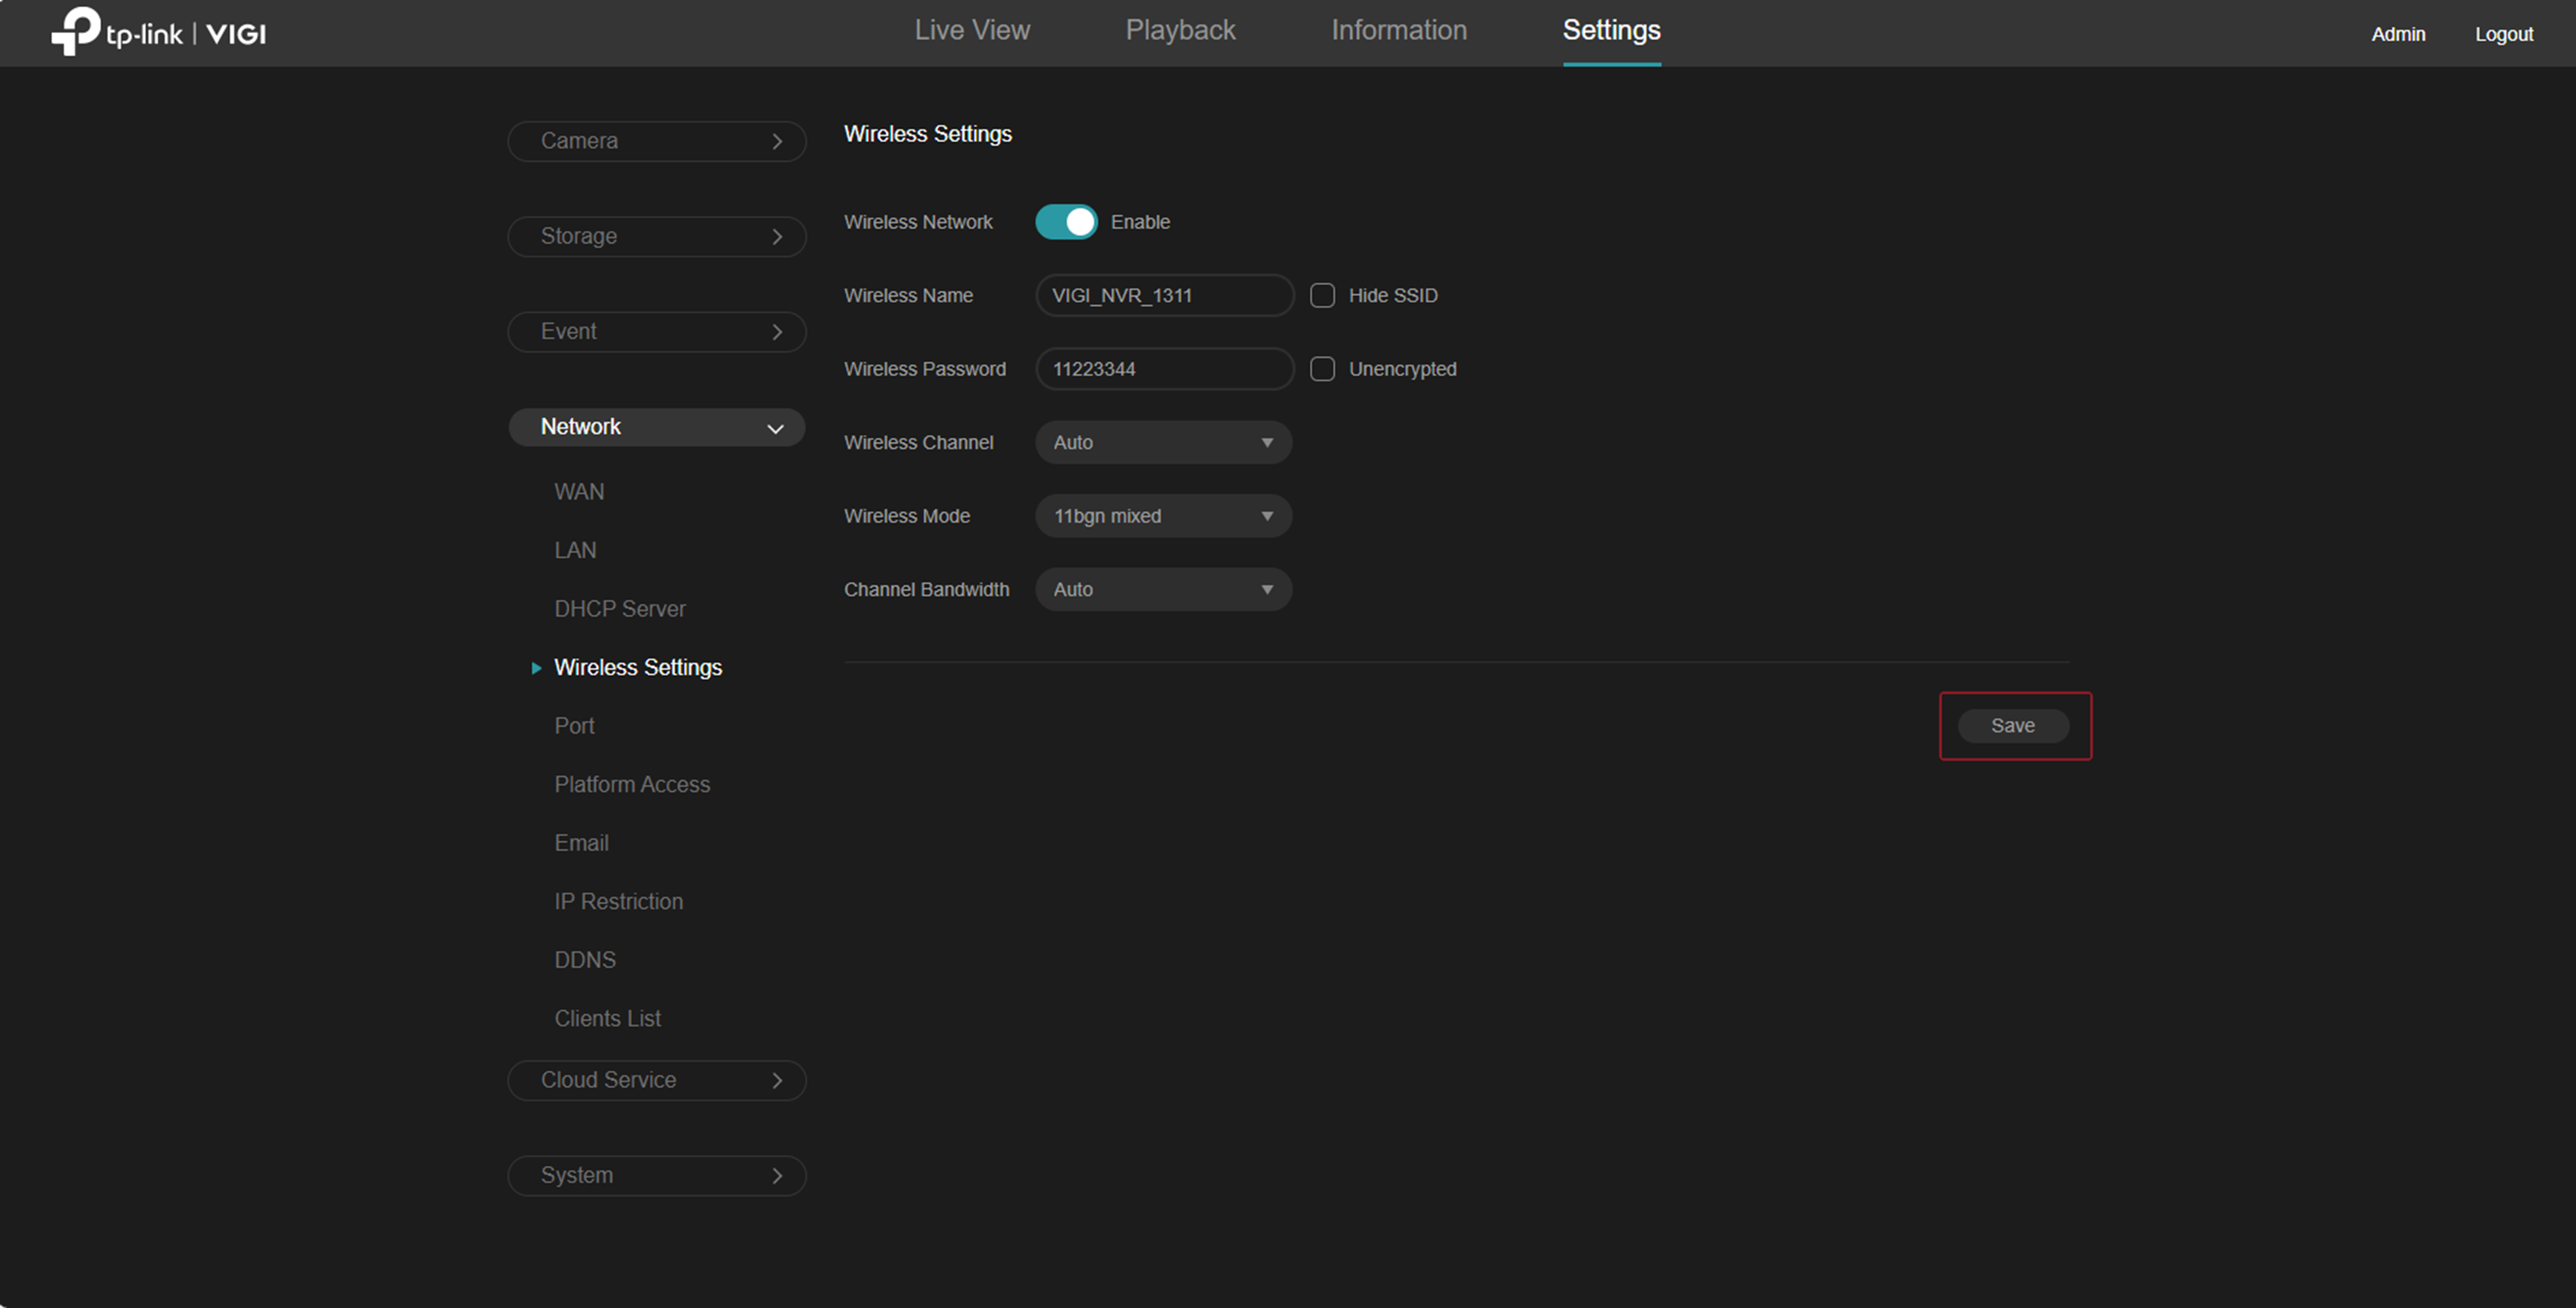
Step 5. Click Save to apply the changes.
Conclusion
You have now learned how to set up and modify Wi-Fi settings on a VIGI NVR.
Get to know more details of each function and configuration please go to Download Center to download the manual of your product.
Czy ten poradnik FAQ był pomocny?
Twoja opinia pozwoli nam udoskonalić tę stronę.

z United States?
Uzyskaj produkty, wydarzenia i usługi przeznaczone dla Twojego regionu.