How to Discover and Add Devices in VIGI PC Client
Contents
Introduction
This FAQ describes how to discover and add devices in My VIGI organization using VIGI PC Client.
Requirements
- PC installed with VIGI PC Client v2.0.55 or above
- VIGI devices
Configuration
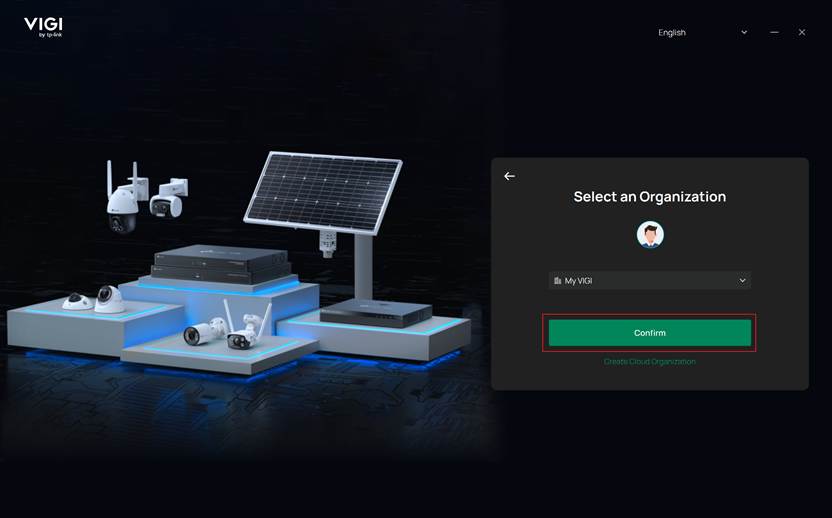
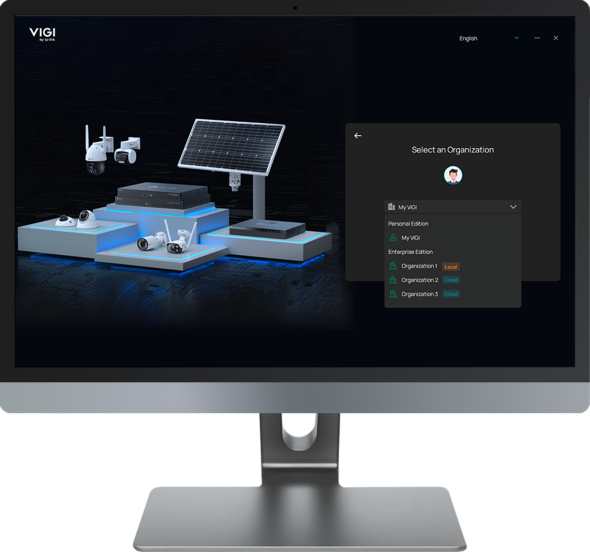
Step 1. Install and run the VIGI PC Client, enter your TP-Link ID and password, when selecting organizations, please select My VIGI to enter your personal edition VIGI.
Step 2. On the Home page, there are five modules. Among them, modules Live View, Playback, and Device all support device discovery and addition. In this FAQ, module Live View is selected for detailed demonstration.
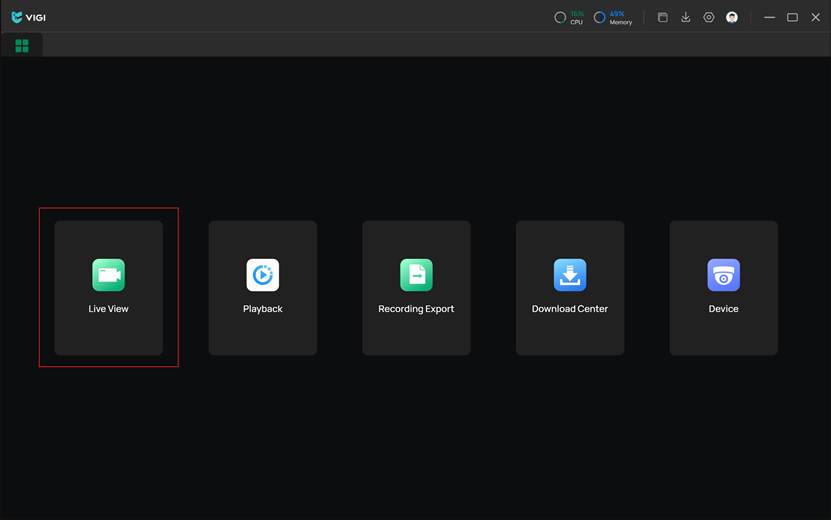
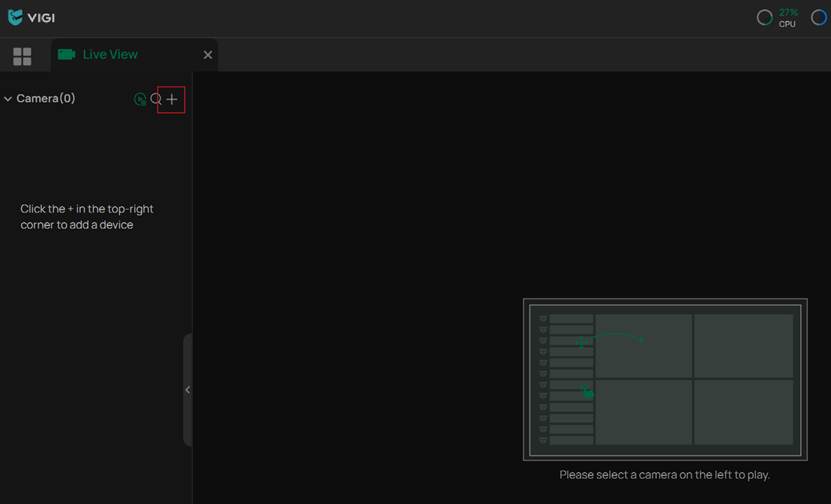
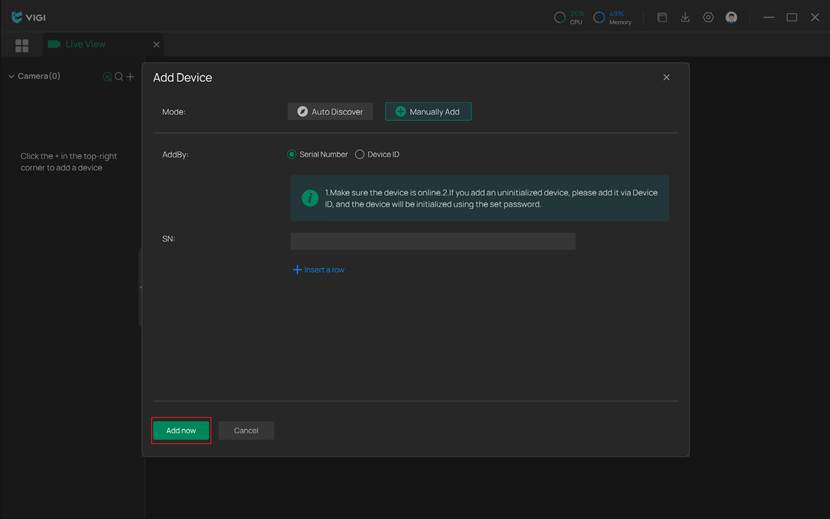
Step 3. Click Live View, then click the plus icon at the top of the camera list on the left to open the adding window.
Step 4. You can discover and add devices in two ways. The first one is Auto Discover. VIGI PC Client can automatically scans and displays VIGI devices on the same network as your PC. You can select multiple devices here and batch add them.
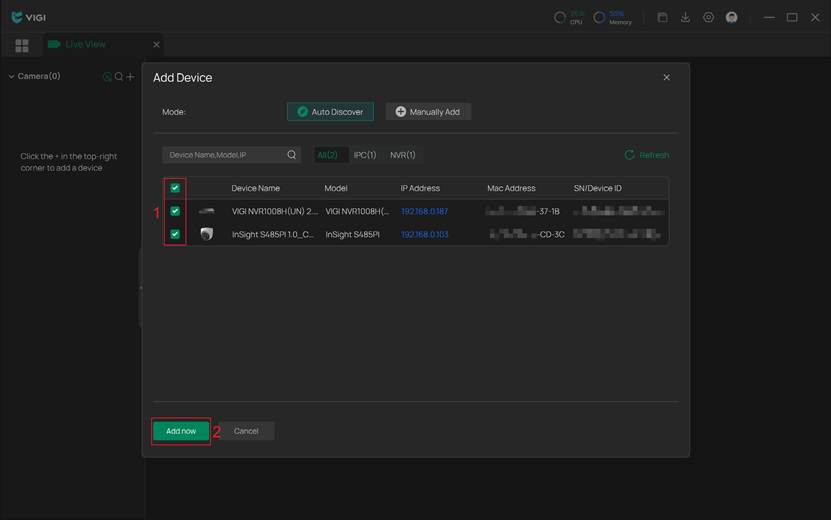
The second way is Manually Add. Make sure that the device you want to add all have access to the Internet. Then you can manually enter the devices’ Serial Number or Device ID here, which can be found on the label attached to the device.
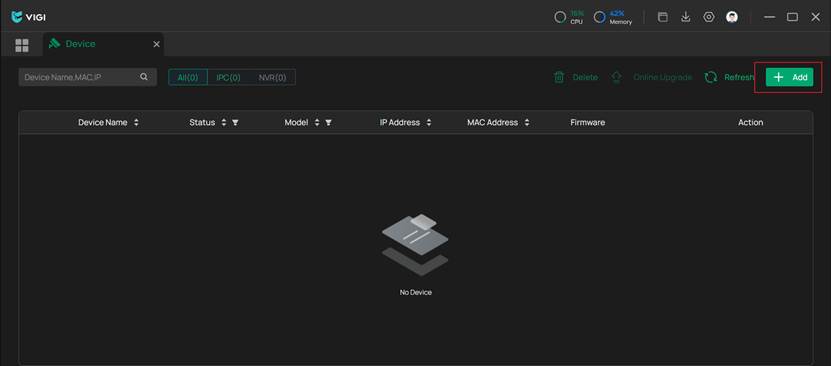
Step 5. (Optional) You can also add devices in Playback or Device modules. The button to start adding is shown in the image below.

Conclusion
Now you have successfully discovered and added your devices to your VIGI organization using VIGI PC Client.
Get to know more details of each function and configuration please go to Download Center to download the manual of your product.
Is this faq useful?
Your feedback helps improve this site.
TP-Link Community
Still need help? Search for answers, ask questions, and get help from TP-Link experts and other users around the world.