How to use VIGI Cameras with Third-Party NVR, NAS or Software
Contents
Introduction
Clients may sometimes choose not to use VIGI NVR but other management platform to manage VIGI Cameras when they already have a third-party storage device. VIGI Cameras support ONVIF Profile S and can be added to the third-party management device that also supports the ONVIF protocol. When ONVIF Profile S is not supported on the third-party device, VIGI Cameras can also allow for live streaming on the third-party platform via the RTSP protocol.
Requirements
- VIGI Cameras
- Third-party NVR/NAS/Software
- Laptop
Configuration
Our VIGI Cameras support ONVIF Profile S/G/T and can be added to third-party NVRs, NASs, or software that also support the ONVIF protocol.
|
Profile S (Streaming Video) |
Profile T (advanced video streaming) |
Profile G (Recording and Storage) |
|
|
|
Note: When ONVIF is not supported on the third-party device, VIGI Cameras can also enable live streaming on third-party platforms via the RTSP protocol.
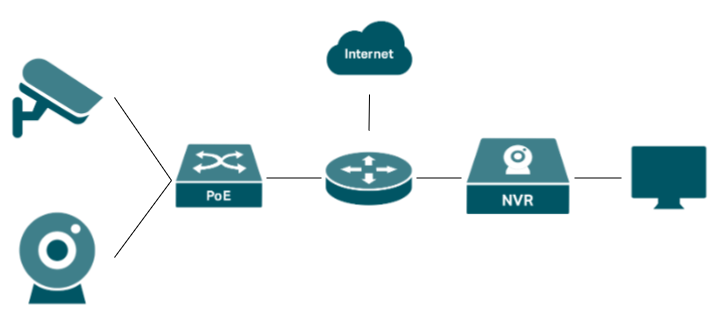
Step 1. Connect the VIGI Cameras to the third-party NVR according to the network topology below, ensuring they are on the same network.
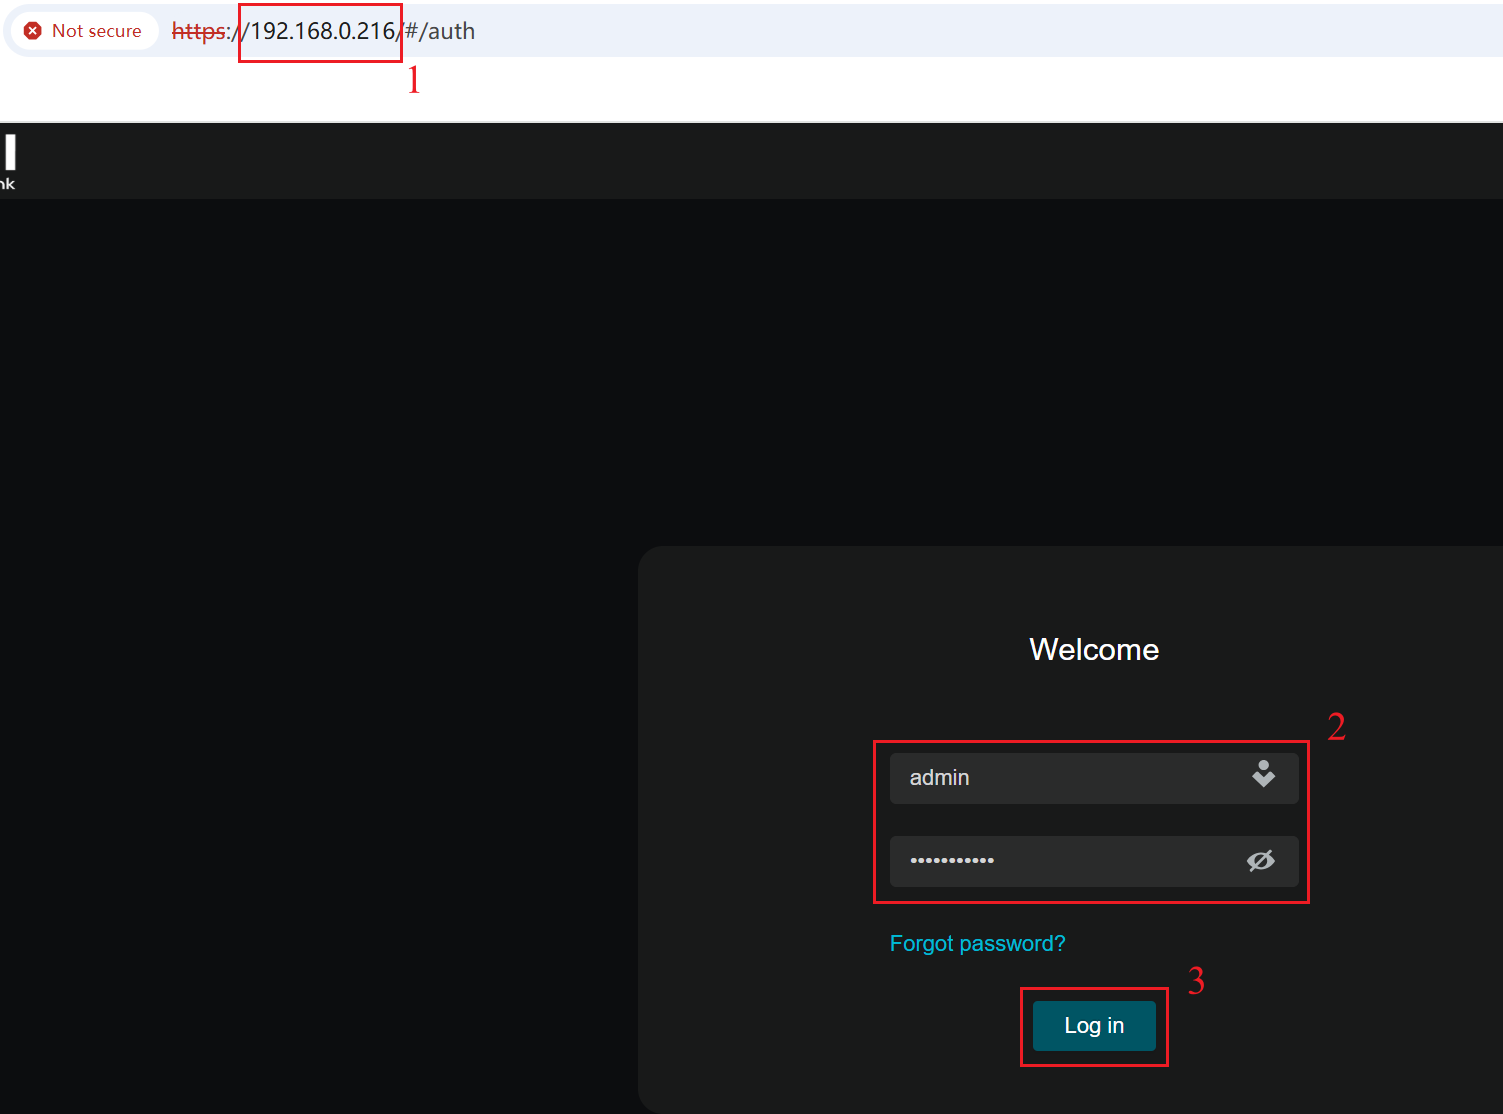
Step 2. Use the IP address of the VIGI Camera to access its Web Management Interface. Enter the username and password, click Log in.
Step 3. Add the VIGI Camera to the third-party device through ONVIF or RTSP. In this document, we use iSpy and VLC for demonstration purposes.
Added using the ONVIF protocol:
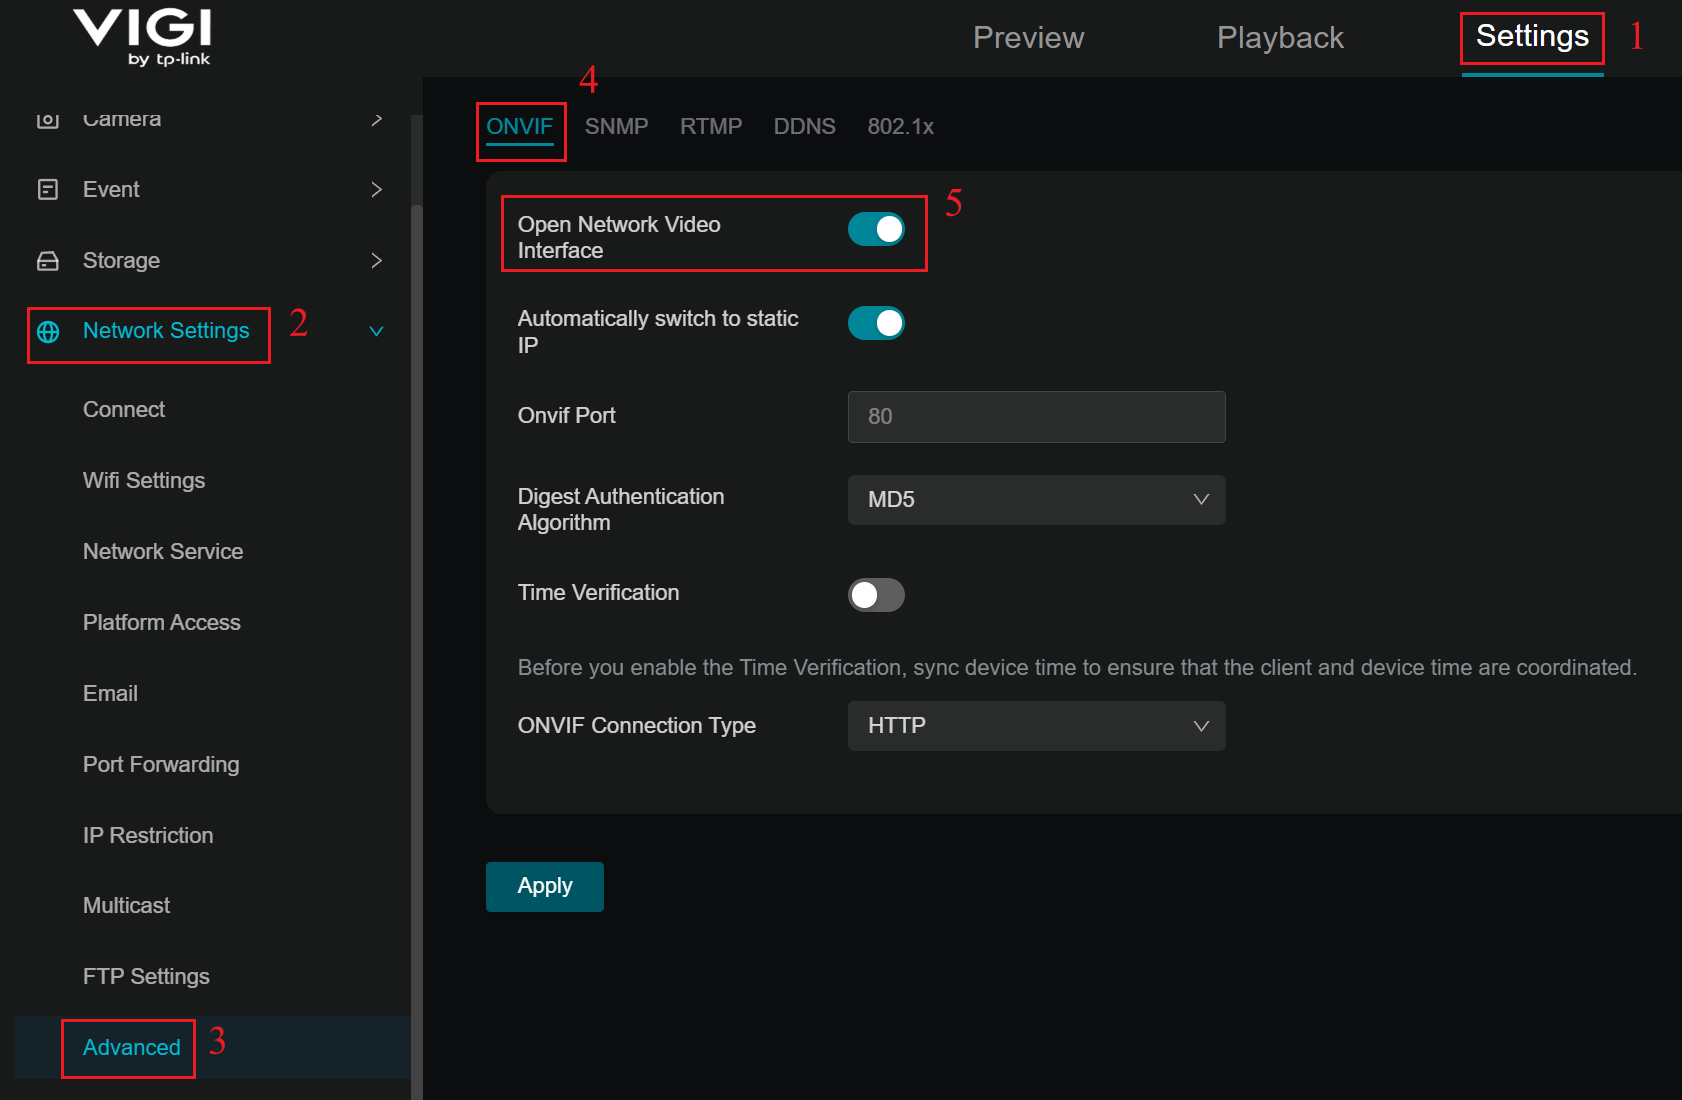
When the third-party device or management platforms support the ONVIF protocol, VIGI Cameras can be added using the ONVIF protocol. Please go to Settings > Network Settings > Advanced > ONVIF to ensure that the Open Network Video Interface is enabled. Default ONVIF Port: 80.
Configuration example: adding your VIGI camera to iSpy software
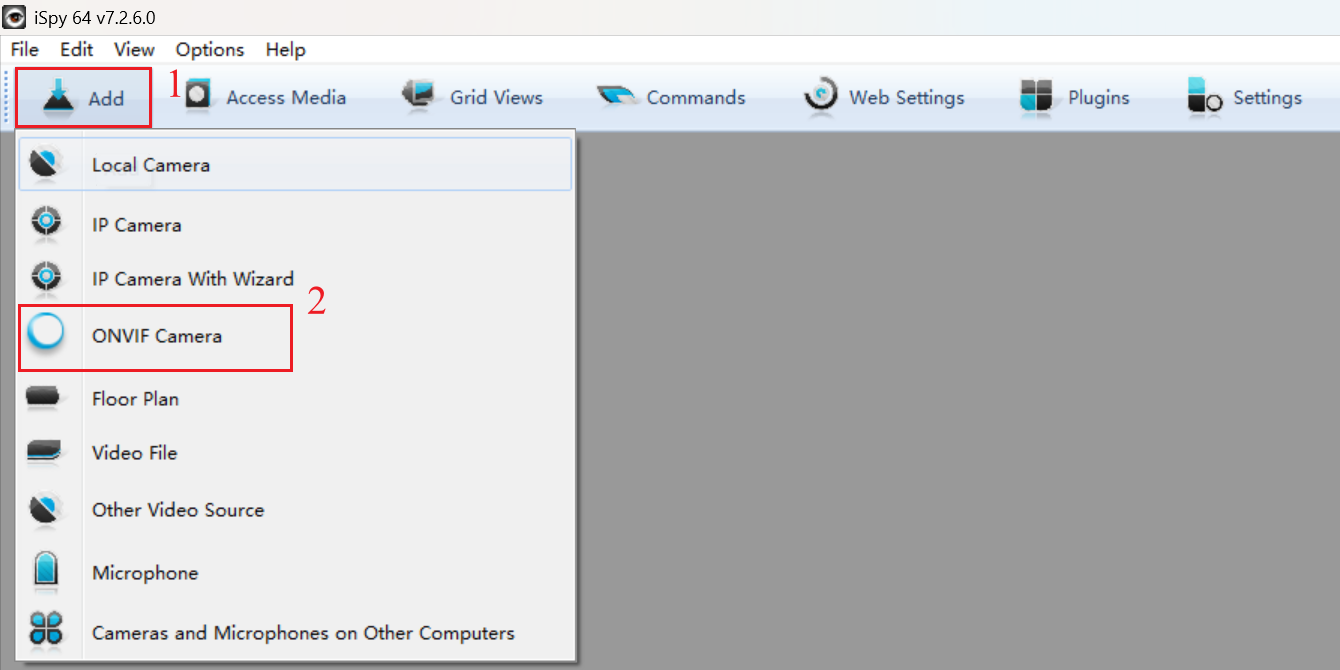
Step 1. Run the iSpy software on your laptop. Click Add on the top left menu and select ONVIF Camera.
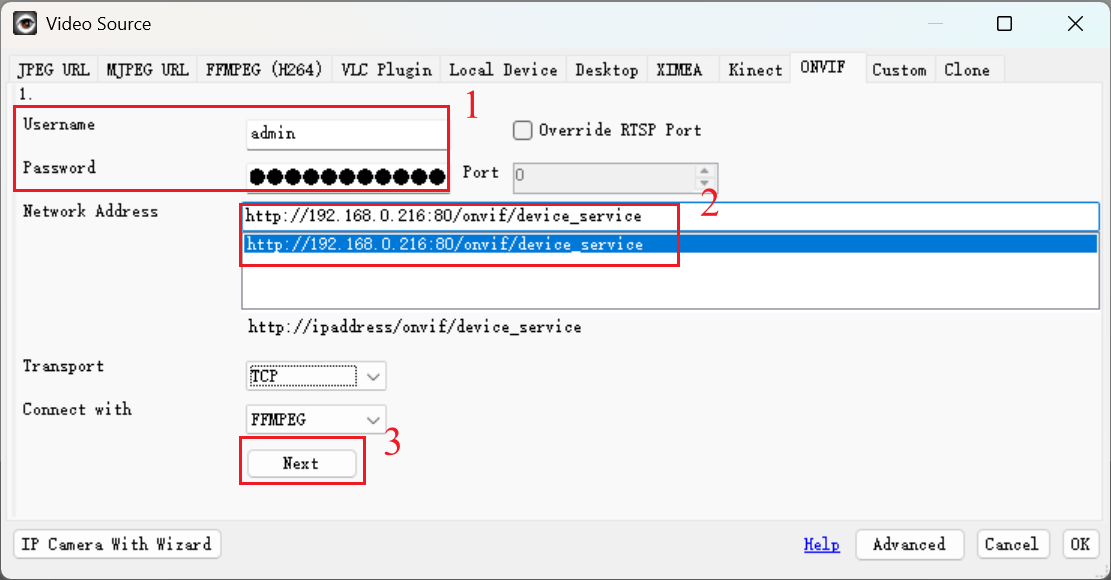
Step 2. Enter the username and password that you set for your camera on the pop-up window, select Network Address, and click Next. You can customize other parameters if needed.
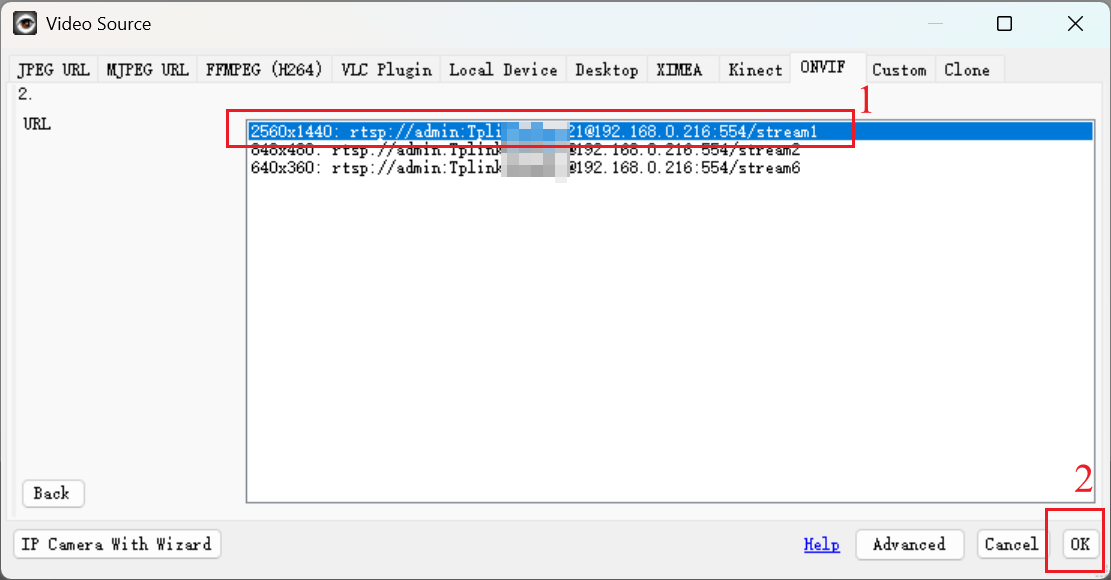
Step 3. Choose the Video Resolution and click OK.
Step 4. Customize the camera settings as needed. You can also change all the settings later. Click Finish to complete adding your camera to iSpy software.

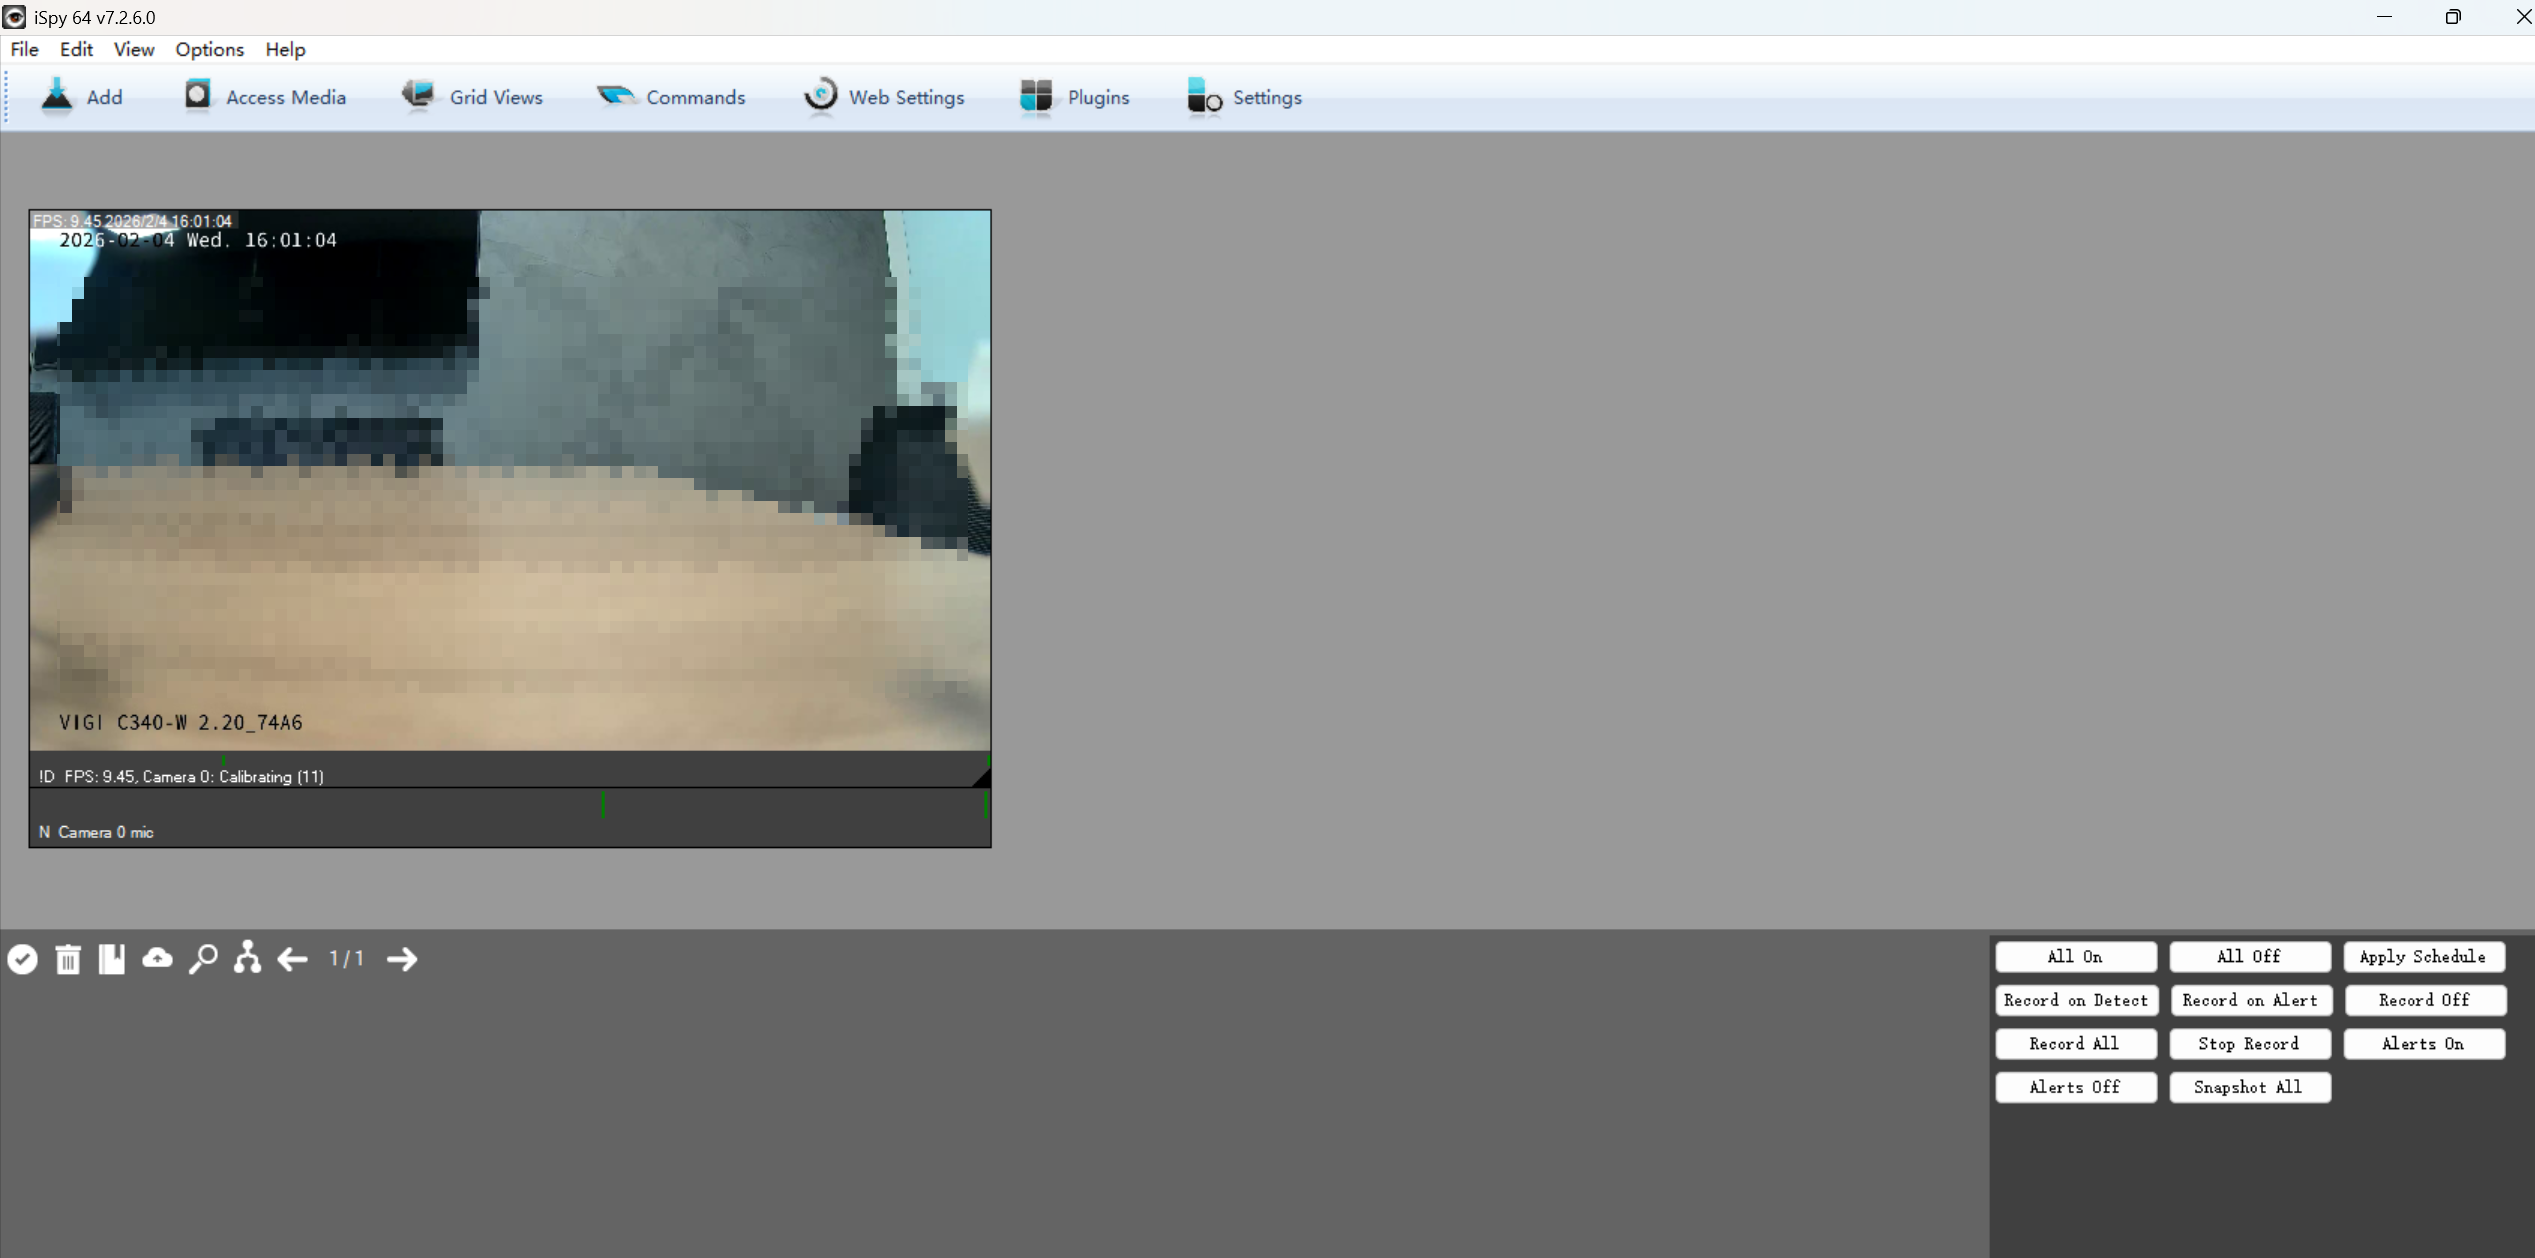
Step 5. After adding your VIGI camera to iSpy via ONVIF protocol, you can monitor and manage it using the software. View the live feed, customize motion detection, check recordings when motion is detected, set recording schedules, record videos, and more.
Added using RTSP protocol
When the ONVIF Profile is not supported on a third-party device or platforms, VIGI Cameras can also enable live streaming on third-party platforms via the RTSP protocol. However, the VIGI camera settings cannot be modified at this time.
The URL of the RTSP live stream for the VIGI cameras will be:
- For high quality stream1: rtsp://IP Address/stream1
- For low quality stream2: rtsp:// IP Address/stream2
In some software, the URL needs to include the port to access the live stream:
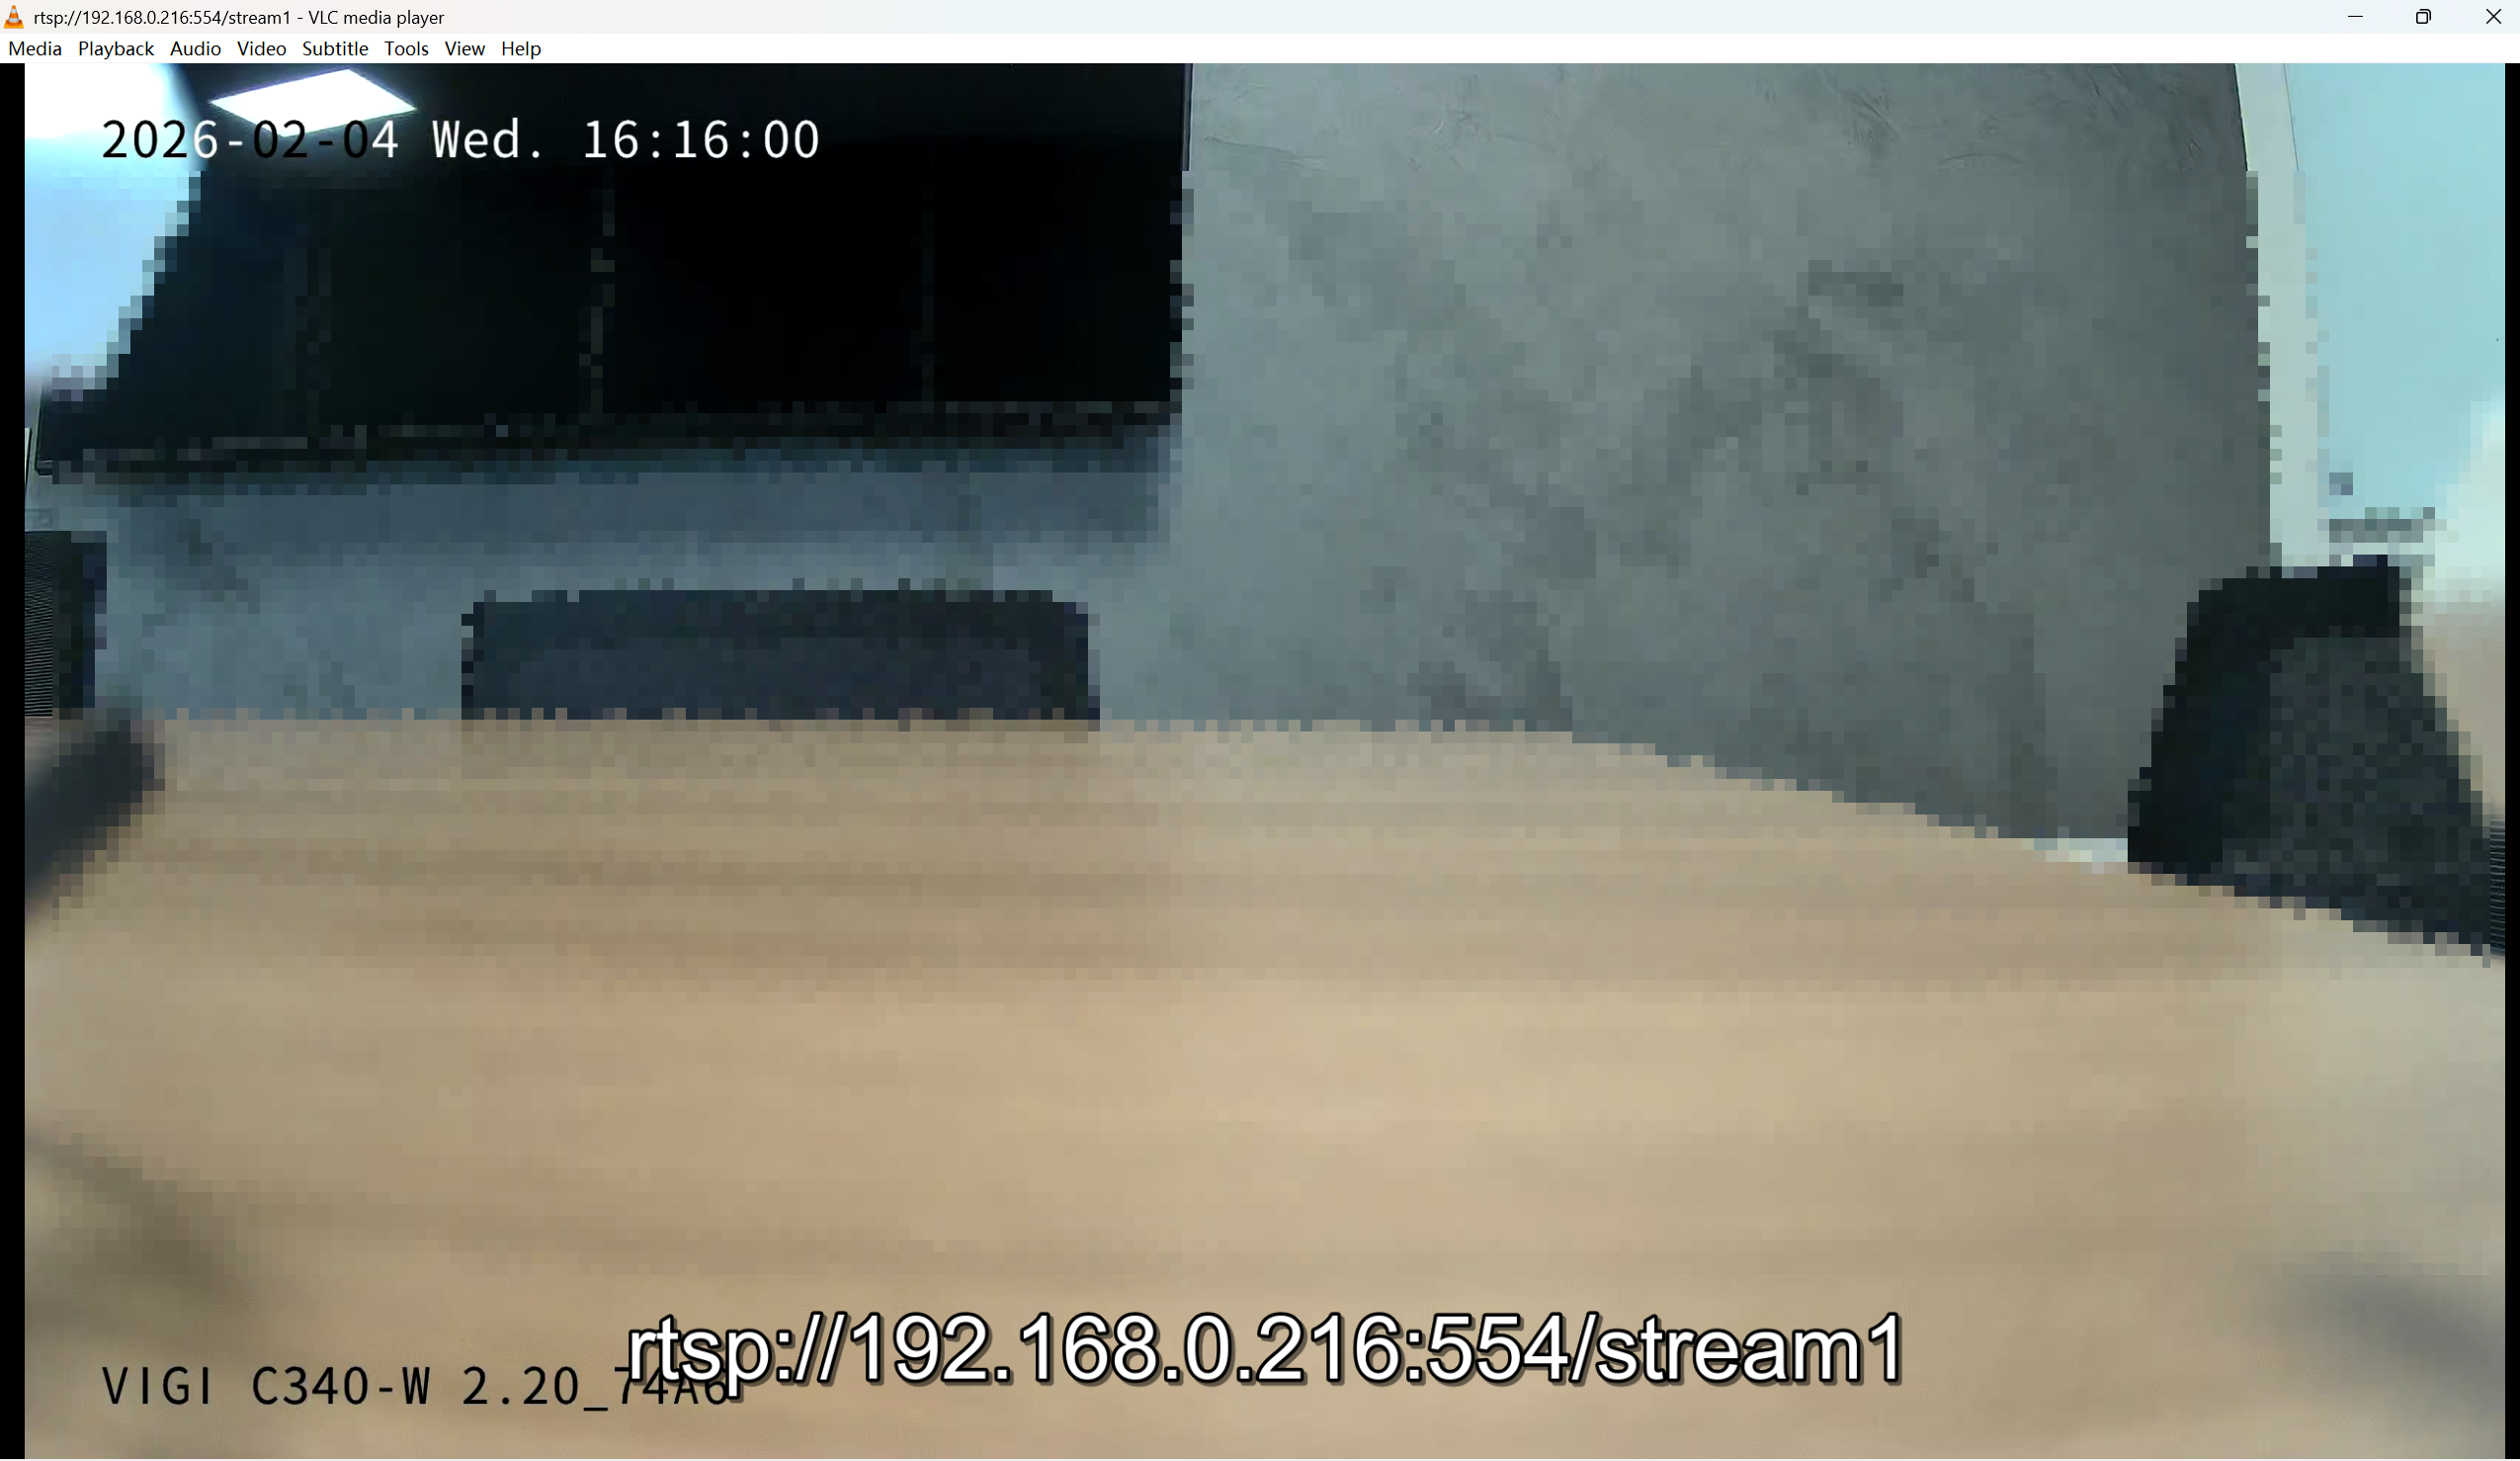
- For high quality stream1: rtsp://IP Address: 554/stream1(rtsp://192.168.0.216:554/stream1)
- For low quality stream2: rtsp:// IP Address: 554/stream2 (rtsp://192.168.0.216:554/stream2)
- RTSP Service Port: 554 (default)
Configuration example: the VLC software
Step 1. Open the VLC software, click Media on the top left menu and select Open Network Stream.

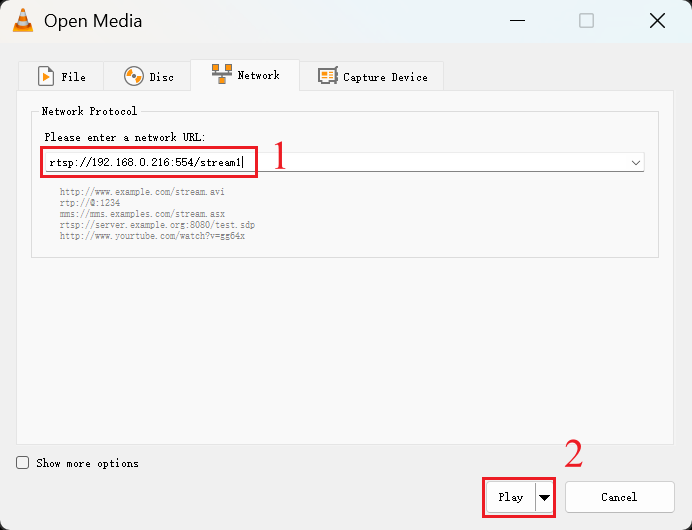
Step 2. Fill in the URL of the VIGI camera, then click Play.
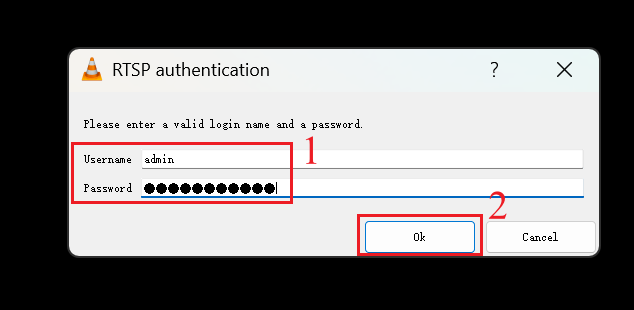
Step 3. Enter the username and password that you set for your camera on the pop-up window, click OK.
Step 4. After adding your VIGI camera to VLC via RTSP protocol, you can monitor it using the software.
Troubleshooting
When a VIGI camera cannot be added to a third-party platform via ONVIF or RTSP, possible causes may include basic network or configuration issues, protocol compatibility issues, or authentication/encryption mechanism compatibility issues. For protocol compatibility issues, please refer to How to troubleshoot VIGI cameras not working with NVR or RTSP software.
In certain models (Wireless and 4G VIGI cameras) and scenarios, the issue may be due to incompatibility between the encryption algorithms supported by the VIGI camera and the third-party client for HTTP Digest Authentication when adding the camera via the ONVIF protocol.
Step 1. On VIGI Cameras’ Web UI, navigate to Settings > Network Settings > Advanced > ONVIF > Digest Authentication Algorithm. Check the selected Digest Authentication Algorithm.
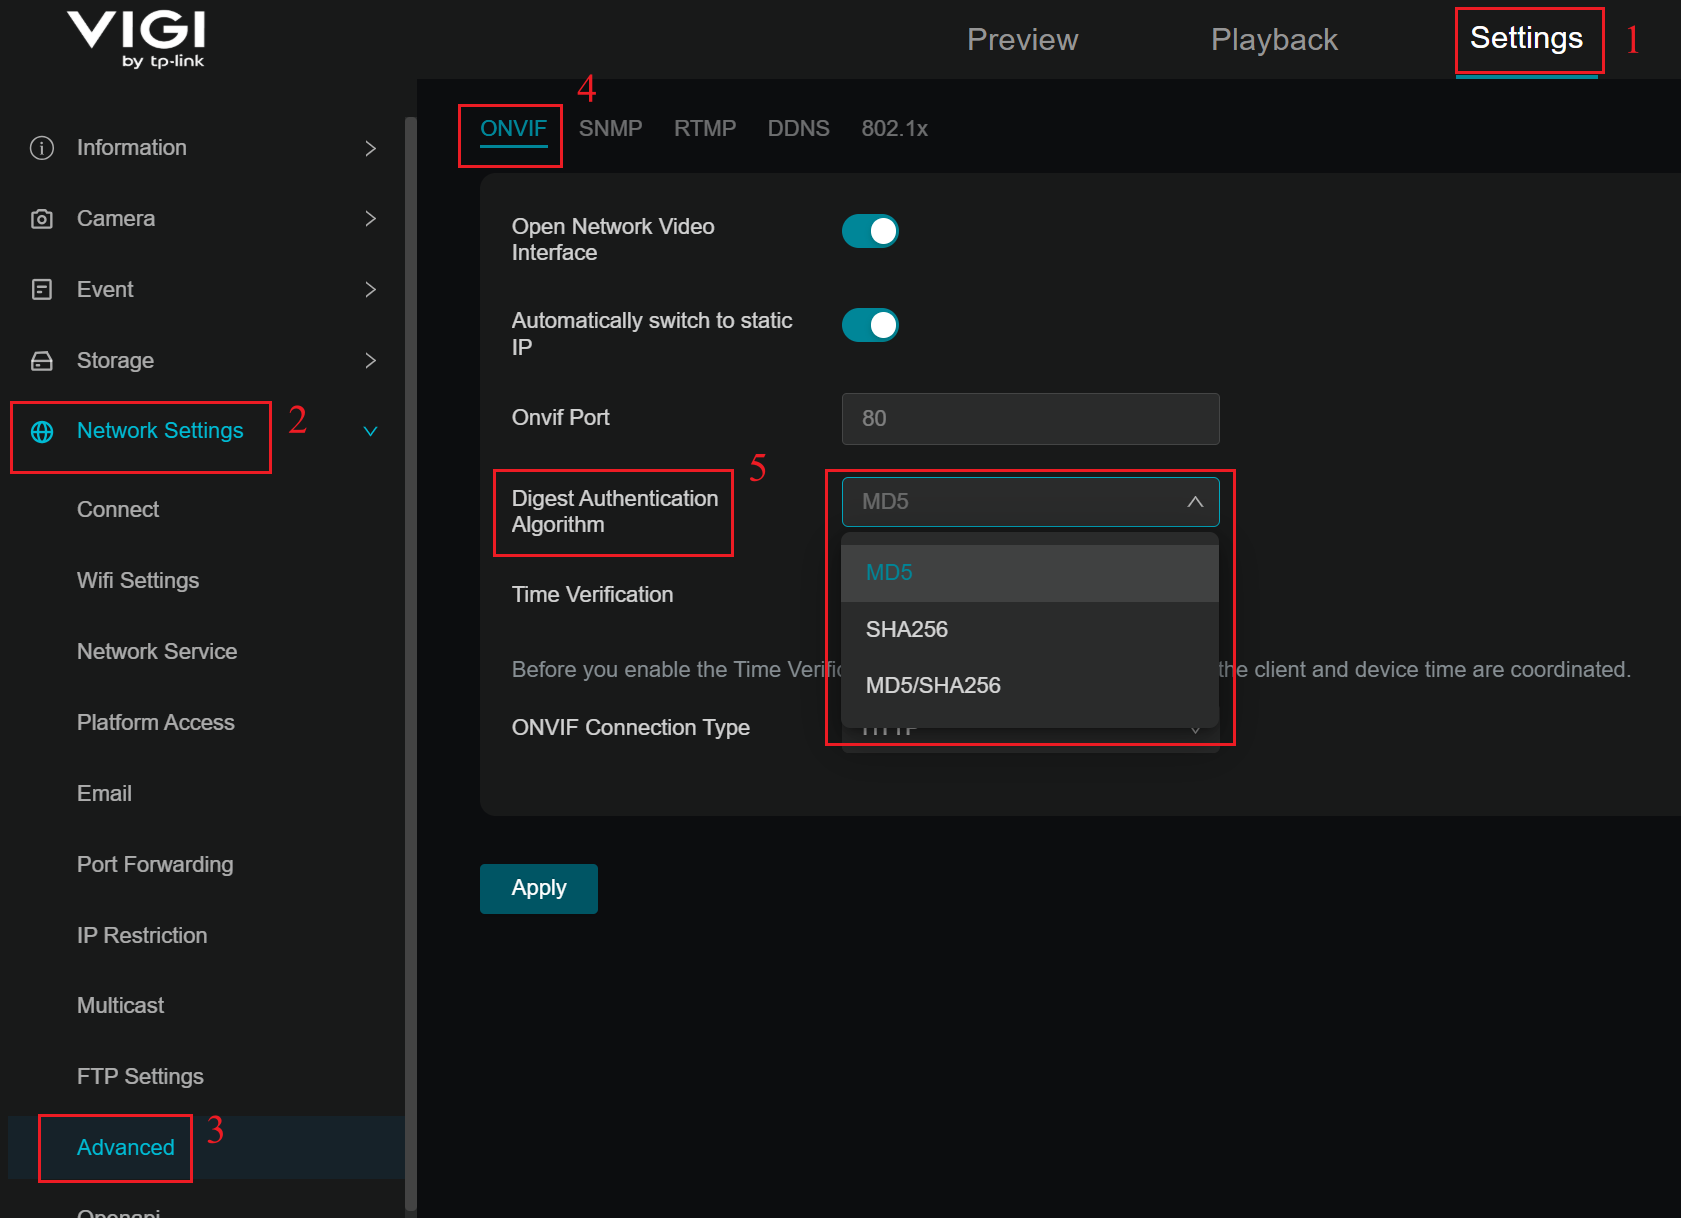
Please proceed to Step 2 if the Digest Authentication Algorithm is MD5 or MD5/SHA256, or go to Step 3 if it is SHA-256.
Step 2. If set to MD5 or MD5/SHA-256:
- Ensure the camera is powered on and connected to the network.
- Ensure the client and camera are in the same subnet.
- Verify the username and password are correct.
Step 3. If set to SHA-256:
- Ensure that the third-party platform supports SHA-256 during HTTP Digest Authentication when communicating with VIGI cameras via the ONVIF protocol; if not, it will not work.
- Ensure the camera is powered on and connected to the network.
- Ensure the client and camera are in the same subnet.
- Verify the username and password are correct.
Conclusion
You have successfully added VIGI Camera to a third-party NVR, NAS, or software. And you can identify issues that prevent specific VIGI cameras from being added to third-party platforms via the ONVIF protocol.
Get to know more details of each function and configuration please go to Download Center to download the manual of your product.
QA
Q1: How can I view the live stream of the VIGI camera remotely from another network?
A1: You can set up a VPN network or use your router's port forwarding feature to allow external devices to access the public IP and reach the camera. However, please note that the RTSP/ONVIF protocols are not highly secure, so it is not advisable to expose the camera to a public IP via port forwarding for long periods. It is recommended to use a secure, encrypted VPN network.
Q2: What ports are used by the VIGI camera for RTSP/ONVIF?
A2: The VIGI camera uses the following ports for RTSP/ONVIF:
ONVIF Service Port: 80
RTSP Service Port: 554
Note: Some VIGI cameras using older firmware, their ONVIF port is 2020. After upgrading to the latest firmware from the official website, the default ONVIF discovery port will be changed to 80. To prevent cameras added via port 2020 from becoming unmanageable after upgrading firmware, port 2020 remains open, allowing managers to continue using the port 2020 without having to re-add them.
Is this faq useful?
Your feedback helps improve this site.


TP-Link Community
Still need help? Search for answers, ask questions, and get help from TP-Link experts and other users around the world.