


How to Fix Reddish Image Color on Your IP Camera
Contents
Objective
This guide provides instructions for fixing a reddish of image issue on live view of the Omada camera.
Requirements
- Omada camera
Introduction
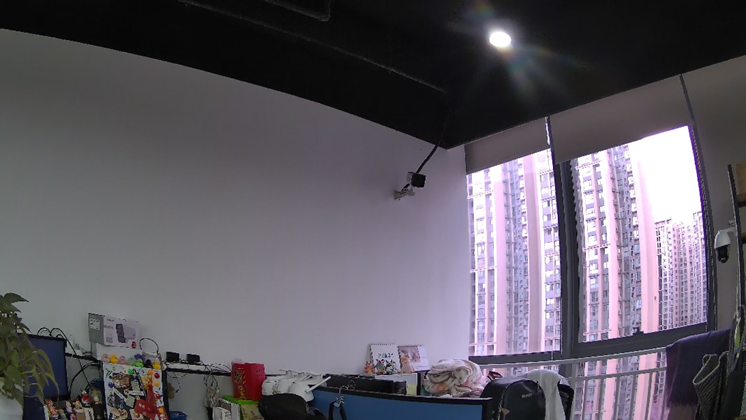
This article aims to assist users who encounter reddish surveillance images from Omada cameras.The video footage appears too red, reddish, or purple, as shown in the image below:
It is typically caused by an IR-Cut filter jam, improper white balance settings, or interference from red lights.
Troubleshooting
IR-Cut Filter
During the day and night mode switch, the IR-Cut filter also switches its working mode. Sometimes, the IR-Cut filter can become jammed, resulting in reddish surveillance images during the daytime.
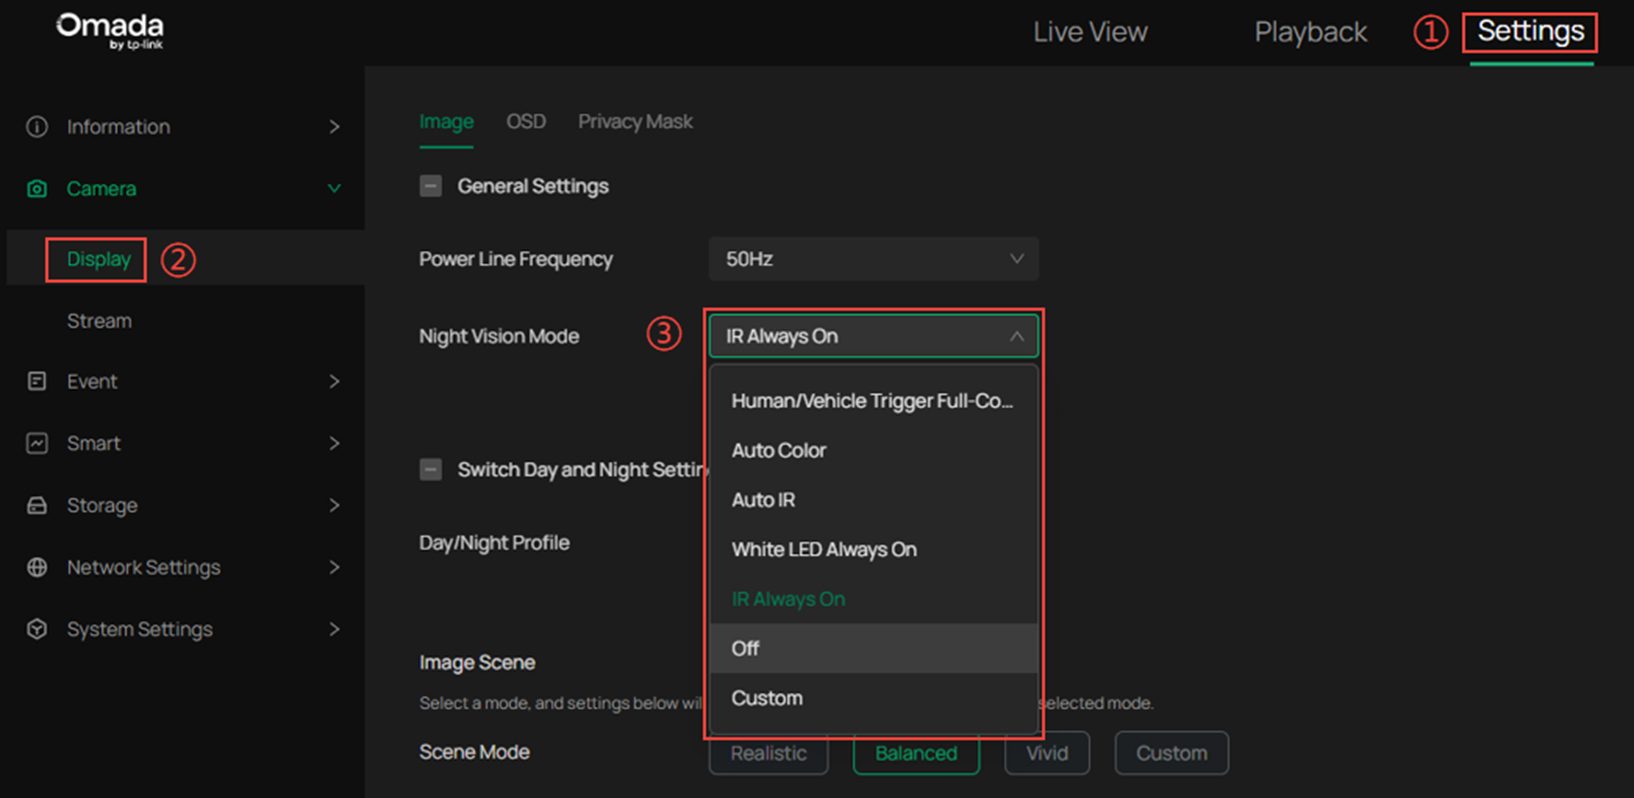
We can manually switch mode in the Settings > Display > Night Vision Mode to trigger the IR-Cut filter to switch.
White Balance
When using an incorrect custom white balance setting or if the camera's automatic white balance adjustment is incorrect, the surveillance images may display unnatural colors. This may include cool or warm color temperatures, color distortion, or excessive color bias towards a particular hue.
We can trying to adjust the white balance settings by selecting Auto or one of the preset white balance options in the Settings > Display > White Balance.

If Auto white balance results in unnatural reddish colors, please refer to the next section for further adjustments.
Red Light Interference
If the surveillance environment includes red LED screens, lightboxes, or similar light sources, they may interfere with the camera’s image, causing a reddish tint.
We can adjust the camera angle to avoid direct red light exposure and observing if the image improves.
Conclusion
The above is the introduces for Cable Test on Omada Central.
Get to know more details of each function and configuration please go to Download Center to download the manual of your product.
Is this faq useful?
Your feedback helps improve this site.
TP-Link Community
Still need help? Search for answers, ask questions, and get help from TP-Link experts and other users around the world.