


How to Configure URL Filtering on Omada Gateway via Omada Controller
Content
Objective
This article primarily introduces the implementation and configuration of the URL Filtering function on Omada Gateways, enabling users to utilize this feature efficiently.
Requirements
-
Omada Controller (software Controller/hardware Controller / Omada Central)
-
Omada Gateway (supporting URL Filtering)
Introduction
URL Filtering is a security technique used for network access control based on URLs. It enables network administrators to create rules that allow or deny access to specific websites, protecting the local network from potential Internet threats and preventing access to malicious websites. When filtering, it compares the URLs in HTTP, HTTPS, and DNS requests with websites pre-defined in filtering rules, and intercepts requests towards blocked ones. These rules could be applied to those specific clients or user groups whose traffic will pass through gateways and EAPs.
Configuration
Step 1. On the controller’s management page, go to Settings > Network Security > URL Filtering > Gateway Rules. Here is where the URL Filtering function is configured, shown as a picture below, and we have the following parameters to set:
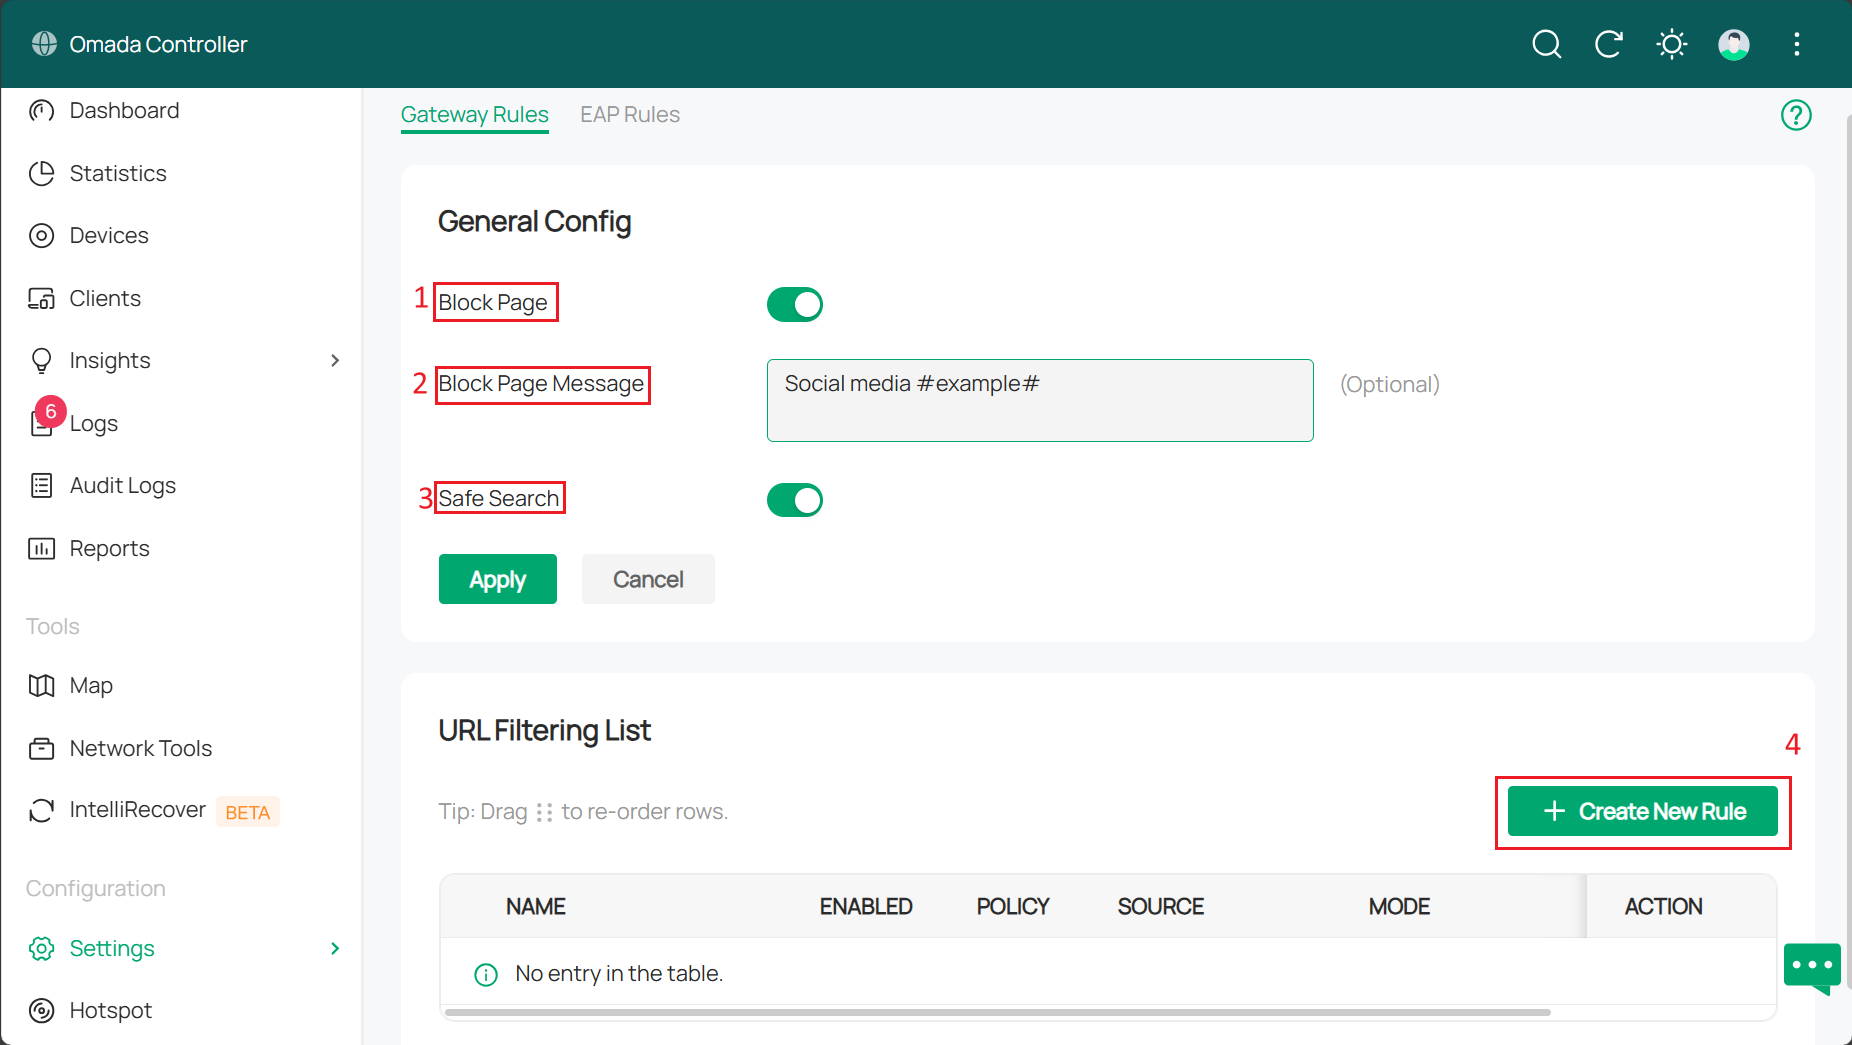
1. Block Page: When enabled, users attempting to access blocked websites will be redirected to a specific page indicating the website is blocked by the access policy.
2. Block Page Message: The words written here will be displayed when users attempt to access a blocked URL, explaining the reason for access denial. This could effectively remind users to adhere to network usage regulations.
3. Safe Search: Activating this feature enables safe search globally. This feature allows you to filter search results to block inappropriate content. Suitable for home and education scenarios. This feature typically functions without requiring configuration rules.
4. Create New Rule: To create a new URL filtering rule. The current function would only be applied as configured when rules are configured.
Step 2. Click Create New Rule to configure new URL Filtering rules. Configuration parameters include:
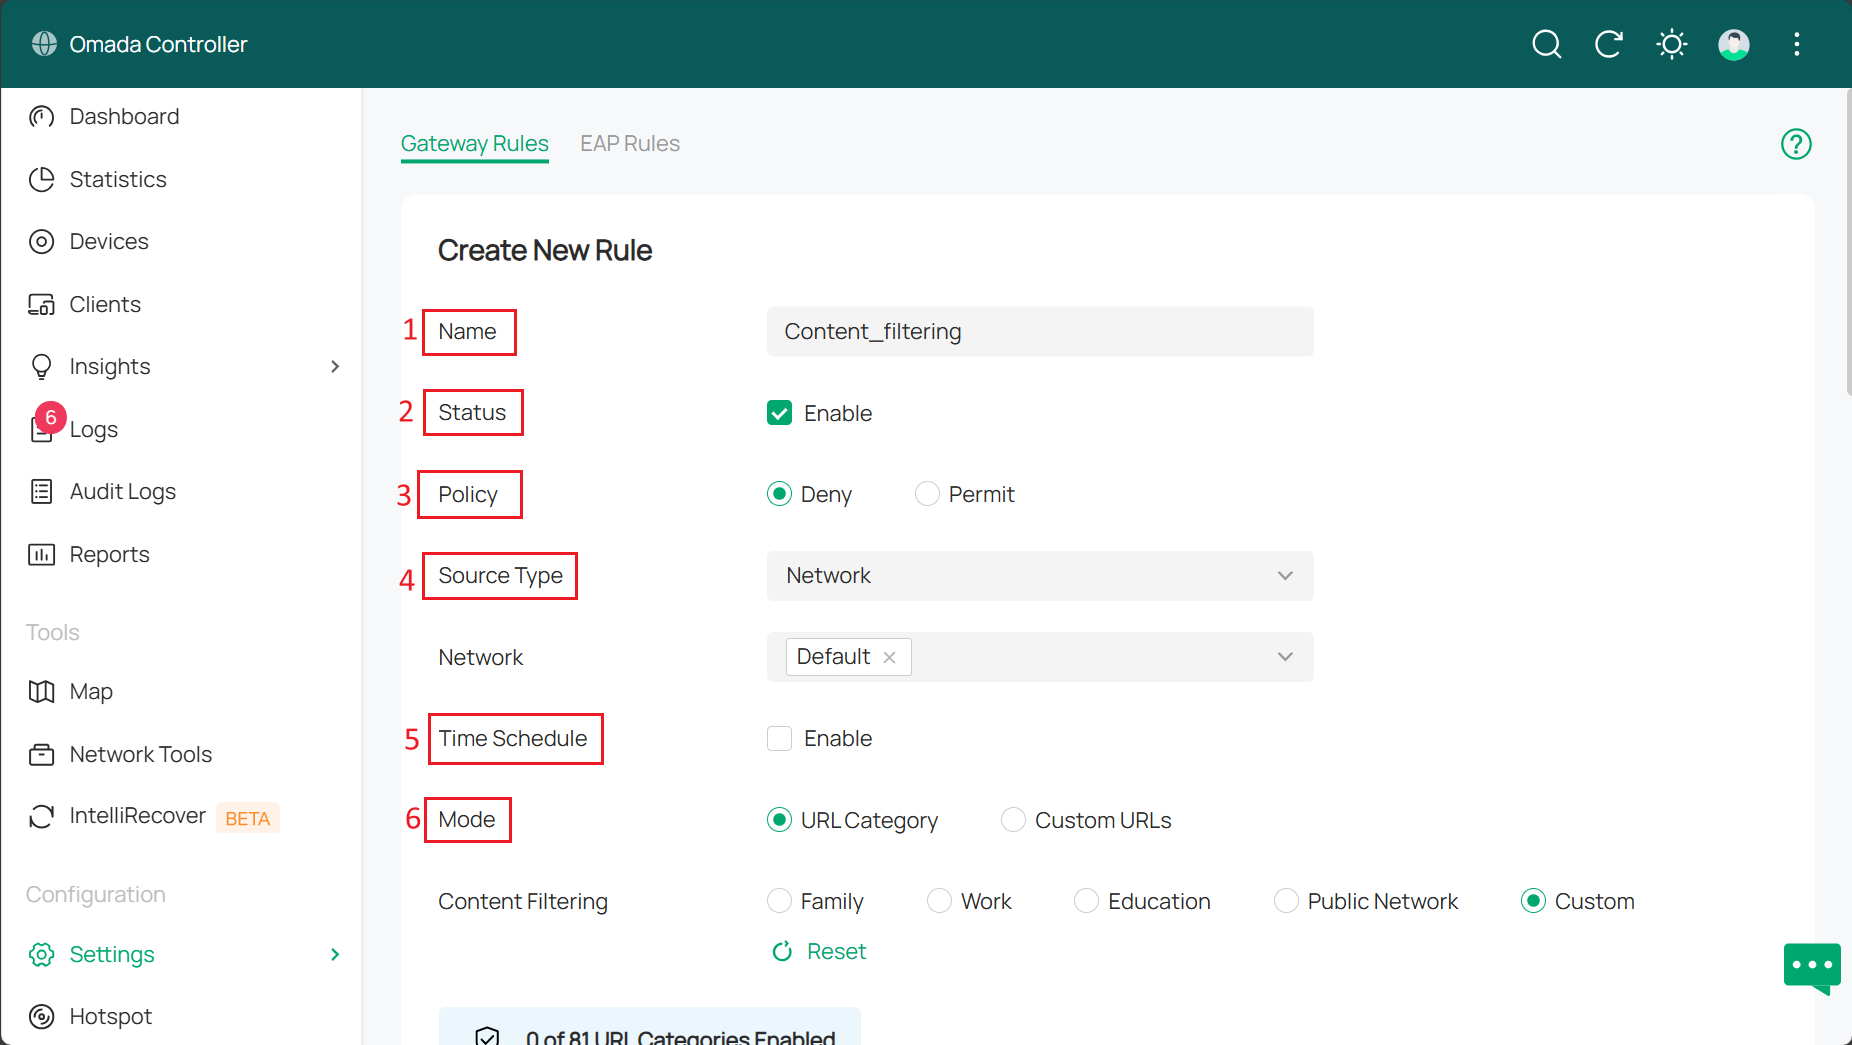
1. Name: Enter a name for rule identification.
2. Status: Click the check box to enable URL filtering rules
3. Policy: Selecting measures taken when data packets are matched to URL rules. Including:
- Deny: Discard matched packets; clients are unable to access the web URL.
- Permit: Forward matched packets, allowing clients to access web URLs.
4. Source Type: Selecting the source of the packets applied to this rule. It can be either a network or an IP group. Make a decision according to the scenario.
- Network (when Source Type is Network): If you selected network, then choose the network you created from the drop-down list below. Gateway will filter packets from the selected network. If no network is created, you can choose the default network (LAN) or go to Settings > Wired & Wireless Networks > LAN to create one.
- IP Groups(when Source Type is IP Groups): If you selected IP groups, then choose the IP group you created from the drop-down list below. Gateway will check whether the source IP of the packets is in the IP groups. If no IP groups are made, you can click '+' on this page to create a new one, or go to Settings > Basic Profile > Groups to create one.
5. Time schedule: When enabled, you can set a schedule for filtering as needed.
6. Mode: selecting modes of filtering to fit the URL. There are two different types of them.
- URL Category: Common websites, such as news, entertainment, and shopping, are divided into different categories. This mode applies to the most common stages of development. However, you can add specific URLs in custom URL mode when you find a URL required to filter that is not in the filtering list.
- Custom URLs: Manually enter the URL to filter. This mode allows you precise URL access control.
Step 3. Configure parameters separately for both URL Category and Custom URLs mode.
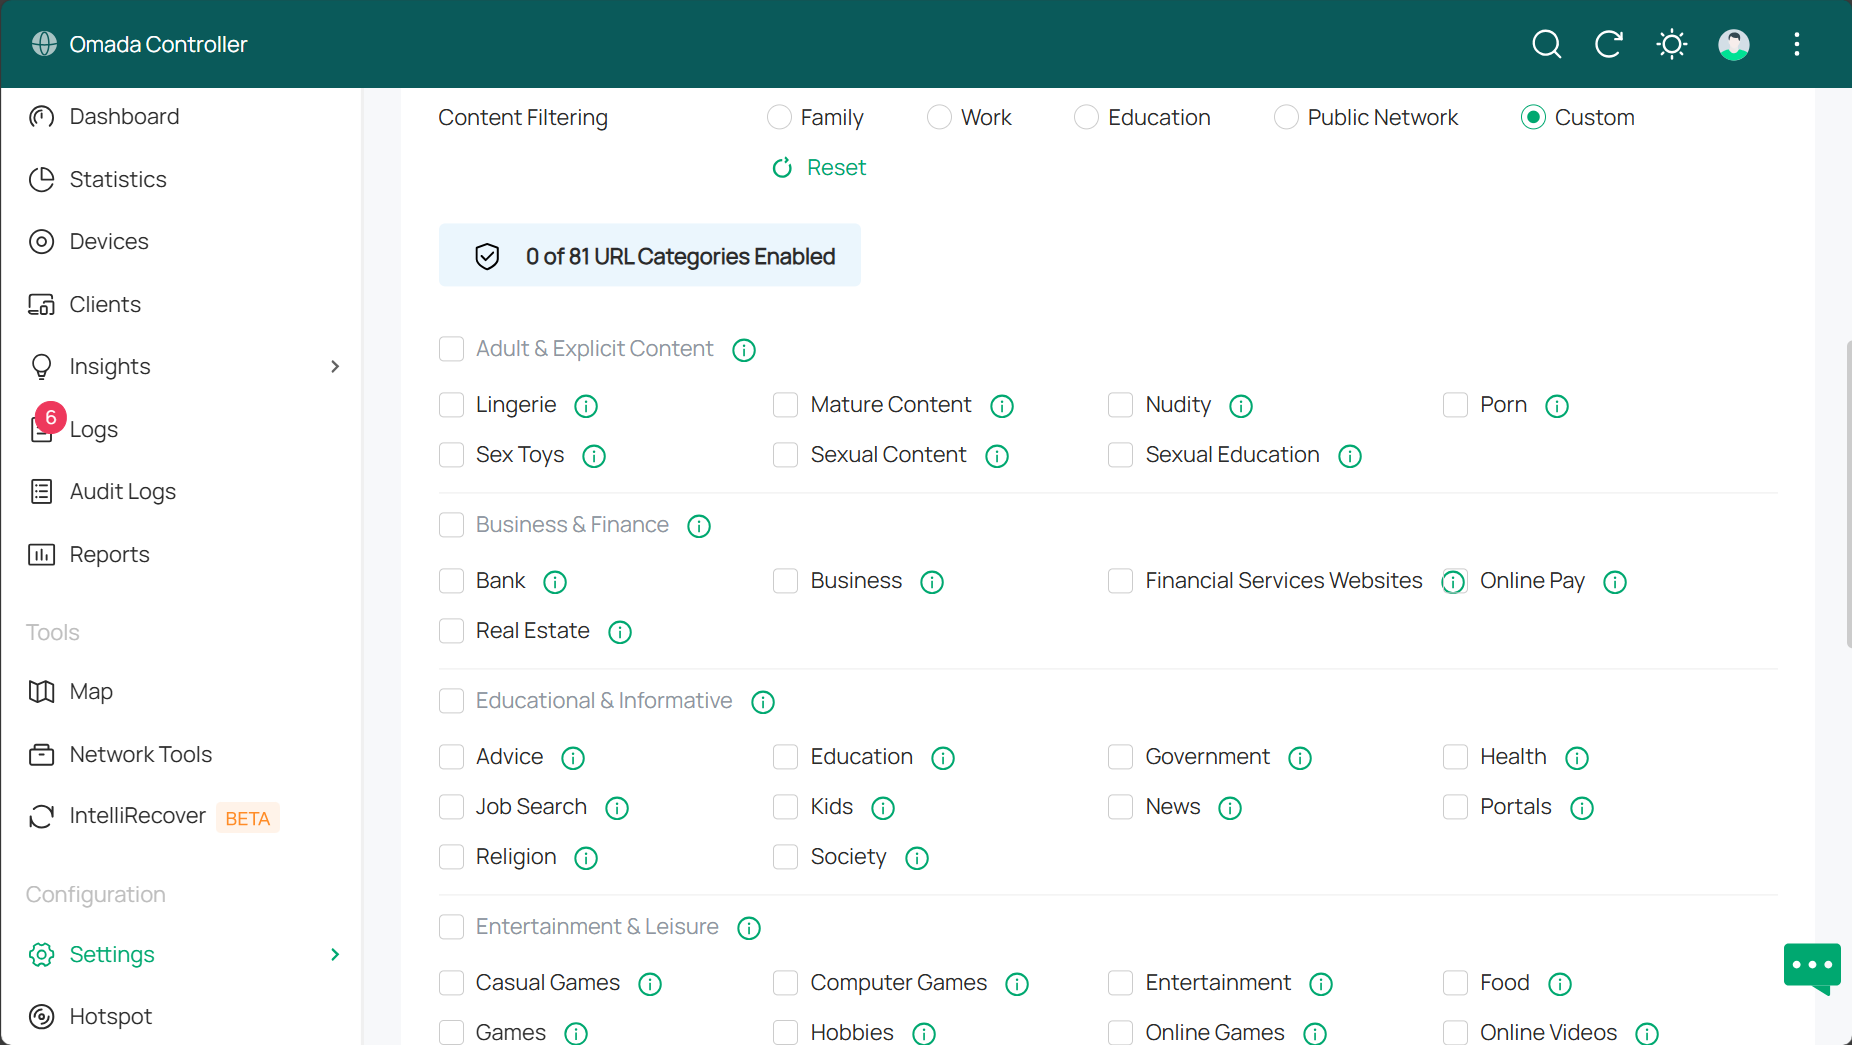
URL Category offers several preset scenarios, Family, Work, Education, Public Network and Custom. The customer is tailor filtering rules to specific needs in various scenarios. If you choose Custom, you will then decide on the content to be filtered.
Custom URLs requires you to specify urls you would like to block. They can be a list of urls or some key words in the domain name.
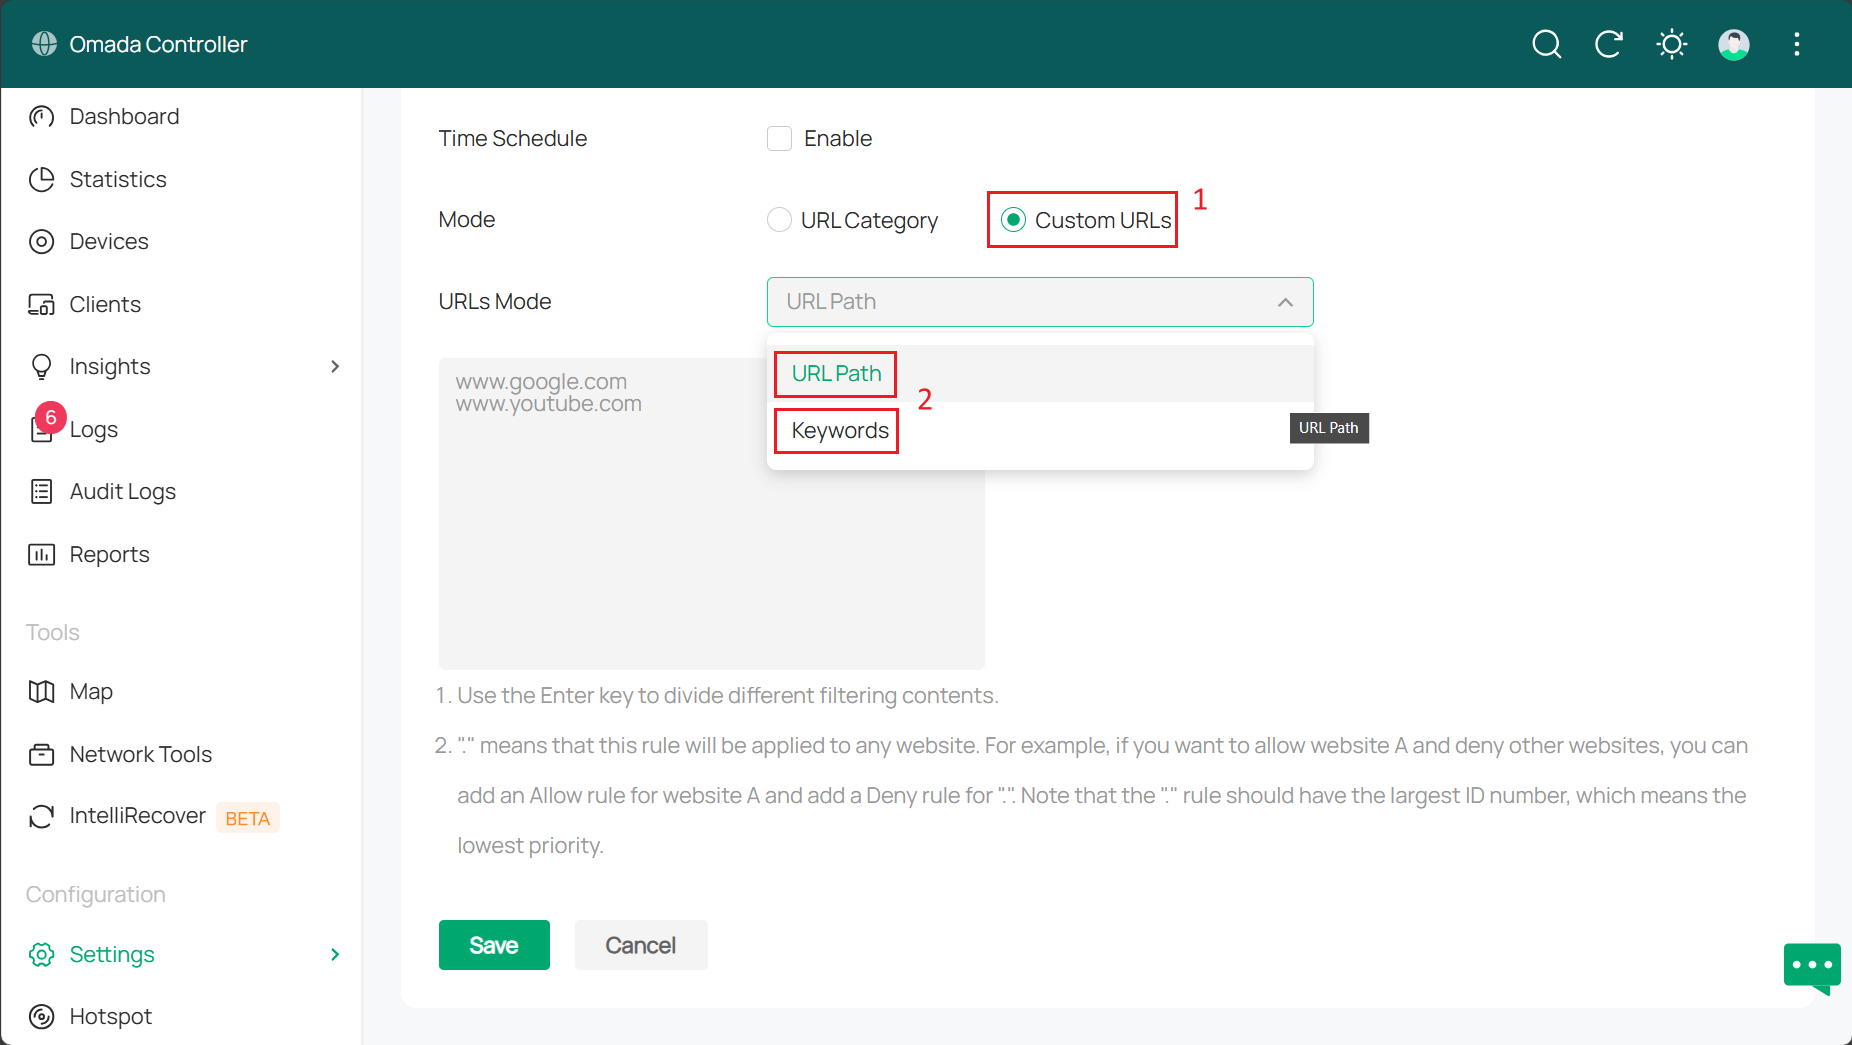
- URL path: Filtering rules will be applied to the designated URL if the URL matches any of the URLs in the URL filtering rules.
- Keywords: Filtering rules will be applied to the designated URL if it contains any keywords specified in the URL filtering rules.
Conclusion
The content above outlines the detailed configuration steps for the URL Filtering function on Omada Gateways.
Get to know more details of each function and configuration please go to Download Center to download the manual of your product.
QA
Q1. Why are some URLs not blocked, even though I have configured URL Filtering and selected a specific URL type?
A1. For the specified URL type, the device will only block URLs that are known to belong to this URL type. If a domain belongs to this URL type but is not a known URL to the device, it will not be blocked.
Is this faq useful?
Your feedback helps improve this site.


TP-Link Community
Still need help? Search for answers, ask questions, and get help from TP-Link experts and other users around the world.