


How to manage EAPs in different subnets using Omada controller (via EAP Discover Utility) (Old UI)
In the network topology below, there are three VLANs (three subnets), which are VLAN1 (192.168.0.0/24), VLAN2 (192.168.1.0/24) and VLAN3 (172.30.30.0/24). These three VLANs (three subnets) are divided by TP-Link L3 Switch (T2600G-28TS). Now we want TP-Link EAP Controller in VLAN1 (192.168.0.0/24) to manage EAP in VLAN2 (192.168.1.0/24). The gateway Router is TP-Link SMB router TL-ER6120.
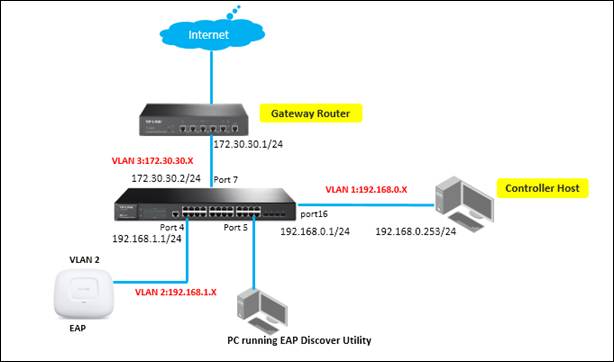
This document will introduce how to manage EAPs in different subnets using TP-Link EAP/Omada controller (via EAP discover utility). For the configurations of multi-nets NAT function on TP-LINK SMB router, please refer to:
Step1. Configurations on Layer 3 switch
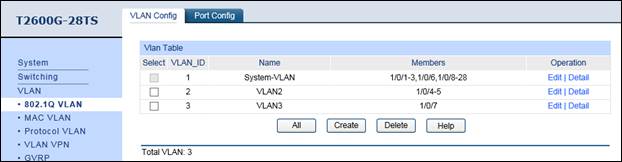
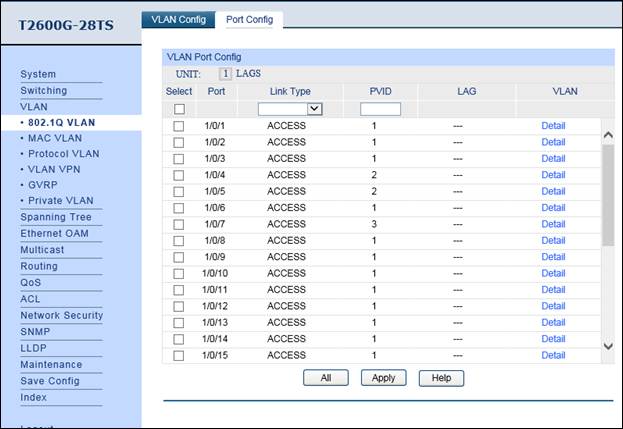
1. Create VLAN2 & VLAN3. VLAN2 includes port 4 & port 5, and VLAN3 includes port7. The detailed VLAN settings are shown as below. Note: port4/5/7/16 should be configured as “Access” type.
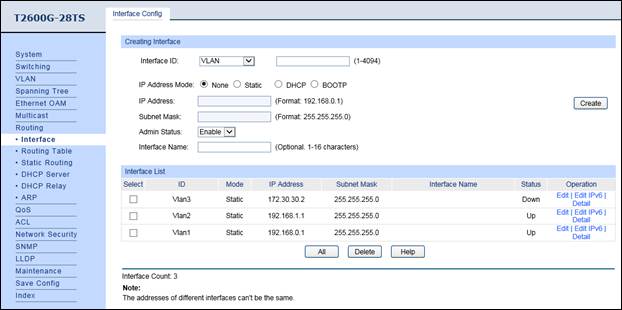
2. Enable IP interface for VLAN1 & VLAN2 & VLAN3, and configure relevant IP addresses for these three interfaces shown as below.
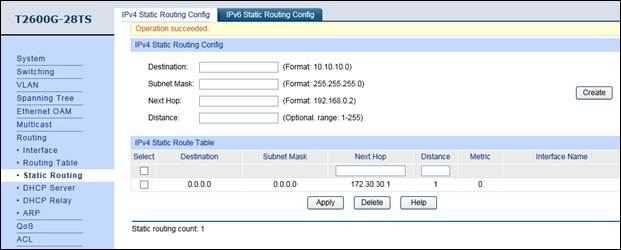
3. Configure the static default routing entry which leads to the gateway router.
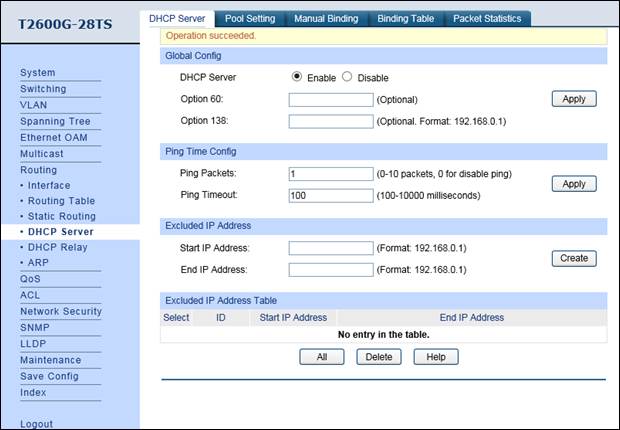
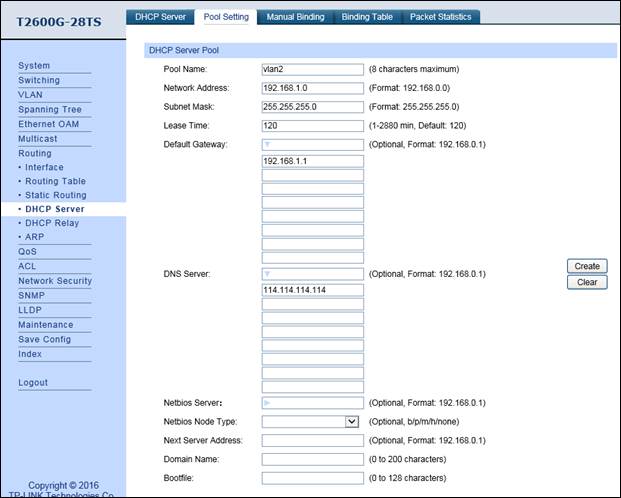
4. Enable DHCP Server function, and configure 192.168.1.0/24 IP address pool for EAPs. Note: don’t forget to fill in the DNS server address.
Step2. Configurations on SMB Router
1. Configure Static Routing for VLAN1 and VLAN2 subnets.

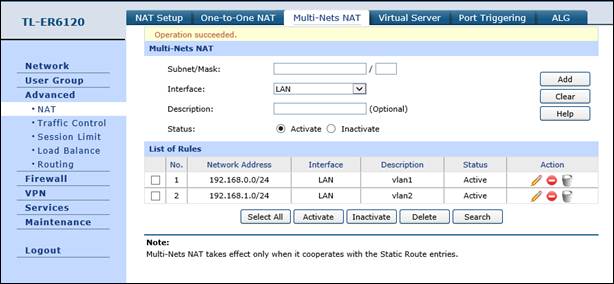
2. Configure multi-nets NAT for 192.168.0.0/24 and 192.168.1.0/24 subnets.
Step3. Configurations on EAP Discover Host
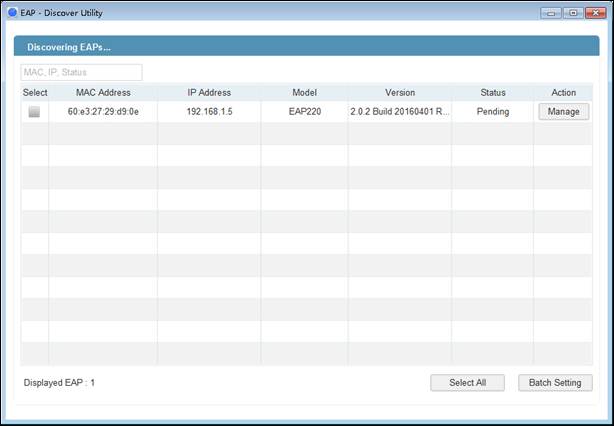
1. Connect the PC that is running EAP Discover Utility to switch’s port 5, and connect EAP to switch’s port 4. In this way, both EAP discover utility and EAP are in the same subnet (192.168.1.0/24). Now open EAP Discover Utility to let it discover EAP shown as below.
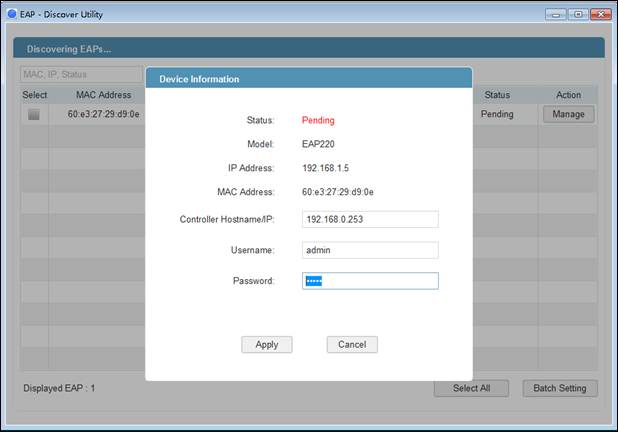
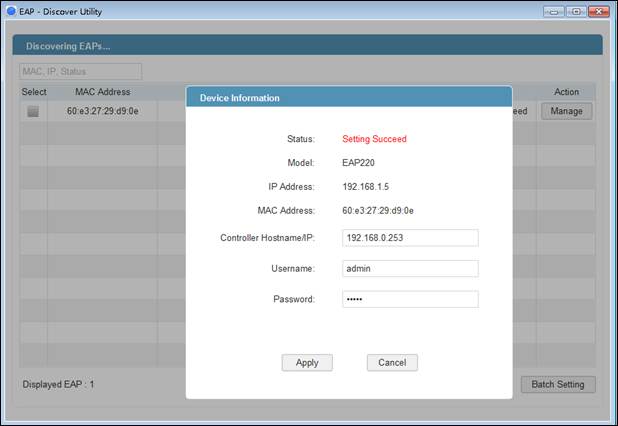
After EAP discover utility finds the EAP, click “Manage” icon, and then fill in the IP address of EAP controller Host and the Username/Password of the EAP (admin/admin by default) to let EAP/Omada controller finds & manages this EAP.
Note: After EAP successfully adopted by EAP/Omada Controller, you don’t need EAP Discover Utility any more, thus you can remove the PC which is running the EAP discover utility from the network.
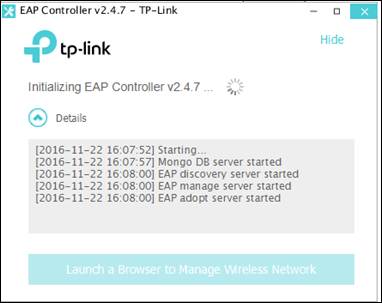
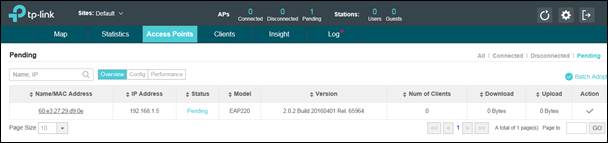
Step4. Run EAP Controller. The EAP which has been configured by EAP discover utility just now will appear in EAP/Omada controller’s “pending” list, which means you can use EAP/Omada controller to adopt and manage this EAP now shown as below.
Полезен ли этот FAQ?
Ваши отзывы помогают улучшить этот сайт.
4.0-F_normal_20211214092556n.png)
3.0-F_normal_20240110082325v.png)
4.0-F_normal_20211214093002j.png)
From United States?
Получайте информацию о продуктах, событиях и услугах для вашего региона.