


How to set up DHCP reservation for clients on Omada Gateway in Controller mode
In this article, we will share how to set up DHCP reservations, i.e. assign static IP addresses to network clients or Omada Controller (including Omada Software Controller Server, OC200, and OC300) on Omada Gateway in Controller mode.
Go to Clients, find the client you would like to give DHCP reservation, go to Config, check “Use Fixed IP Address”, select Network and assign an IP address.
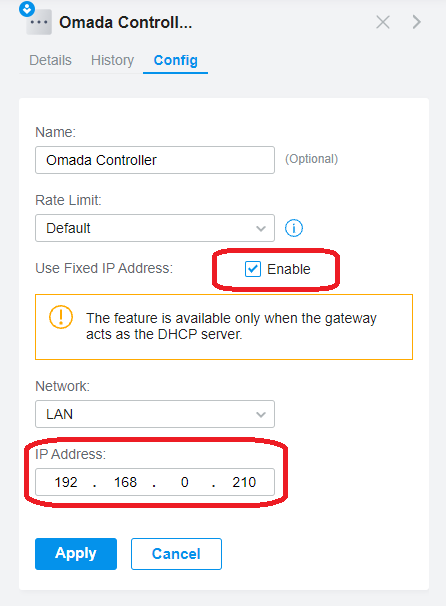
Note:
1. Omada Gateway should act as the DHCP server.
2. From the 5.0.29 controller, the reserved IP addresses can be set out of the DHCP range. For the below version controller, the reserved IP addresses should be in the DHCP range. If not, the clients will still obtain a dynamic IP address.
3. If assigning a different IP address from the current one, please re-plug the Ethernet cable for wired clients, re-enable Wi-Fi for wireless clients, or reboot the IoT clients to update.
4. Omada Controller, including OC200 and OC300, will be listed on the Clients page.
Questa faq è utile?
Your feedback helps improve this site.

1.0_normal_1609659027171k.png)