


How to Configure Voucher Authentication on Omada Controller
This article applies to Omada Controller 4.1.5 or above.
Voucher authentication is a simple type of portal authentication, with which you can generate random voucher codes in Omada Controller and hand them out to clients. Then clients can use these vouchers to pass the portal authentication and access the network. It is especially convenient to use Voucher authentication in places such as café, restaurant and hotel.
This document introduces how to configure Voucher authentication.
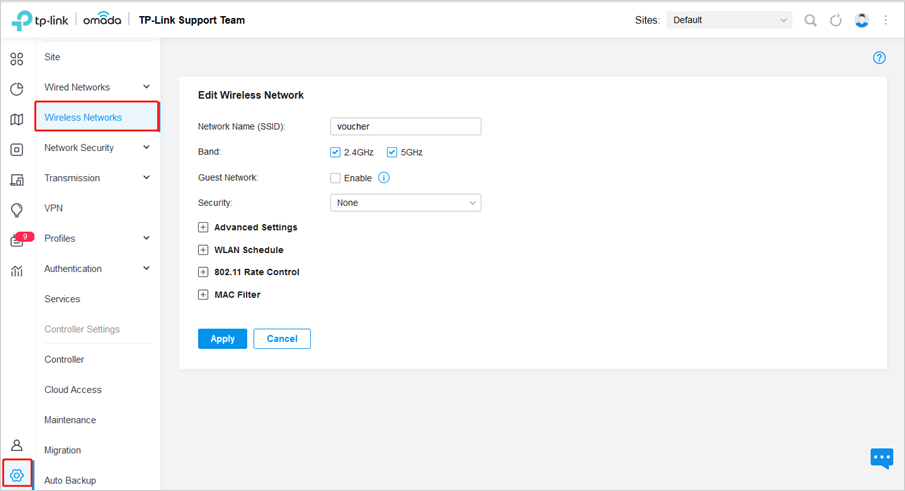
1. Create an SSID
Go to Settings > Wireless networks to create an SSID for Voucher authentication.
2. Add Voucher Portal and Configure Login Page
Go to Authentication > Portal and click Create New Portal. Then please refer to the picture for configuration.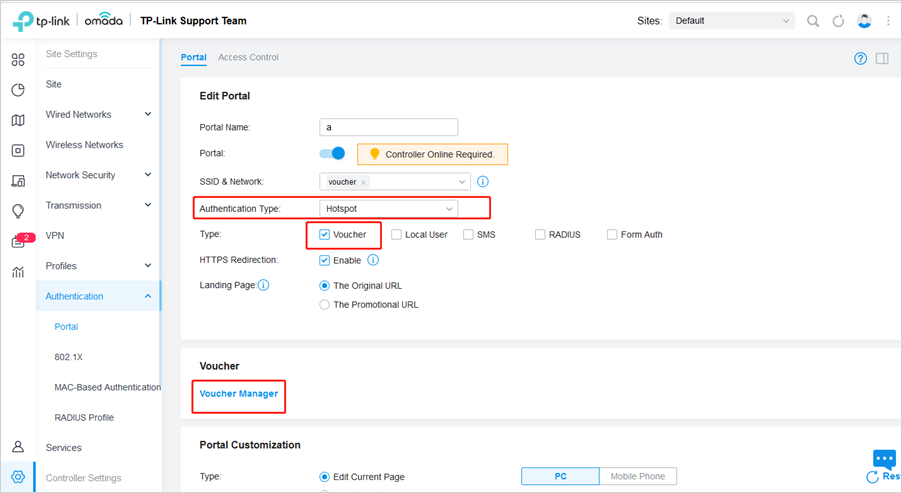
Configure the basic settings and login page as the following figure shows. You can also configure the advertisement feature according to your needs.

3. Create Vouchers
Click on Voucher Manager to create Vouchers.
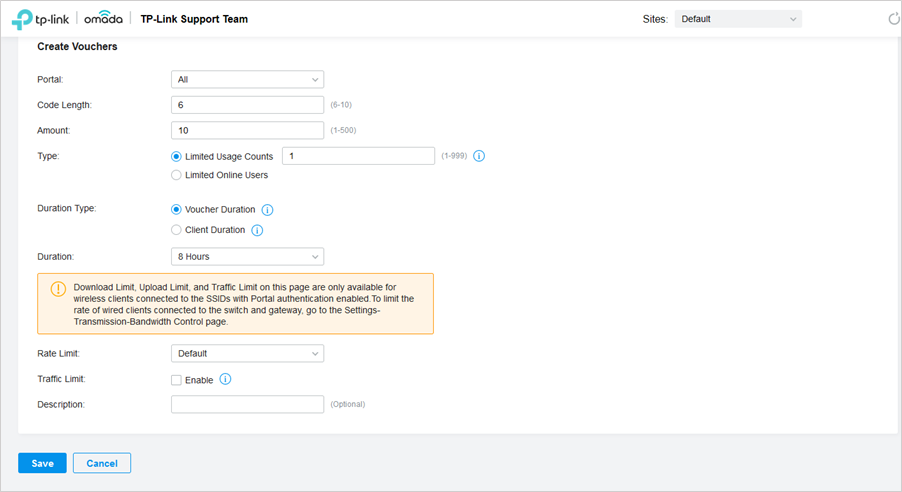
Configure the parameters for the vouchers to be created: code length, amount of vouchers, voucher type and duration.
There are two voucher types: Limited Usage Counts and Limited Online Users
Limited Usage Counts: The voucher code can only be used for a limited number of times within its valid period.
Limited Online Users: The voucher code can be used for an unlimited number of times within its valid period, but only a limited number of wireless clients can access the network with this voucher code at the same time.
Additionally, you can configure the Rate Limit and Traffic Limit features. Rate Limit is used to limit the rate of each client, and Traffic Limit is used to limit the total traffic allowed to be transmitted by each client.
4. Print Vouchers
The generated vouchers are displayed on the following page. Click Print Selected Vouchers.
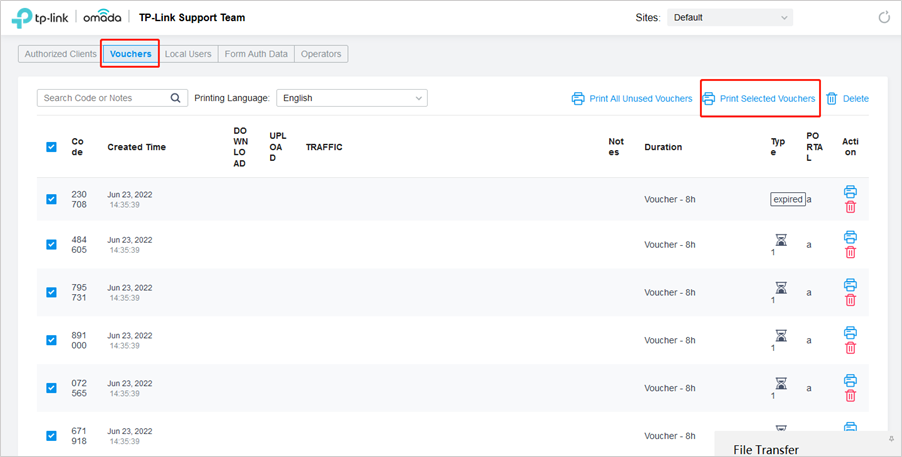
Then you can print the following page and hand out the vouchers to your clients.

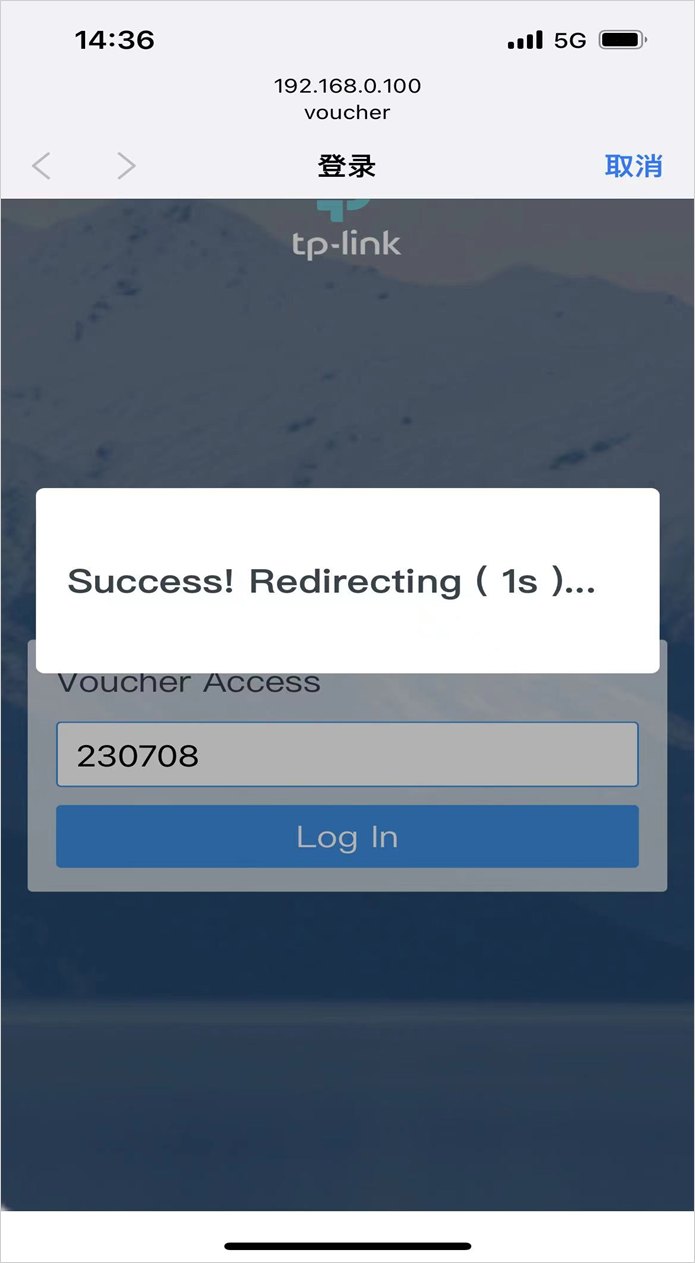
5. Use Vouchers to Access the Network
Clients can connect to the SSID for Voucher authentication and enter the voucher codes to access the network.
6. Manage Guests
Click on Authorized Clients to view the information of clients that have passed Voucher authentication and manage these clients.
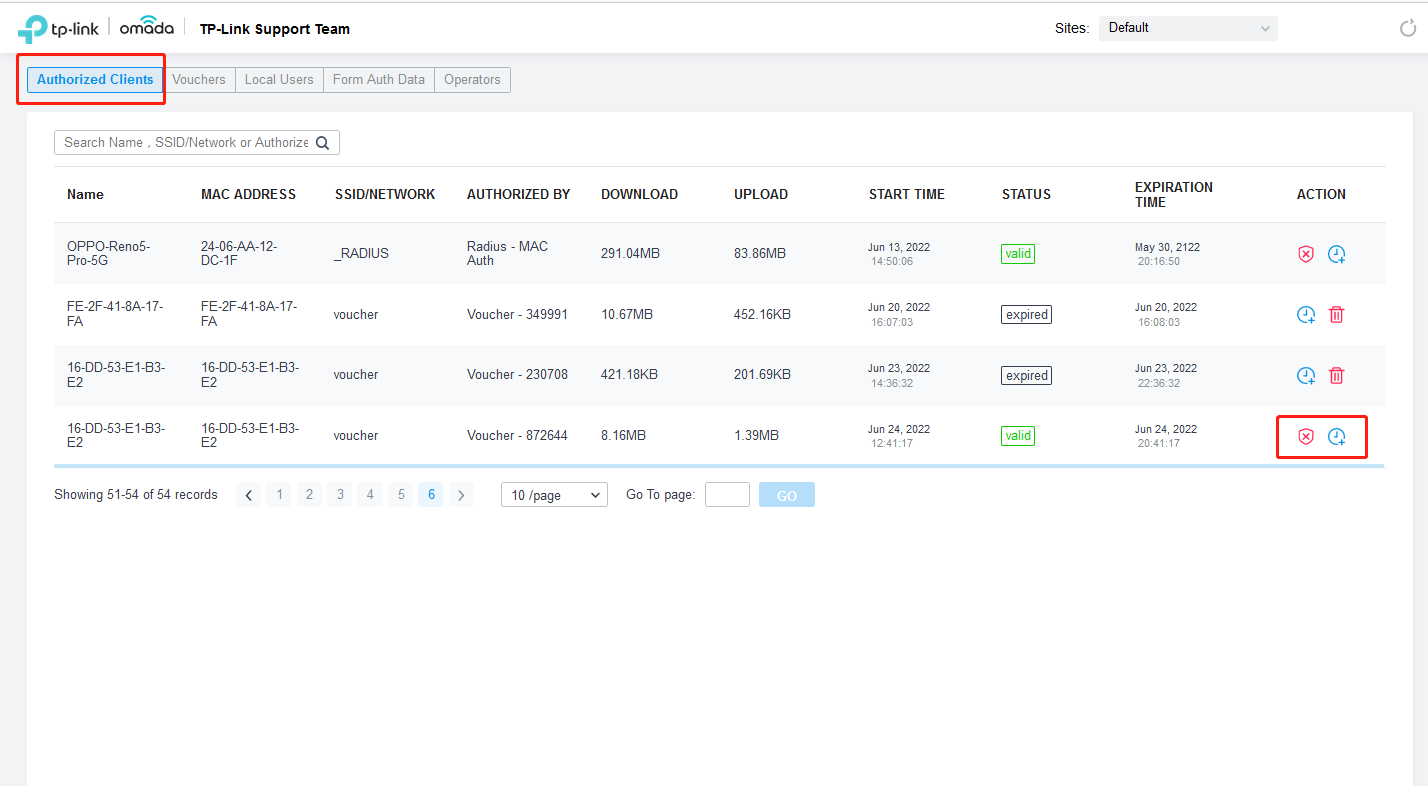
You can click ![]() to disconnect a client or click
to disconnect a client or click ![]() to extend its connection duration before the voucher expires.
to extend its connection duration before the voucher expires.
Note:
To make sure that the Voucher authentication works normally, your Omada Controller needs to be kept running all the time.
Ez a GY.I.K. hasznos volt?
Véleménye segíti az oldal fejlesztését


